
How to Fix Default Boot Device Missing or Boot Failed Windows 11 or 10?
The “Default Boot Device Missing or Boot Failed” error usually appears when Windows 11/10 cannot detect the system drive. This guide explains why the error occurs and provides clear, beginner-friendly solutions—including checking BIOS settings, adjusting boot mode, repairing disk errors, rebuilding boot records, and recovering data if necessary—to help you restore normal startup quickly and safely.
By Emma / Updated on December 3, 2025
What Does "Default Boot Device Missing or Boot Failed" Error Mean?
The "Default Boot Device Missing or Boot Failed" error means your computer cannot find a drive with a bootable operating system (such as Windows 11 or Windows 10). In other words, the system doesn’t detect the disk it needs to load Windows, so the startup process stops before the OS can begin.
This error usually appears when:
- The boot drive (HDD/SSD) is disconnected, corrupted, or damaged
- BIOS/UEFI is set to the wrong boot mode (Legacy vs. UEFI)
- The boot order is incorrect and the system tries to start from a non-bootable device
- System files or the boot loader are missing or corrupted
- The drive has bad sectors or hardware failure
When this happens, your computer cannot continue booting and displays this message on a black screen until the issue is fixed.
How to Fix "Default Boot Device Missing or Boot Failed" Windows 11 or 10?
When your computer cannot locate a valid system drive to load Windows and you see the "Default Boot Device Missing or Boot Failed" error message, try the following solutions one by one.
1: Check Physical Connection of the Boot Drive (HDD/SSD)
Loose or damaged cables can cause the system to lose contact with the system drive, so first you can check the connection before proceeding to other advanced solutions.
Step 1. Shut down the computer completely.
Step 2. Disconnect the power cable and battery (if it’s a laptop with a removable battery).
Step 3. Open the case and check:
- SATA/PCIe cables
- Power connectors
- M.2 SSD screws
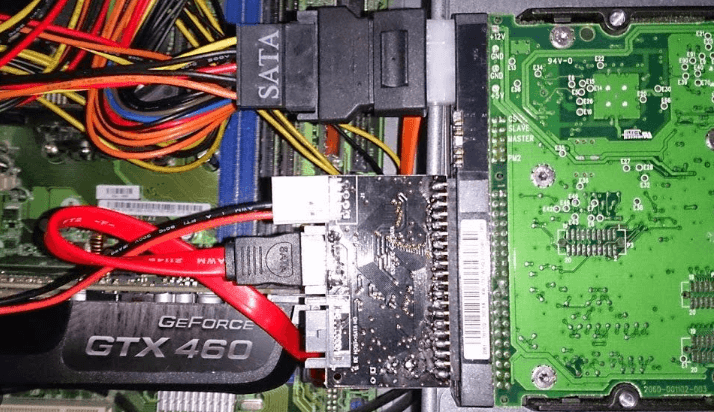
Reconnect everything firmly and restart your PC to check if the "Default Boot Device Missing or Boot Failed" error message disappear.
2: Change Boot Order in BIOS/UEFI
If your PC was attempting to boot from a non-bootable drive, then the boot failure would occur as well. Thus, you can check the boot order and make sure the computer is booting from the right device.
Step 1. Restart your computer. During the initial startup screen (often showing the manufacturer’s logo), press the designated key to enter BIOS/UEFIsetup.
- Note:✎...
- Common keys are F2, Delete, F10, or Esc. The correct key is usually displayed on the screen (e.g., "Press F2 to enter Setup").
Step 2. Go to "Boot", "Boot Priority", or "Boot Options".
Step 3. Set your system drive (HDD/SSD/NVMe) as the First Boot Device.
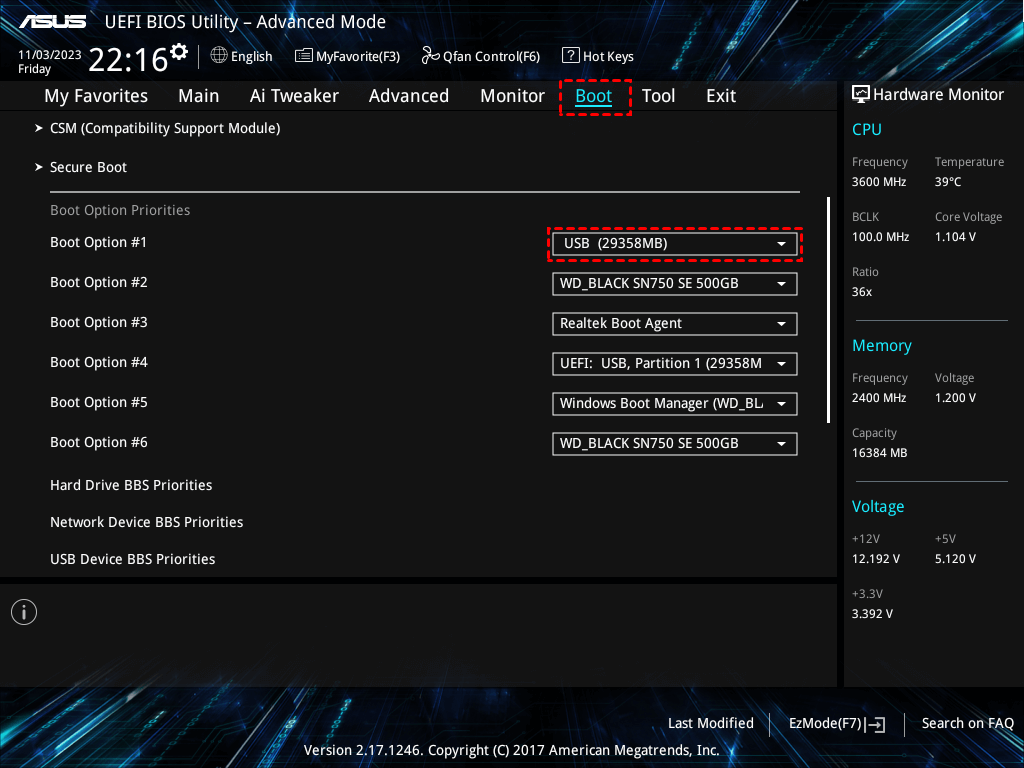
Step 4. Save and exit, then restart.
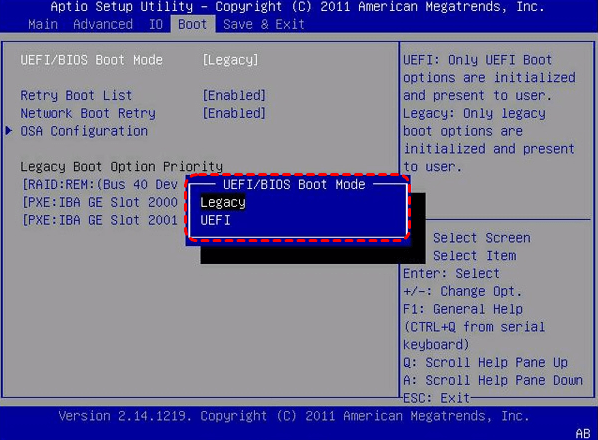
3: Switch Between UEFI and Legacy Boot Mode
An incorrect boot mode is another primary cause of Windows failing to start. This happens when your computer's firmware setting (UEFI/Legacy) does not match the partition style (GPT/MBR) of your system disk. Here’s how to diagnose and change this setting.
Diagnosis First:
Before changing modes, it’s helpful to know what your disk uses in Disk Management.
- If your disk is partitioned as MBR, it requires Legacy (BIOS) boot mode.
- If your disk is partitioned as GPT, it requires UEFI boot mode.
Steps to Change Boot Mode:
Step 1. Restart your PC and enter BIOS/UEFI.
Step 2. Navigate using your keyboard (mouse often doesn't work here). Look for menus or tabs named: Boot, Boot Options or Boot Configuration, Security or Advanced.
Step 3. Within these, search for settings labeled:Boot Mode, UEFI/Legacy Boot, CSM (Compatibility Support Module).
Step 4. If the current setting is UEFI Only, change it to Legacy, Legacy Support, Enabled (for CSM), or Legacy First.
If the current setting is Legacy, change it to UEFI Only, UEFI with CSM, or disable the CSM option entirely.
- Note:✎...
- The exact wording varies by motherboard manufacturer (e.g., Dell, HP, Lenovo, ASUS)
Step 5. Navigate to the "Exit" or "Save & Exit" tab. Select the option to save changes and exit.
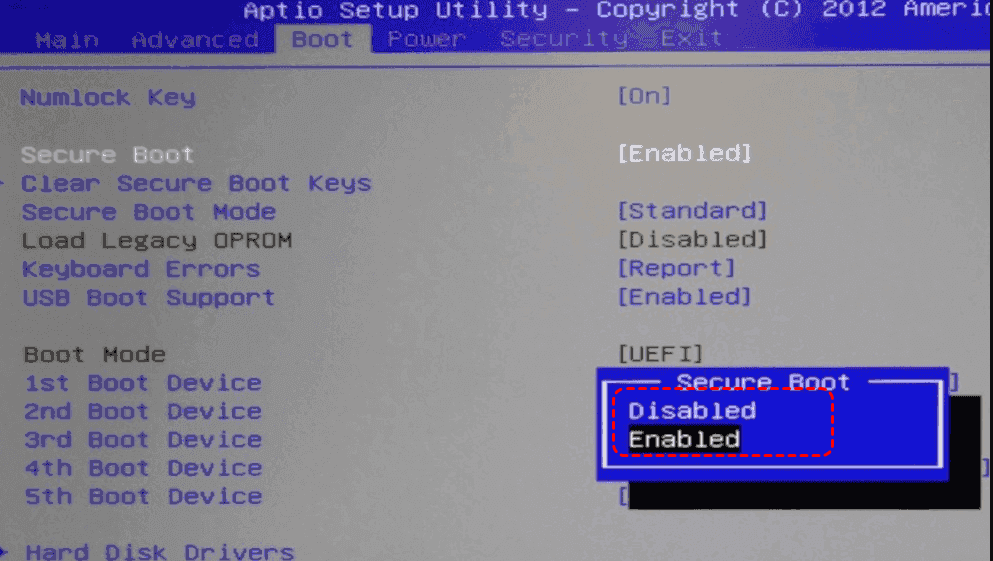
4: Enable or Disable Secure Boot
Secure Boot is a security feature found in UEFI firmware that ensures your PC boots only using software that is trusted by the PC manufacturer. It prevents malware from loading during the startup process. However, it can sometimes conflict with operating systems (like older Windows versions) or hardware that isn't digitally signed with a recognized key, causing boot failureslike the "Default Boot Device Missing or Boot Failed"error .
- Note:✎...
- Secure Boot settings are usually only accessible and functional when your BIOS/UEFI is set to UEFI Mode (not Legacy/CSM). You may need to disable CSM (Compatibility Support Module) first to see or change Secure Boot options.
Step 1. Restart your PC and press the key (e.g., F2, Del, F10, Esc) to enter the BIOS/UEFI setup during startup.
Step 2 .Using the keyboard, go to the "Security" or "Boot"tab where Secure Boot is located.
Step 3. Change the Secure Boot setting. The option might be called Secure Boot, Secure Boot Control, or UEFI Secure Boot.
Step 4. Select it and press Enter to change its value.Choose "Enabled" to turn it on, or "Disabled" to turn it off.
Step 5. Select "Save Changes and Exit" or other similaroptions.
5: Repair Disk File System Errors Using Windows Recovery Environment
Disk errors, including corrupted file systems, can prevent the operating system from loading properly. The Windows Recovery Environment (WinRE) provides built-in tools to diagnose and repair these issues.
- Note:✎...
- This method requires booting from external media if Windows cannot start normally. You will need a Windows installation USB drive or the system's built-in recovery partition.
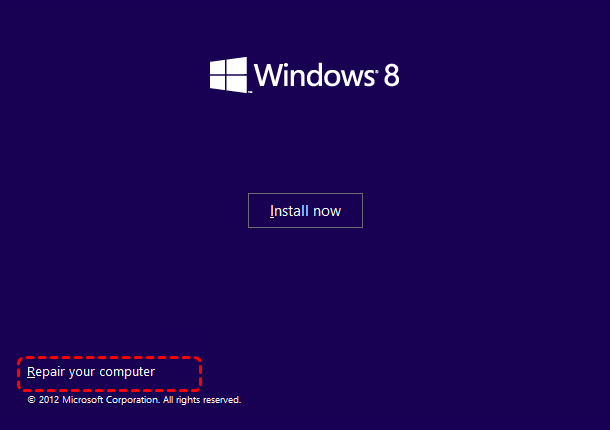
Step 1. Restart your PC and press F11/F12 to access recovery options, or boot from a Windows installation USB and select "Repair your computer".
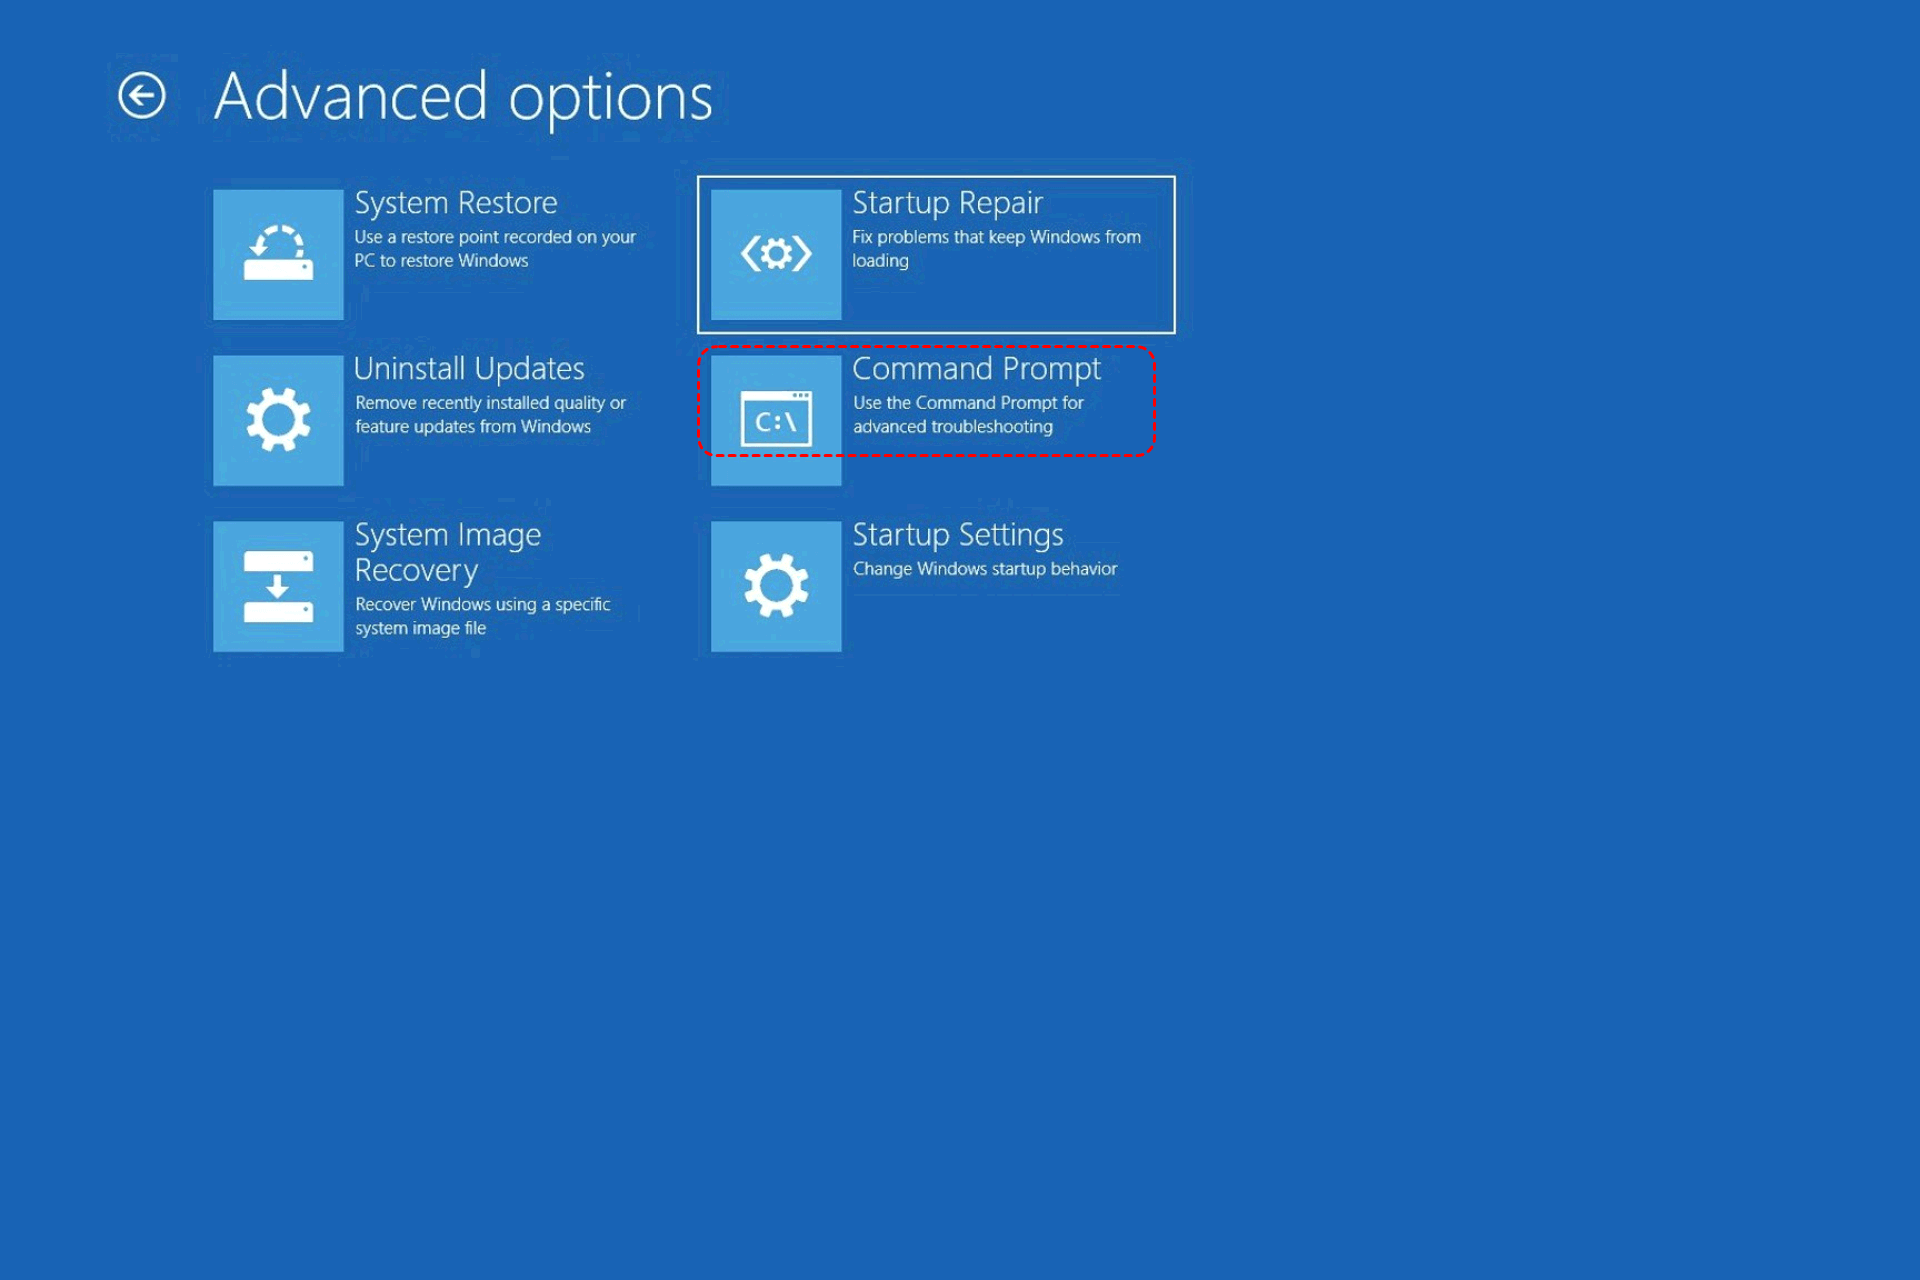
Step 2. Navigate to "Troubleshoot → Advanced options → Command Prompt" in the recovery menu.
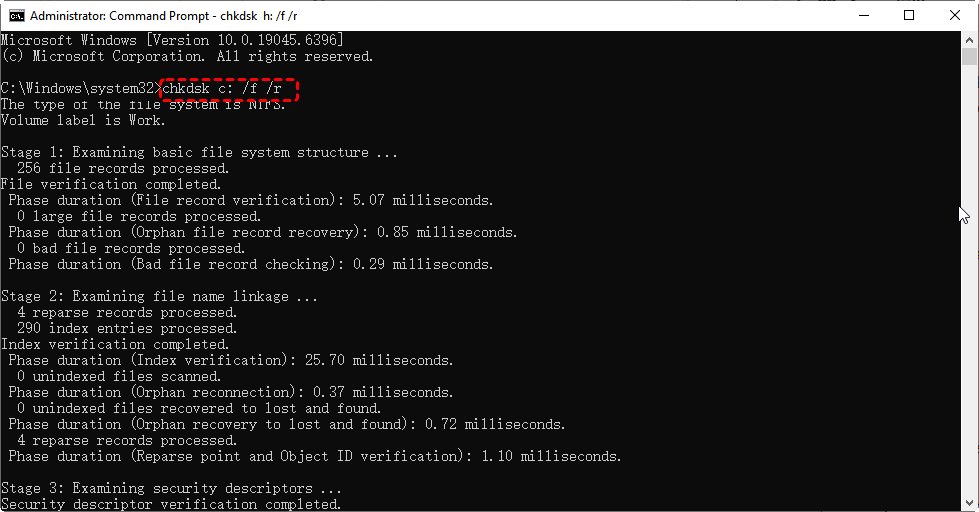
Step 3. Run disk repair: Enter chkdsk C: /f /r to check and repair disk errors. Replace "C:" with your actual system drive letter if different.
6: Rebuild the Boot Configuration
Boot Configuration Data (BCD) corruption is a common cause of boot failure. Rebuilding it can resolve errors like "Default Boot Device Missing or Boot Failed", "Boot configuration data file is missing" or "Boot/BCD error".
Step 1. Boot into WinRE using installation media or recovery drive and open Command Prompt from "Advanced Options".
Step 2. Backup existing BCD by running: bcdedit /export C:\BCD_Backup (C: is typically your system drive).
Step 3. Scan for Windows installations using: bootrec /scanos.
Step 4. Rebuild BCD with these commands:
bootrec /rebuildbcd
bootrec /fixmbr
bootrec /fixboot
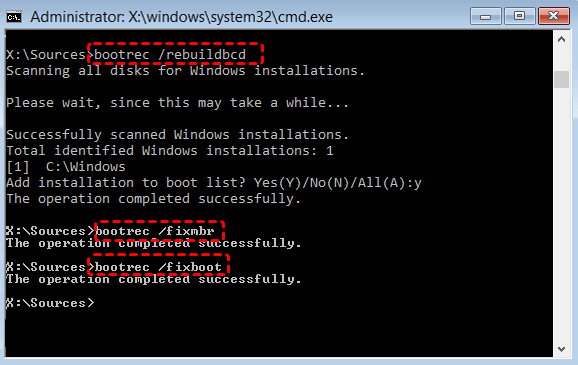
Step 5. Restart your system after completing all commands to check if Windows boots normally.
7: Use System Restore (If Enabled Before Boot Failure)
If the system boot files became damaged after updates or software installations, a restore point may fix it by reverting your computer to a previous working state
Step 1. Boot into Windows Recovery Environment.
Step 2. Go to "Troubleshoot → Advanced options → System Restore".
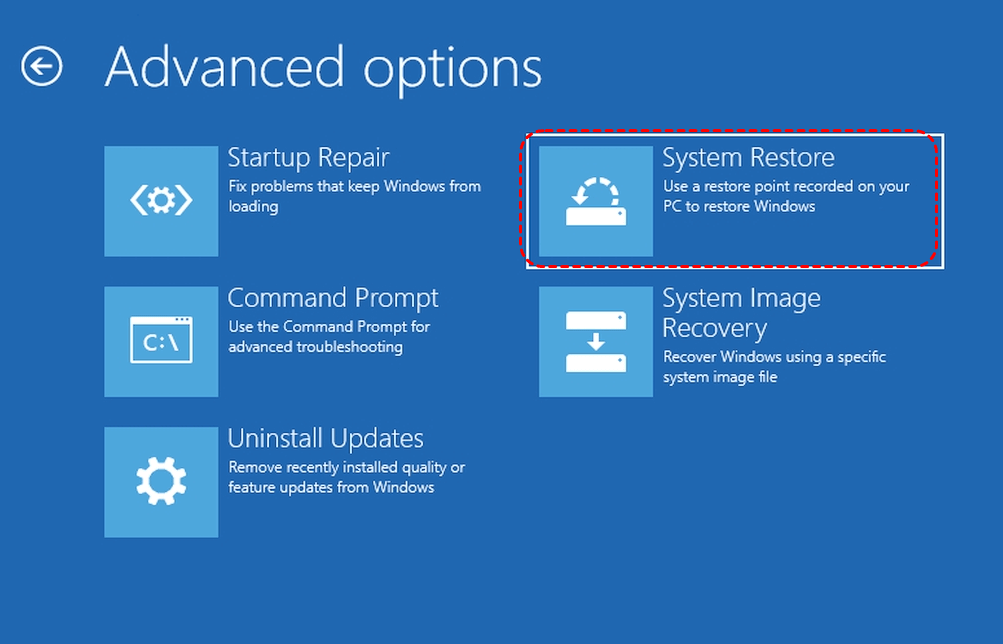
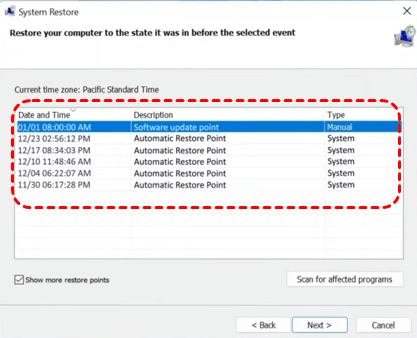
Step 3. Select a restore point before the boot issue occurred.
Check also: can System Restore Point recover deleted personal files?
8: Recover Data and Reinstall Windows (Last Resort)
When all troubleshooting steps fail and no system restore point exists, reinstalling the operating system is the definitive solution to replace corrupted system files and restore a working boot loader.
However, a clean installation will erase all personal files on the system drive (usually C:). Therefore, recovering your data is the critical first step before proceeding.
Data Recovery with MyRecover (Crucial Pre-Reinstall Step)
A key advantage of MyRecover is its ability to recover data without requiring a functioning operating system. This is essential when you cannot boot into Windows to run standard recovery software.

- 🌟Recover Without Backup: Restore lost files even if no Windows backup exists.
- 🌟High Success Rate: AI-powered file recognition and recovery algorithms ensure easy use and zero file omission.
- 🌟Wide File Support (1000+): Recover photos, documents, videos, audio, archives, and more.
- 🌟Supports Multiple Devices (500+): Works on HDDs, SSDs, USB drives, SD cards, cameras, and other storage devices.
- 🌟Covers 500+ Data Loss Scenarios: Handles accidental deletion, formatting, system crashes, virus attacks, emptied Recycle Bin, partition loss, and more.
Step 1. Download and install MyRecover on a separate, working Windows computer.Connect an empty USB drive to the computer as well.
Step 2. Use the software's "Create Bootable Media" feature. This will guide you through creating a bootable USB drive (WinPE environment).
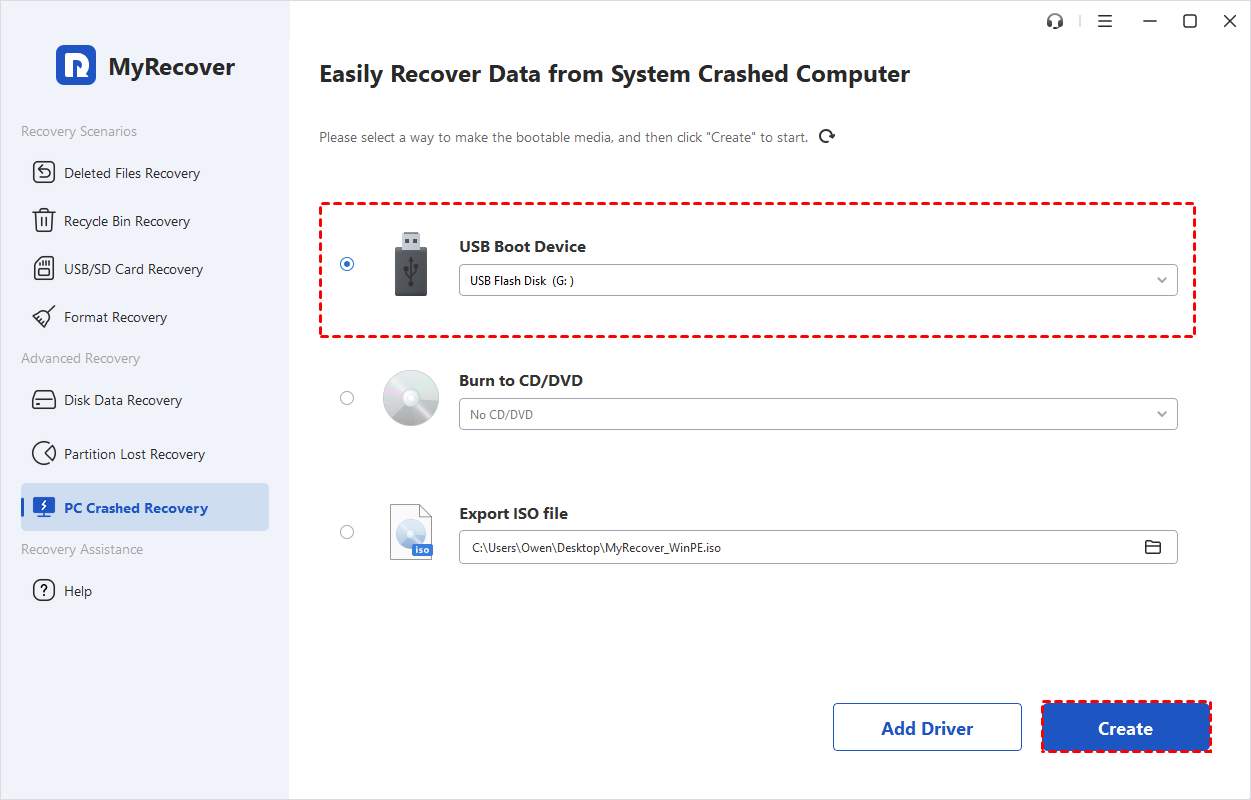
Step 3. Insert this bootable USB drive into the non-booting computer, change the boot order in BIOS/UEFI to start from the USB, and boot into the WinPE environment.
Step 4. Once startup, you will enter the main interface of the MyRecover software installed on the USB drive.Select the target drive inyour non-booting PC and click "Scan".

Step 5. After the scanning, choose what you need and recover them to another safe external drive.

This method bypasses the need for your original Windows installation to be working, allowing you to securely back up documents, photos, and other important data before you reinstall operating system.
Perform a Clean Windows Installation Now
When your personal files have been restored and saved to a safe location via MyRecover, now you can reinstall operating system from scratch.
Step 1. On a working computer, use the Media Creation Tool from Microsoft's official website to create a Windows Installation USB drive (separate from your recovery USB).

Step 2. Insert this installation USB into your non-booting PC, boot from it, and begin the setup.
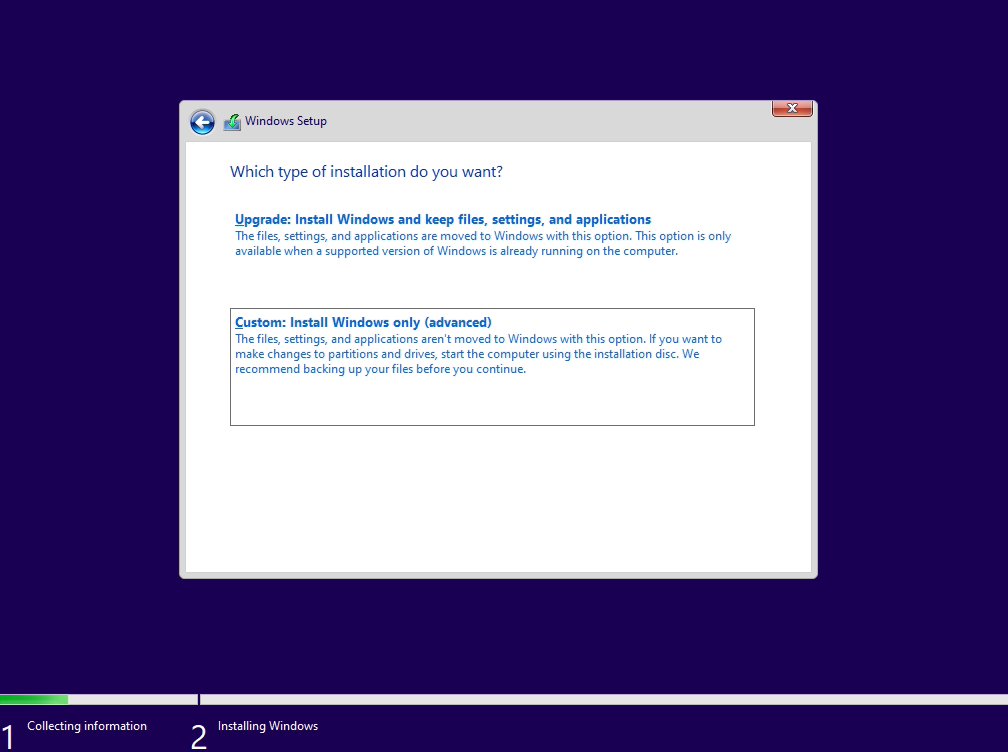
Step 3. When prompted to choose an installation type, select "Custom: Install Windows only (advanced)".
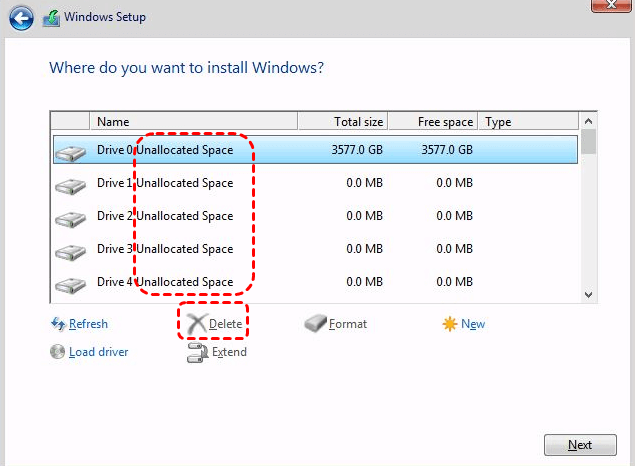
Step 4. At the drive selection screen, delete all partitions on your system drive until only "Unallocated Space" remains, then select it to proceed. This ensures a completely clean install.
Step 5. Follow the on-screen prompts to finish. This will install a fresh copy of Windows with a new, functional boot loader.
Closing Thoughts
So, the "Default Boot Device Missing or Boot Failed" errorsignifies that your computer's BIOS/UEFI firmware cannot locate a valid hard drive with an operable operating system during startup, halting the boot process.The guide provides a comprehensive guide to diagnosing and fixingthis problem.
If all repair attempts fail, the guide also outlines the definitive last-resort procedure: recovering personal data using specialized bootable recovery software like MyRecover, followed by performing a clean reinstallation of Windows. This two-step approach ensures that users can resolve the boot issue without losing important files.


Stay Updated With Our
Latest Tips
Add us as a preferred source on Google to never miss helpful guides.