
How to Empty Recycle Bin from Command Line in Windows 11 /10/ 7
The Recycle Bin in Windows serves as a temporary storage for deleted files. However, when the bin is full or you wish to permanently delete its contents, you may want to empty it via the Command Line for efficiency. This guide demonstrates how to empty the Recycle Bin on Windows 7, 10, and 11 using command-line tools.
By Emma / Updated on December 12, 2025
Why Empty Recycle Bin from Command Line?
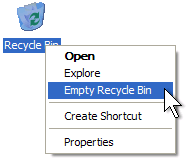
The Recycle Bin temporarily stores deleted files, allowing users to recover files if deleted by mistake. Emptying it is essential to free up storage space, improve system performance, and ensure data privacy.To empty it, the most common way is: right-click the Recycle Bin icon and choose "Empty Recycle Bin".
However, sometimes, users tend to use the Command Line to empty the Recycle Bin for the following reasons:
- Faster and More Efficient: The command line is quicker than navigating through the GUI, especially when clearing multiple drives or users' bins.
- Bypass UI Issues: If the Recycle Bin doesn’t empty through the GUI or the Recycle Bin takes forever to open, the command line can work around this problem.
How to Empty Recycle Bin using Command Line in Windows 11/ 10/ 7?
You can empty the Recycle Bin using the command line in Windows 11, 10, and 7 with a few simple commands by the following steps:
First of all, we need to open Command Prompt as Administrator. Easiest way for this is: press "Windows + X" and select "Command Prompt (Admin)".

Then, you can empty each drive’s Recycle Bin by running the corresponding command:
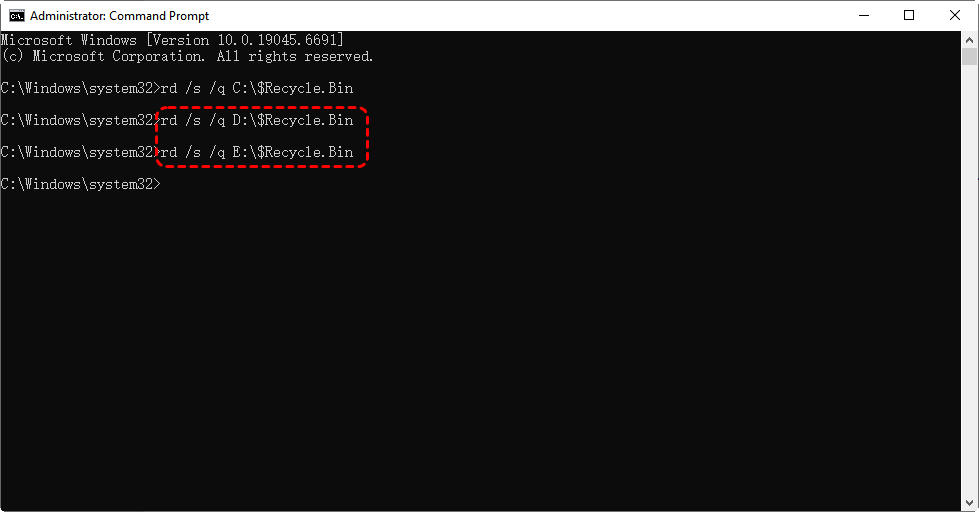
Clean C drive Recycle Bin (or empty Recycle Bin for all users account): rd /s /q C:\$Recycle.Bin
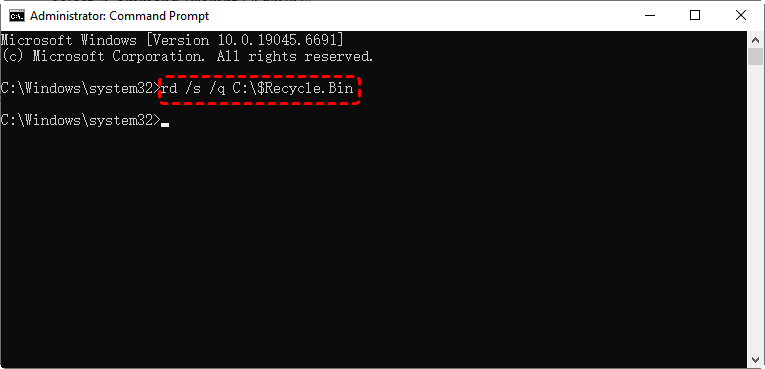
- `/s` deletes all subdirectories and files in the folder.
- `/q` suppresses confirmation prompts.
If you have other drives (e.g., D:, E:), repeat the command for each one:
rd /s /q D:\$Recycle.Bin
rd /s /q E:\$Recycle.Bin
After you run all the commands, you can see all files deleted from C:, D:, E: drives are also permanently removed from Recycle Bin.

Others Command Methods to Empty Recycle Bin
Apart from Command Line, PowerShell and batch script also provides more flexible ways to empty the Recycle Bin, especially in "Windows 10 and 11".
Method 1: Using PowerShell
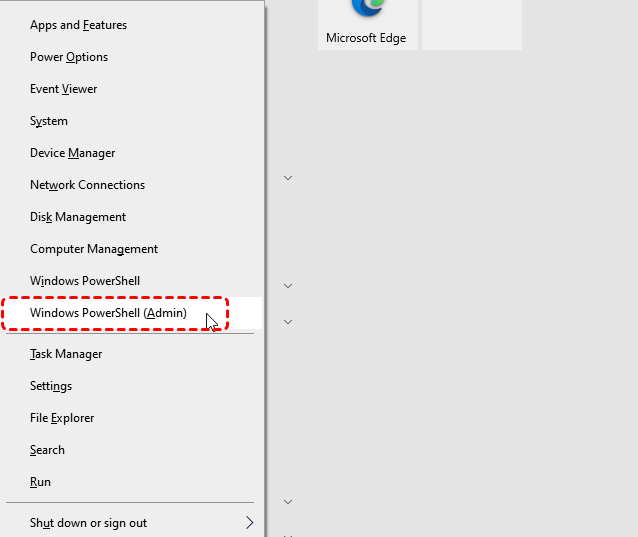
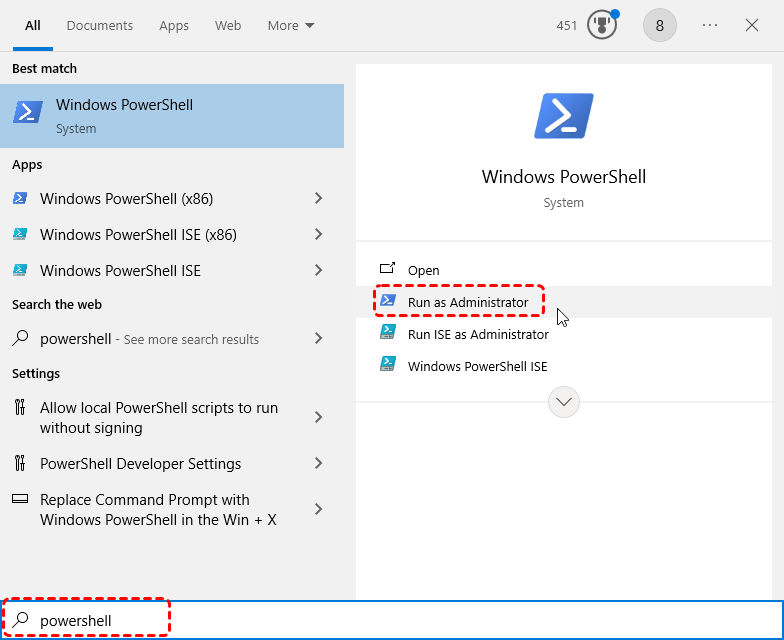
Step 1. Press "Windows + X" and choose "Windows PowerShell (Admin)".
Or search PowerShell in the Start menu, and select "Run as Administrator".
Step 2. Now that PowerShell is open, according to your requirements, run one of the below commands:
Clear a specified recycle bin: Clear-RecycleBin -DriveLetter C

Clear all recycle bins with confirmation: Clear-RecycleBin
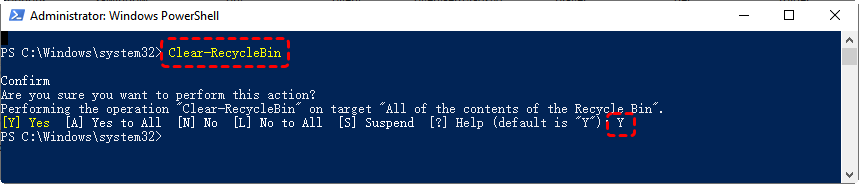
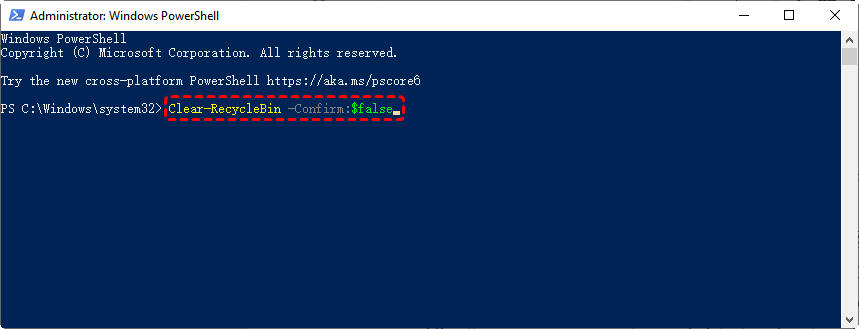
Clear all recycle bins without confirmation: Clear-RecycleBin -Force or Clear-RecycleBin-Confirm:$false
Method 2: Using Batch Script
If you want to streamline the process of cleaning the Recycle Bin without manually typing commands every time, a batch script is a great solution. While this method doesn’t fully automate the cleanup, it provides a convenient shortcut for quickly clearing the Recycle Bin with a single click, avoiding the need to type the same command every time.
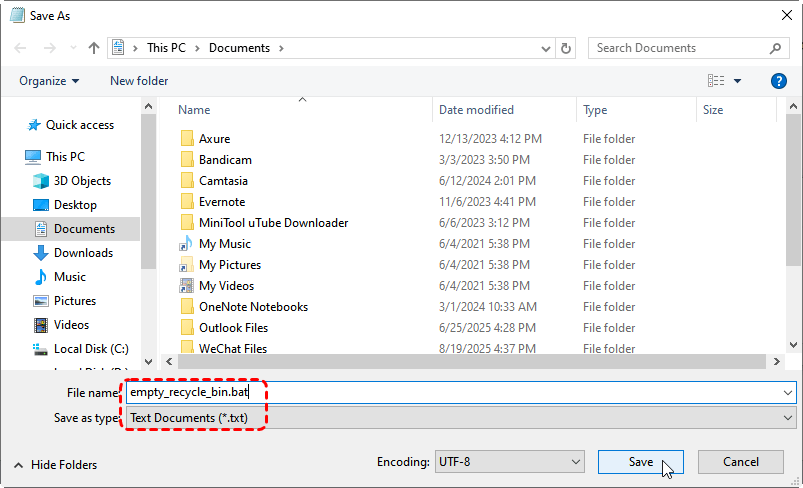
1. Create a Batch File: Open "Notepad" and paste the following code:
rd /s /q C:\$Recycle.Bin
rd /s /q D:\$Recycle.Bin
rd /s /q E:\$Recycle.Bin
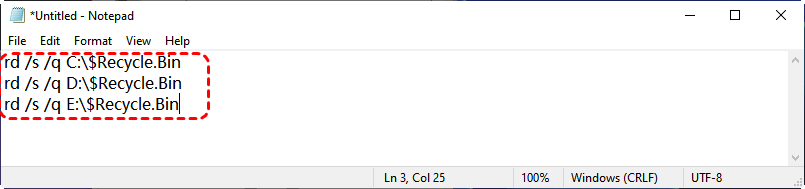
2. Save the file with a ".bat" extension (e.g., "empty_recycle_bin.bat").
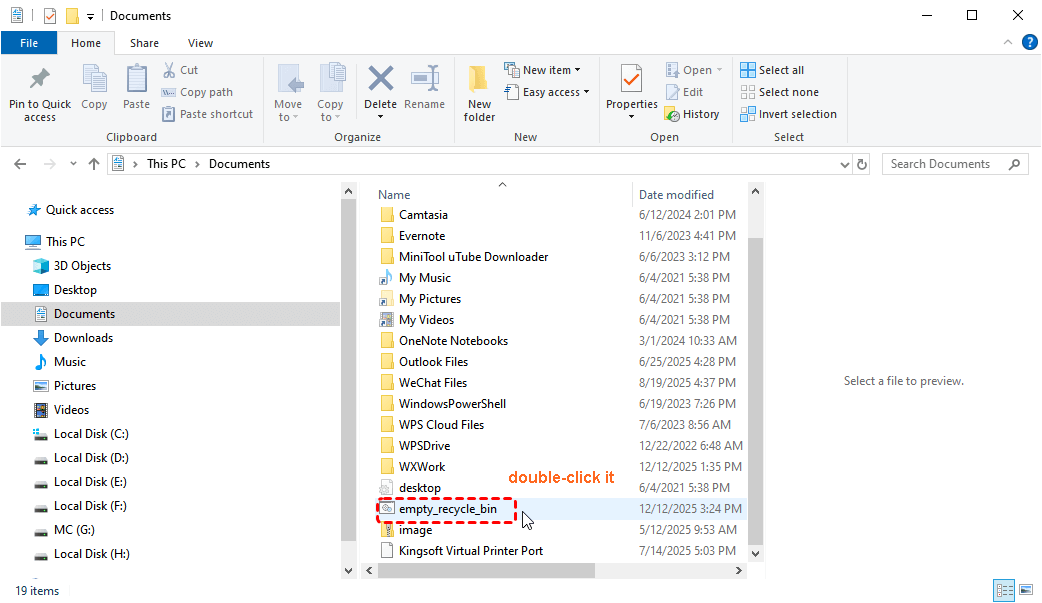
3. Run the Script: Double-click the batch file to run it and empty the Recycle Bin for the specified drives.
Emptied the Wrong Drive’s Recycle Bin? How to Recover Files Easily
When using the command line or a script to clear the Recycle Bin, if you enter the wrong disk letter (e.g., mistakenly targeting D: instead of C:), it can result in the deletion of files you didn’t intend to remove. The good news is, deleted files from the Recycle Bin are not gone forever (at least not immediately). With the right approach, you can still recover them.
In such scenarios, MyRecover is highly recommended since this powerful data recovery software can help you get your lost files back quickly from over 500 data loss cases including emptied Recycle Bin, system crash, power failure, etc.

- 🌟Recover Without Backup: Restore lost files even if no Windows backup exists.
- 🌟AI Empowered Recovery: AI-embedded file recognition & recovery algorithm makes easy use and 0 file omission.
- 🌟Wide File Support (1000+): Recover photos, documents, videos, audio, archives, and more.
- 🌟Supports Multiple Devices (500+): Works on HDDs, SSDs, USB drives, SD cards, cameras, and other storage devices.
- 🌟Covers 500+ Data Loss Scenarios: Handles accidental deletion, formatting, system crashes, virus attacks, emptied Recycle Bin, partition loss, and more.
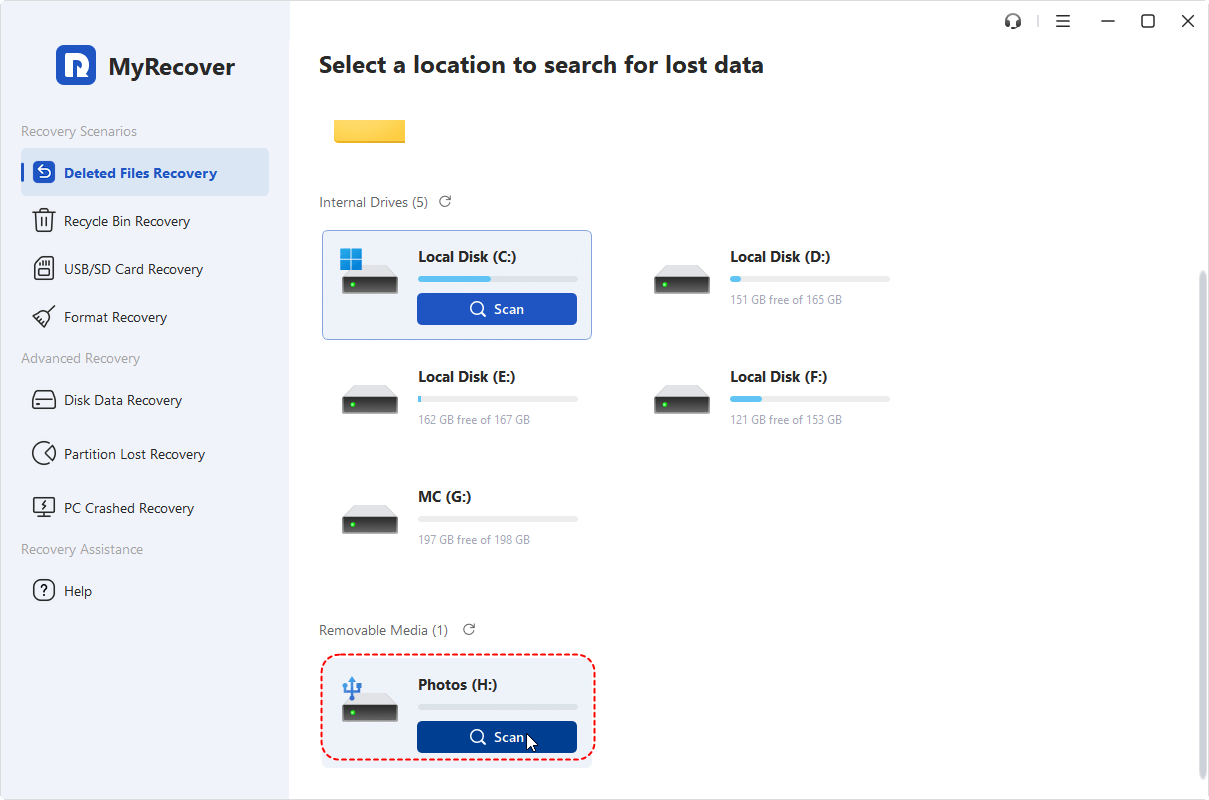
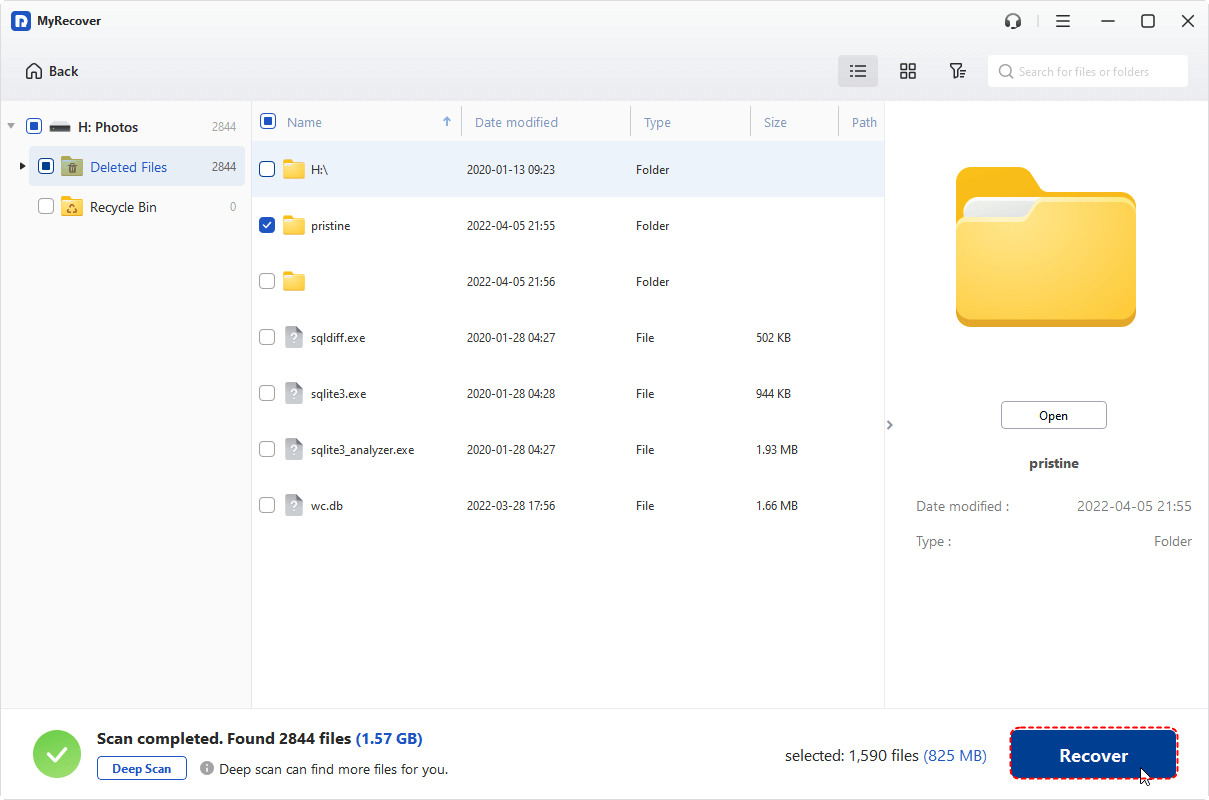
Step 1. Install MyRecover on your computer and open it. Choose the drive where the files were accidentally deleted. Click "Scan" to start scanning the drive.
Step 2. MyRecover will search for deleted files and show you a list of recoverable files. You can preview the files to check their quality and confirm that they are the ones you need to recover.
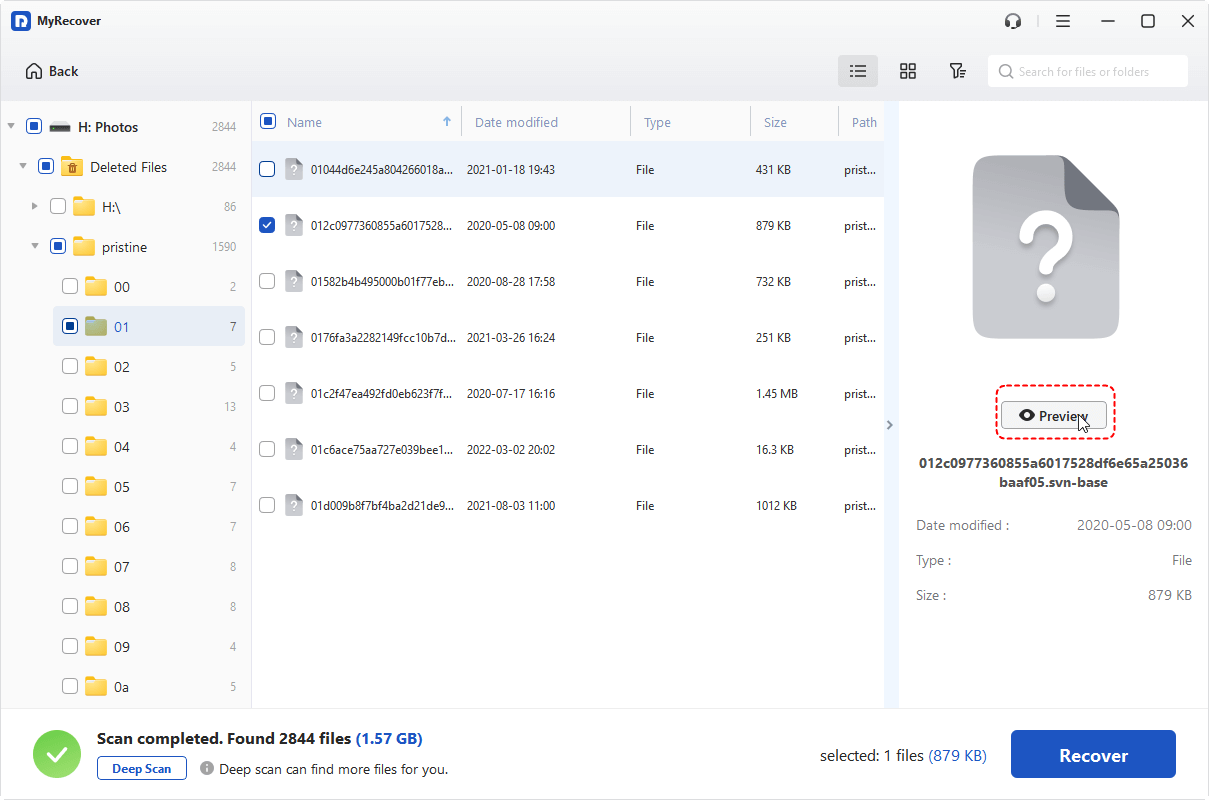
Step 3. Select the files you want to restore and click "Recover".
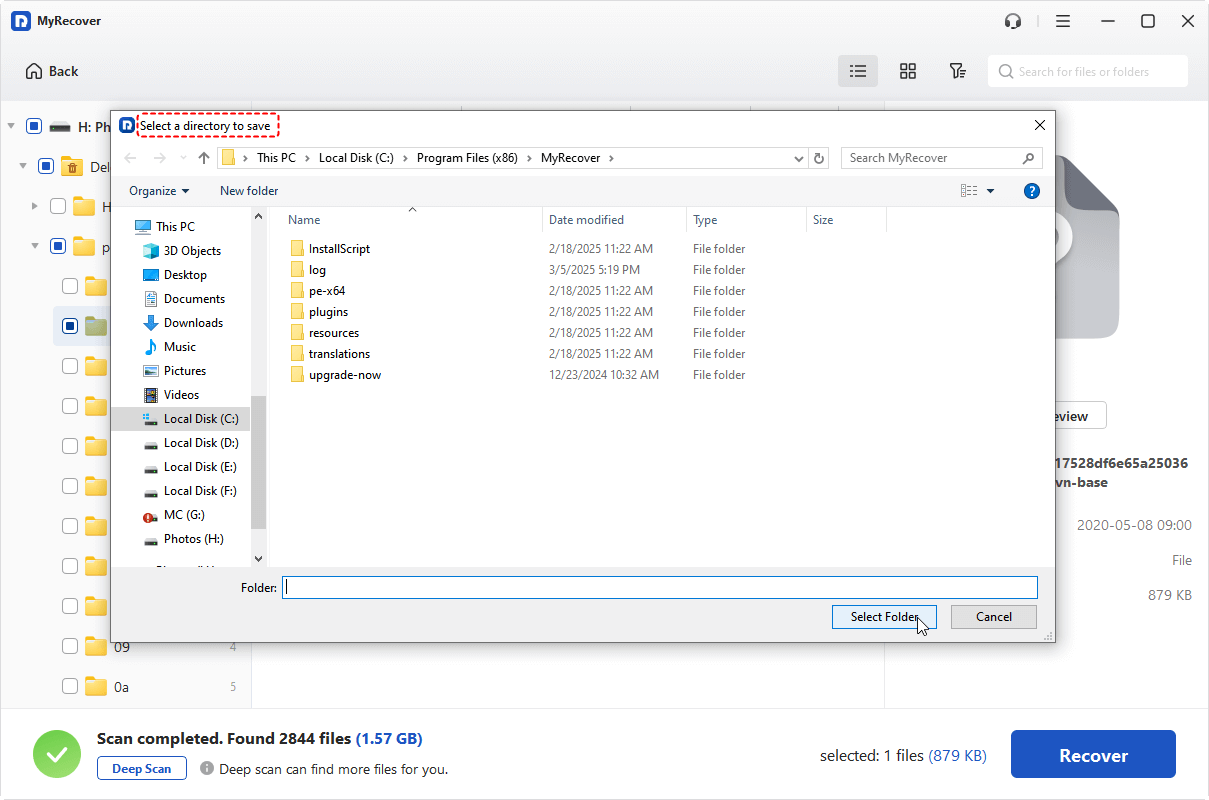
Step 4. Save the recovered files to a different drive or location to prevent overwriting any other deleted files.
Closing Thoughts
Emptying the Recycle Bin from the command line offers several benefits, including increased efficiency, the ability to automate the process, and a solution for bypassing UI issues. Whether you use Command Prompt, PowerShell, or a Batch Script, these methods give you flexibility and control over your system’s file management.
However, mistakes can happen — especially when using the command line. Accidentally emptying the wrong drive’s Recycle Bin can lead to the loss of important files. The good news is that MyRecover provides a simple and effective solution to recover those them, even if files were deleted from the Recycle Bin.


Stay Updated With Our
Latest Tips
Add us as a preferred source on Google to never miss helpful guides.