
How to Create a System Restore Point in Windows 10 and 11
What is a restore point, and how do you create and use it effectively? This article walks you through the process of creating and using restore points in Windows 10 and 11. This guide also introduces a professional tool that ensures complete protection for recovering deleted or lost files that system restore cannot bring back.
By Aria / Updated on October 28, 2025
What is a System Restore Point?
A System Restore point is essentially a snapshot of your system settings, Windows registry, and certain program files at a specific time. When something goes wrong with your Windows system, whether due to a failed update, software installation, or corrupted settings, a System Restore point can be your lifesaver. It allows you to roll your system back to an earlier state.
Unlike a full backup, System Restore does not recover personal files such as photos, videos, or documents. Instead, it’s primarily designed to restore your system to a working state after issues arise. For example, if your computer starts acting up after installing a driver, rolling back to a restore point created before the installation can fix the problem quickly.
It’s important to note that Windows allocates a limited amount of disk space for System Protection. When this space is full, older restore points are automatically deleted to make room for new ones. As a result, the number of restore points on Windows is limited.
How to Create a System Restore Point on Windows 10 and 11
If you’ve enabled System Protection, Windows automatically creates restore points when it detects major system events, such as installing Windows updates, device drivers, or performing a system restore. However, not all software installations or system changes will trigger an automatic restore point.
In that case, you can also manually create a System Restore point. The process is straightforward:
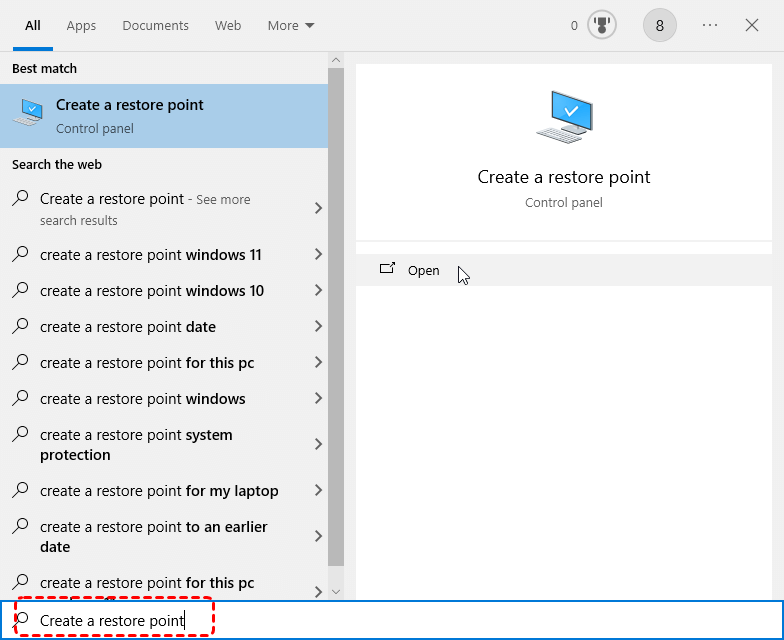
Step 1. Type "Create a restore point" in the Start menu and open it.
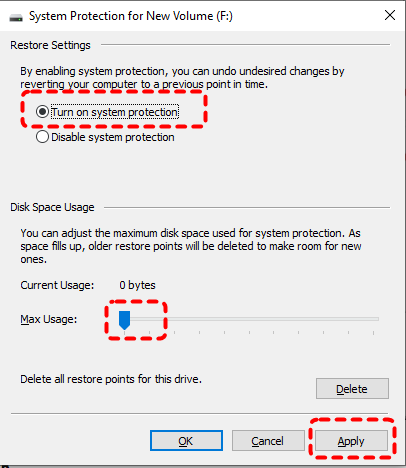
Step 2. Under the System Protection tab, select the drive where you installed Windows OS and click "Configure".

Step 3. Check the "Turn on system protection" option under the Restore Settings and assign the disk space for the restore points based on your needs, then click "Apply" and "OK" to save the settings.
Now, whenever Windows detects a major system event, it will automatically create a restore point.
Step 4. Click "Create", give your restore point a descriptive name (e.g., “Before driver update”), and hit "Create" again.

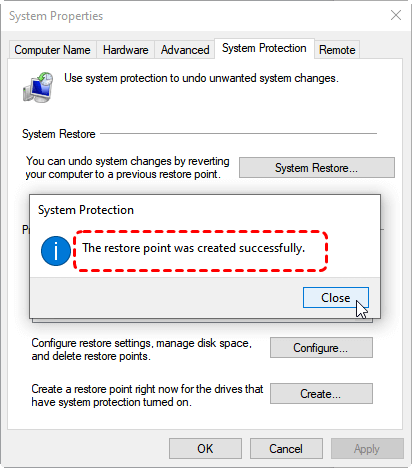
Step 5. Wait for Windows to confirm the restore point has been created successfully.
How to Roll Back Windows Using Restore Point
Once you’ve configured System Protection and created a restore point, you can restore your system to any saved point while troubleshooting. This will restore your system back to a working state. If your Windows can start normally, you can follow these steps to perform a System Restore.
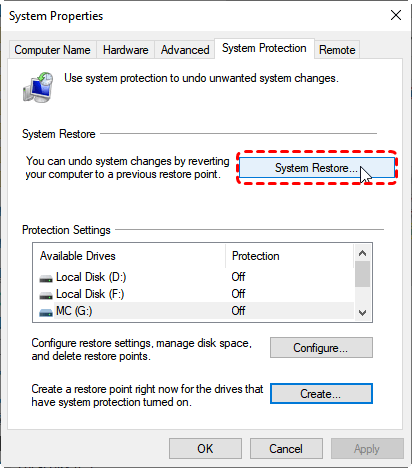
Step 1. Type "Create a restore point" in the Start menu and open it.
Step 2. Under the "System Protection" tab, click "System Restore".
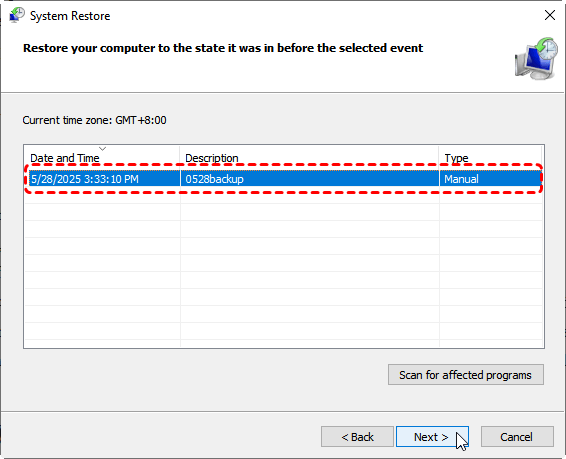
Step 3. Click "Next" and choose a restore point created before the problem began from the list. You can check the software will be affected by clicking "Scan for affected programs".
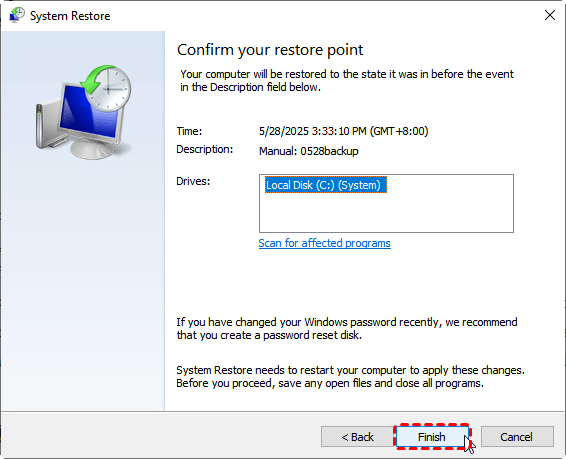
Step 4. Click "Next" and "Finish" to begin the process. Your computer will be restarted and utilize the selected restore point.
If your computer can’t boot normally due to a serious issue, restoring the system to a point before the problem occurred may fix it.
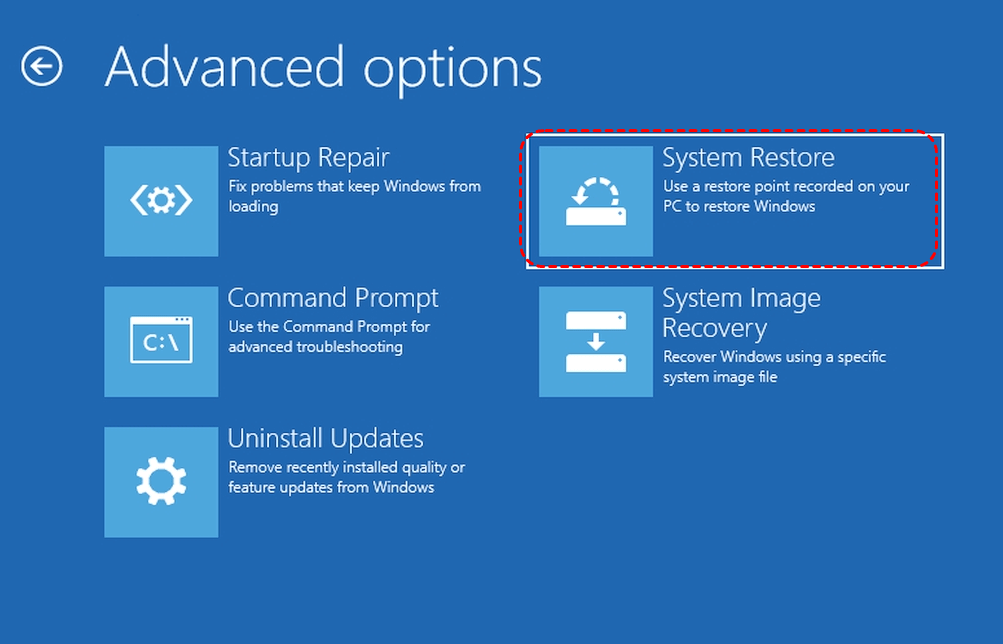
Step 1. Start your computer, and when the Windows logo appears, press and hold the power button to force a shutdown. Repeat this 2–3 times, and Windows will automatically enter the "Automatic Repair" screen.
Step 2. Select "Advanced options" > "System Restore". Then you can follow the steps mentioned above to restore your system.
How to Delete a System Restore Point
Sometimes, restore points can take up too much disk space. If you want to free up storage, you can delete them safely. Besides automatic deletion when space is full, you can also manually delete unnecessary restore points.
Step 1. Open "Create a restore point" and locate the "System Protection" tab.
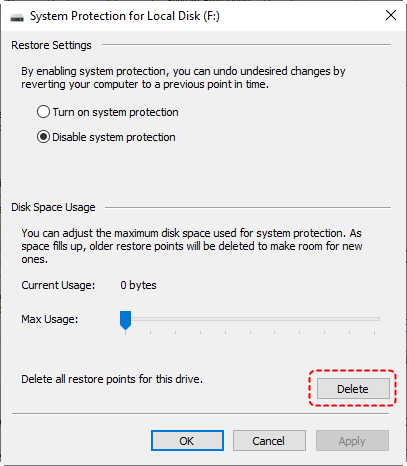
Step 2. Select the drive with restore point and click "Configure".
Step 3. Click "Delete" to erase all the restore points for this drive.
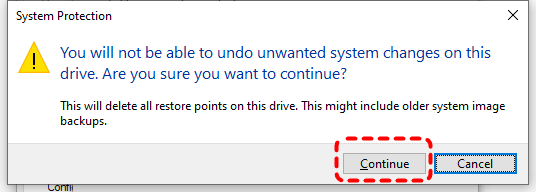
Step 4. Click "Continue" to confirm deletion.
Bonus: How to Recover Deleted Files After System Restore
Although System Restore won’t delete your personal files, some software-related files, such as AppData and Program Files will be completely removed. Some users mistakenly believe that System Restore can recover deleted personal files, but that’s not the case. If data is lost after a System Restore for any reasons, using a professional data recovery tool like MyRecover can help you retrieve the lost files.
It can scan all the drives (System Restore generally affects only the C: drive) on the computer and offer an opportunity to recover missing files from these drives. In addition, MyRecover also supports data recovery after Windows updates, system crashes, hard drive formatting, and other complex data loss scenarios.
Step 1. Download and install MyRecover on your computer from Microsoft Store, avoid installing it on the drive with lost files.
Step 2. Launch it and choose the C drive to scan for lost files, then click "Scan".

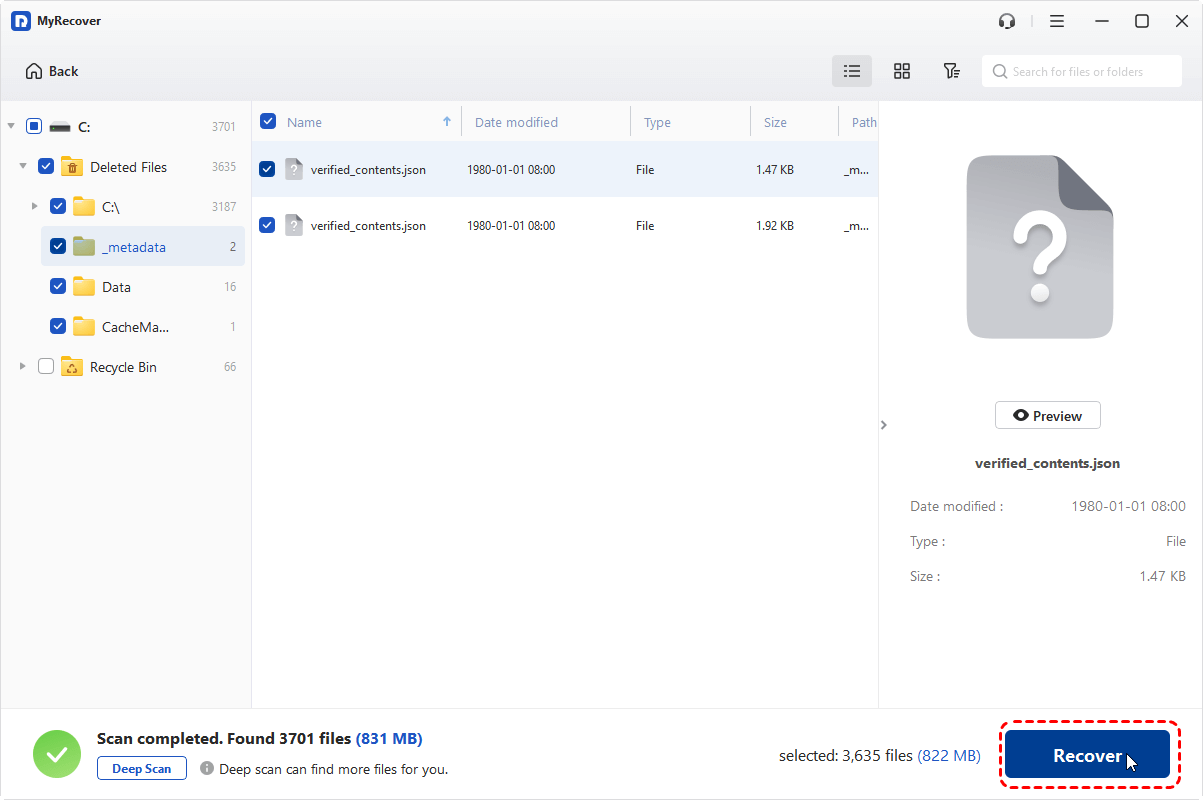
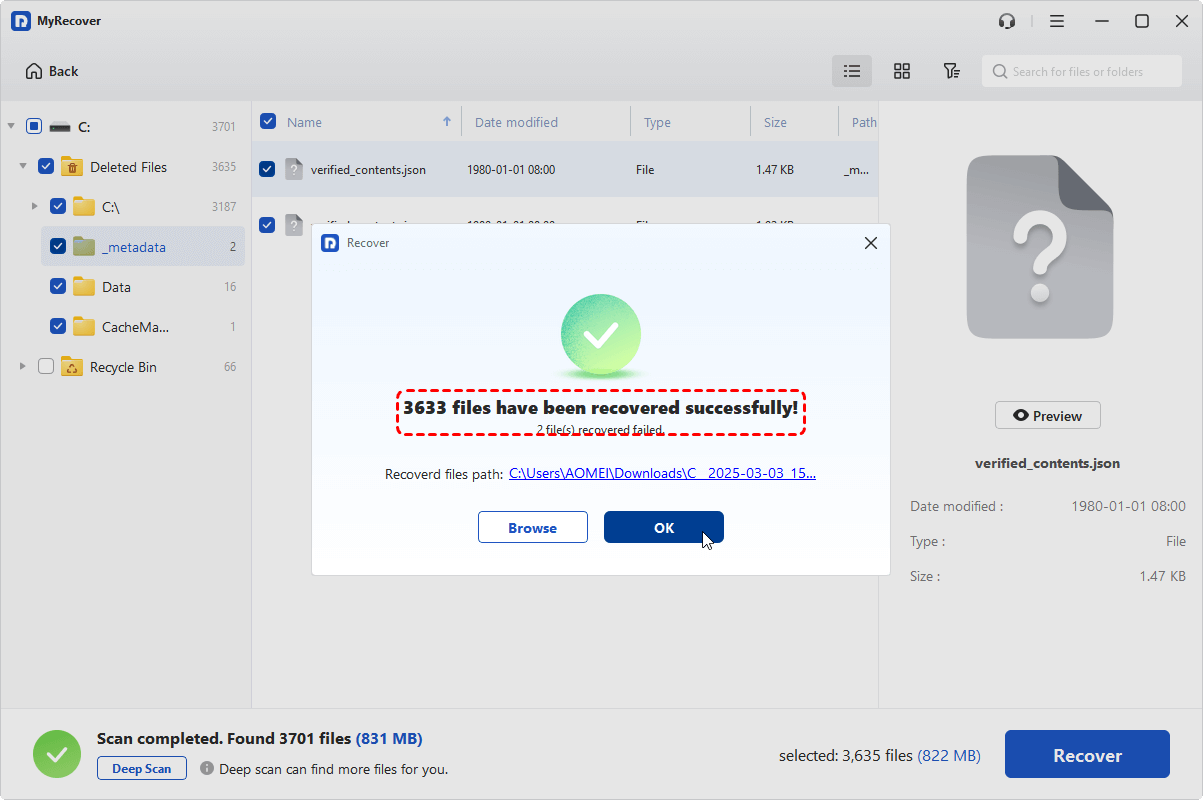
Step 3. Choose the files you would like to recover from the recoverable lists and click "Recover".
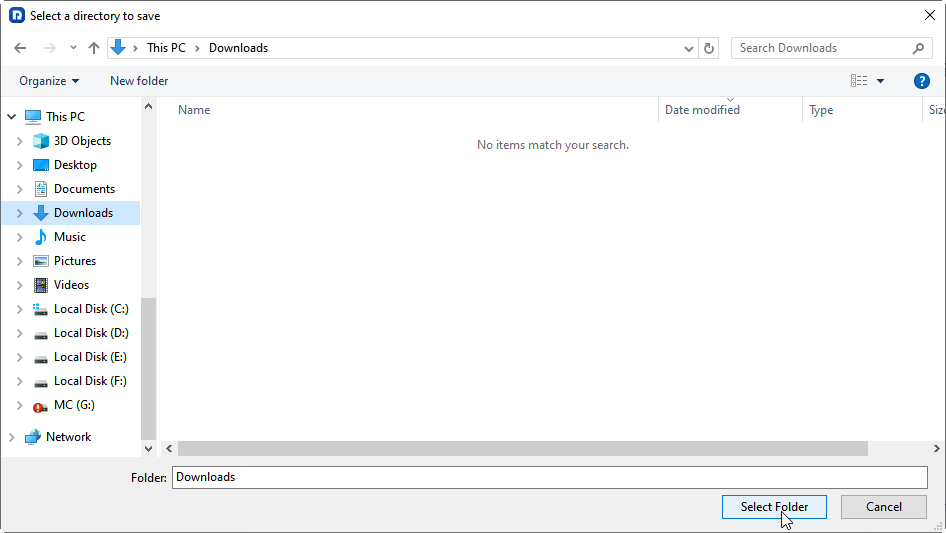
Step 4. Select a safe destination folder path to save the recovered files.
When the process is completed, you'll see the message "Files have been recovered successfully". You can check the recovered files by clicking on the destination folder path or "Browse" button.
Bottom Line
System Restore points are a powerful Windows feature that can protect you from unstable updates, drivers, or software changes. Knowing how to create a System Restore point on Windows 10 and 11, use it to roll back your system, and manage restore points ensures your PC stays healthy. And if you accidentally lose important files during the process, tools like MyRecover can help you recover them easily.
With the Professional version of MyRecover, you can enjoy unlimited data recovery and file content preview before restoring. Moreover, it can rescue data from crashed system. It’s the all-in-one solution designed to give you complete peace of mind when data loss occurs.


Stay Updated With Our
Latest Tips
Add us as a preferred source on Google to never miss helpful guides.