
How to Recover Data After Reinstalling Windows: A Complete Guide
Reinstalling the Windows system can resolve some operating system issues, but it may also lead to problems such as losing personal data. What should you do in this situation? This article will focus on how to recover data after reinstalling Windows and provide 5 effective methods to retrieve your files.
By Aria / Updated on June 30, 2025
Does Reinstalling Windows Delete Everything?
Reinstalling Windows can be necessary when your system is slow, corrupted, or infected by malware. Reinstalling Windows can start fresh, fixing long-lasting bugs and making your system run smooth again. But be careful—there are risks during the process. Some improper operations may lead to huge data loss after reinstalling the Windows, such as forgetting to save your important files, accidentally erase the wrong drive.

Before delve into the solutions to recover lost data after reinstalling Windows, one of the biggest concerns is: does reinstalling windows delete everything? Yes, reinstalling Windows can delete everything—but it depends on how you reinstall it.
| Method | Effect on files | Recovery possible |
| Reset this PC (Keep my files) | Keep personal files in C: \Users | ✅Higher (safe) |
| Reset this PC (Remove everything) | Deletes all personal files | ❗ Lower (unless backed up or using professional tool) |
| Clean install (USB/DVD) | Erase entire drive | ❗ Lower (unless recovering via professional software) |
| Upgrade install (Repair) | Keep files & apps | ✅Higher (safest) |
How to Recover Data After Reinstalling Windows 10/11
If you've already reinstalled Windows and choose the option "Remove everything", don’t worry—there are still several methods you can try to recover the lost personal files, especially if the drive hasn't been overwritten extensively. If you backed up important data before reinstalling the Windows, the recovery process will be easy. Even without a backup, there are two other ways to help you retrieve deleted files without backup.
Solution 1. Restore Files with File History
Windows developed a powerful backup feature—File History—which allows you to restore previous versions when needed. If you have enabled File History in Windows 10/11 before reinstallation, you can retrieve previous versions of files and folders.
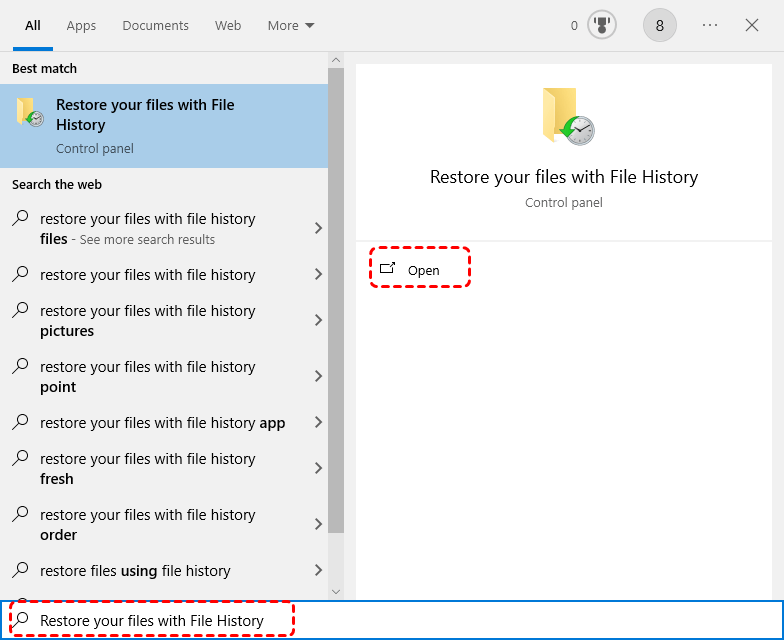
Step 1. Type "Restore your files with File History" in the Start Bar and open it.
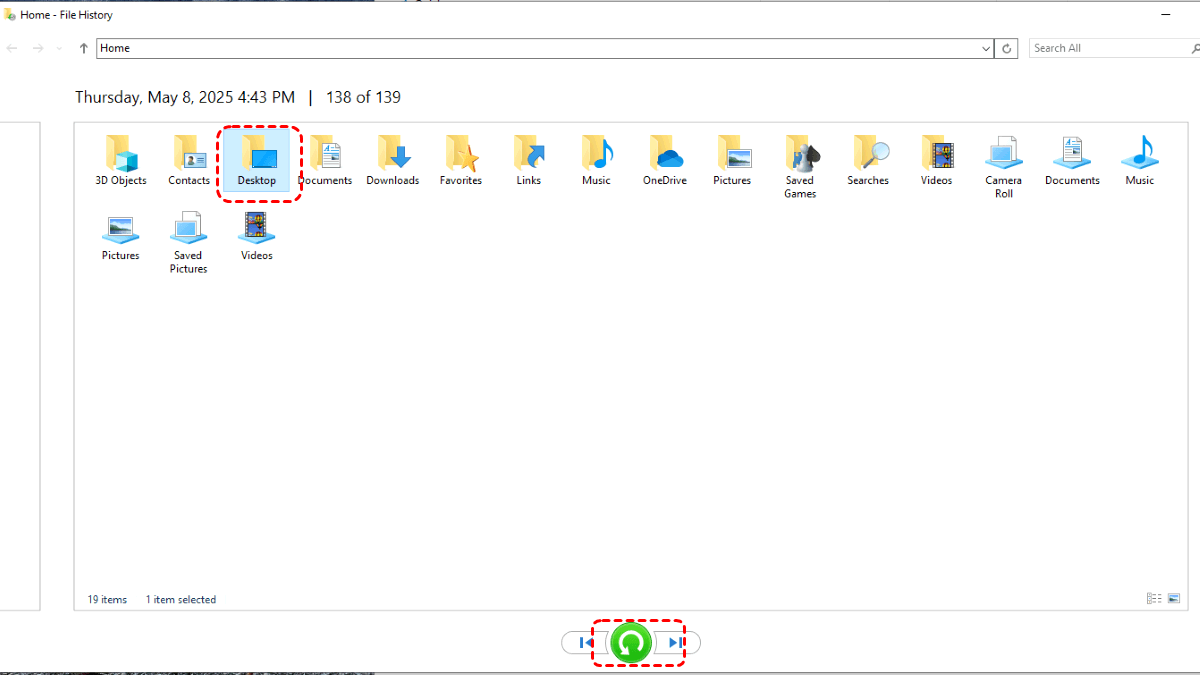
Step 2. Browse and select the folder where the lost data were stored. You can select the version you want based on the backup date.
Step 3. Click the green "Restore" button to restore the files to its original location.
Solution 2. Restore from Backup and Restore (Windows 7)
Backup and Restore (Windows 7) allows users to create backups of files and system images, then restore system and file to a previous state to recover lost data when you needed. It can work only when you create a backup in advance before reinstalling Windows.
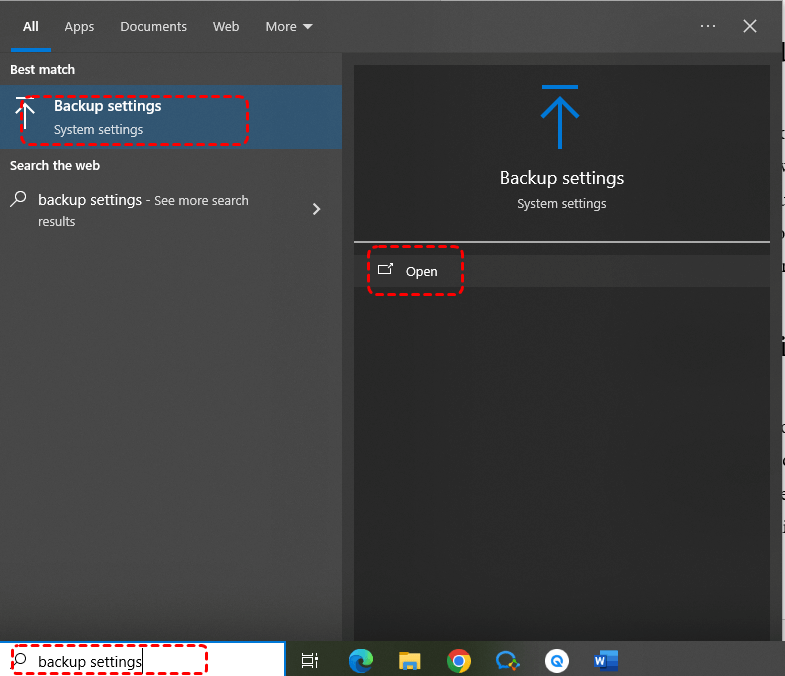
Step 1. Type "Backup settings" in the Start menu and open it.
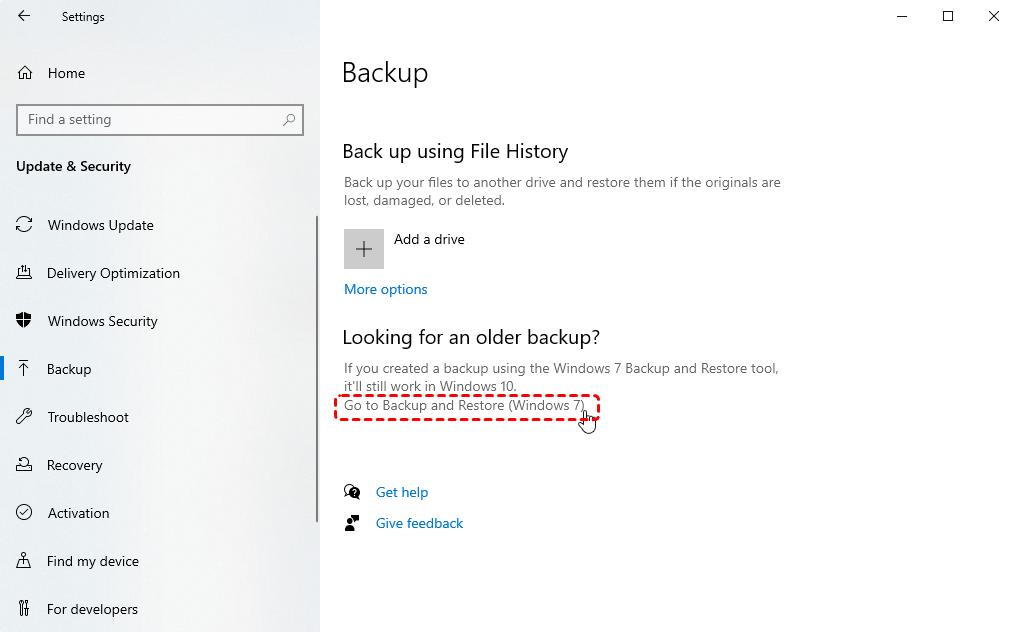
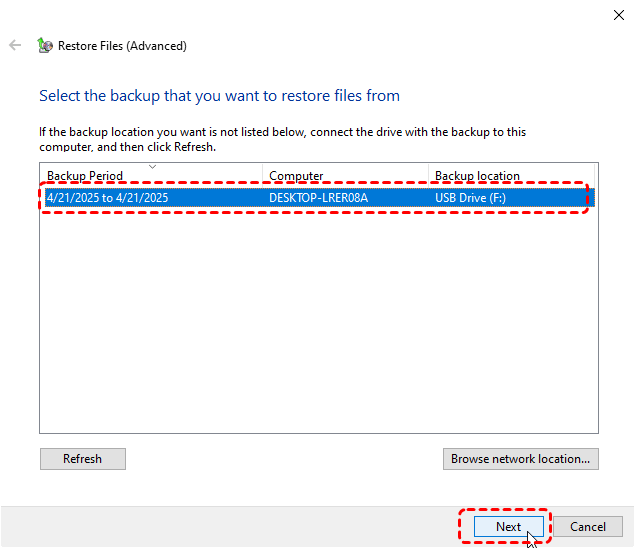
Step 2. Click "Go to Backup and Restore (Windows 7)", then select "Select another backup to restore files from".
Step 3. Select a created backup to restore files from.
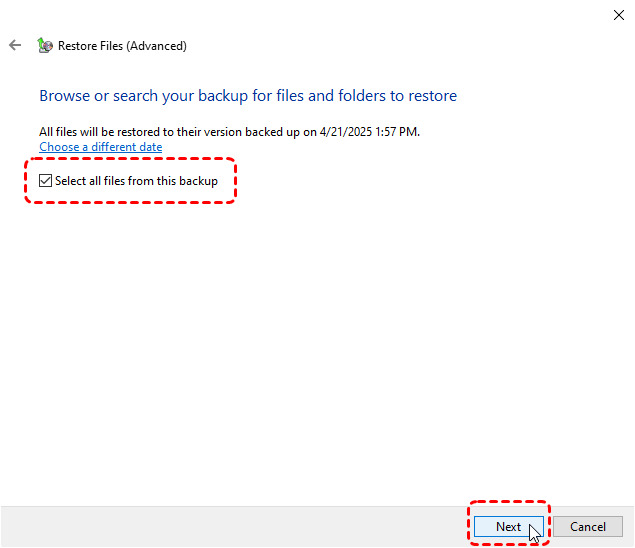
Step 4. Select the files or folders you want to restore by clicking "Browse for files/ folders". If you want to restore all files in the backup, just check the "Select all files from this backup" option.
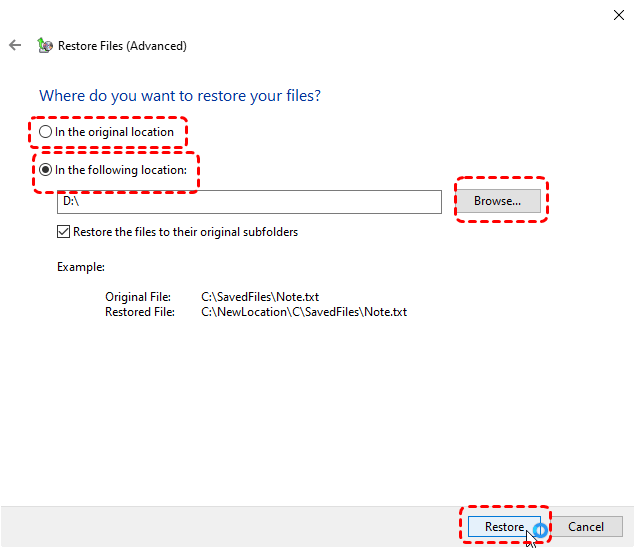
Step 5. Choose a destination folder to restore the recovered files, then click "Restore" to start the process.
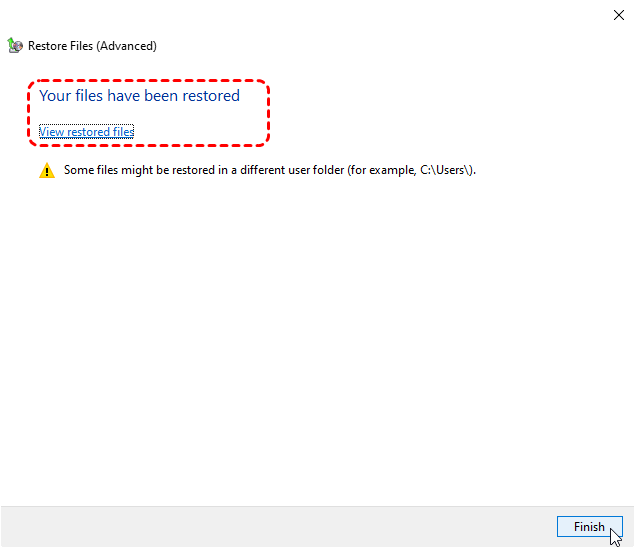
When the process is finished, a message "Your files have been restored" will pop up. You can check the recovered files by clicking "View restored files".
Solution 3. Recover from Cloud Backup
If you used a cloud backup tool such as OneDrive, Google Drive, Dropbox to sync all data on your computer before reinstalling the system, you're in lucky. Data stored in the cloud won't be affected at all by reinstalling the system. This is a good chance to recover lost data after reinstalling Windows.
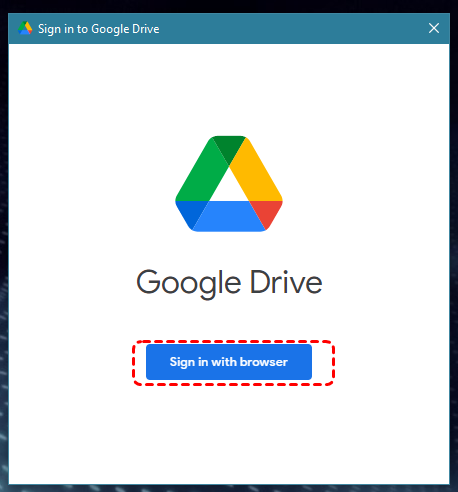
Step 1. Sign in to Google Drive with your correct account (Here's take Google Drive as an example).
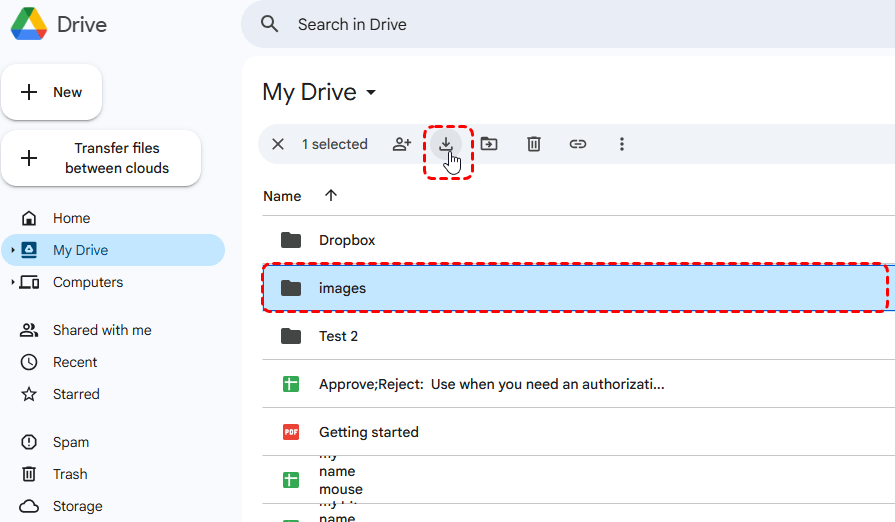
Step 2. Browse through and navigate to the folders or files you wish to recover.
Step 3. You can download the files to recover lost data by clicking "Download".
- Notes:✎...
- Once again: the above three methods all require backing up files before data loss, otherwise they will not work.
Solution 4. Retrieve Files from Windows.old Folder
When you perform an upgrade installation or choose to keep my files during a PC reset, Windows will automatically create a Windows.old folder which contains your old system files. You can restore lost files from the folder.
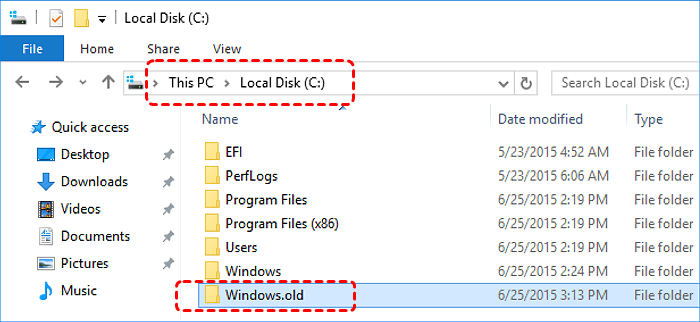
Step 1. Navigate to C:\Windows.old\Users in File Explorer.
Step 2. Browse and select the files you want to recover, then save them to a secure destination.
- ★Tips:
- Windows will automatically clean up Windows.old after 10 days. Therefore, when you find files missing, take action to recover the data as soon as possible.
- If the new system writes a large amount of data to the C: drive, old files may be overwritten. So, after discovering missing files, stop writing new data immediately to prevent data overwriting.
Solution 5. Professional Data Recovery Tool—MyRecover
If you don't have any backups, or the Windows.old folder wasn't generated for some reason, third-party data recovery software will come in handy. MyRecover is highly recommended. As a professional data recovery tool, MyRecover enables data recovery without requiring any backups. It features a graphical user interface (GUI), allowing even non-technical users to complete the data recovery process independently by clicking icons.
Here are the remarkable features of MyRecover:
✅Supports Over 1000 File Types: Recover photos, videos, documents, emails, ZIP files, and more.
✅Supports Multiple Storage Devices: support data recovery from external HDD, SSD drives, USB flash drives, SD/memory cards, digital cameras, and more.
✅Safe & Read-Only Process: Your original data remains untouched during the scan and recovery process.
✅Comprehensive Scan: You can run quick scan to recover data quickly, or choose Deep Scan to retrieve more data from fragmented clues.
Step 1. Download and install MyReocver on your computer.
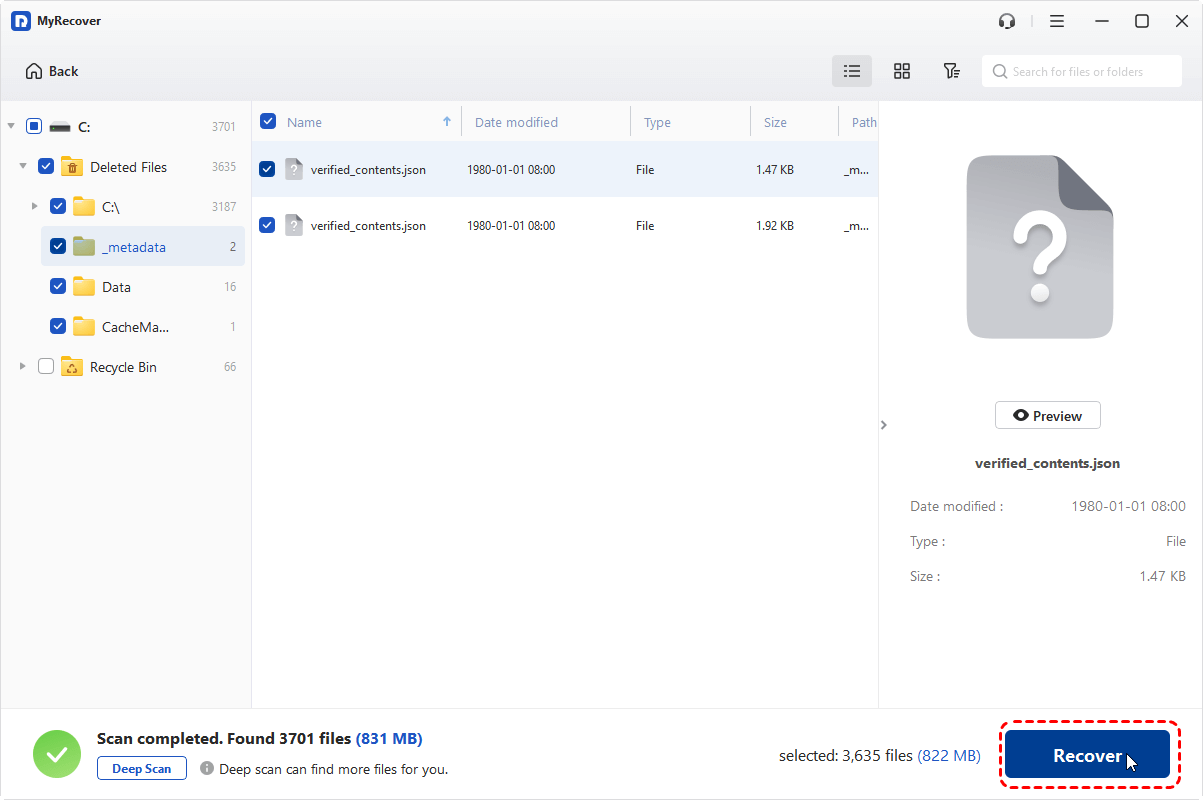
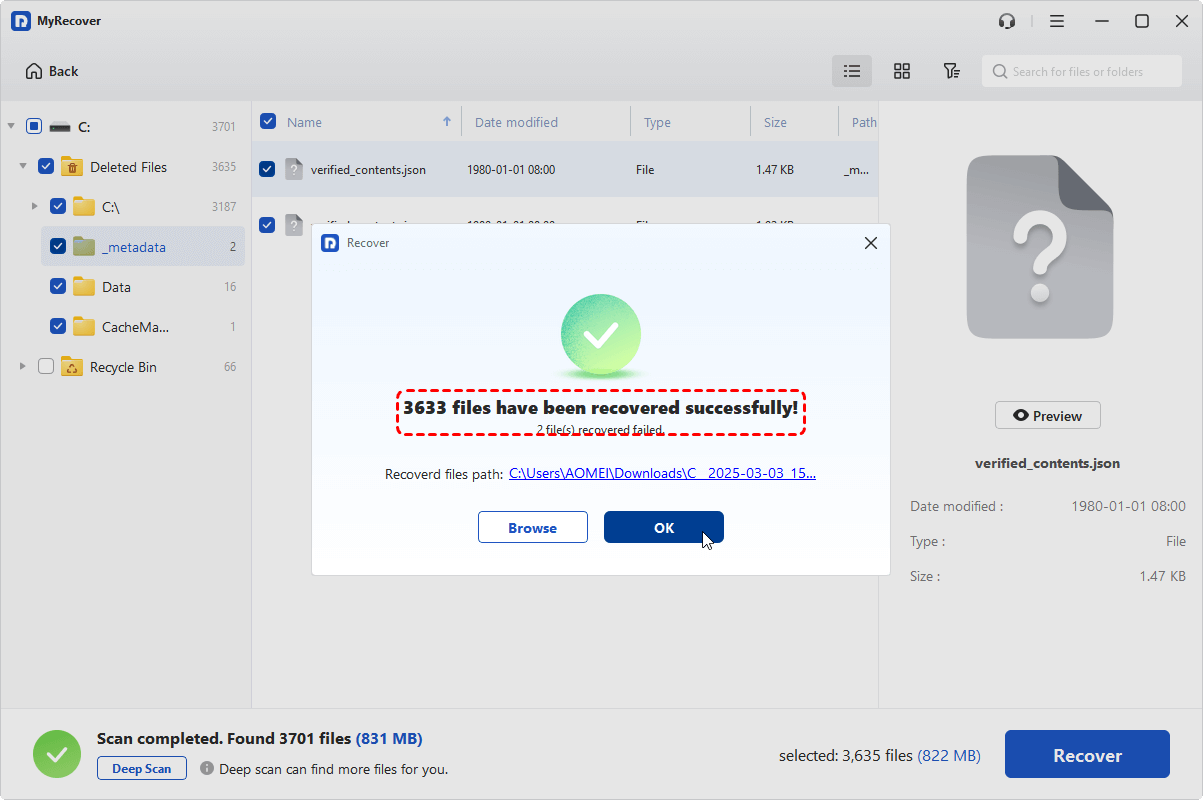
Step 2. Launch it and select the C drive with lost files to Scan, then click "Scan".

Step 3. Choose the files you want to recover from the recoverable lists and click "Recover".
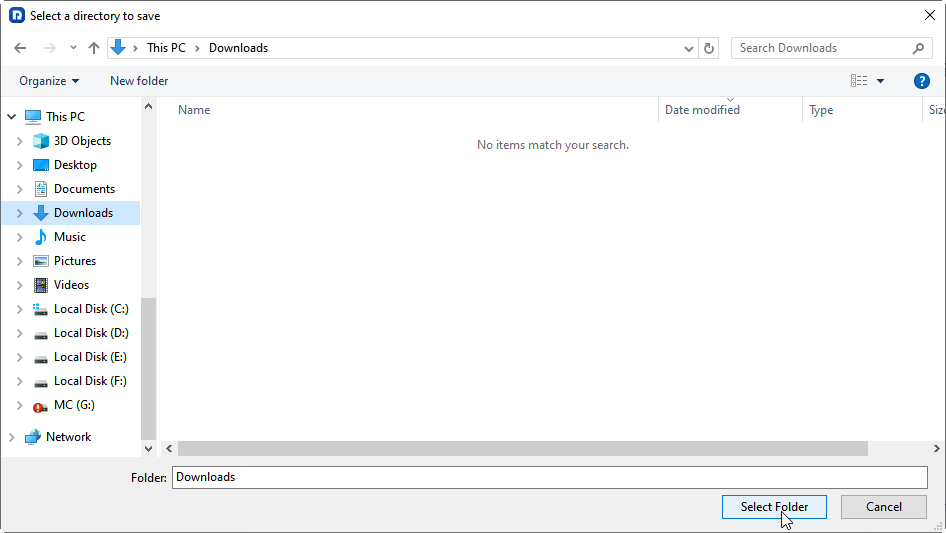
Step 4. Select a different location (not the C: drive) to save the recovered files.
When the process is finished, the message " Files have been recovered successfully" will pop up. You can click the path of recovered files to access and check them.
How to Prevent File Lost When Reinstalling Windows
After you've hopefully recovered your data, it's wise to consider how to avoid this kind of stress in the future. Backup is key when it comes to avoiding file loss. Whether you're doing an in-place upgrade or a clean installation, these suggestions can help you to safeguard your files.
Backup in advance
Whether you use Windows backup tools, cloud backup services, or back up to an external hard drive, backing up before data loss can significantly reduce the likelihood of losing your data.
Double-check before reinstalling
Before starting the system reinstallation process, carefully check the reinstallation options, tick the box "Keep personal files", and ensure that the hard drive is not formatted.
Conclusion
Reinstalling Windows doesn't always mean you'll lose everything—but it can if you're not careful. Whether you're preparing to reinstall or recovering after the fact, understanding your options is essential. Keep regular backups to ensure that your valuable files are never permanently lost.
If your files are unfortunately lost, using a data recovery tool like MyRecover can help you retrieve the lost data after reinstalling the system. In addition, MyRecover offers the Professional Edition and a Technician Edition to meet more advanced needs, both of which allow you to preview file contents before recovery. For enterprise users, the Technician Edition is more suitable; it allows you to run on multiple computers with a single license.


Stay Updated With Our
Latest Tips
Add us as a preferred source on Google to never miss helpful guides.