Wondering how to recover C drive data on Windows? This guide will walk you through practical methods to recover C drive data from using built-in backup tools to reliable professional recovery software. Recover your important data effortlessly!
The C drive is typically the main system partition in a Windows computer, where the operating system, installed programs, and often default user data are stored. However, just like files lost in D, E, or USB drives, data stored in the C drive is also frequently lost due to reasons like accidental deletion or minor data corruption. What’s worse, the system data and other information stored in the C drive play a crucial role in the normal operation of the computer.
Deleting files from the C drive could lead to the following consequences:
🔔Loss of Personal Files
Documents, pictures, videos, and downloads stored in the user profile folders may disappear due to accidental deletion, formatting, or system errors.
📌Corrupted System Files
Important system files required for Windows to function can get deleted or corrupted.
🔍Windows Fails to Boot
If the system partition (C drive) is damaged, missing, or formatted, Windows may fail to start.
⛏️Software Malfunction
Programs installed on the C drive may become unusable or crash unexpectedly because their files or registry entries are lost or damaged.
🛠️Access Restrictions
User profiles and permissions stored on the C drive may be affected, leading to login issues or restricted access to files.
Whether caused by accidental deletion, formatting, virus attacks, or system crashes, losing C drive data can severely affect system performance and user access. But don’t worry — lost data recovery from C drive is often possible with the right tools and steps.
If you're seeking solutions on how to recover C drive data, below are several methods that may help, from basic built-in features to professional data recovery software, suitable for both beginners and advanced users. These solutions cover common scenarios and ensures you can recover important data safely without overwriting original files.
No matter when data is lost on Windows, checking the Recycle Bin immediately is always the most correct approach. Files deleted on Windows (not "Shift + Delete") are moved to the Recycle Bin, allowing you to restore them to their original location when needed.
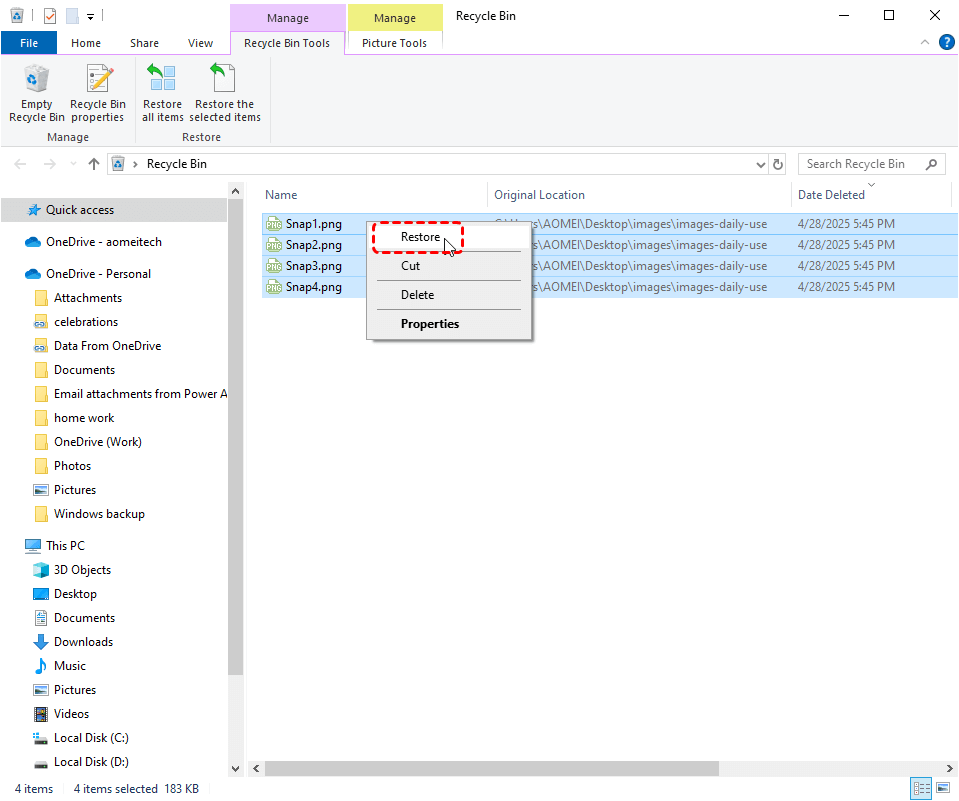
Step 1. Double click Recycle Bin icon to open it.
Step 2. Browse through the items and select the files you want to restore.
Step 3. Right click on them and choose "Restore" to return them to their original location.
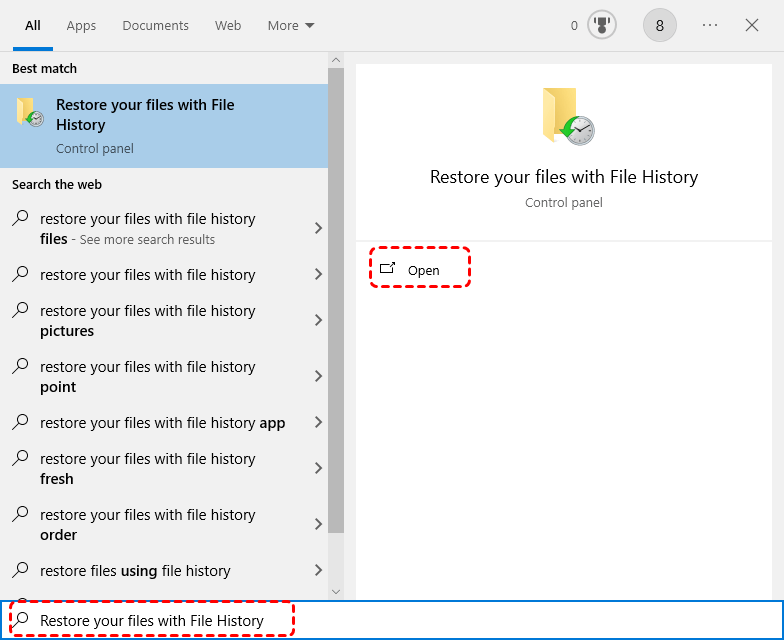
File history is a Windows built-in backup tool, which automatically backup your personal files in libraries like Documents, Videos, Pictures, Downloads (These files are basically stored in the C drive.). If you have enabled File History on Windows before data loss, it allows you to recover previous versions of files or folders.
Step 1. Type "Restore your files with File History" in the Start menu and open it.
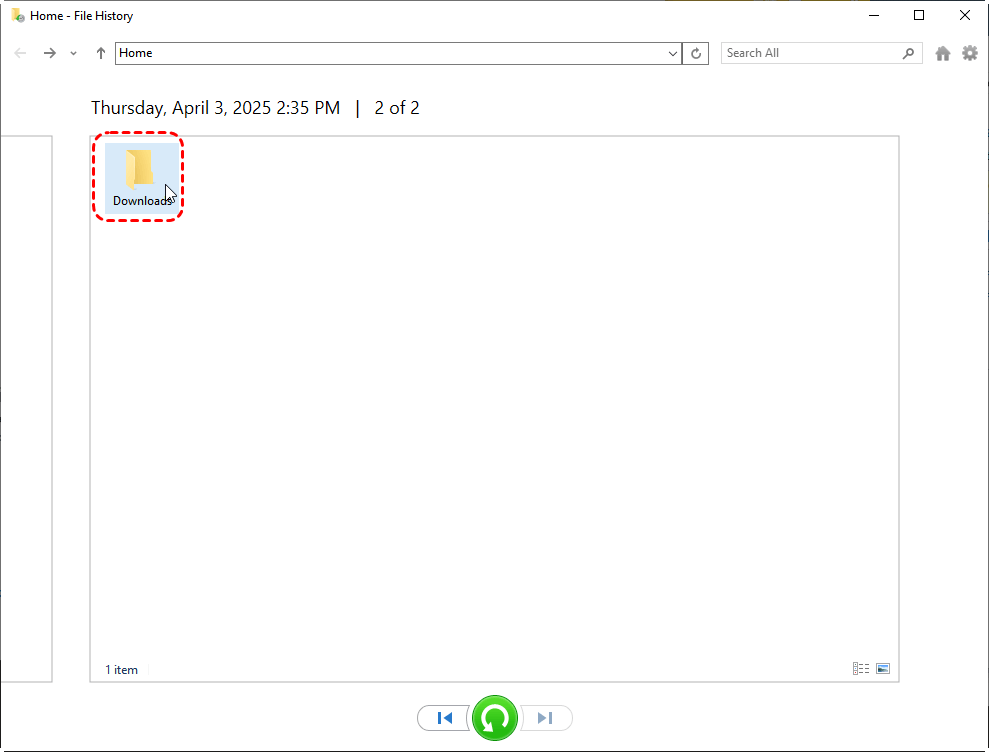
Step 2. Locate to the folders or files you want to restore and choose a desired version based on the backup time.
Step 3. Click the green "Restore" button to recover them.
Alternatively, you can restore previous versions in File Explorer.
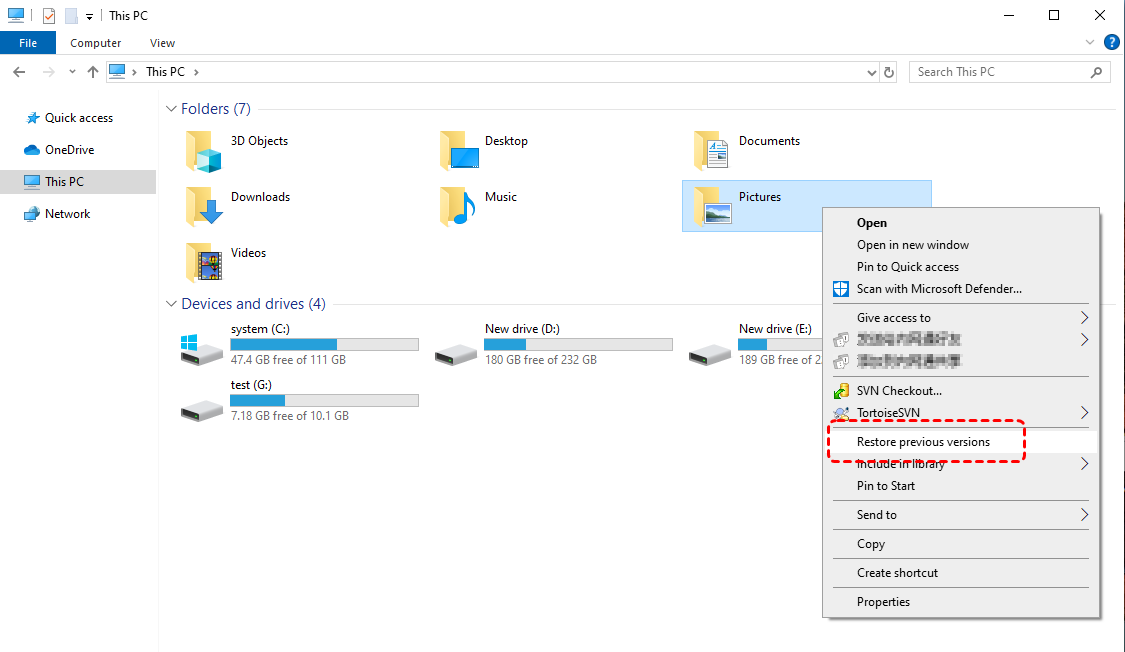
Step 1. Open File Explorer and navigate the folder containing the lost data.
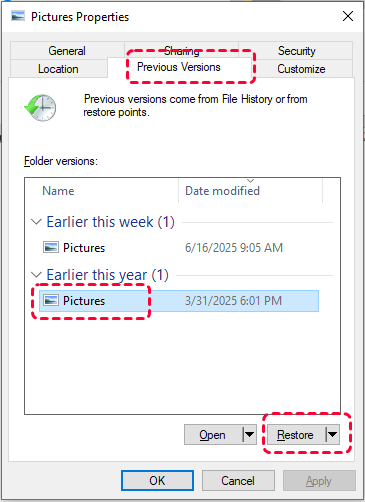
Step 2. Right click on it and choose "Restore previous versions" from the context menu. A list of versions will be displayed.
Step 3. Select the desired version and click "Restore" to recover it.
Backup and restore can create a full system image including your personal files and system data. When encountering issues such as system crashes, it allows you to restore files from backups that have already been created. If you have backed up the C drive, follow these steps to recover lost data.
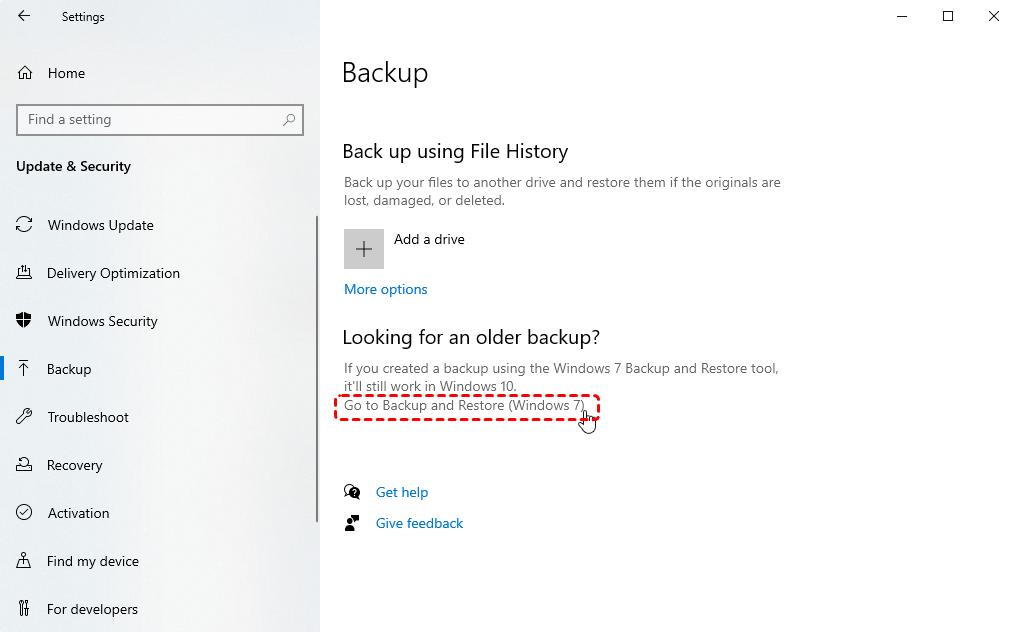
Step 1. Open "backup settings" and click "Go to Backup and Restore (Windows 7)".
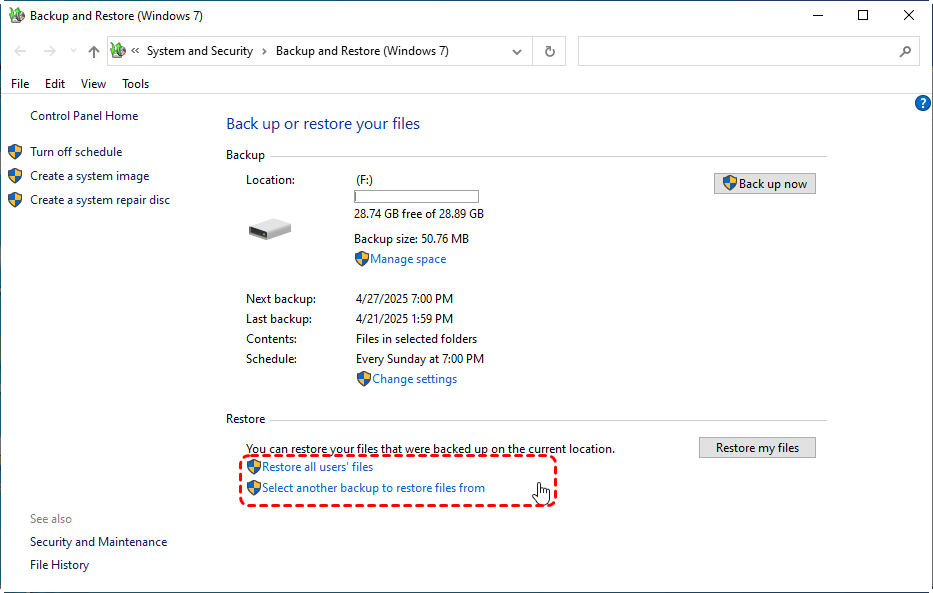
Step 2. Choose "Select another backup to restore files from" and select a created backup including the lost data, then click "Next".
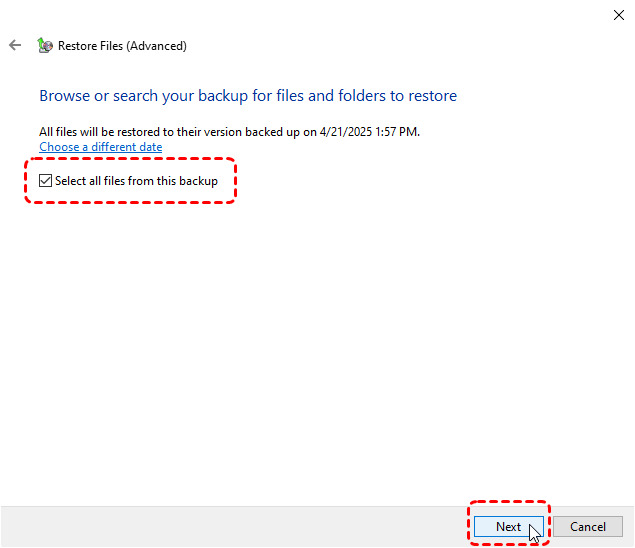
Step 3. Select files you wish to recover and click "Next". If you want to recover a specific files or folders, click "Browse for files/folders".
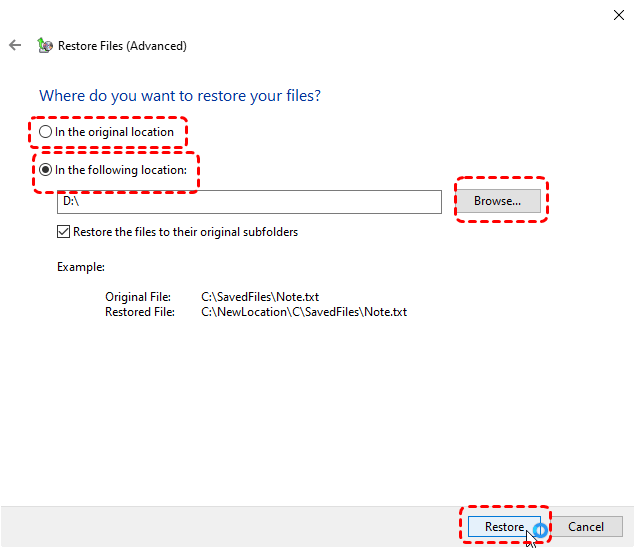
Step 4. Choose a location to save the recovered files and click "Restore" to start the process.
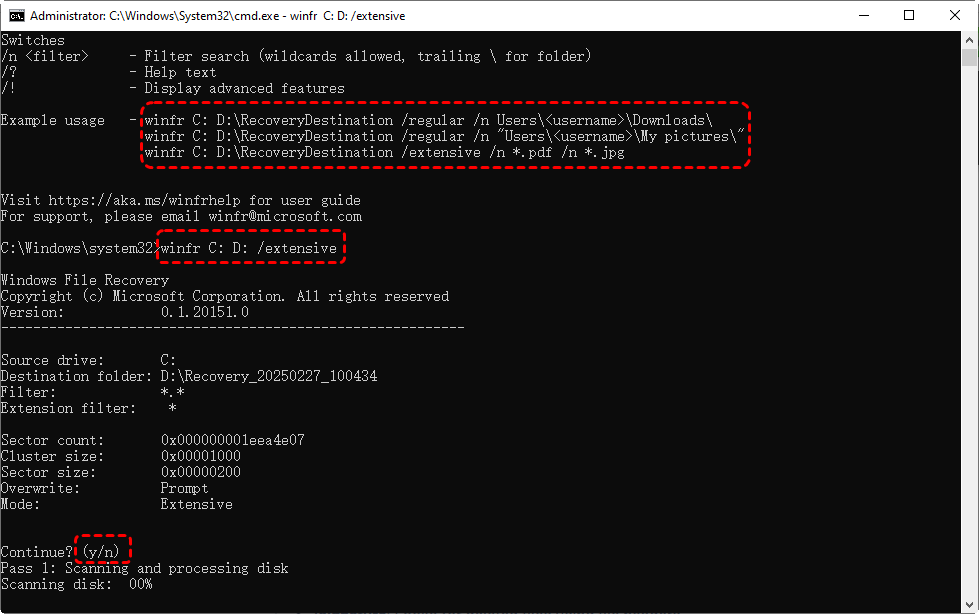
Windows File Recovery is a command-line tool by Microsoft for retrieving permanently deleted files from local storage device like C drive, D drive, USB drive, etc. Follow below steps to recover lost data using Windows File Recovery command:
Step 1. Download and install Windows File Recovery from the Microsoft official channel, avoiding installing it on the C drive.
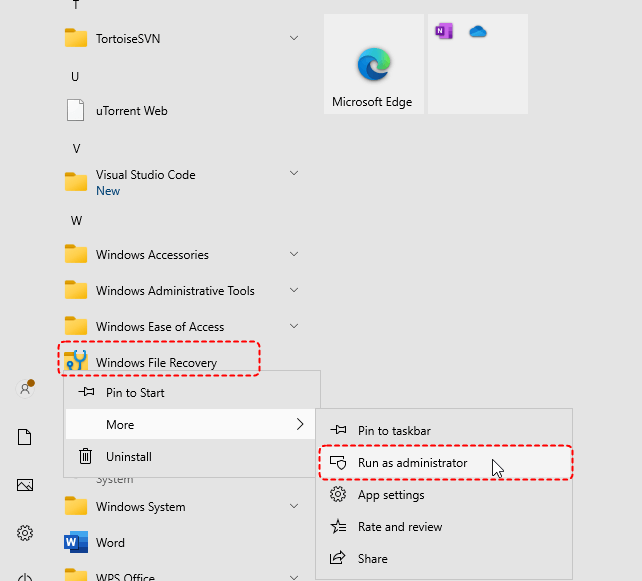
Step 2. Open Windows File Recovery and run it as administrator.
Step 3. Type the command "Winfr C: D: /extensive" and press "Enter". Replace the drive letters "C" (the target drive letter) and "D" (the destination drive letter) with actual drive letters. If you want to recover more data or retrieve data from a formatted C drive, you can switch to "Extensive" mode for a comprehensive scan.
Step 4. When the process is completed, press "y" to check the recovered files in the destination folder.
Windows System Restore can revert your computer to a previous state, if you have created a system restore point. However, System Restore will only restore system settings, installed apps, and rollback updates. You cannot restore your personal files using this feature.
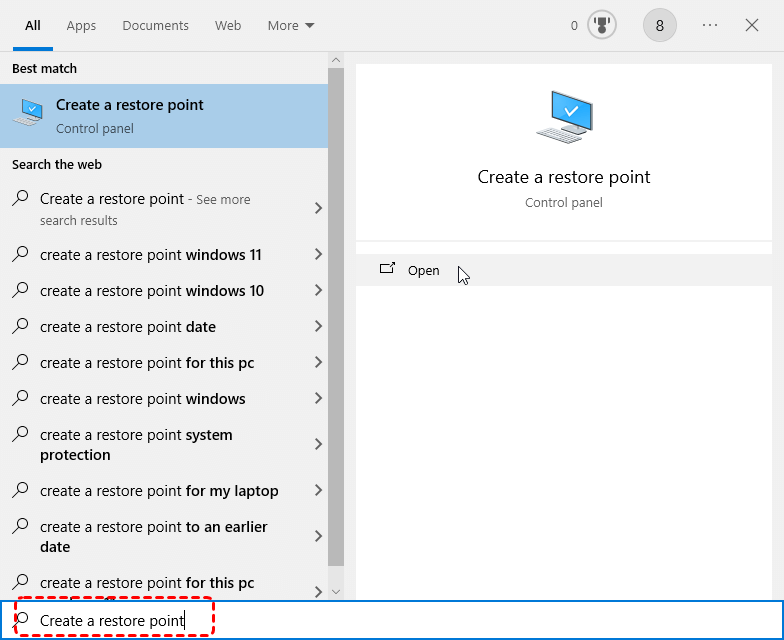
Step 1. Type "Create a restore point" in the Start menu and open it.
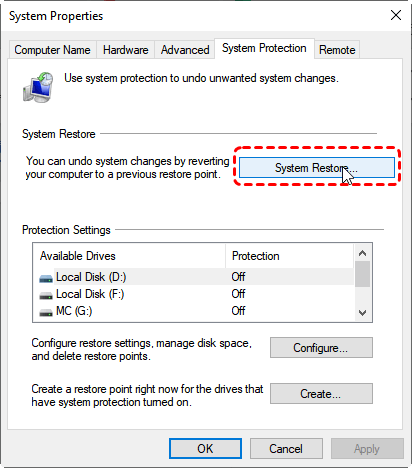
Step 2. Click "System Restore" under the "System Protection" tab and click "Next".
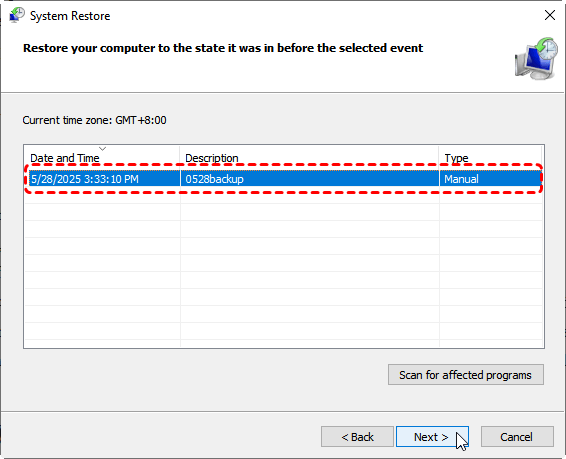
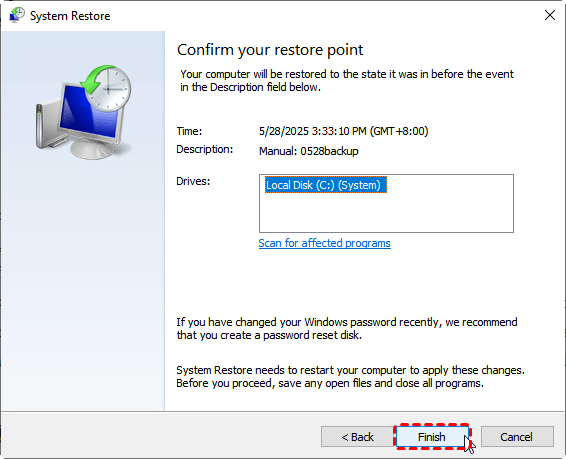
Step 3. Choose a restore point to restore the system data from.
Step 4. Click "Finish" to start the process.
If none of the above methods can effectively recover the data you need, the professional data recovery tool MyRecover will be your last option. MyRecover features an intuitive graphical user interface that simplifies the data recovery process, allowing users to recover data with just a few clicks on icons. It can cover all the aforementioned data loss scenarios.
Let's explore the remarkable advantages of MyRecover.
✅No Command Line Needed – Simple GUI (graphical interface) for easy file recovery.
✅500+ Devices Support - Recover files from all types of devices like SSD, HDD, USB flash drive, SD card, cameras and more.
✅Handle 500+ Data Loss Scenarios – Recover from deleted partition, formatted hard drive, emptied Recycle Bin, system crash, virus attack, etc.
✅Supports over 1,000 File Types – Including documents, photos, videos, audio, archives, and Outlook data files.
✅OS Compatibility – Work not only on Windows 11 /10, but also on Windows 8.1/ 8/ 7 and all Servers.
Step 1. Download and install MyRecover on your computer from secure channel, avoid installing it on the C drive.
Step 2. Launch it and select the C drive to scan for lost data, then click "Scan".
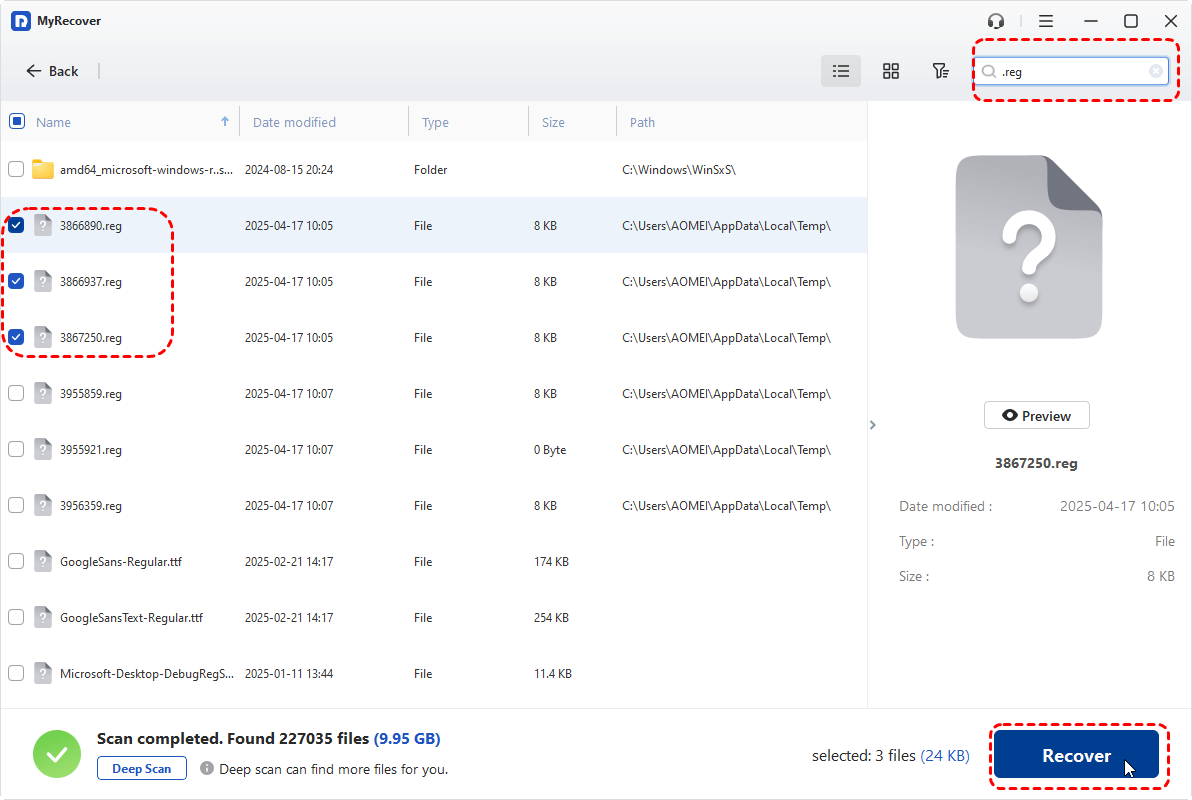
Step 3. Choose files you wish to recover from the recoverable lists and click "Recover".
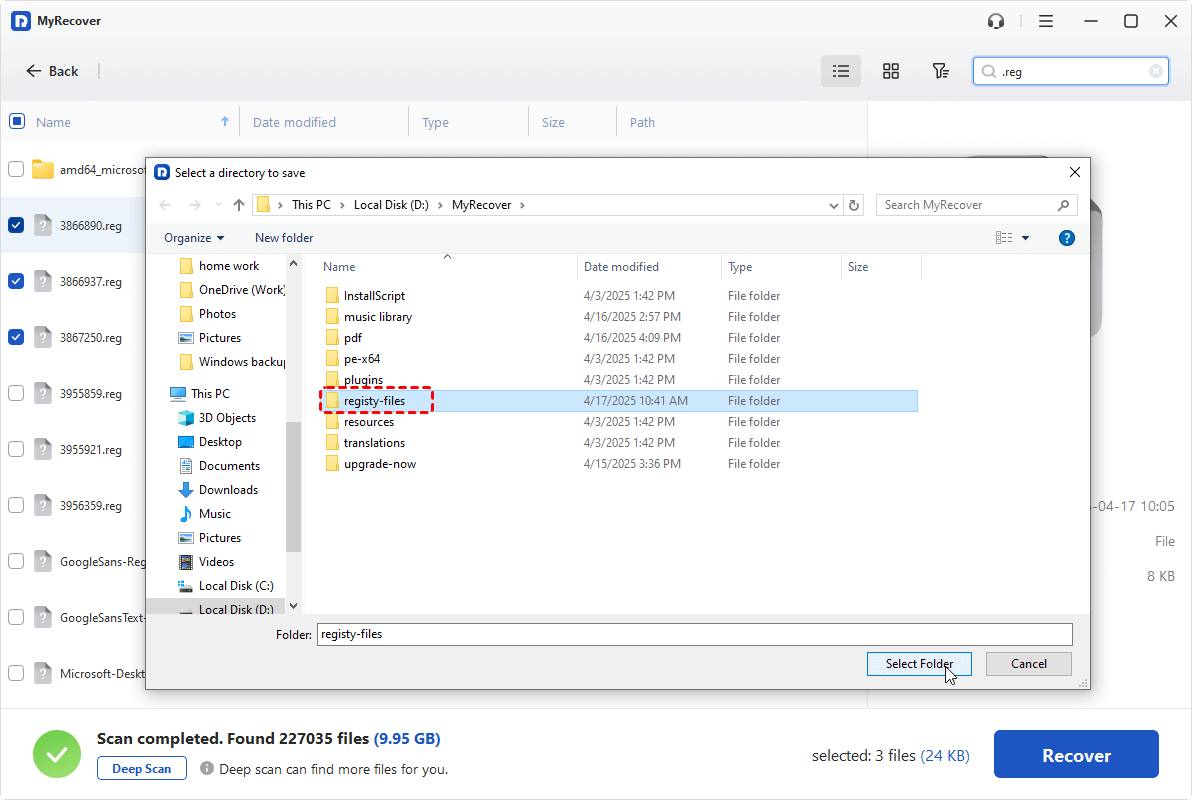
Step 4. Select a location (not the C drive) to save the recovered files.
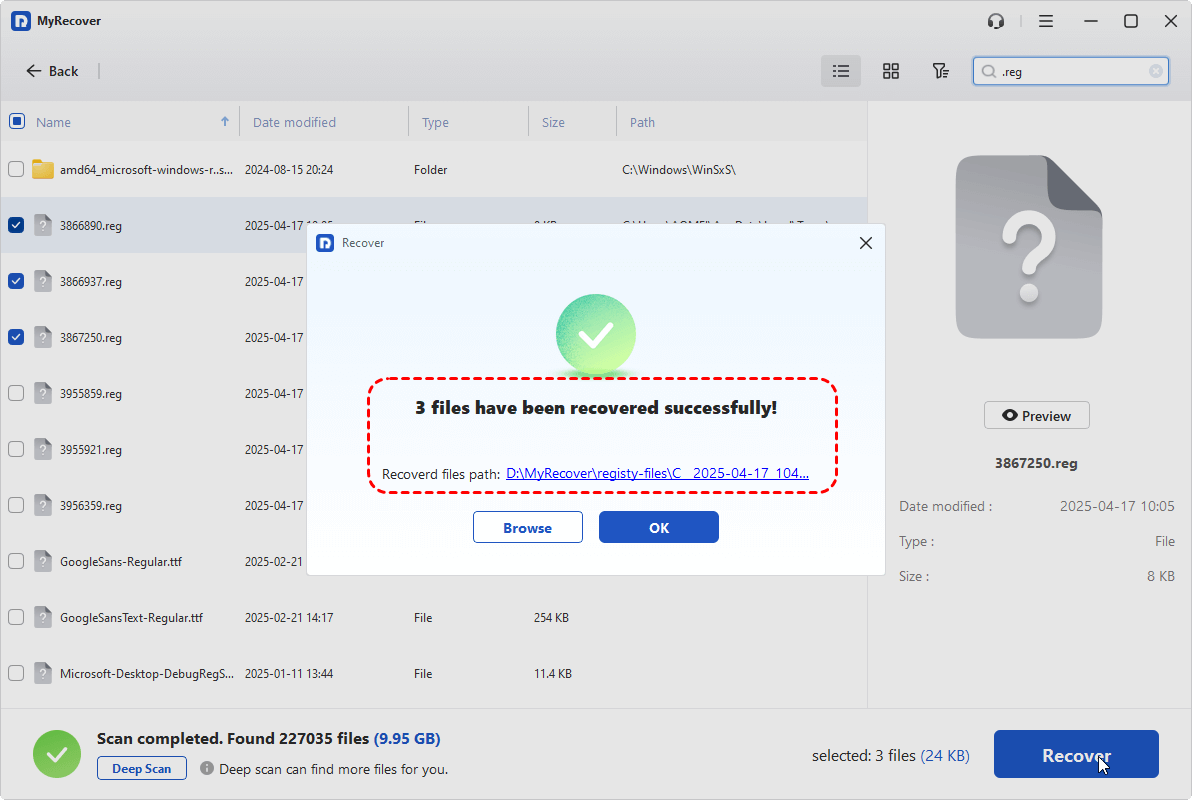
When the process is completed, the message "Files have been recovered successfully" will pop out. You can access and check the recovered files by clicking the destination folder path or "Browse".
If important system startup-related data has been deleted, causing the computer to fail to start, you can still recover the data with MyRecover.
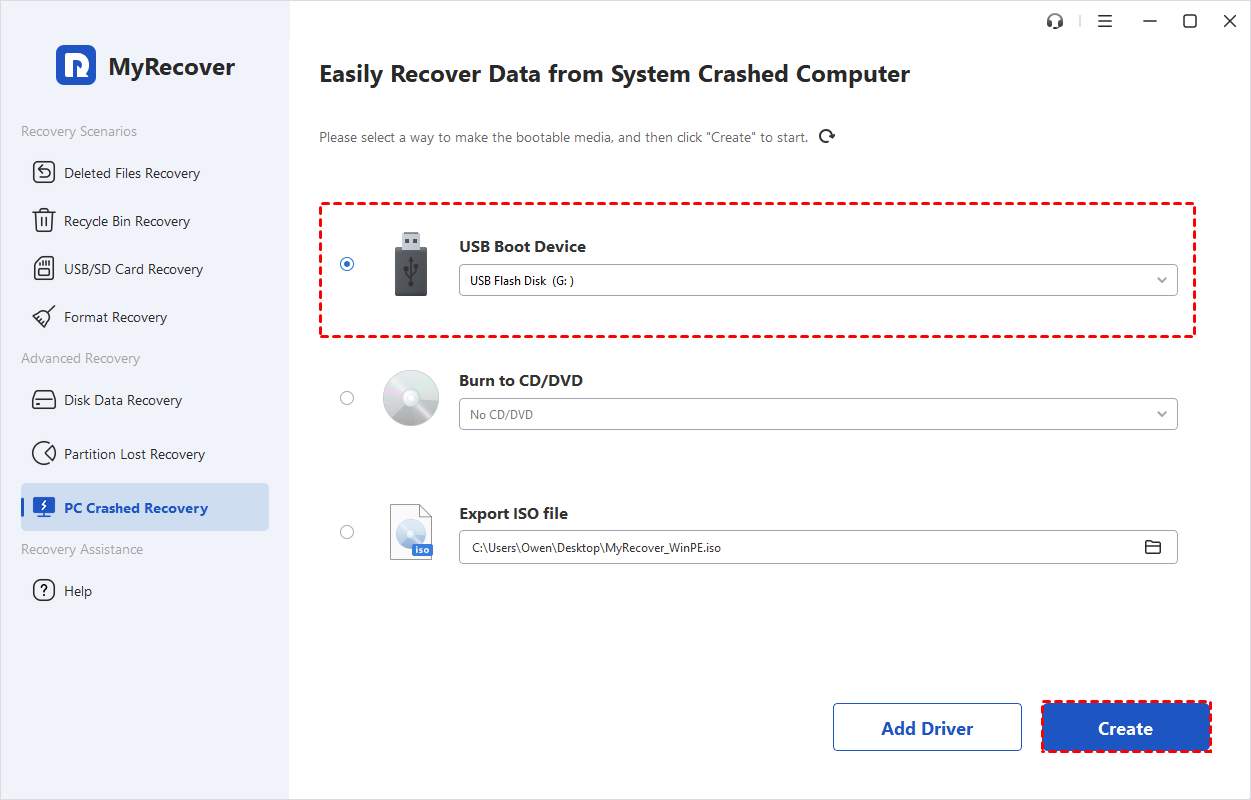
Step 1. Launch MyRecover on a working computer and select "PC crashed recovery". Connect a USB flash drive to your computer.
Step 2. Select "USB Boot Device" and click "Create" to make a bootable media.
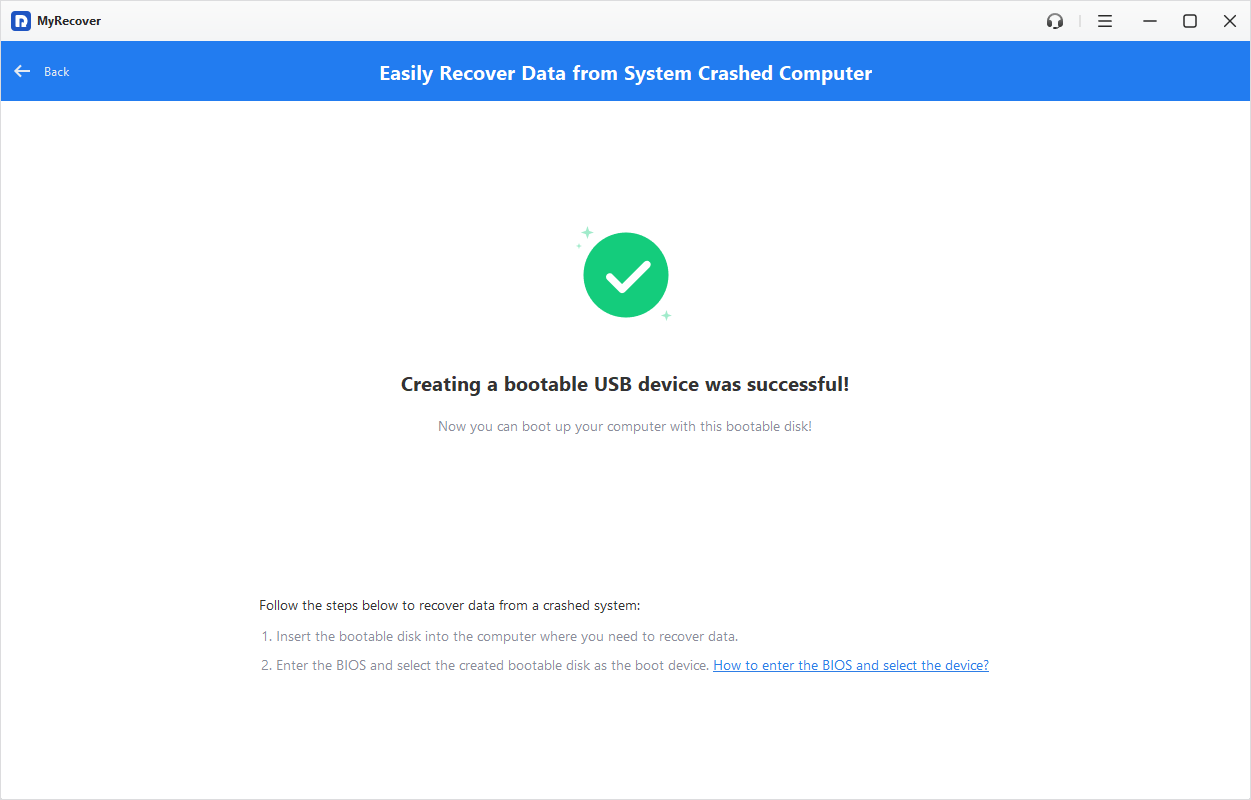
Step 3. Wait a few minutes until the bootable drive be created successfully. Insert the bootable media into the unbootable computer.
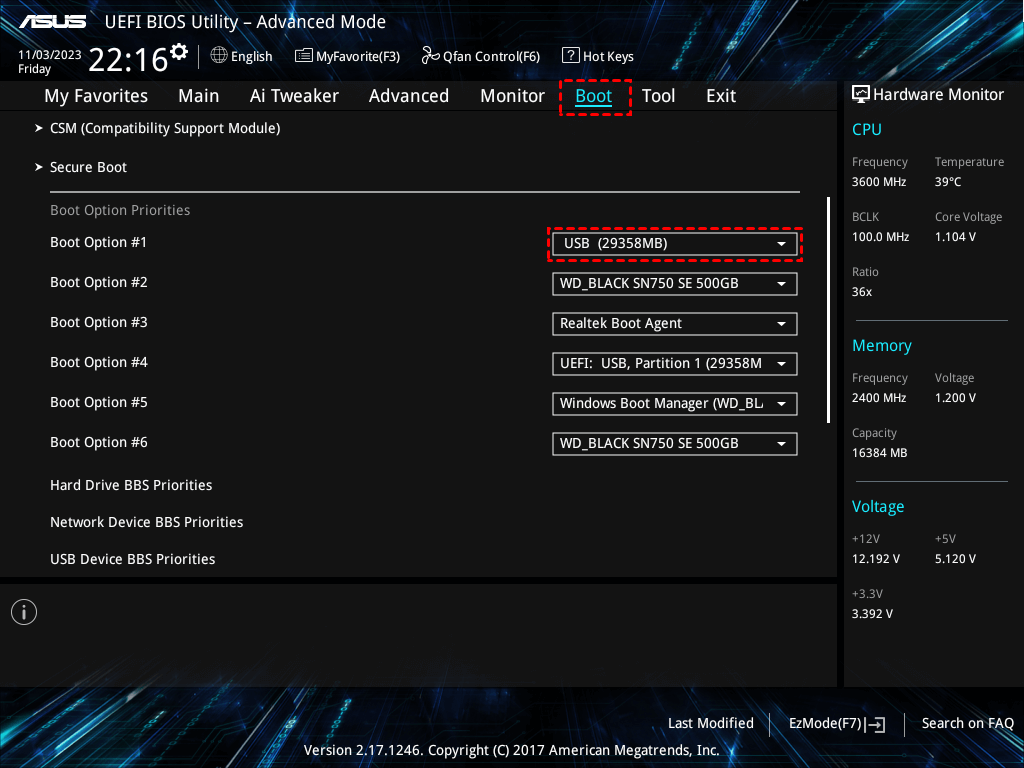
Step 4. Power on the computer and enter BIOS system. Then select the USB bootable drive to boot the computer.
Step 5. Follow the steps mentioned above to recover the lost data using MyRecover according to your needs.
Data loss on the C drive can be alarming, but multiple recovery paths exist depending on the situation. From simple restores via Recycle Bin and File History to advanced recovery using command-line tools or third-party software like MyRecover, each method serves a specific purpose.
If you're seeking for solutions on how to recover C drive data, MyRecover is strongly worthy of recommendation. Moreover, MyRecover offers Technician Edition for both home users and business users, which support usage on multiple devices with a single one license.