
NTFS Data Recovery Software Free Download on Windows
Experiencing data loss on an NTFS file system hard drive? This article will provide several reliable solutions and recommend tools for NTFS-formatted storage devices like hard drives, USB flash drives and external storage devices, to ensure efficient and safe retrieval of valuable data.
By Aria / Updated on July 30, 2025
Is NTFS a Recoverable File System?
Designed for reliability and robust error handling, NTFS (New Technology File System) is used by Windows operating systems and allows for high-capacity storage, file compression, and security features. But despite its advantages, data loss can still occur on NTFS file system hard drive.
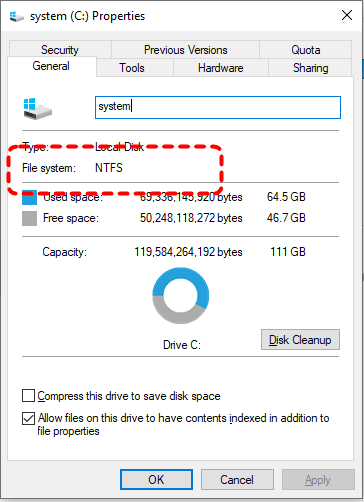
When data goes missing from your NTFS-formatted hard drive, it can be exasperating. This will arise a question: is NTFS a recoverable file system? The good news is that NTFS is a recoverable file system. Unlike older file systems like FAT32, NTFS keeps detailed metadata, journaling, and backup records that can assist in recovering lost or corrupted files. This structure makes it more fault-tolerant and enables advanced NTFS data recovery using specialized tools.
How to Recover Data from NTFS Hard Drive Free on Windows
Whether you accidentally deleted files or formatted the NTFS drive, there’s still a strong chance of recovering your data with the right approach. This section will offer three ways to recover data from Windows backup tools if it's available, and two professional data recovery software will be introduced for NTFS data recovery.
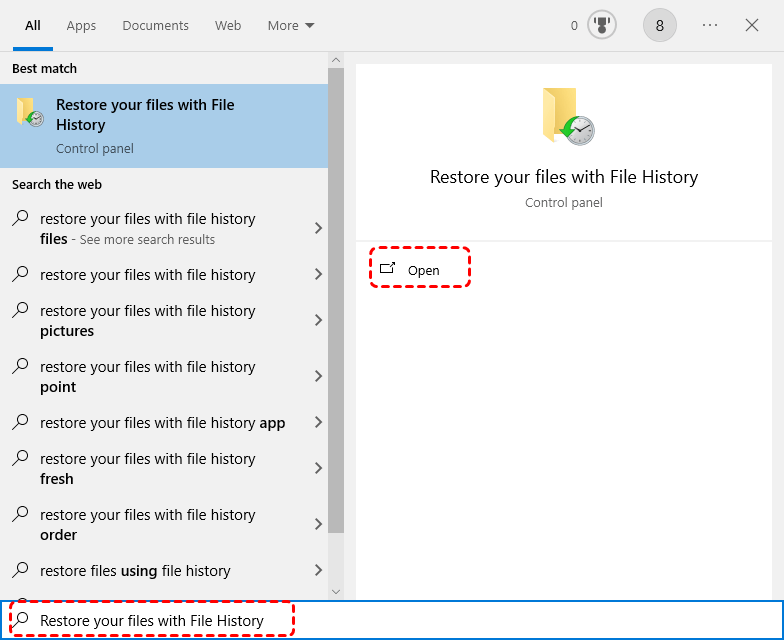
Restore Your Files from File History
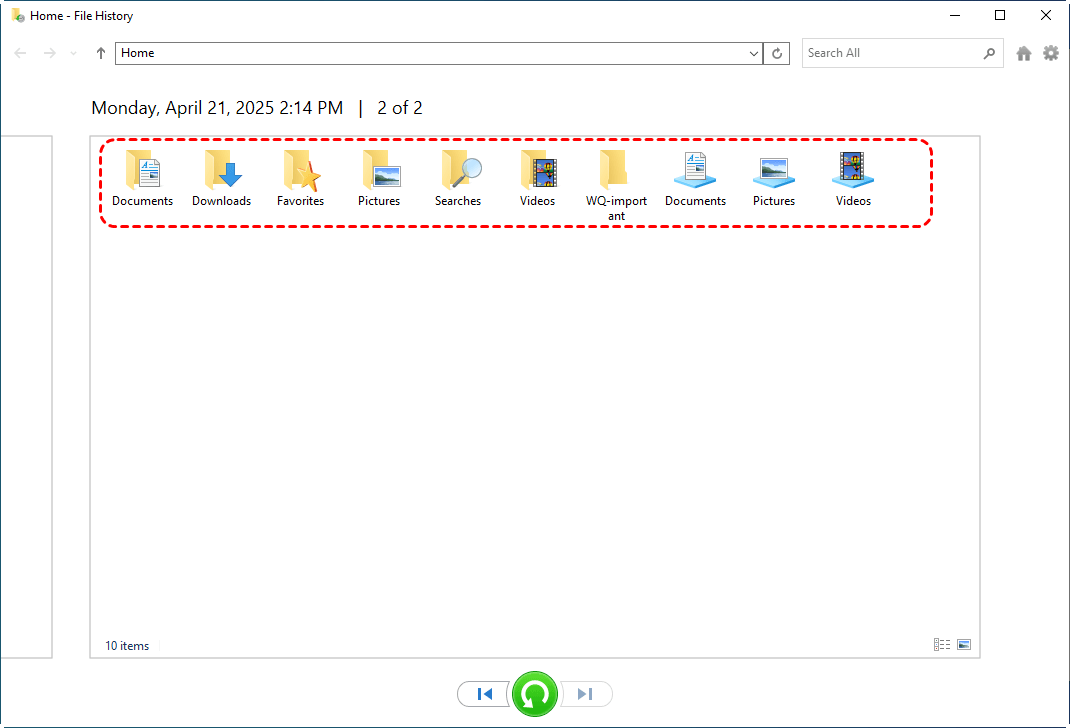
File History automatically backs up versions of your files on a schedule if it was set up earlier. It allows you to restore files or folders to previous versions. If you have enabled File History on Windows, you can follow these steps to restore your files.
Step 1. Type "Restore your files with File History" in the Start menu and open it.
Step 2. Select the folder containing the files you wish to recover and choose a desired version based on the backup time.
Step 3. Click the green "Restore" button to return them to their original location.
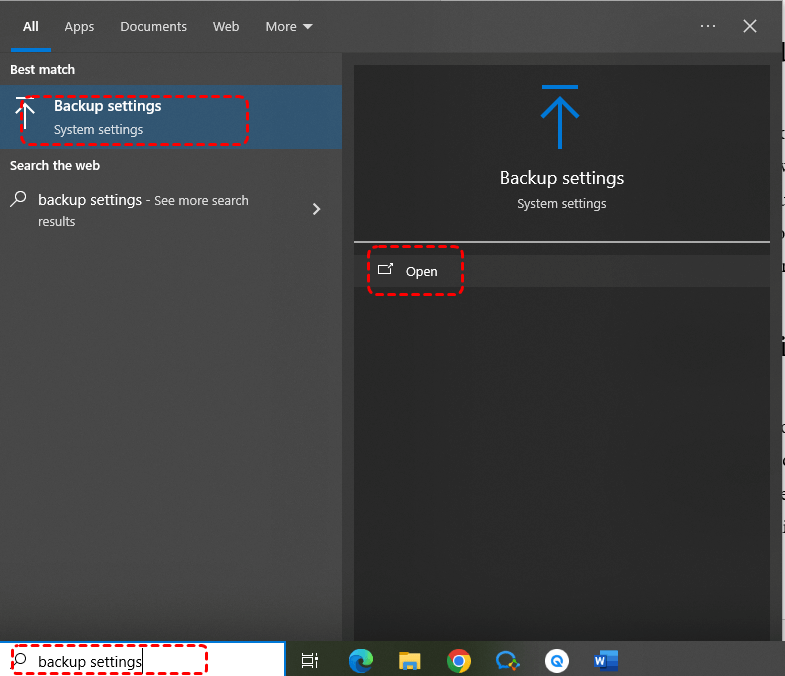
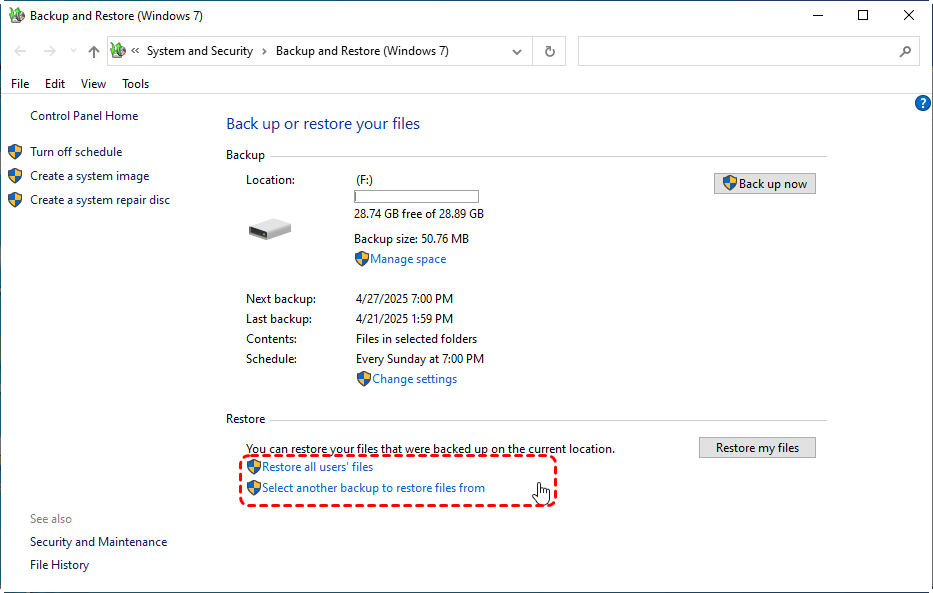
Backup and Restore (Windows 7)
Backup and restore (Windows 7) is a legacy tool that allows you to recover your personal files from system image backups, if you have backed up the entire system.
Step 1. Open "backup settings" in the Start menu and click "Go to Backup and Restore (Windows 7)".
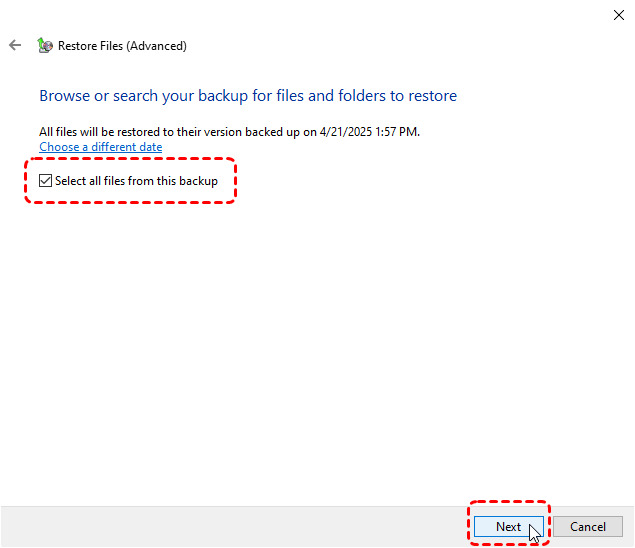
Step 2. Choose "Select another backup to restore files from" and select a backup containing your lost files to restore.
Step 3. Select the files you wish to recover. You can also select the specific file or folder by clicking "Browse for files/folders".
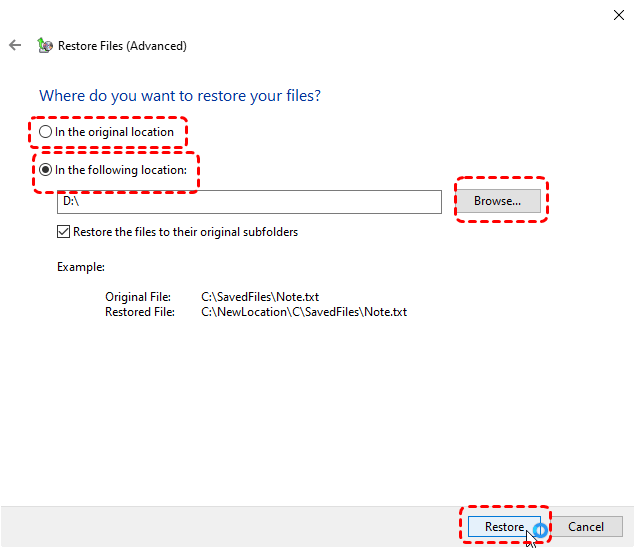
Step 4. Choose a destination folder to save the recovered files and click "Restore" to start the process.
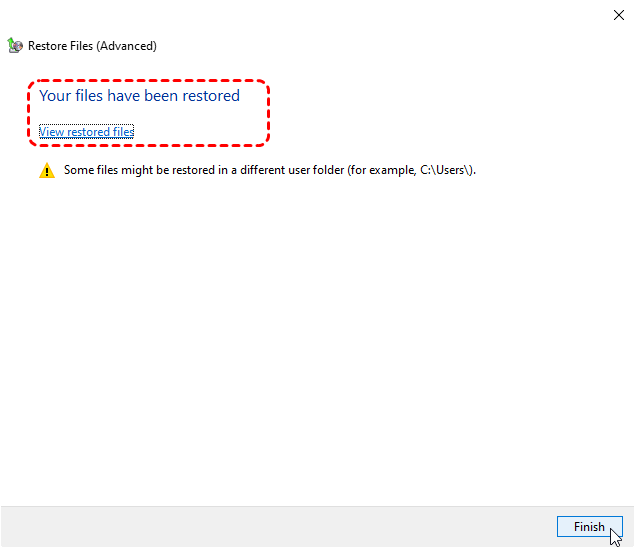
When the process is completed, the message "Your files have been restored" will pop out. You can check and access the recovered files by clicking "View restored files".
Restore from Cloud Backup
If you sync the file from NTFS hard drive with cloud backup tool like OneDrive, Google Drive, Dropbox, you might find deleted files in the Recycle Bin or Trash of Cloud Backup online. Take OneDrive as an example here:
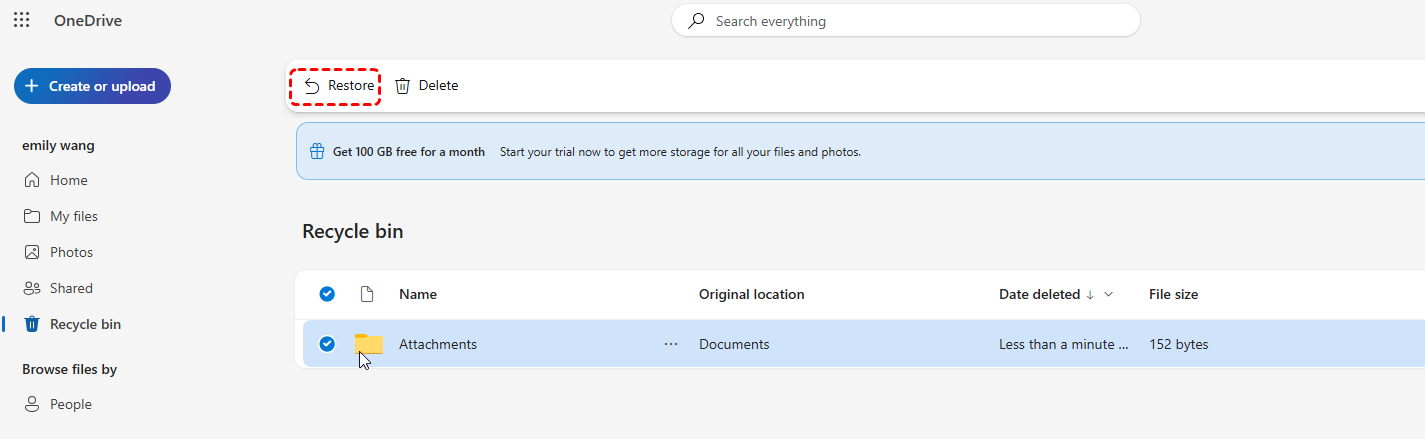
Step 1. Sign in to your OneDrive with your account.
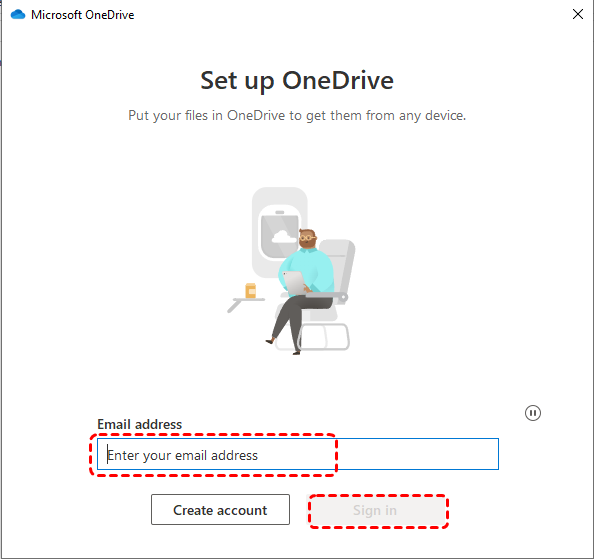
Step 2. Select the "Recycle Bin" section, browse through and select the files you wish to recover.
Step 3. Click "Restore" in the right upper corner to recover the files to their original location.
- Notes:✎...
- All the three methods mentioned above can only work if backups have been made before data loss.
Free NTFS Recovery Tool —Windows File Recovery
When no backup is available, Microsoft’s own command-line recovery tool Windows File Recovery can help retrieve lost files from NTFS drives. It allows users to recover deleted or lost files from local storage drive. Follow these steps to recover lost files from NTFS drive using Windows File Recovery command:
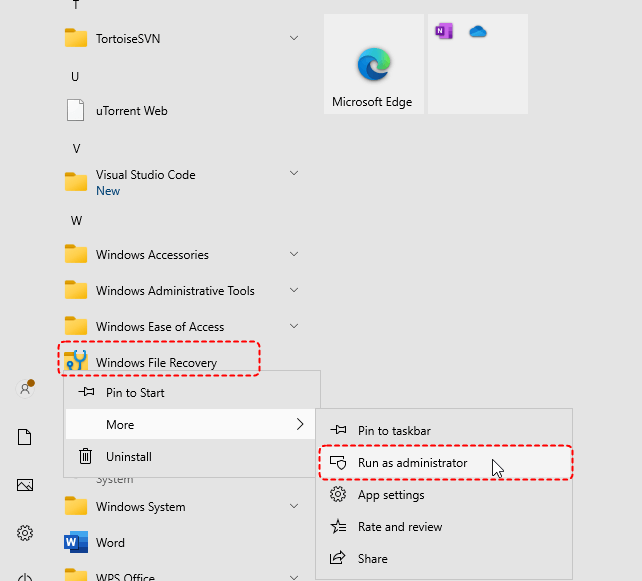
Step 1. Download and install Windows File Recovery on your computer from Microsoft official site.
Step 2. Open Windows File Recovery and run it as administrator.
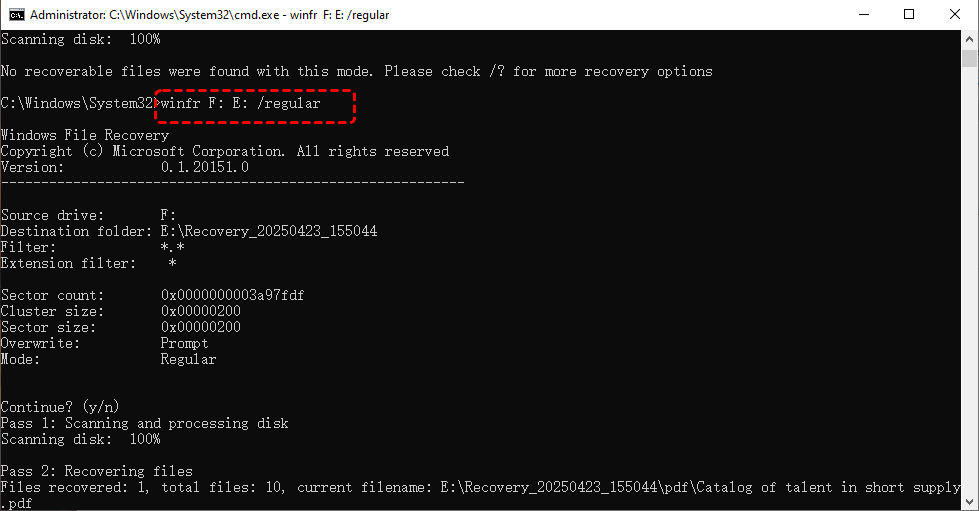
Step 3. Type the command "Winfr F: E: /regular" and press "Enter". Replace the drive letters "F" (the source drive letter) and "E" (the destination folder) with your actual drive letters. If Winfr doesn’t find the files you want in "regular" mode, you can switch to "extensive" mode. It performs a more comprehensive scan (while taking more time) to retrieve more lost data.
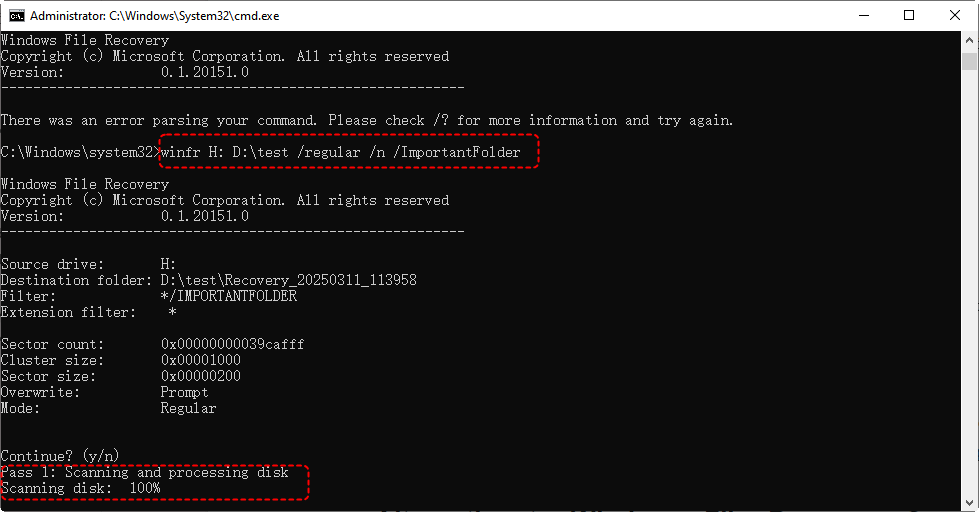
If you want to retrieve a specific file, file type, or folder, you can add a filter command after the basic command. For example, if you want to recover files under a folder named "ImportantFolder", you can enter the following command "Winfr H: D: /regular /n /ImportantFolder".
Windows File Recovery only works on Windows 10 and 11.
When the process is finished, you can press "y" to check the recovered files in the destination folder.
NTFS Data Recovery Software Free Download—MyRecover
If you’re just a computer novice, command-line tools will be too difficult for you to master. A beginner-friendly NTFS data recovery tool like MyRecover will be more suitable for you. It can scan all drives on your computer and provide opportunities to recover lost data. MyRecover features a beginner-friendly graphical user interface (GUI) that intuitively displays the entire recovery process, allowing users to recover data with just a few clicks on icons.

- Deeply scans unallocated, deleted, or missing partitions to locate and recover lost files.
- Supports NTFS, FAT32, exFAT, and ReFS in Windows 11/10/8/7 & Windows Server.
- Recovers 1,000+ file types, including documents, photos, videos, audio, emails, archives, and more.
- Safe and read-only recovery—no risk of overwriting existing data.
Step 1. Download and install MyRecover on your computer from secure channel, avoid installing it on the drive with lost files.
Step 2. Launch it and select the drive where the lost data were stored to scan, then click "Scan". If you are not satisfied with the recoverable files shown in the quick scan results, you can also click "Deep Scan" after the quick scan is completed to find more lost data.

Step 3. Choose files you wish to recover from the retrievable lists and click "Recover". If you want to find a specific file or file type, you can use the "Filter" function in the upper right corner to filter by file type and size. (Since the file name may have been corrupted during the data loss process, filtering by file name may not be very accurate.)

Step 4. Select a safe location to save the recovered files and click "Select Folder".

Upon completion of recovery process, a message indicating successful recovery will be displayed. You can check and access the recovered files by clicking the destination folder path.

Summary
NTFS data recovery can be achieved through the methods mentioned above, whether you have a backup or not, you are a professional or a computer novice. Using professional data recovery software like MyRecover is the most reliable method, as it does not write data during the recovery process, avoiding data overwriting.
For more advanced scenarios like recovering from unbootable Windows system, previewing file content before restoration, MyRecover's Professional edition offers a powerful, user-friendly solution.


Stay Updated With Our
Latest Tips
Add us as a preferred source on Google to never miss helpful guides.