
[Beginner] PhotoRec Step by Step Guide With Screenshots
This guide provides a detailed, visual walkthrough of how to use PhotoRec for file recovery. From downloading the tool to selecting the right drive, configuring recovery options, and restoring your files, each step is explained with screenshots to ensure even first-time users can follow along with confidence. Ideal for anyone searching for “PhotoRec step by step guide” or learning how to recover files using PhotoRec.
By Emma / Updated on November 19, 2025
What is PhotoRec?
PhotoRec is a free and open-source data recovery tool designed to recover deleted or lost files from a wide range of storage devices even if drives are formatted or with damaged file system. It works even when the file system is damaged or the drive can’t be read normally.

Breakdown:
✔️Recovers photos, videos, documents, archives, and more.
✔️Works on hard drives, SD cards, USB flash drives, digital cameras, etc.
✔️Supports many file systems, including FAT, NTFS, exFAT, ext2/3/4.
✔️Bypasses the file system and scans the underlying data sector-by-sector.
PhotoRec Step-by-Step Guide With Screenshots [For Windows]
Now, follow this comprehensive guide to learn how to use PhotoRec to recover files effectively, complete with images to make each step easy to follow, even for beginners.
Step 1. Download and Run PhotoRec
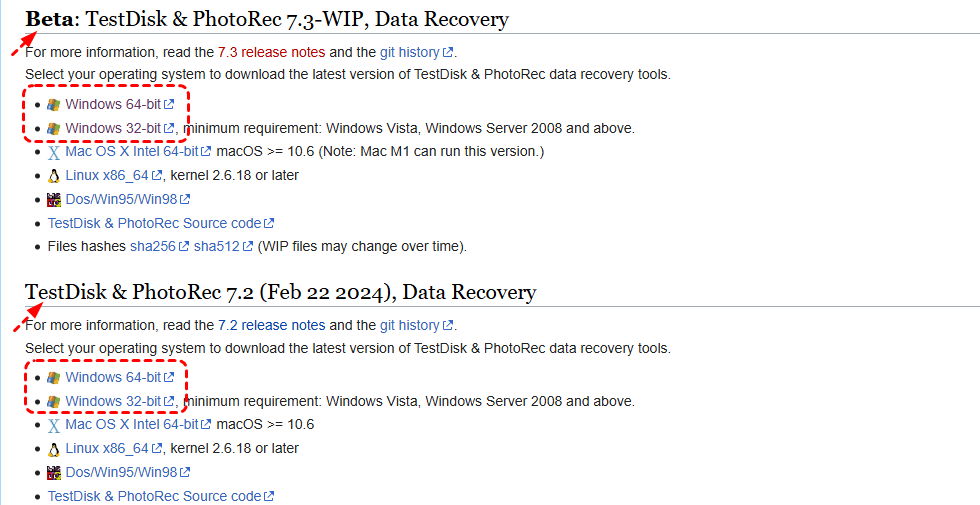
Go to PhotoRec’s official page. PhotoRec is bundled with TestDisk, so downloading TestDisk will include PhotoRec. Choose the version that matches your operating system: Windows, macOS, or Linux. For Windows, click the Windows linkunder the Latest Version section.
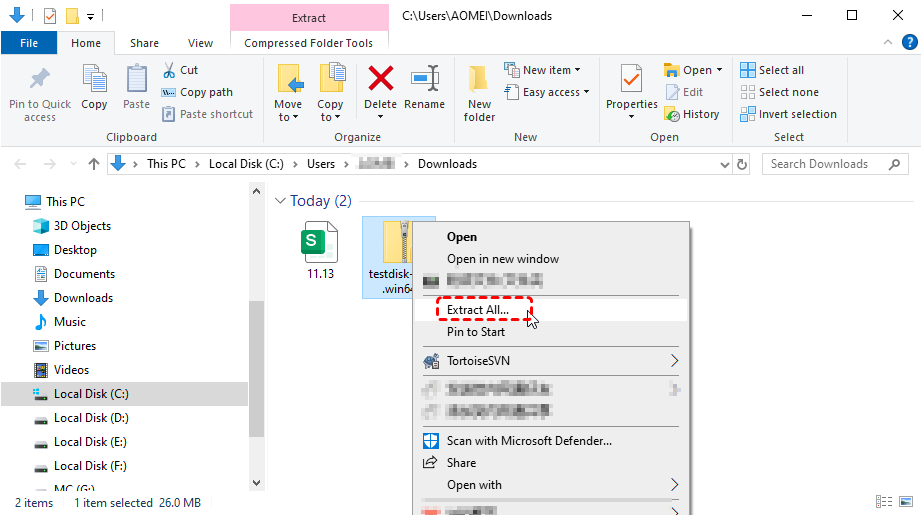
The downloaded file is usually a ".zip"archive (for Windows). Right-click the ".zip"file and select "Extract All" or use software like WinRAR or 7-Zip. Choose a folder where you want to extract the files.
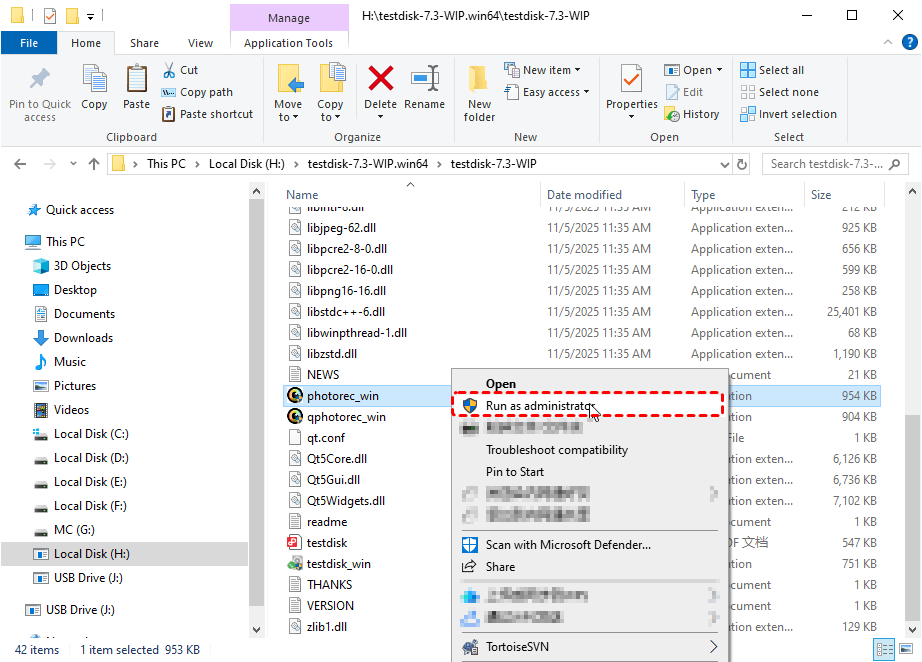
Inside the extracted folder, find "photorec_win.exe" (for Windows).Right-click it and choose "Run as Administrator" to run PhotoRec.
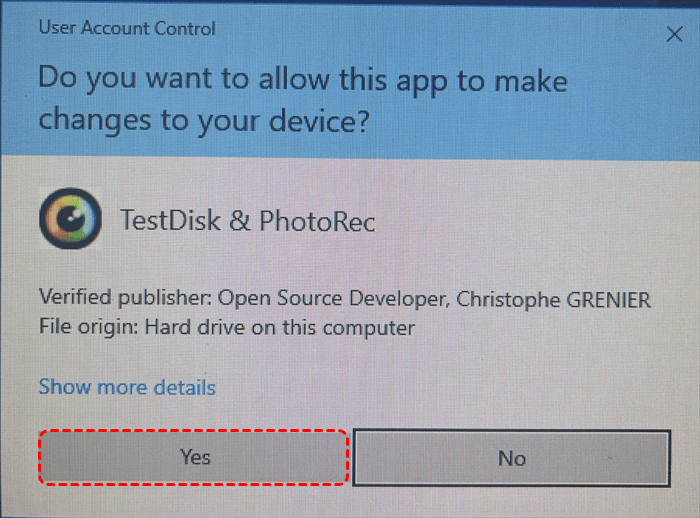
If you may see a "User Account Control (UAC) prompt". Click "Yes" to allow the program to run.
Once PhotoRec opens, you’ll see a "text-based interface"(command-line style). From here, you can proceed to select the disk or partition you want to recover files from.
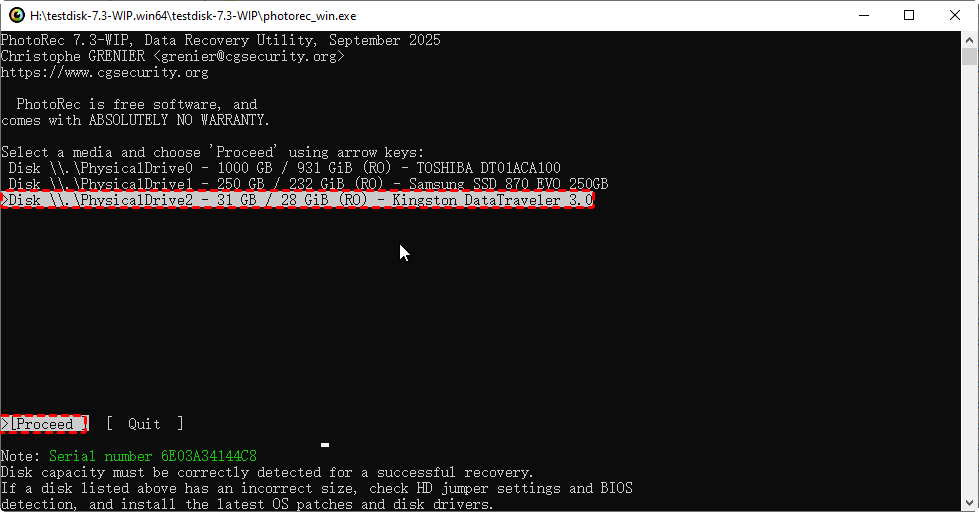
Step 2: Select the Disk
After opening PhotoRec, you’ll see a list of available storage devices.Use the arrow keys on your keyboard to highlight the disk from which you want to recover files. Press "Enter" to select the highlighted disk.Make sure you select the correct drive, especially if you have multiple drives connected. Next, highlight "Proceed" and press "Enter" to continue.
Step 3: Select the Partition
PhotoRec will show a list of partitions on the selected disk. Highlight the partition you want to recover files from. Press Enter to proceed. If you want to scan the entire disk, choose "Whole disk".

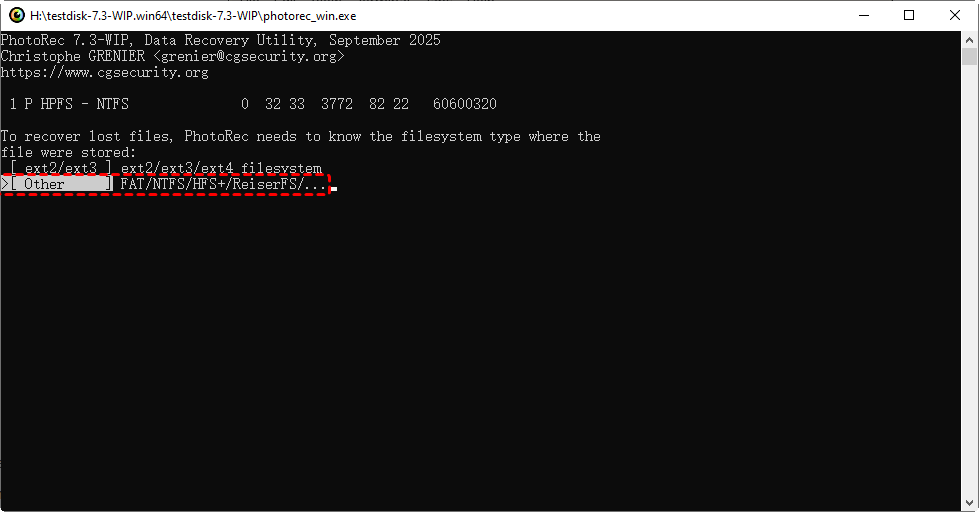
Step 4: Choose File System Type
PhotoRec will ask if the file system is ext2/ext3/ext4 (Linux) or Other (FAT/NTFS/exFAT). Select the correct type and press Enter. On Windows, choose "Other".
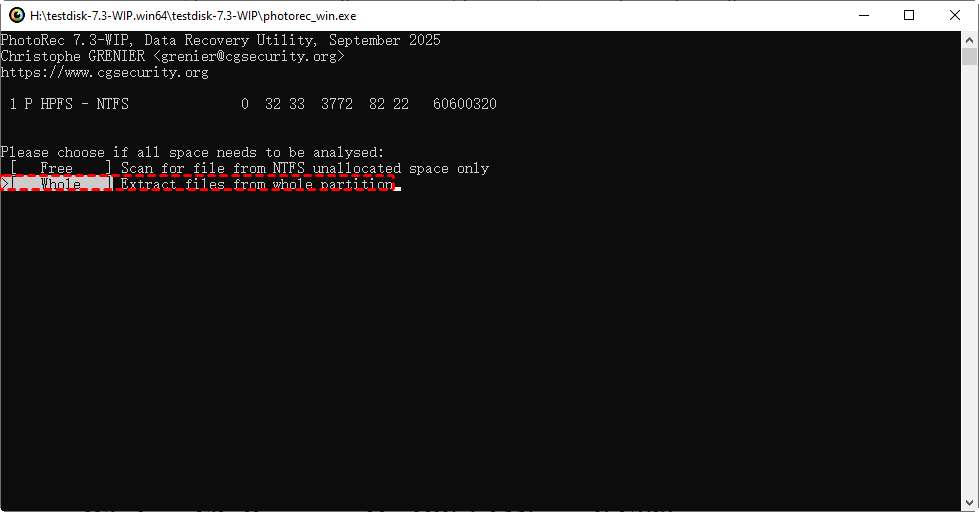
Step 5: Decide Which Space to Analyze
Next, PhotoRec will ask whether you want to scan:
- Free — only the unallocated space where deleted files are likely locatedon NTFS drive
- Whole — the entire partition, including both used and free space
Step 6: Select Where to Save Recovered Files
PhotoRec will ask you to choose a destination folder for recovered files. Use the arrow keys to navigate to a folder on a different drive than the one you are recovering from. Press "C" to confirm the selection.
- Note:✎...
- Never save recovered files to the same drive you’re recovering from — it can overwrite lost data.

Step 7: Start the Recovery Process
PhotoRec will begin scanning the selected partition or disk. A progress indicator will show the number of sectors scanned. Depending on the disk size, recovery may take minutes to hours. You can check the "estimated time to complete".

Step 8: Review Recovered Files
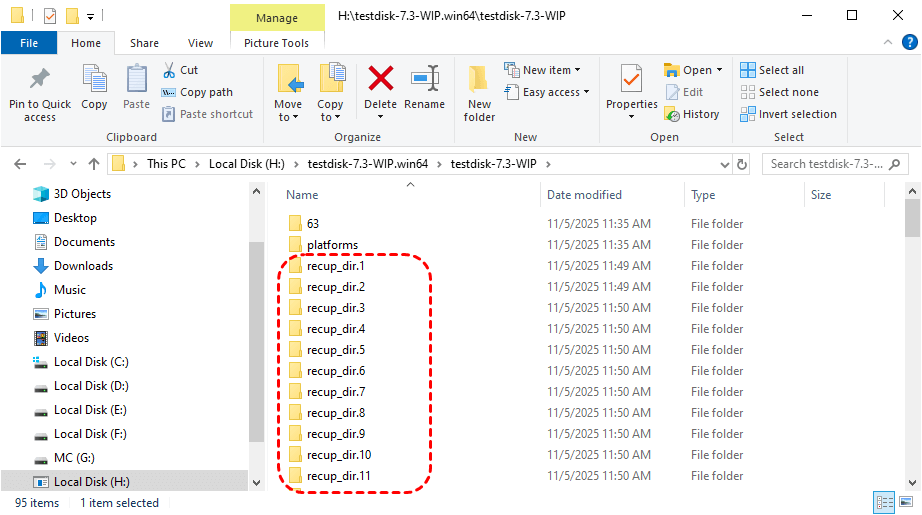
Once the scan is complete, PhotoRec will save recovered files in the folder you selected.
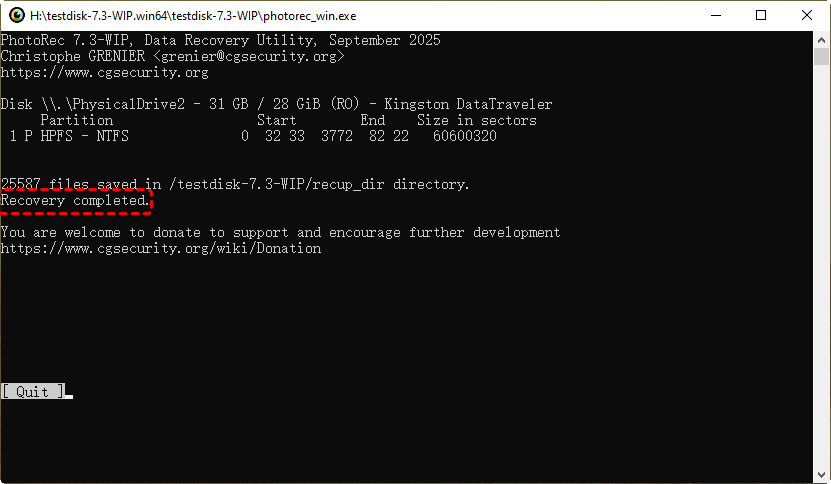
Open the folder and review the files.Files are often organized in subfolders like "recup_dir.1"," recup_dir.2", etc.Rename and organize the recovered files as needed.
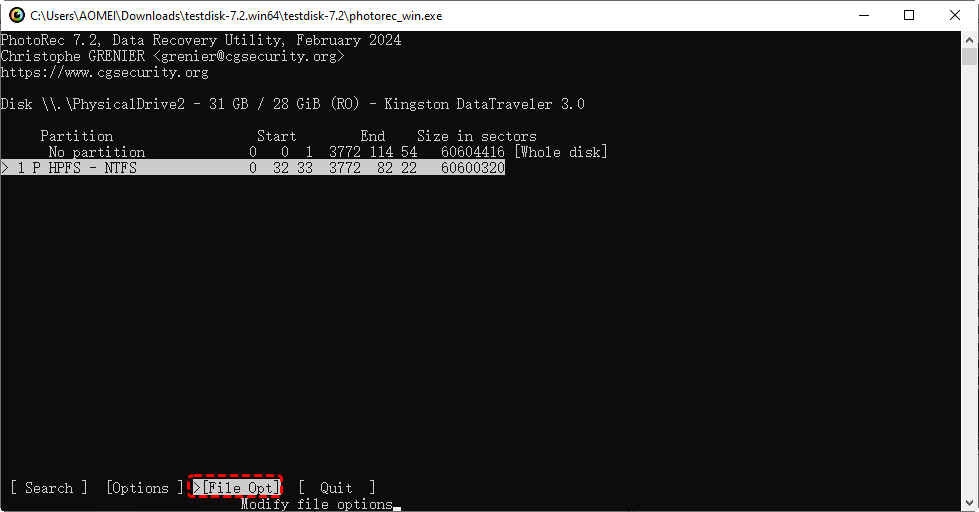
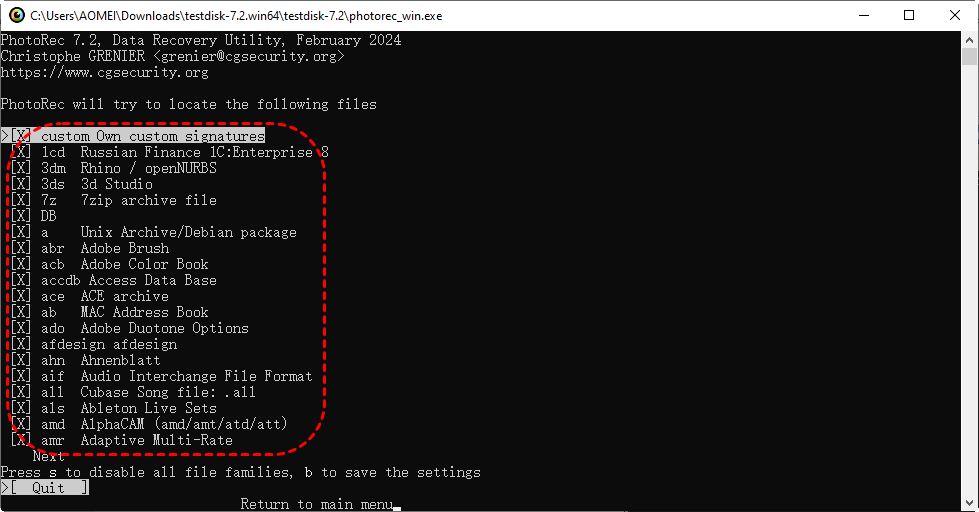
Step 9: Optional — Filter by File Type
Before starting recovery, you can choose “File Opt” when specifying the target partition in "Step 3". Check or uncheck file types to recover only specific types of files (e.g., photos, videos, documents).This can speed up the process and reduce clutter in the recovered folder.
Need Alternative to PhotoRec With Fewer Steps? MyRecover Has You Covered
While PhotoRec is powerful, from the above step by step guide for PhotoRec, we can know it requires at 9 steps to complete the recovery. Moreover, its text-based interface can feel overwhelming for beginners. If you prefer a simpler, more intuitive solution with a modern interface, FREE MyRecover is an excellent alternative. It offers a streamlined recovery process that requires far fewer steps— easier to understand and more accessible for all experience levels.

- ✨Easy-to-use interface: No command-line navigation or keyboard-based selection required.
- ✨Fewer steps: Start a scan and recover files in one simple workflow.
- ✨Wide file support (1000+): Photos, videos, documents, audio files, archives, and more.
- ✨Supports all common devices (500+): HDDs, SSDs, USB flash drives, SD cards, external drives, etc.
- ✨Cover 500+ Scenarios: deletion, formatted disk, emptied Recycle Bin, system crashes and more.
- ✨AI-Powered Recovery: Uses AI recognition and deep scanning technology.
How to Recover Files With MyRecover (3 Simple Steps)
Step 1. Download and install MyRecover from the official website. Launch the program and select the drive you want to recover files. Click "Scan".

Step 2. MyRecover will automatically run "Quick Scan" or "Deep Scan" to locate lost files.You can manually switch from "Quick Scan" to "Deep Scan" if necessary.
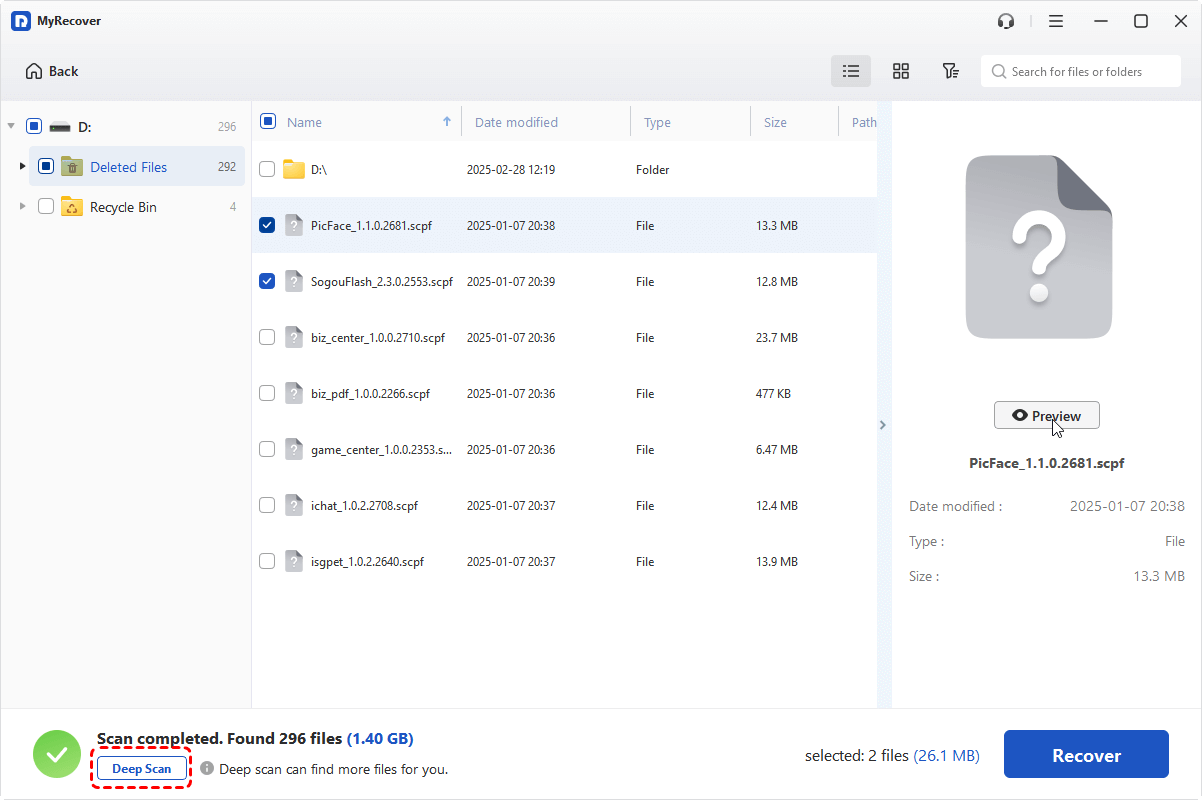
To unlock real-time file preview(see what can be recovered before restoring), please upgrade to Professional edition.
Step 3. After scanning, filter and select what you want to restore, and click "Recover". Save them to a different drive to avoid overwriting data.


Final Thoughts
With this PhotoRec step-by-step guide (complete with images), you’ll be able to recover files from various storage devices with confidence. It remains a powerful data recovery tool, especially for advanced users who don’t mind its text-based interface and multi-step workflow. The ability to restore files even from corrupted drives makes it a reliable option for deep-level recovery.
However, for beginners or users who prefer a more intuitive and efficient workflow, MyRecover offers a smoother experience with far fewer steps. With its modern interface, automatic scanning, real-time preview, and broad device/file-type support, MyRecover simplifies the entire recovery process with excellent results, even when recovering files from unbootable computers.


Stay Updated With Our
Latest Tips
Add us as a preferred source on Google to never miss helpful guides.