
Stepwise Guide: Recover Files From File History Windows 10
File History in Windows 10 is a powerful backup tool that automatically saves copies of your files, allowing easy recovery in case of accidental deletion or corruption. This guide explains how to restore files from File History in Windows 10, detailing the process of accessing backups, selecting specific file versions, and recovering them to their original or a new location.
By Emma / Updated on June 26, 2025
About Windows File History
Windows File History is a built-in backup tool in Windows 10 designed to automatically back up your personal files, such as those in Documents, Pictures, Music, Videos, and Desktop folders. Unlike traditional backup methods, File History regularly saves different versions of your files, allowing you to easily recover accidentally deleted files or restore them to a previous state.
How to Turn On Windows File History?
To recover files from File History in Windows 10 successfully, you have to verify this feature has been turned on and the files have been included in the backup before the data loss happens.
1. Go to "Settings"> "Update & Security"> "Files Backup".
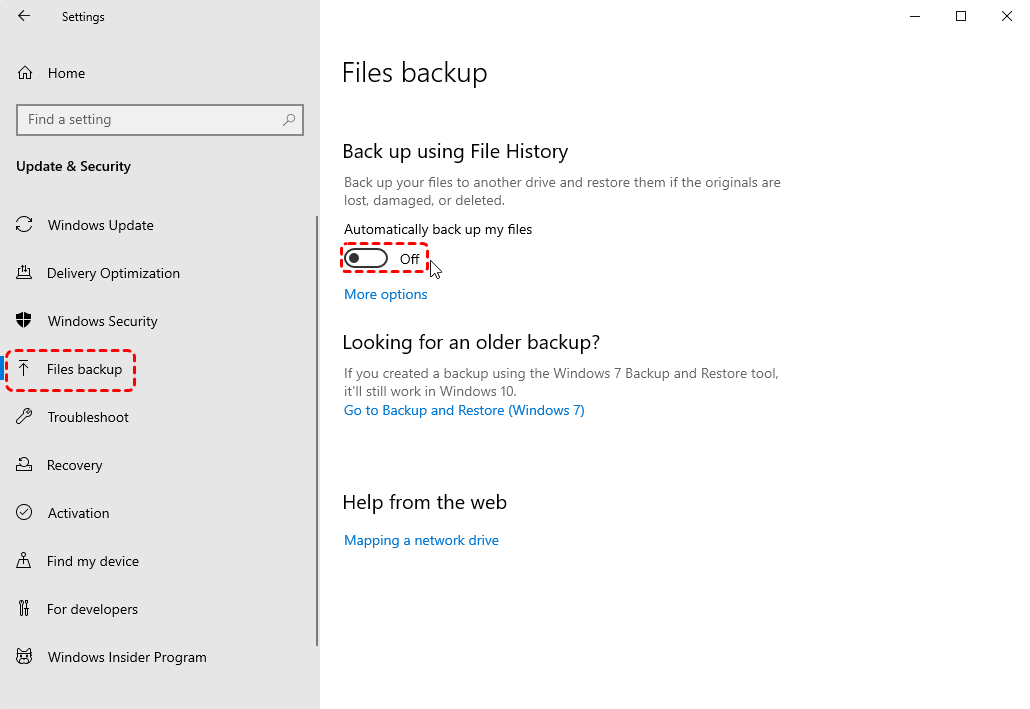
2. Toggle "Automatically back up my files" to ON.

3. Click "Add a drive", then select an external hard drive or a network location to store your backups.
4. Once selected, File History will automatically turn on and start backing up your personal files.
How to Customize File History Setting?
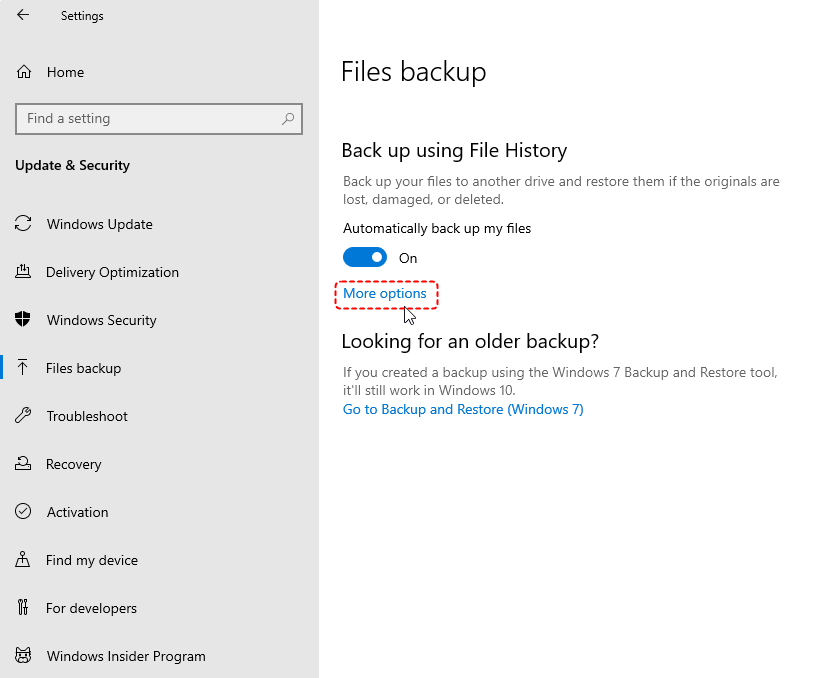
1. Select "More Options" under "Backing up using File History".
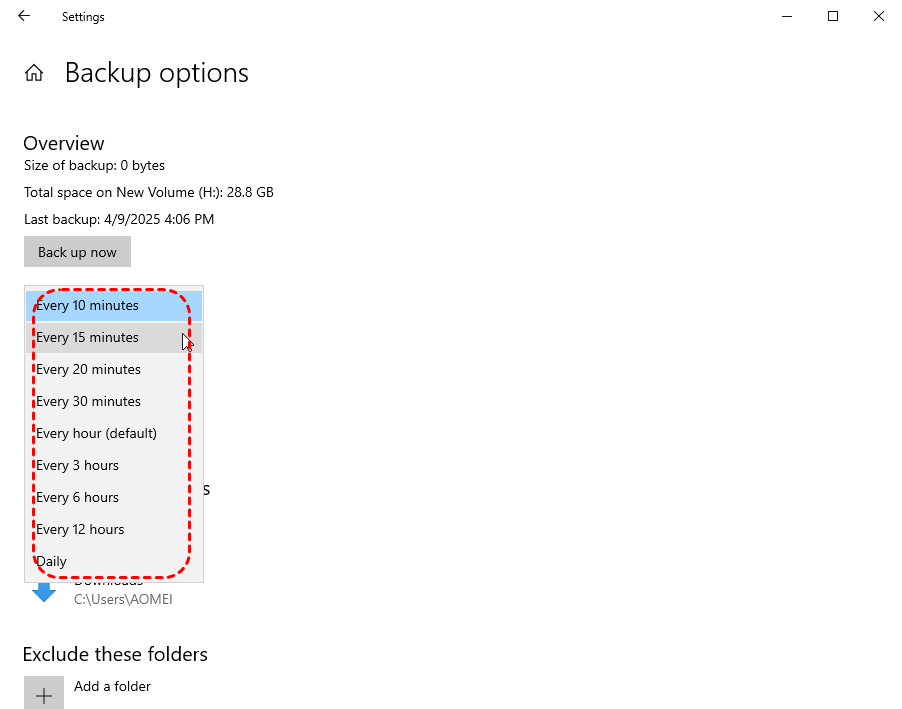
2. Change how often files are saved (e.g., every 10 minutes or every hour), and how long versions are kept (e.g., forever or only for a certain period).
3. Add other specific folder to Windows File History backup in "Backup these folders" section.
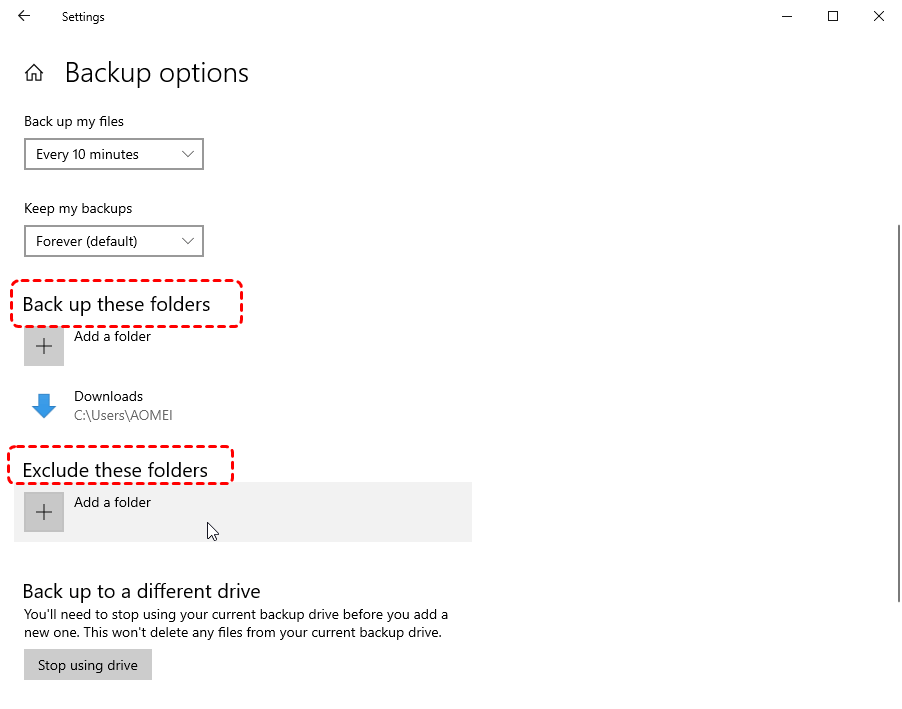
4. You can also choose folders to exclude from backup under the "Exclude these folders" option.
Step by Step to Recover Files from File History in Windows 10?
Windows File History allows you to recover lost, deleted, or modified files easily. Here are two common ways to restore files: through "Control Panel" and "File Explorer".
Method 1: Recover Files via Control Panel
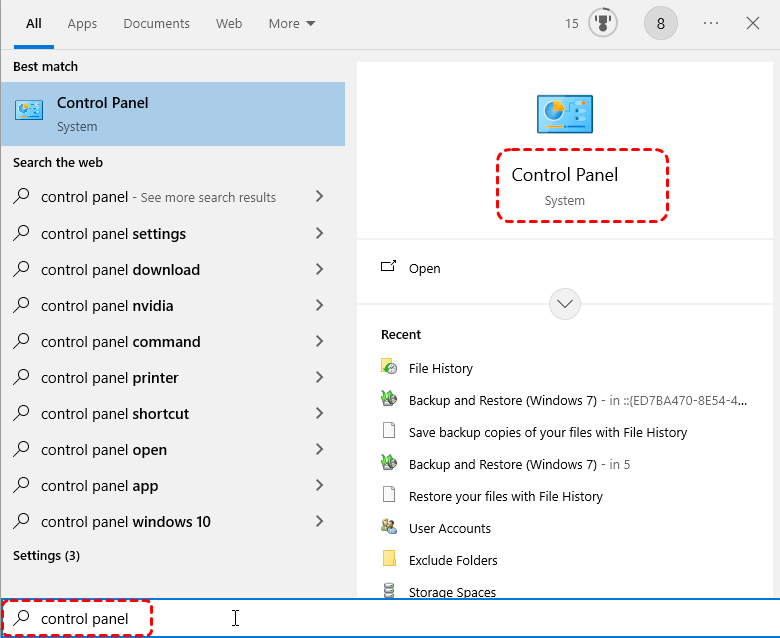
1. Open Control Panel: Press "Win + S", type "Control Panel", and press Enter.
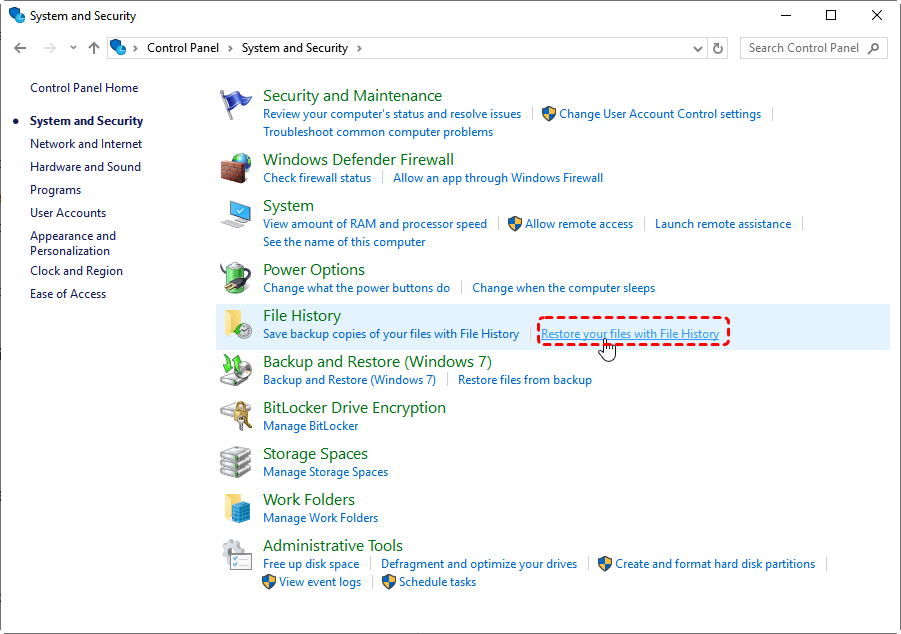
2. Go to File History: In Control Panel, click "System and Security"> "File History"> "Restore your files with File History": This will open a window showing your backed-up folders.
3. Browse for the file or folder you want to restore: Navigate through the folders or use the search bar in the upper-right corner.
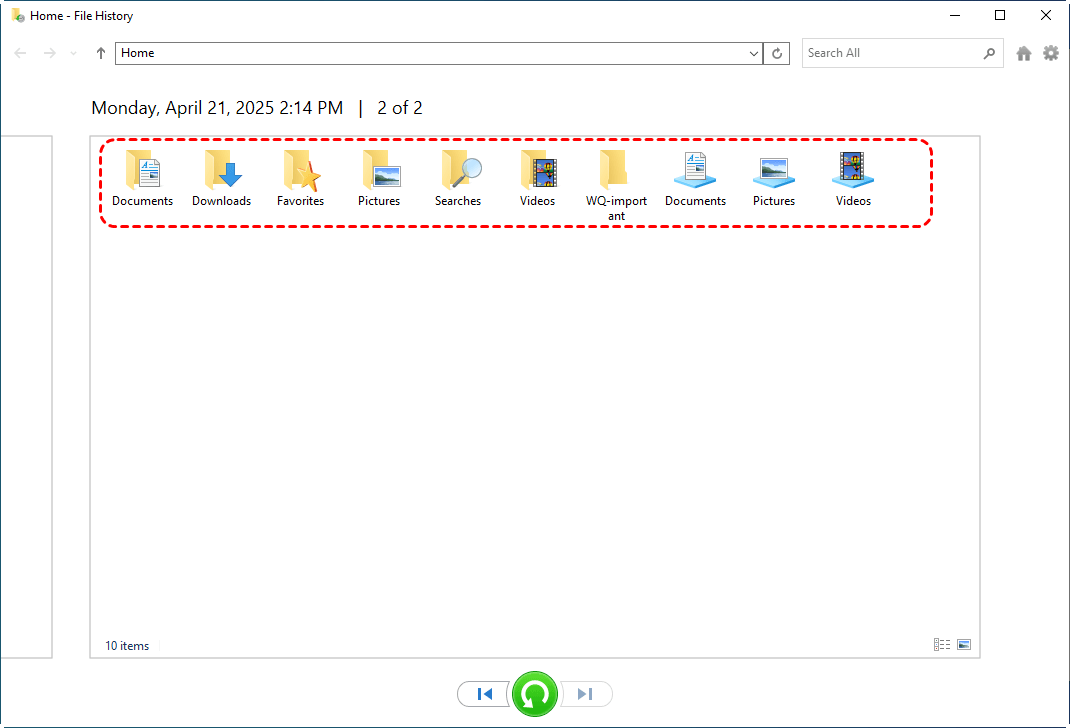
4. Select the files you want to Recover: Click on the target files or folder, and click the green "Restore" button. This will restore the selected file(s) to their original location. To restore to a different location, right-click and select "Restore to".

Method 2: Recover Files via File Explorer
1. Open File Explorer: Press "Win + E" to open File Explorer.
2. Navigate to the folder where the file was located. Even if the file is deleted, go to its original folder path.
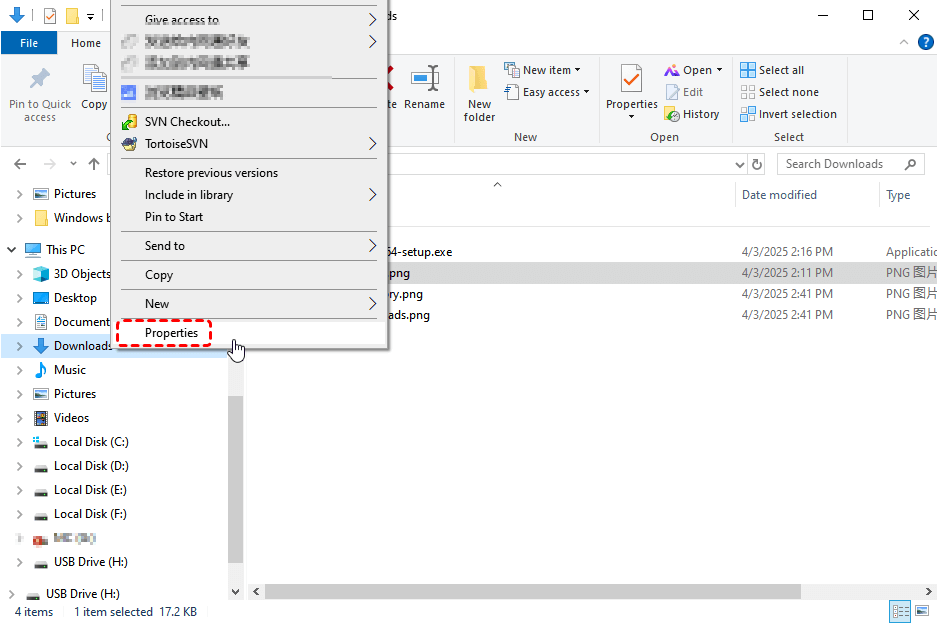
3. Click the "Home" tab in the top menu, then click "History". Alternatively, right-click inside the folder and choose "Properties", then switch to the "Previous Versions"tab (if available).
4. Browse and preview versions: A File History window will appear showing available versions.
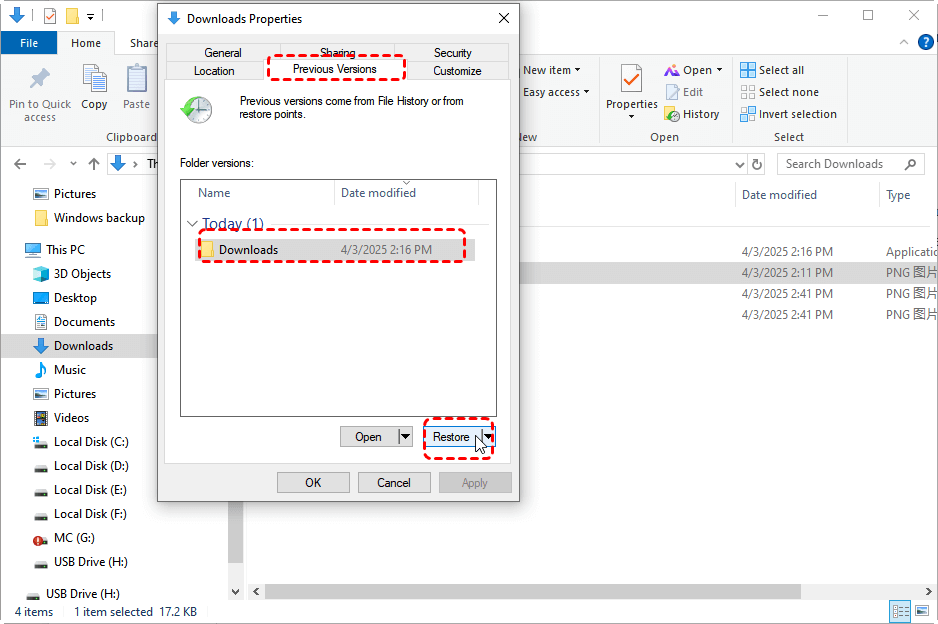
5. Select the file and version you want to recover, and click the green "Restore" button". The file will be restored to its original location.To avoid overwriting existing files, right-click and choose "Restore to" to save it elsewhere.
How to Recover Files When File History Backup is Not Available?
If you find that File History was not turned on before the data loss occurred, or the lost files were not included in the backup, you won’t be able to restore them using File History. In such cases, you’ll need a professional data recovery solution to retrieve your missing files.
Use Free MyRecover to Retrieve Files (No Backup Required)
MyRecover is a powerful and user-friendly Windows data recovery tool designed to recover deleted, lost, or formatted files—even when no backup exists. It supports recovery from various storage devices, including HDDs, SSDs, USB drives, and memory cards.

- Recover files lost due to accidental deletion, formatting, system crashes, power failure, virus attack or disk errors.
- Supports over 1000 file types including documents, photos, videos, audios, emails, zips, and more.
- Fast scanning speed with deep scan capabilities for better recovery results.
- Fully compatible with Windows 11/10/8/7 and Server 2025/2022/2019/2016/2012.
To recover lost files using MyRecover, just take the following steps:
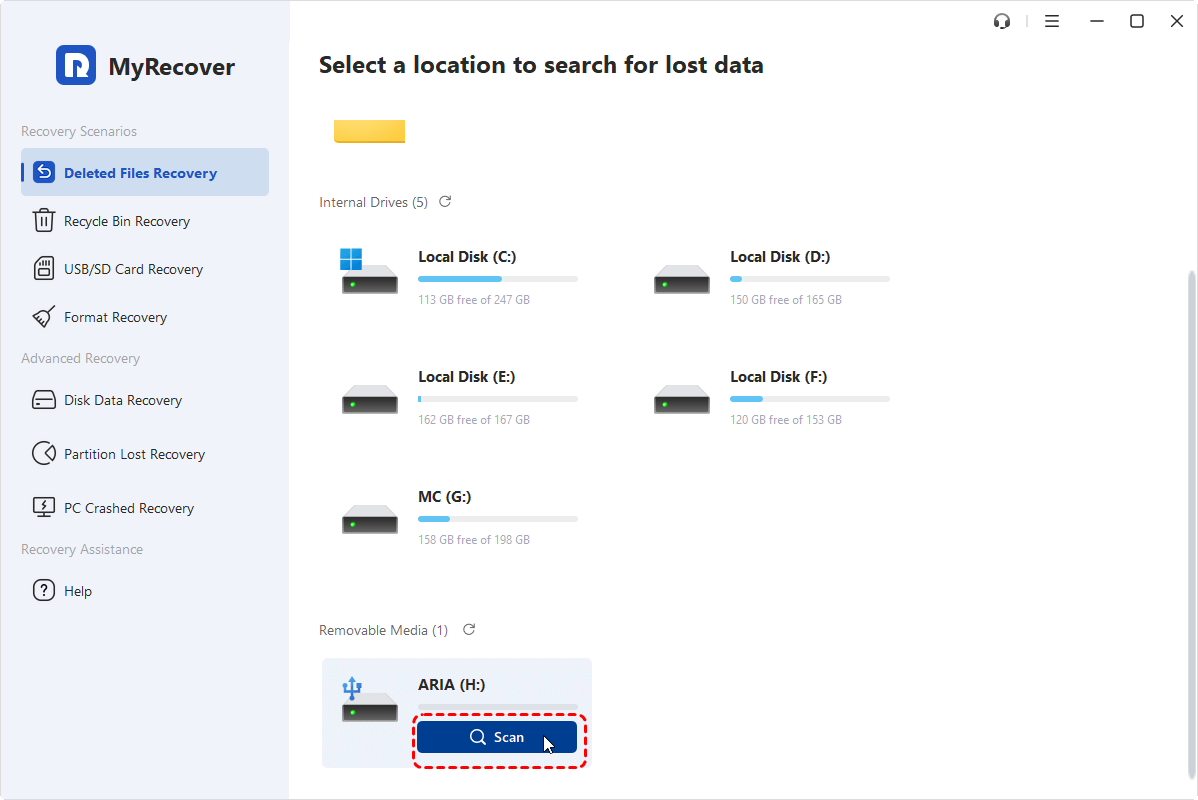
1. Download and install MyRecover on your Windows PC.
2. Launch the program and select the drive where your files were lost. Click "Scan" to begin scanning for deleted or lost files.
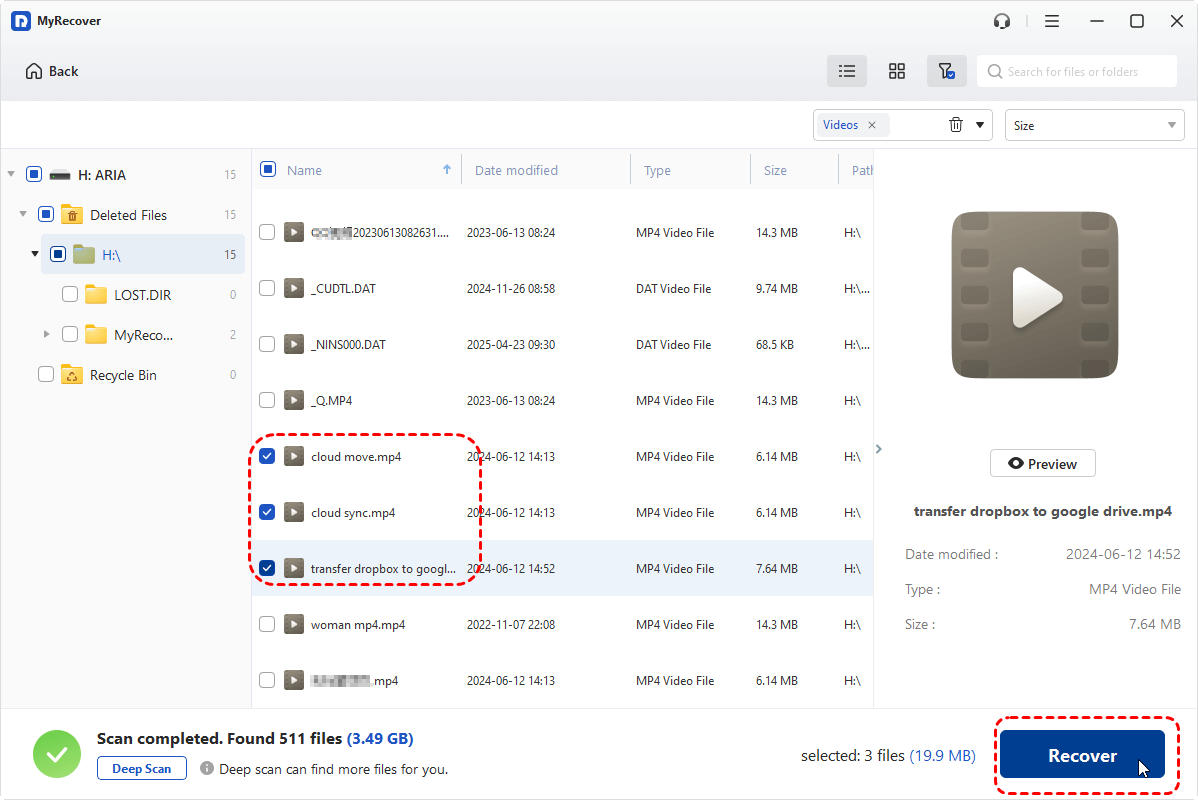
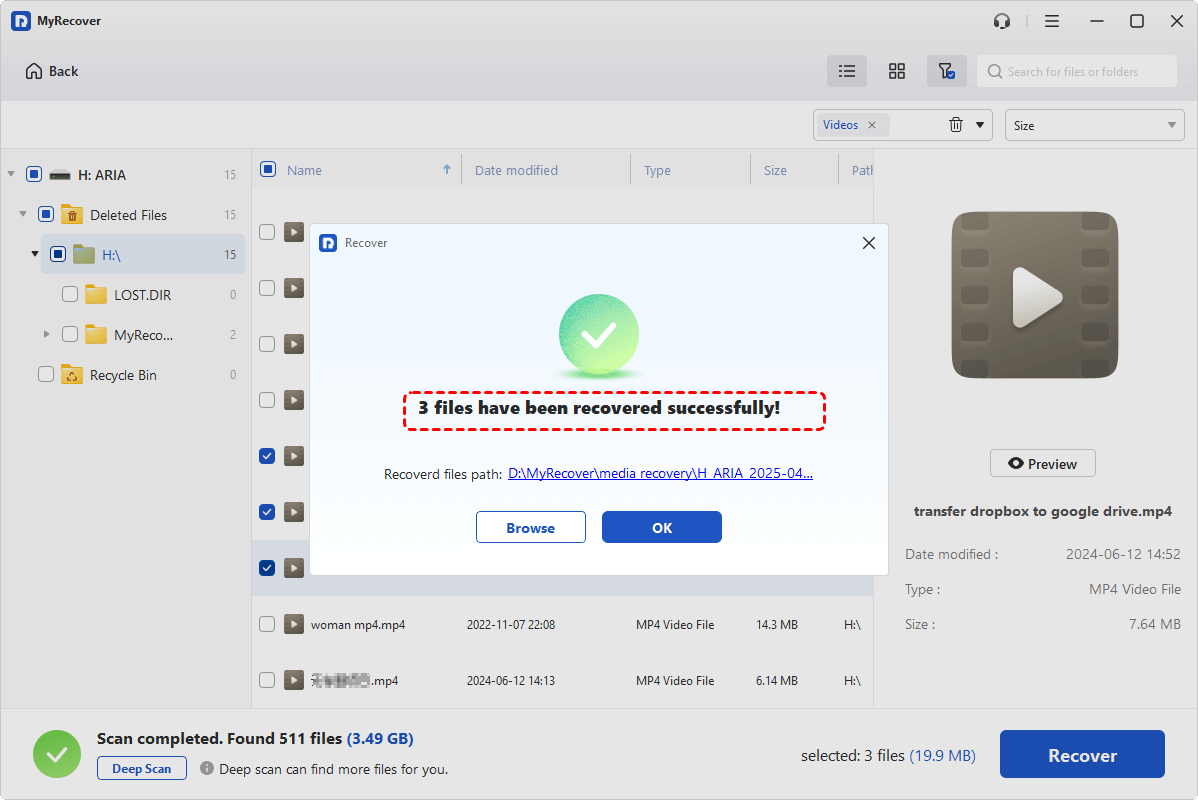
3. Once the scanning process finishes, you can browse through all recoverable files, tick what you need and click on "Recover" button. To quickly find files or folders, you can make use of the Filter or Search box.

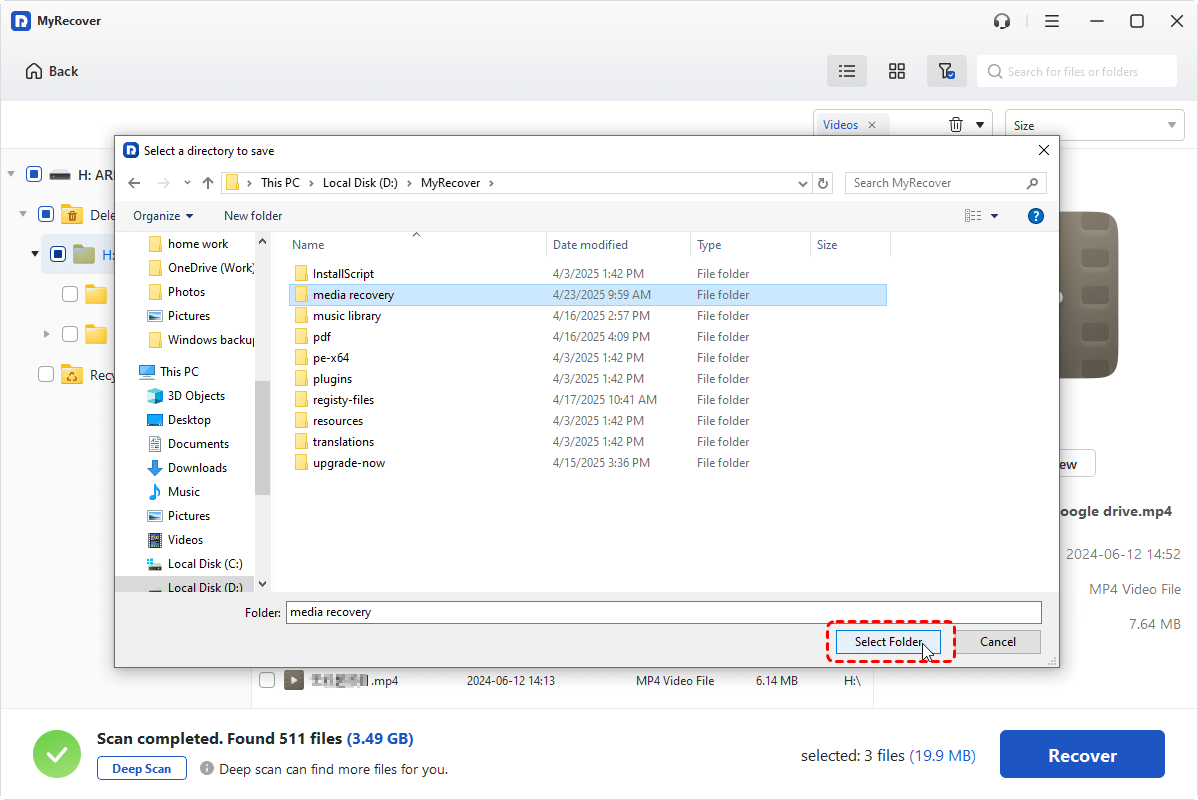
4. Then, choose a different drive to save the recovered files.
When the process is completed, you will be notified of how many files were successfully restored and where they are located.
Conclude
Windows File History provides a convenient way to back up and restore your personal files, but it must be enabled beforehand to be effective. If it is not turned on or the files were never backed up, you cannot recoverf files from File History in Windows 10 as expected. However, luckily, a reliable data recovery tool like MyRecover can help you recover your lost data quickly and efficiently-no backup required.
To unlock more advanced features such as recovering files from unbootable Windows computer, previewing files before recovery, unlimited data recovery quota and more, please consider upgrading to Professional edition.


Stay Updated With Our
Latest Tips
Add us as a preferred source on Google to never miss helpful guides.