
How to Show Hidden Files Windows 11 or 10 Via Shortcut?
Want to quickly access hidden files on Windows 11 or 10? This guide covers the fastest ways to show hidden files using keyboard shortcuts, File Explorer settings, or Command Prompt. Follow these easy steps to reveal system or hidden folders safely and efficiently.
By Emma / Updated on October 20, 2025
Why Show Hidden Files in Windows 11?
Hidden files are files or folders that Windows automatically hides from view to prevent accidental modification or deletion. These files often include important system data, configuration files, or app-related folders that help your computer and software run smoothly. Additionally, you can manually hide files or folders for privacy or organizational purposes.
You might want to show hidden files in certain situations, such as:
🛠️Troubleshoot system issues: When fixing errors, malware infections, or missing settings, you may need to access hidden folders like AppData, ProgramDataor $Recycle.Bin folders.
🛠️Free up storage space: Hidden temporary files or leftover folders can take up space — viewing them helps you decide what’s safe to delete.
🛠️Transfer or back up data: Some app data and configuration files are hidden by default but may be necessary for complete backups.
🛠️Manual customization: Advanced users sometimes need to edit or replace hidden configuration files to tweak system or app behavior.
In short, while hidden files are normally concealed for protection, showing them temporarily can be useful when managing your system, recovering data, or troubleshooting problems.
How to Show Hidden Files Windows 11 Shortcut?
To show hidden files or folder on Windows 10 or Windows 11 using shortcuts, you can use a combination of keyboard shortcuts within File Explorer:
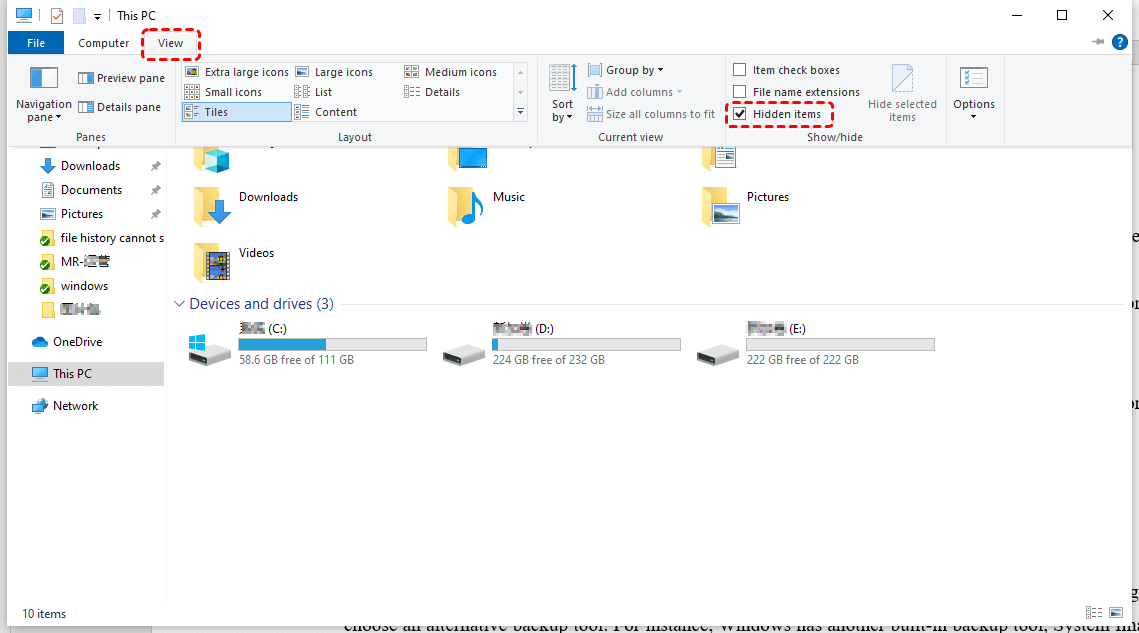
Step 1: Press "Windows + E" to open File Explorer.
Step 2: Press "Alt + V" to access the "View" menu in File Explorer’s ribbon.
Step 3: Check the "Hidden items" option. Hidden files and folders will immediately appear or disappear in the current window.
One More Step You Might Need: Unhide Protected System Files
In addition to regular hidden files, Windows also hides certain protected system files to prevent accidental modification or deletion. These files are critical for the proper functioning of your operating system, such as pagefile.sys, hiberfil.sys, and system configuration files. If you need to access these files, you’ll need to unhide them separately.
Step 1: In the File Explorer Options window, go to the "View" tab.
Step 2: Select "Change folder and search options" under "Options".

Step 3: Switch to the "View" tab. Scroll down the "Advanced settings" list. Uncheck "Hide protected operating system files (Recommended)".
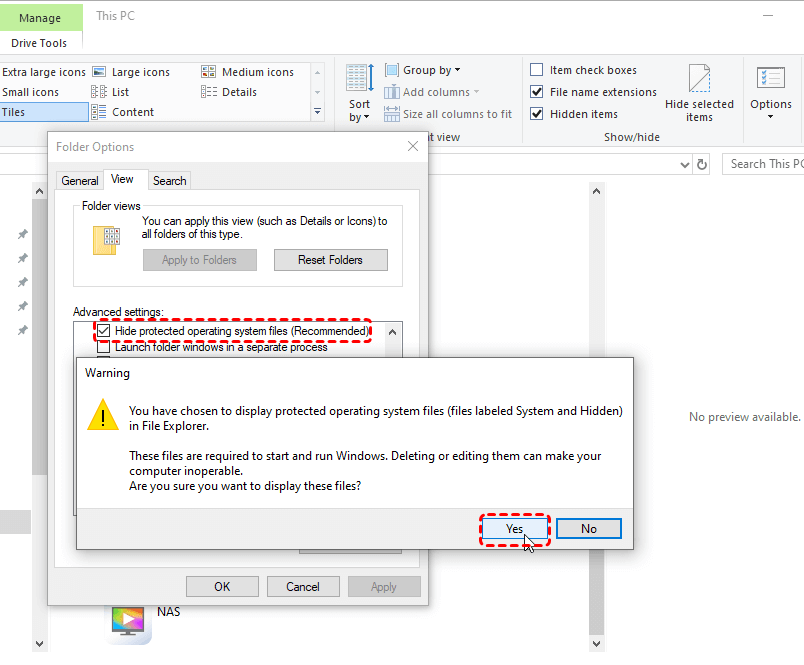
Step 4: Click "Yes" when a warning appears, then click "OK".
Once done, the protected system files will appear alongside regular hidden files, allowing you to access, copy, or troubleshoot them.
Show Hidden Files in Windows 11 Using CMD (Command Prompt)
Apart from showing hidden files via above shorcuts in Windows computer, we can also make the hidden items visible through Command Prompt. This tool allows you to reveal specific hidden files or folders by removing their hidden and system attributes. This method is useful if you know the exact location of the file or folder.
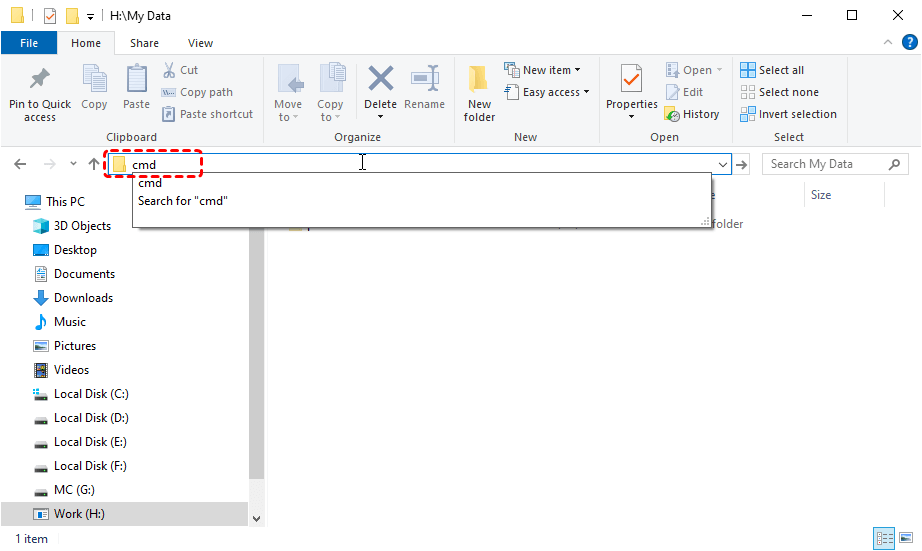
Step 1: Navigate to the drive and folder containing the hidden file or folder, for example, the "H: drive" and the "My Data" folder.
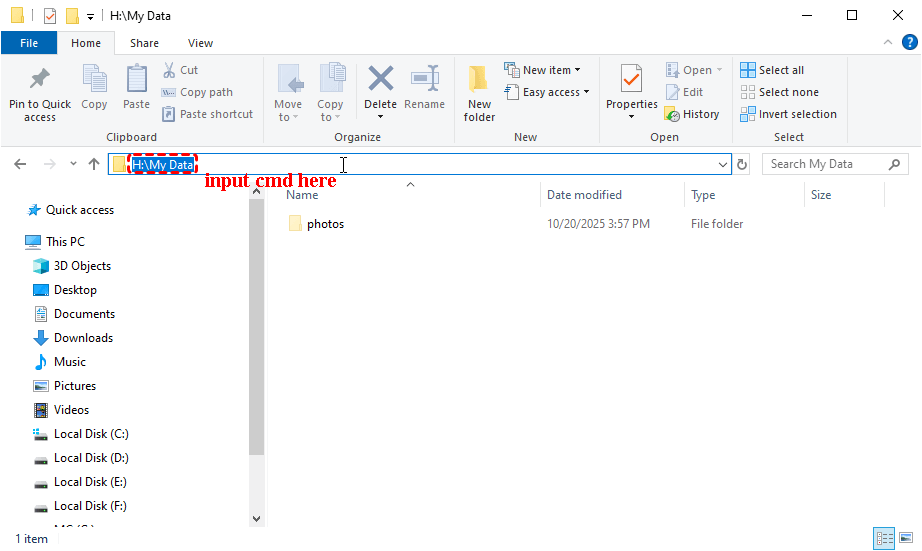
Step 2: In the File Explorer address bar, type "cmd" and press Enter. This will open a Command Prompt window at that folder location.
Step 3: In the Command Prompt window that appears, you should see the prompt like "H:\My Data>". Complete the command by typing: attrib -h -s -r photos
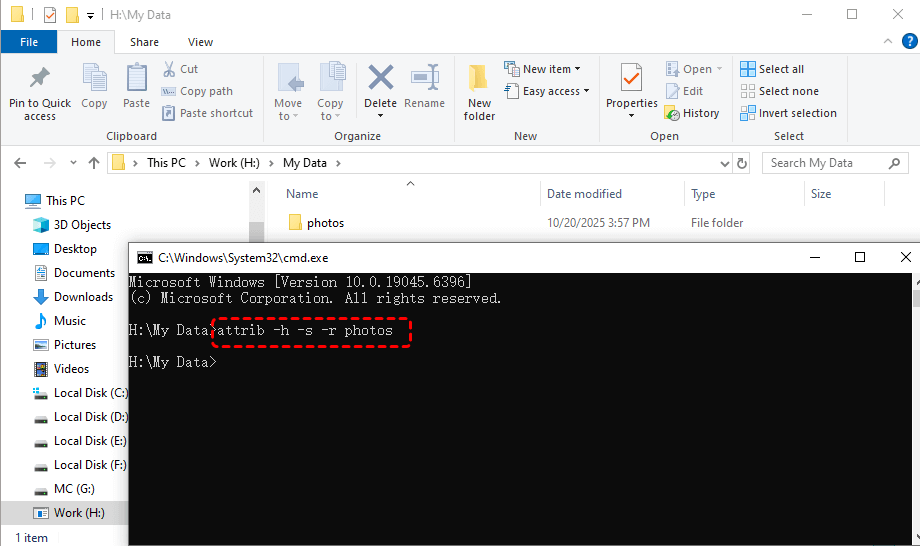
- "-h" removes the hidden attribute
- "-s" removes the system attribute
- "-r" removes the read-only attribute
- "Photos" is the specific hidden folder name you want to show.
Step 4: Open File Explorer and navigate to the location. The previously hidden file or folder should now be visible.
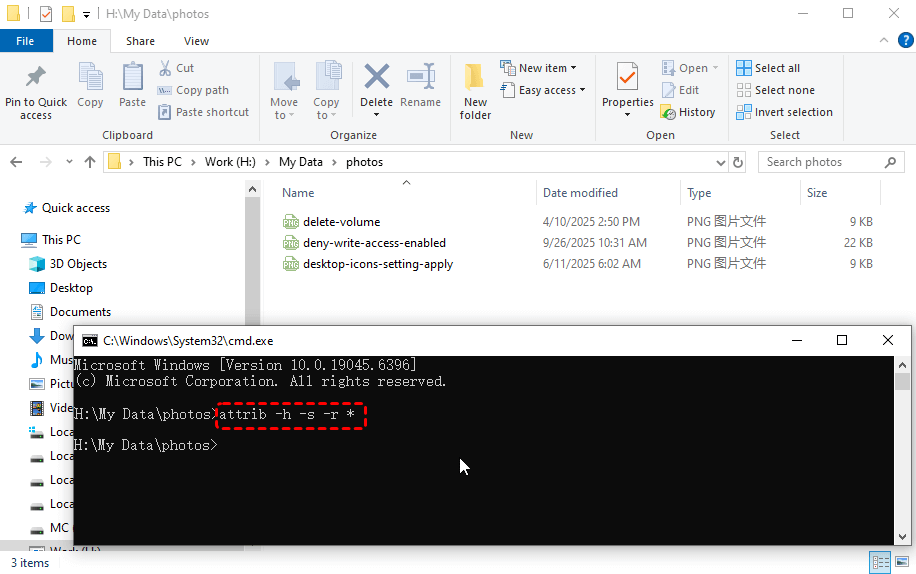
To unhide all files in a specific folder, you can enter the target folder, input "cmd" in the address bar, hit on "Enter", and type: attrib -h -s -r* (* applies the command to all files and folders in the current directory.)
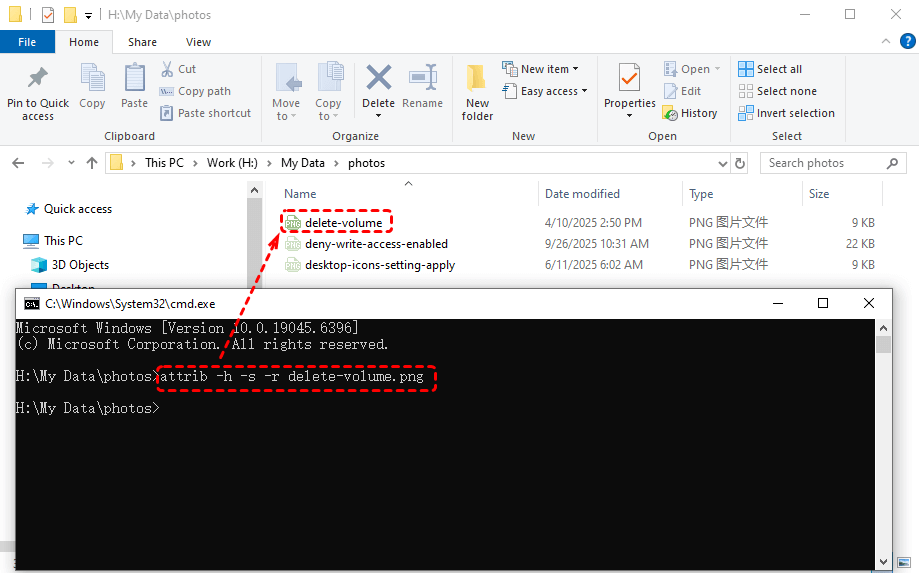
To unhide a specific file, use the command: attrib -h -s -r delete-volume.png ("delete-volume" is the specific file name you want to unhide. ".png" is its file extension, indicating it’s an image file)
Windows 11 Hidden Files Not Showing?
Sometimes, even after enabling Hidden items or using Command Prompt, hidden files may still not appear. Here are the most common reasons and solutions:
1: Permissions or Ownership Issues
Hidden files may not appear if your user account does not have proper permissions.
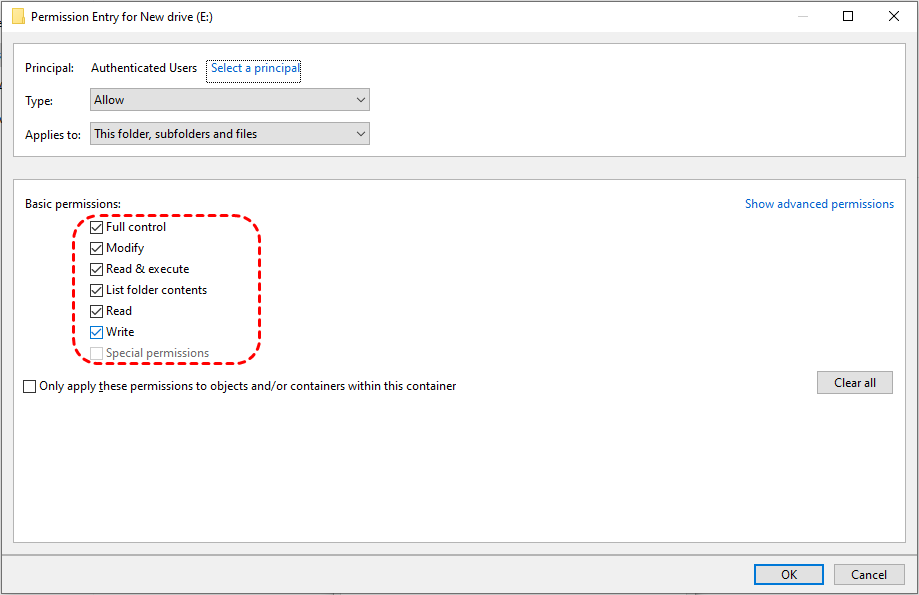
Step 1: Right-click the folder → Properties → Security → Advanced.
Step 2: Ensure your account has Full Control, or take ownership if needed.
2: Corrupted File Explorer Cache
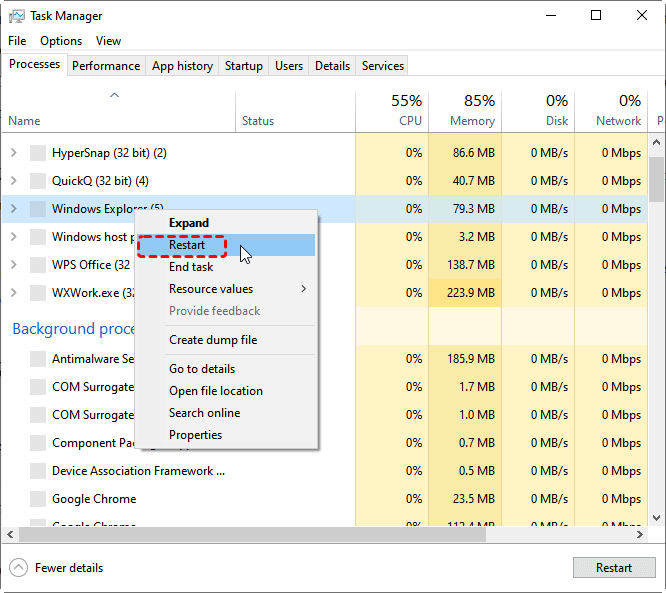
File Explorer sometimes fails to refresh properly. Press "Ctrl + Shift + Esc"to open "Task Manager", find Windows Explorer, right-click → "Restart".
3: Malware or System Errors
Certain malware or system issues can hide files intentionally, either to prevent you from accessing them or to disguise their presence. This can happen with ransomware, trojans, or other malicious software that modifies file attributes or moves files into hidden locations.
To address this: Run a full system scan with Windows Defender: Open Settings → Update & Security → Windows Security → Virus & threat protection → Scan options → Full scan. A full scan checks all files and running programs on your hard drive, which can help detect malware that hides files.

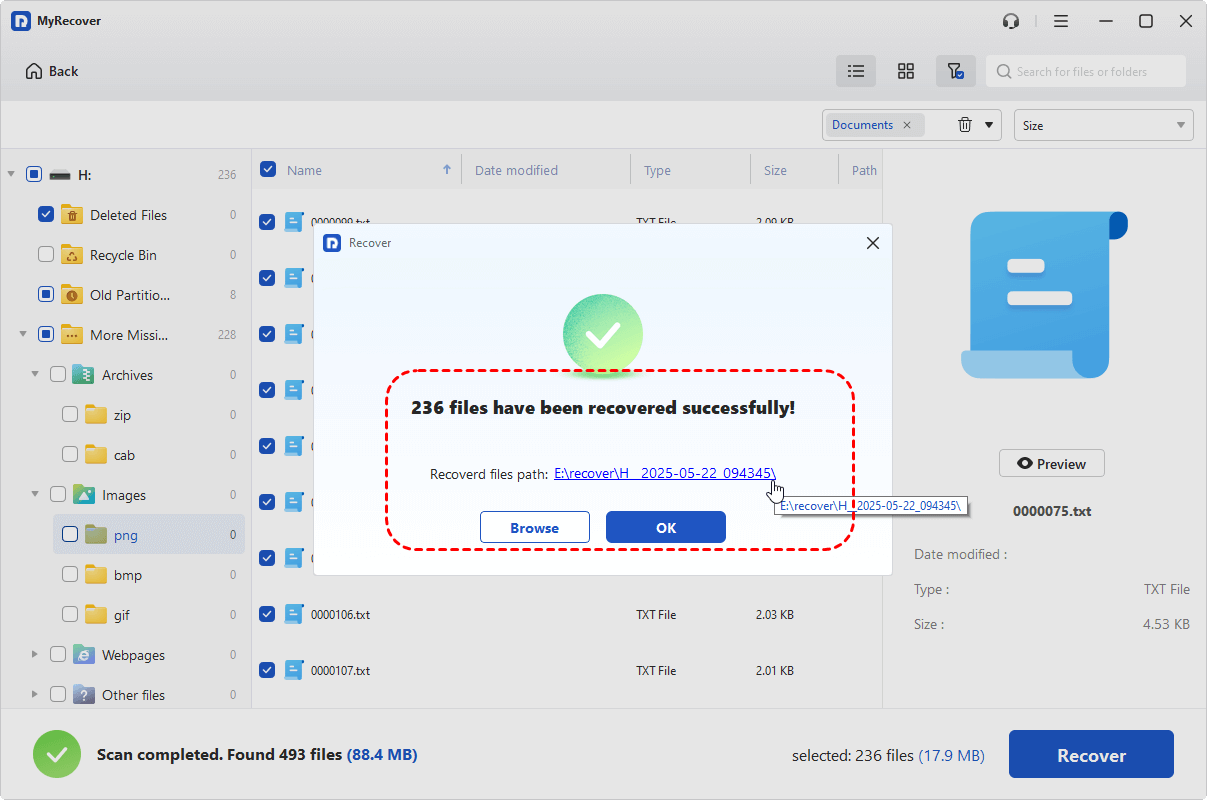
If your hidden files are still not showing or have been accidentally deleted, MyRecover is a reliable solution to safely recover them. It supports a wide range of data loss scenarios, including accidental deletion, virus attacks, system crashes, and formatting errors.
Handle 500+ data loss scenarios, recover 1000+ file types, and support 500+ devices — MyRecover keeps your files safe no matter what.
Using MyRecover is simple: just select the drive or folder where your hidden files were located, run a scan, preview the results, and recover the files safely with simple clicks.
Closing Thoughts
Hidden files in Windows 11 exist to protect important system data and app-related information, but there are situations where accessing them becomes necessary. This article shows how to show hidden files via shortcuts in Windows 11, as well as through Command Prompt commands like "attrib -h -s -r".
For cases where files are still missing or accidentally deleted, MyRecover offers a reliable solution to recover hidden or lost data efficiently, supporting a wide range of file types, storage devices, and data loss scenarios. It is compatible not only with all editions of Windows 11, 10, 8, and 7, but also works seamlessly for file recovery on Windows Server 2025, 2019, 2016, 2012, and other versions.


Stay Updated With Our
Latest Tips
Add us as a preferred source on Google to never miss helpful guides.