
Free Thumb Drive Data Recovery: Effective Methods & Tools You Can Trust
Data loss on thumb drives can occur due to accidental deletion, virus infection, file system errors, or physical damage. Discover step-by-step effective solutions and professional data recovery tools for USB thumb drive data recovery. Get your thumb drive data back quickly and safely with our expert tips.
By Aria / Updated on August 19, 2025
Can You Recover Data from a Thumb Drive?
Thumb drives, also known as USB flash drives, are among the most convenient tools for storing and transferring files. They’re compact, portable, and work with nearly any computer. However, their portability also makes them prone to accidental deletion, corruption, or even physical damage. When important files vanish, knowing how to perform thumb drive data recovery efficiently can save you time and stress.

You might still be skeptical: Can I recover data from a thumb drive? The answer is absolutely yes, in many cases! Unless the files have been permanently overwritten or the device is physically damaged, there’s a good chance to recover data from USB thumb drives. Therefore, after data loss on thumb drive, you should stop using it immediately to avoid overwriting lost data.
How to Recover Data from USB Thumb Drive
Depending on the various cause, recovery might be as simple as restoring from a backup, or it might require specialized thumb drive data recovery software. This section will walk you through detailed USB thumb drive data recovery methods and point out the scenarios which they are suitable for.
Method 1. Restore from Windows Backup
Backup and Restore (Windows 7) is a classic Windows built-in backup tool, which can not only back up a complete system image, but also back up all files in specified folders or drives including external hard drive. When something goes wrong, it allows you to restore files from the backups you created. If you have created backup using this feature, you can follow below steps to retrieve your files.
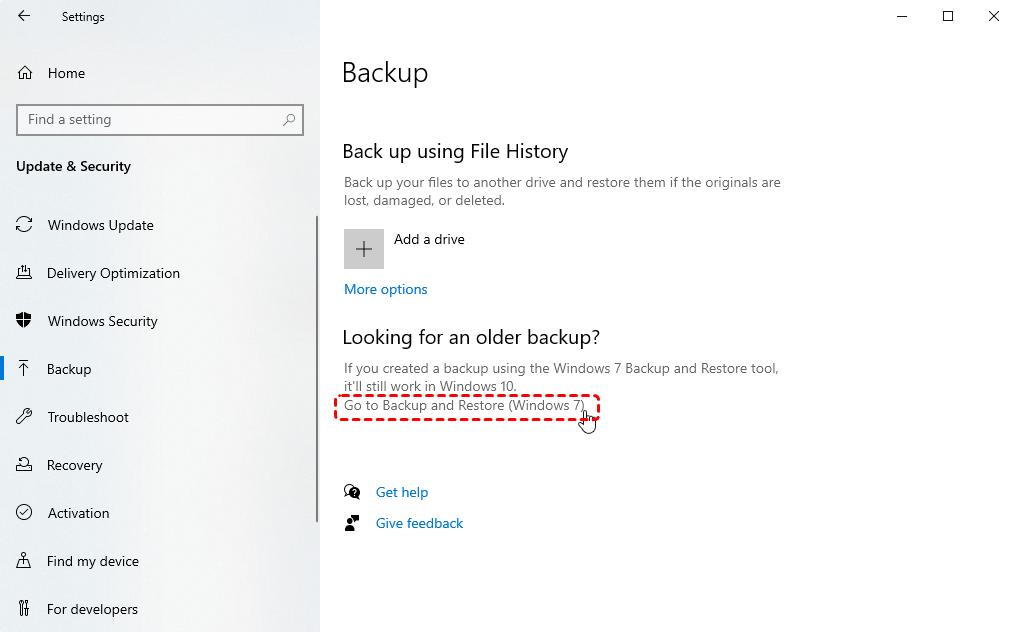
Step 1. Open "Backup Settings" and select "Go to Backup and Restore (Windows 7)".
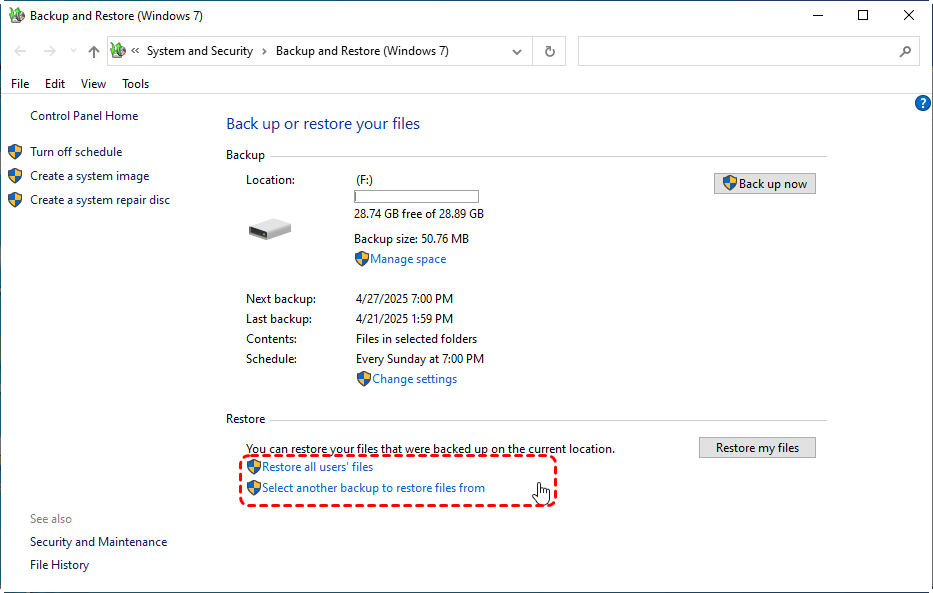
Step 2. Click "Select another backup to restore files from" and choose a created backup including the lost data.
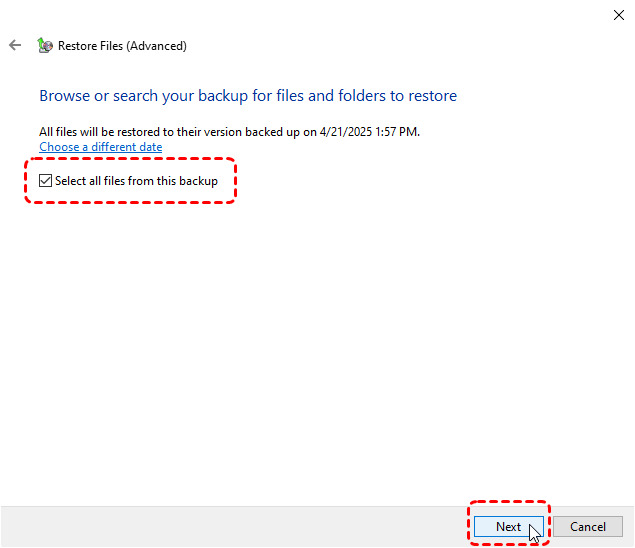
Step 3. Check the "Select all files from this backup" option to restore all files. You can select specific files or folders by clicking on "Browse for files/folders".
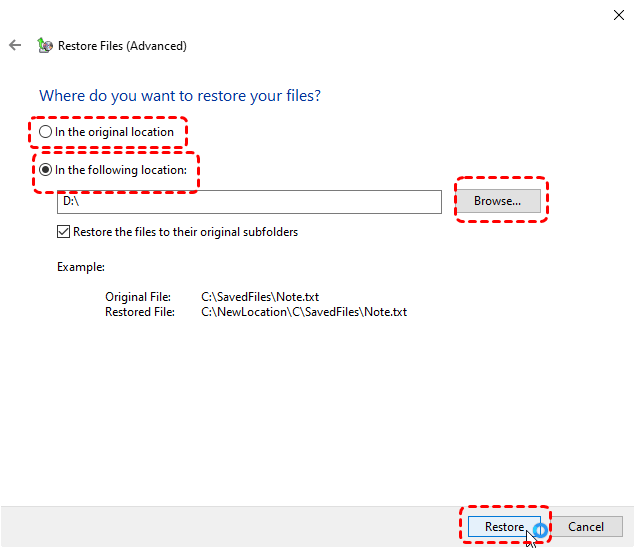
Step 4. Choose a destination folder to save the recovered files and click "Restore" to start the process.
Method 2. Restore from Cloud Backup Tool
More and more users are choosing to create backups using cloud backup tools such as OneDrive, Google Drive, and Dropbox. This allows them to access their files in the cloud anytime and anywhere. If you have created backups using OneDrive (take OneDrive as an example here), you can directly restore these files from OneDrive.
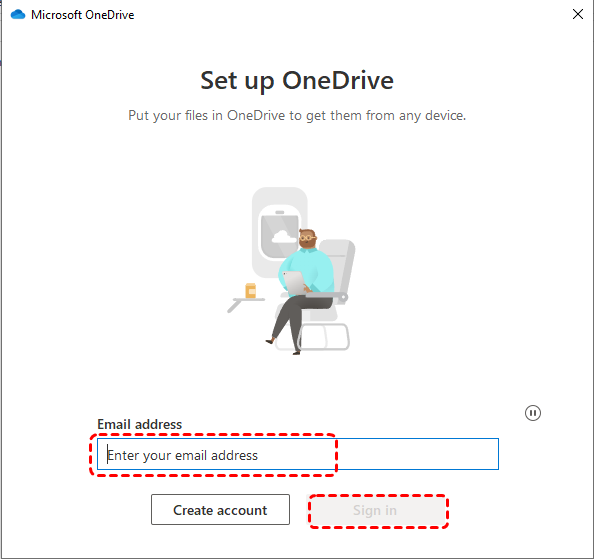
Step 1. Sign in to OneDrive with your account.
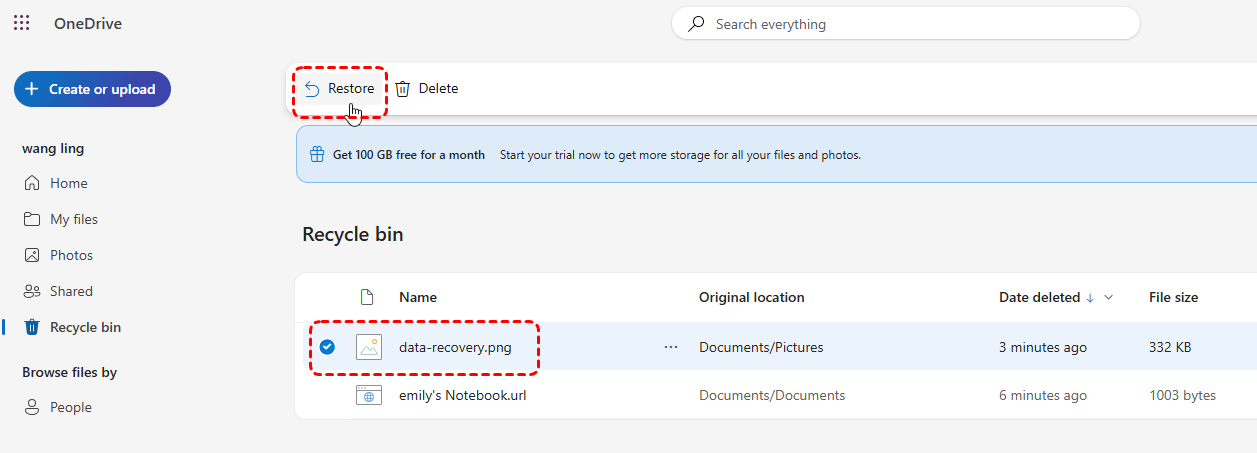
Step 2. If a file is deleted, it will also be moved to the Recycle bin in OneDrive. Normally, you can restore it within 30 days. Navigate to "Recycle bin" section, browse and select the files you wish to recover.
Step 3. Click "Restore" in the left upper corner to recover them.
- Notes:✎...
- If your file hasn’t been deleted, you can directly download it to your local device and then save it to a secure location.
Method 3. Run CHKDSK Command (For Logic Error)
The CHKDSK command is a built-in Windows utility that scans a drive for file system errors and bad sectors, then repairs them if possible. If your thumb drive is corrupted or has any logical errors, you can use this method to troubleshoot the issues and regain access to files in bad sectors.
Step 1. Connect the thumb drive to your computer.
Step 2. Open "Command Prompt" and run it as administrator.

Step 3. Type the following command "chkdsk G: /f /r" and press "Enter". Replace the drive letter "G" with your actual drive letter.

Then the command will automatically scan and attempt to repair the detected errors. Once the process is completed, you can check if the files are accessible.
Method 4. Run ATTRIB Command (For Hidden Files)
The ATTRIB command in Windows is used to view or change file and folder attributes, such as read-only, hidden, system, and archive flags. If the files in your thumb drive disappear without being deleted, it may be because the drive has been attacked by viruses or malware, which altered the file attributes and hid your files. You can use the ATTRIB command to reveal these hidden files.
Step 1. Connect the USB thumb drive to your computer.
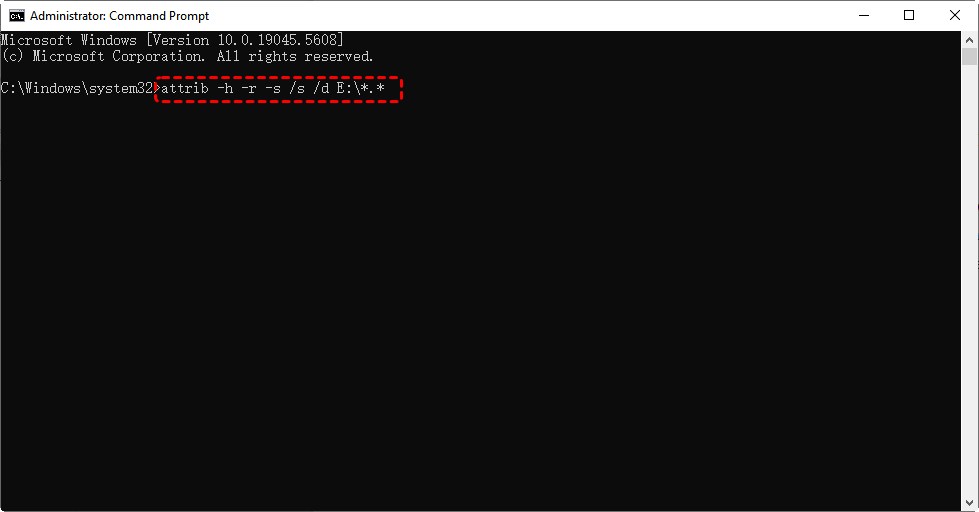
Step 2. Open "Command Prompt" and run it as administrator.
Step 3. Type the command "attrib -h -r -s /s /d E:\*.*" and press "Enter". Replace the drive letter "E" with your actual USB drive letter.
Check if the hidden files in your USB thumb drive are visible.
Method 5. Run Windows File Recovery Command (Command-Line Tool)
Windows File Recovery is a free command-line tool developed by Microsoft, which can retrieve permanently deleted files from your local storage devices, like USB drives, SD cards, HDDs and more. However, it can be somewhat challenging for beginners, as even minor mistakes can lead to data recovery failure, such as spelling errors, punctuation mistakes, or missing a space.
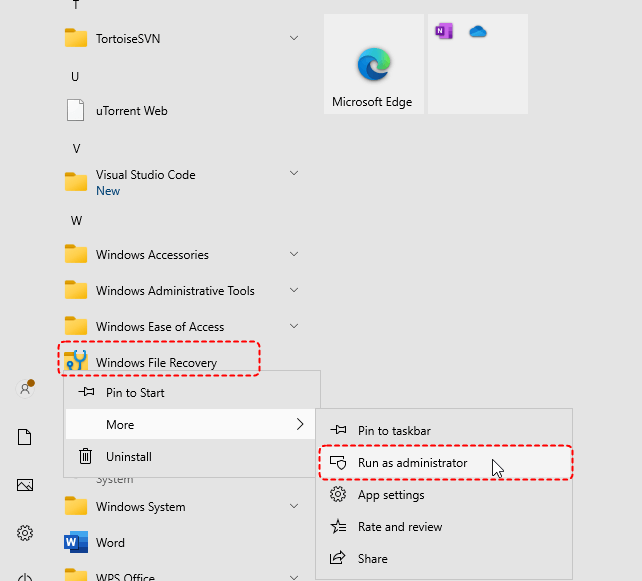
Step 1. Download and install Windows File Recovery on your computer from Microsoft official channel. Insert the USB thumb drive into your computer.
Step 2. Open Windows File Recovery and run it as administrator.
Step 3. Type the command "Winfr F: E: /regular" and press "Enter". Replace the drive letters "F" (the source drive letter) and "E" (the destination drive letter) with your actual drive letters.
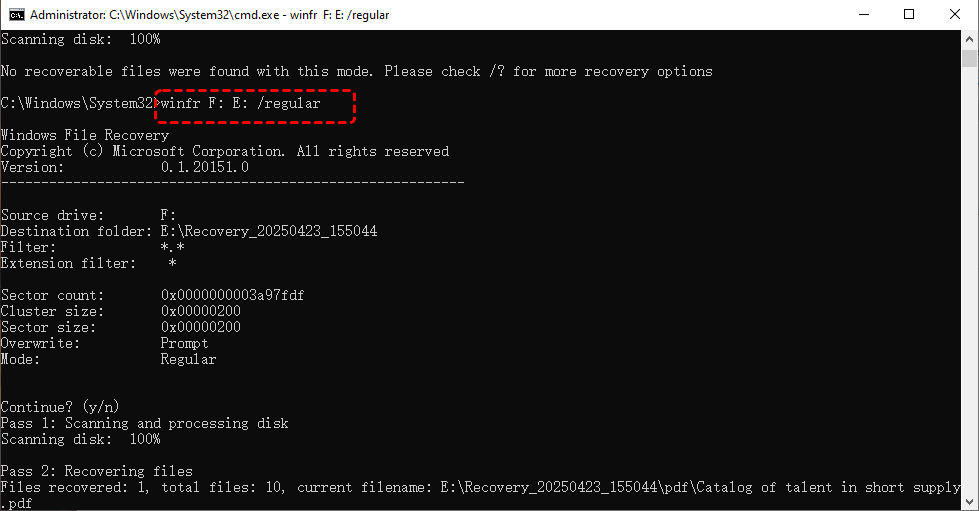
When the process is finished, you can press "y" to check the recovered files in the destination folder.
Method 6. Thumb Drive Data Recovery Software—MyRecover
If you're not comfortable with command-line tools, or encounter more serious situations such as a deleted partition on your thumb drive or an inaccessible partition, MyRecover will come in handy in such cases. It can scan all the drives on your computer and offer a chance to retrieve lost files.
MyRecover's most impressive strengths include:
✅No Command Line Needed – Visual interface simplifies the data recovery process.
✅Higher Success Rate – Advanced deep scan for NTFS/FAT32/exFAT/Ext4 drives.
✅Smart Filtering – Quickly access files by filtering type, date, name, or size with precision.
✅500+ Devices Support – Recover files from all types of devices like SSD, HDD, USB flash drive, SD card, cameras, game console drives and more.
✅Handle 500+ Data Loss Scenarios – Recover from formatted hard drive, deleted partition, emptied Recycle Bin, system crash, virus attack, etc.
✅Supports over 1,000 File Types – Including documents, photos, videos, audio, archives, and Outlook data files.
✅OS Compatibility – Work not only on Windows 11 /10, but also on Windows 8.1/ 8/ 7 and all Servers.
✅Smart Scan Modes – Choose from Quick Scan for recent deletions or Deep Scan for formatted/corrupted drives.
4 Steps to Recover Data from USB Thumb Drive
Step 1. Download and install MyRecover on your computer from a secure channel.
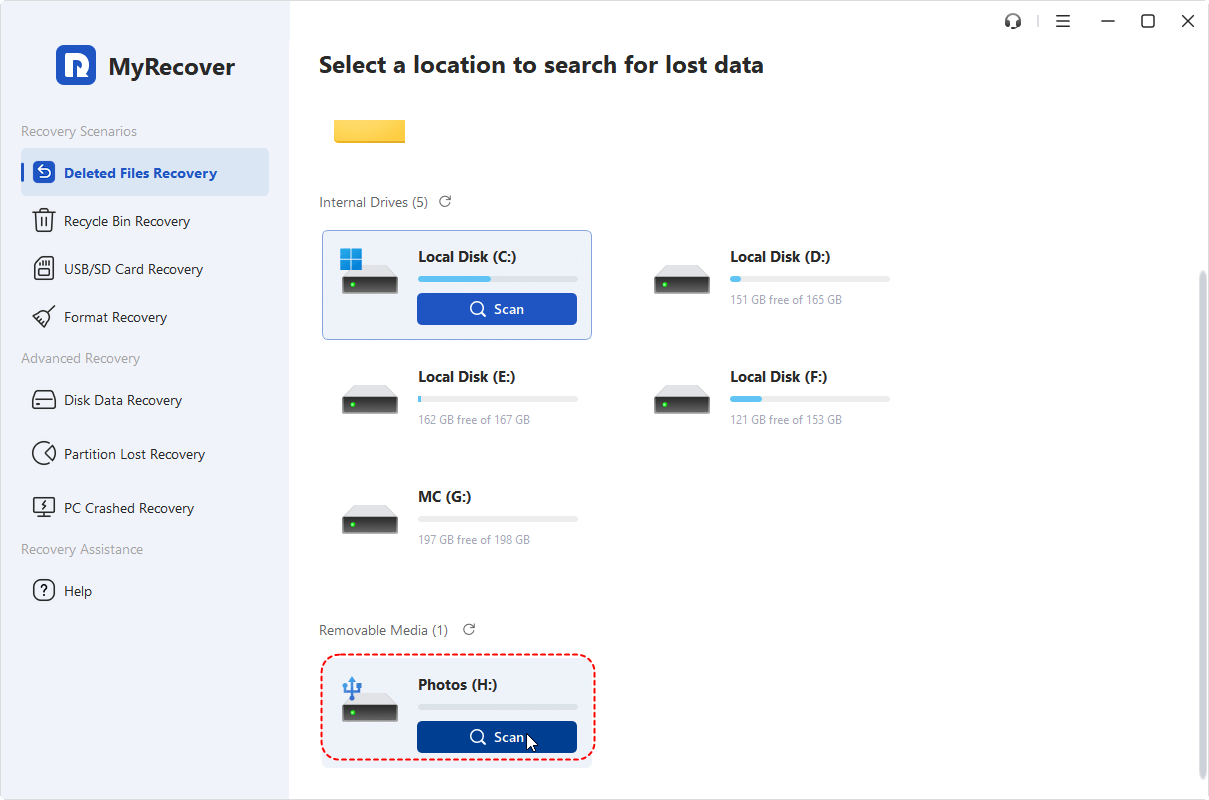
Step 2. Launch it and choose the thumb drive to scan for lost files, then click "Scan".
Step 3. Choose the files you intend to recover from the recoverable lists and click "Recover".
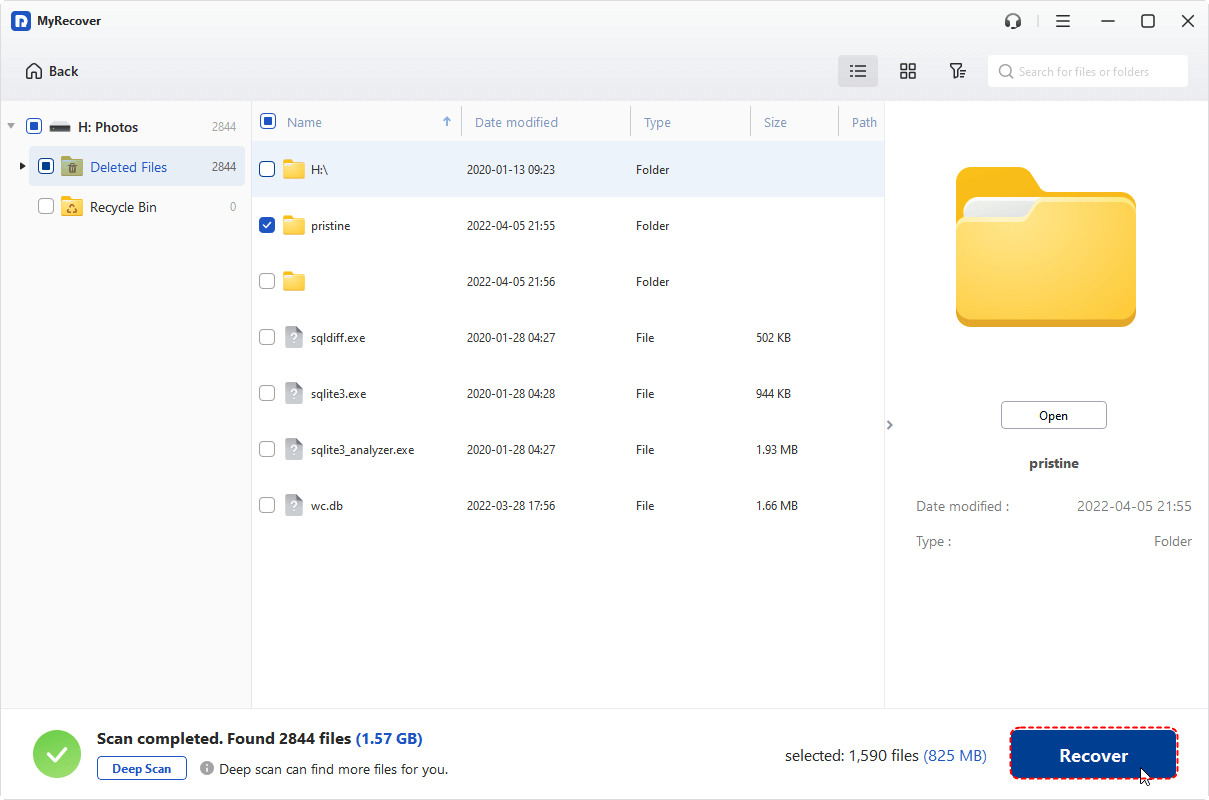
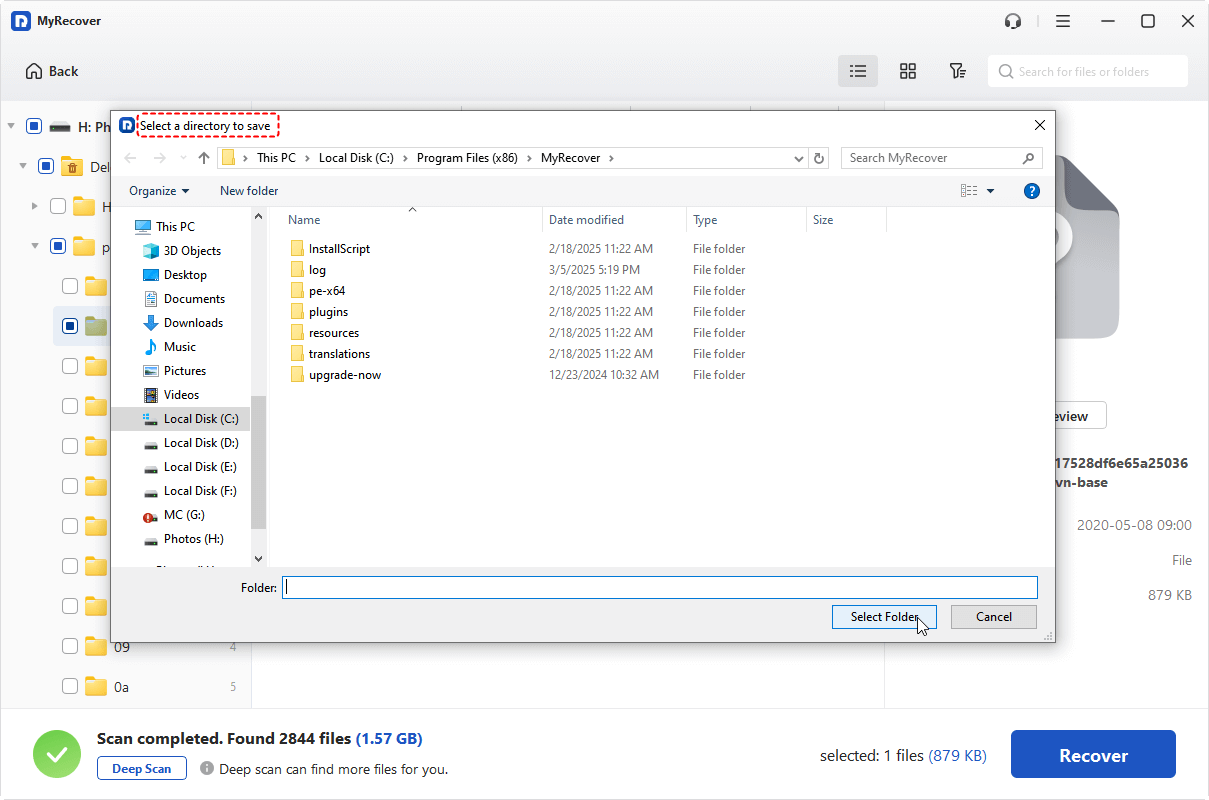
Step 4. Select a location different from the original one to save the recovered files.
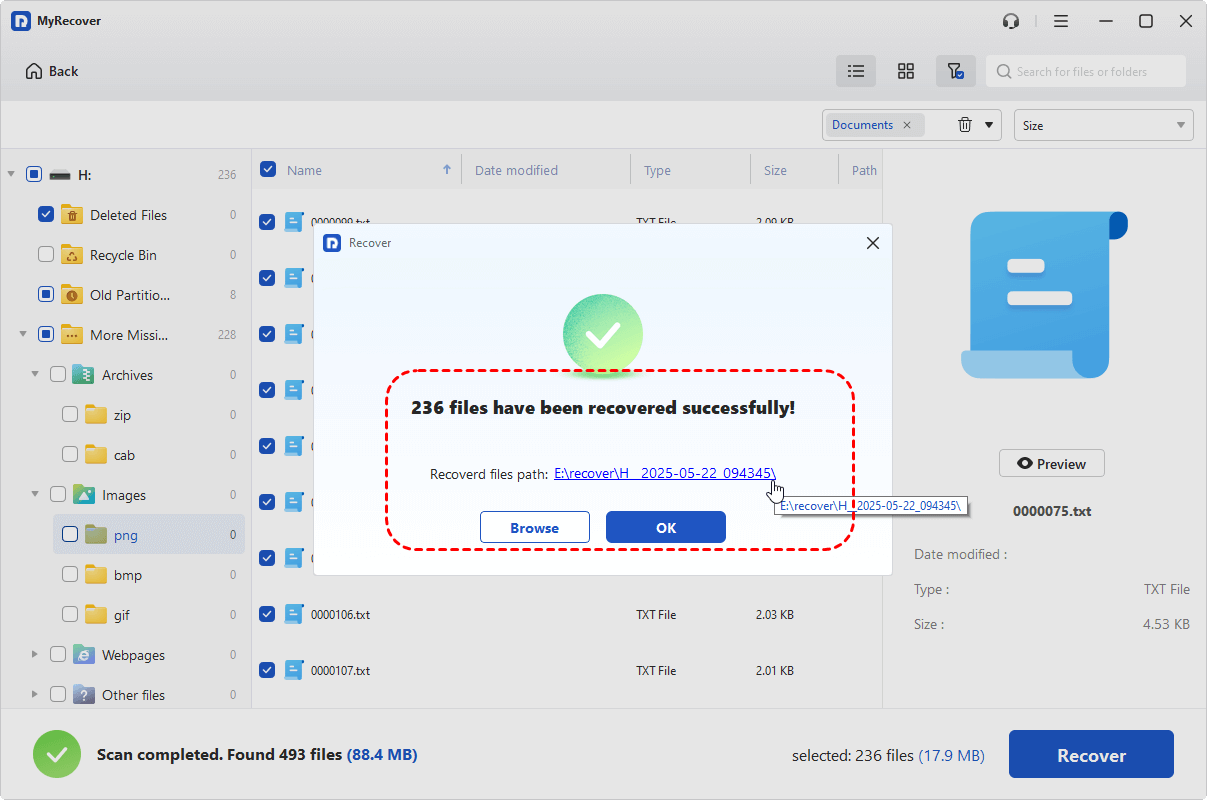
Upon completion of the recovery process, you can access and check the recovered files by clicking on the destination folder path or "Browse" button.
The Bottom Line
Data loss on thumb drives can be stressful, but with the right thumb drive data recovery steps, you can often get your files back. For stubborn cases, thumb drive data recovery software like MyRecover offers more powerful solution. Moreover, MyRecover offers a Professional version to meet users' more advanced needs. It allows you to enjoy unlimited data recovery capacity and file preview function before restoration.


Stay Updated With Our
Latest Tips
Add us as a preferred source on Google to never miss helpful guides.