
ADATA USB Flash Drive Recovery: A Complete Guide
Need to restore lost data? This guide introduces the most effective Adata USB flash drive recovery tool to help you retrieve deleted, formatted, or corrupted files from your Adata USB drive easily and safely. Perfect for beginners and professionals alike.
By Vera / Updated on November 13, 2025
Why USB Data Loss Happens?
ADATA USB flash drives are known for reliability and speed, but even the best drives can fail. A small mistake, a virus infection, or a corrupted file system — that’s all it takes for your data to vanish in seconds.
Before you panic, it helps to understand why data loss happens, so you can handle it the right way.
Common Causes of Data Loss on ADATA USB Drives
1. Accidental Deletion
You hit "Delete" on the wrong file, and poof — it’s gone. The good news? Deleted files usually remain recoverable until overwritten.
If your PC suddenly prompts you to "Format the drive before using it", think twice. Formatting erases all data, but recovery software can often restore it.
3. File System Corruption
Unplugging your USB while it’s transferring files or sudden power failures can damage the file system, making your data unreadable.
4. Virus or Malware Attacks
Malicious software can hide, rename, or delete files. Regular scans can prevent this, but recovery tools can still help afterward.
5. Physical Damage
If your ADATA USB has been dropped, bent, or soaked, recovery becomes harder — but a professional can still help in many cases.
Before You Start: Important Things to Remember
Can I really recover files from an ADATA USB Drive? Yes, absolutely! Unless the USB is physically destroyed, your files likely still exist on it — just hidden from your system. With reliable data recovery software like MyRecover, you can bring back deleted, lost, or even formatted files quickly.
But before recovery, you need to remember the following things:
1. Stop Using the Drive Immediately
The more you use the USB, the higher the chance your deleted files will be overwritten. Stop all activity right away.
2. Don’t Reformat or Rewrite the Drive
Avoid "fixing" the drive with formatting or saving new data on it — that’ll only reduce recovery chances.
3. Check the USB Port and Connection
Sometimes the issue isn’t the drive at all. Try another USB port or a different computer to rule out connectivity problems.
Methods to Recover Data from ADATA USB Flash Drive
Here comes the real deal — how to actually recover your lost data.
Method 1: Use Data Recovery Software (MyRecover)
The easiest and most effective way to restore lost data from an ADATA USB flash drive is by using MyRecover — a professional recovery tool trusted by millions of users.
MyRecover is designed specifically to retrieve files lost due to deletion, formatting, corruption, or system crashes. It supports all major USB brands, including ADATA, and can recover photos, videos, documents, and more in just a few clicks.
Step 1: Download and Install MyRecover
Go to the official MyRecover website and download the installer. Launch the program after installation. Plug your ADATA USB flash drive into the computer.
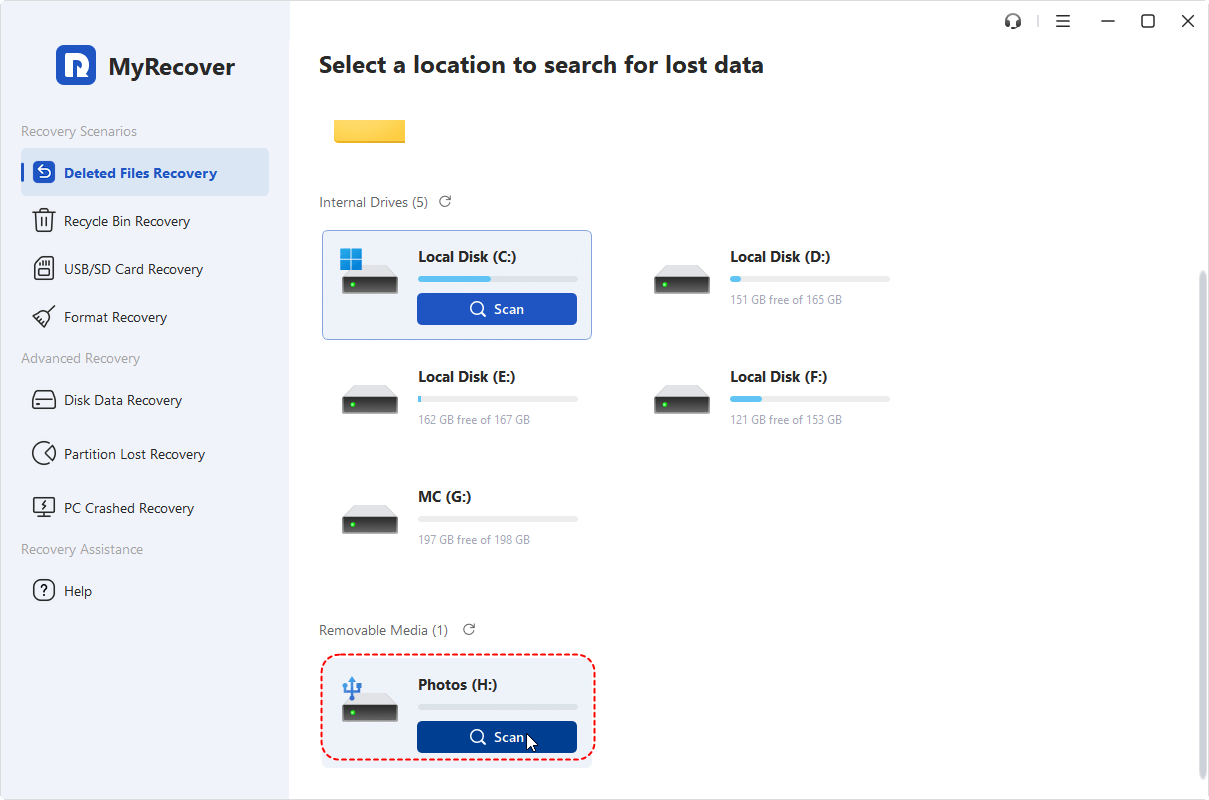
Step 2: Connect and Scan Your ADATA USB Drive
MyRecover will automatically detect your USB drive. Select it and click Scan. The software will perform a Quick Scan to locate all recoverable files.
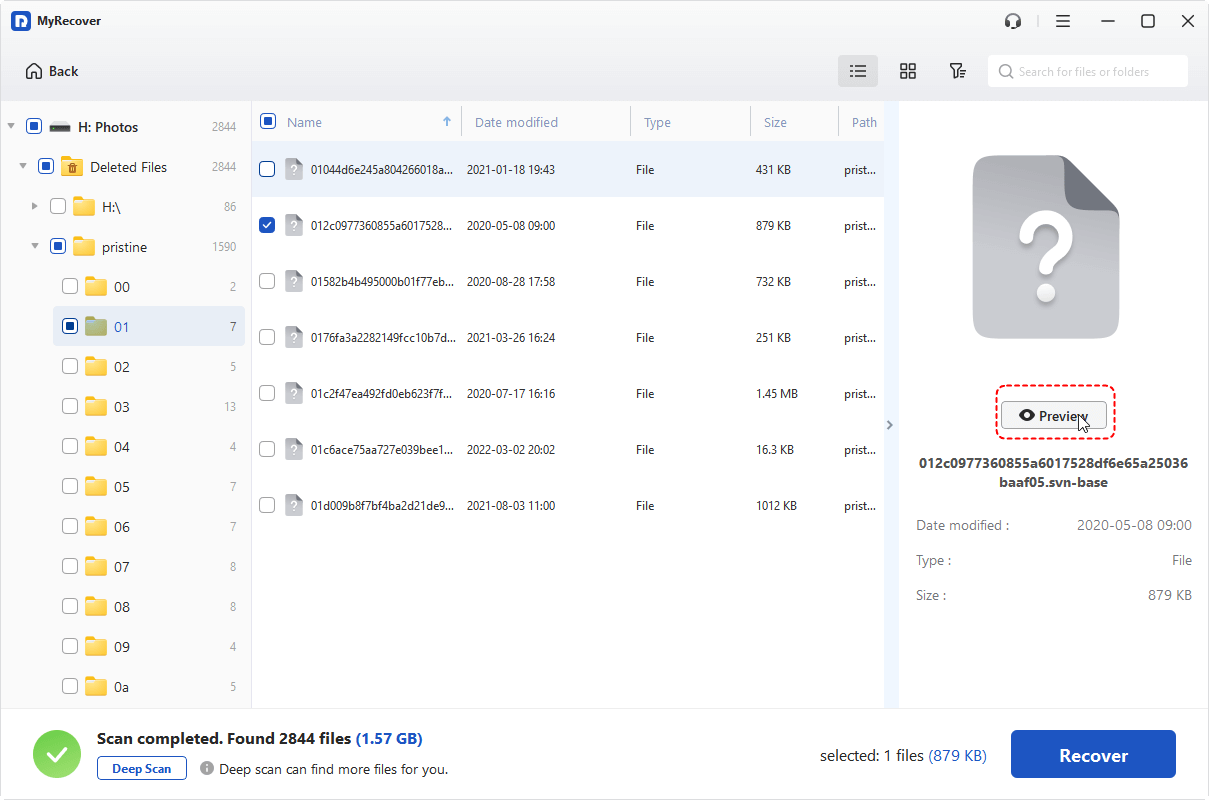
Step 3: Preview and Recover Lost Files
Once the scan completes, you’ll see a list of found files.
- Use the Preview feature to confirm they’re the right ones.
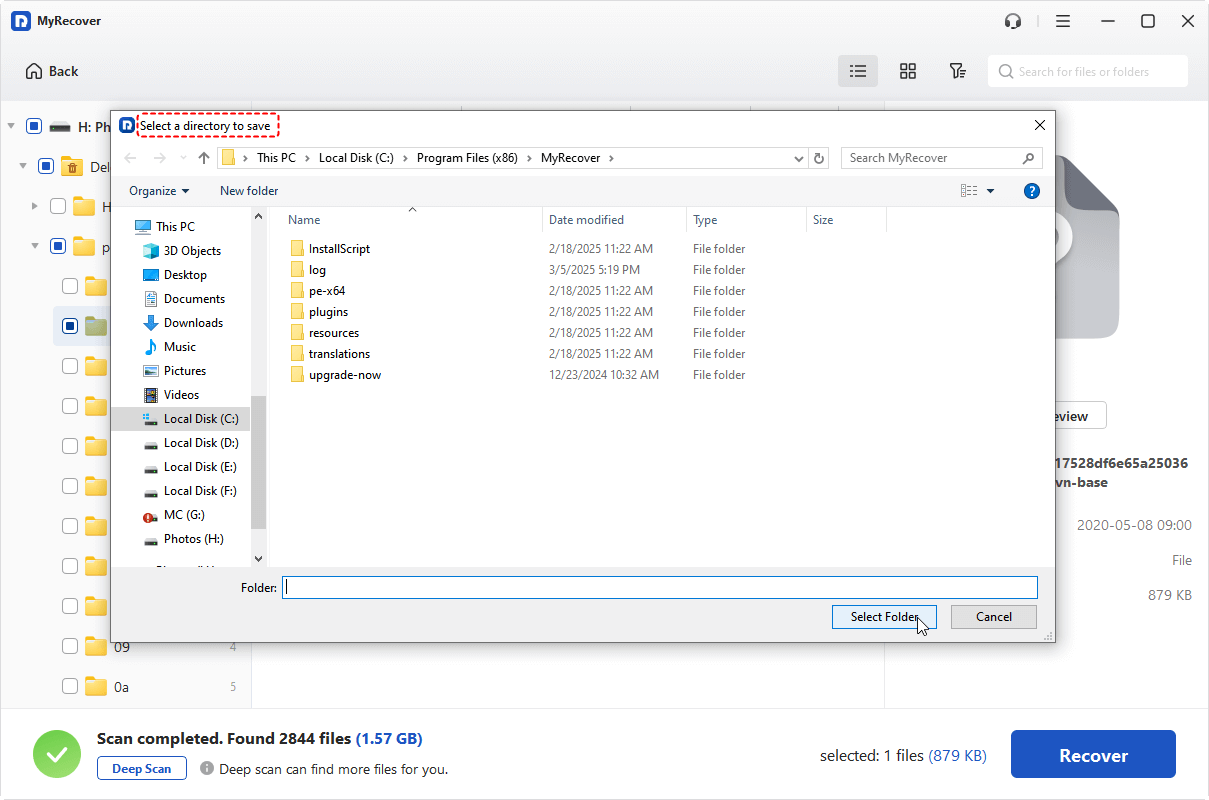
- Click Recover and choose a different location on your computer (not the same USB drive) to save them.
And that’s it! You’ve successfully recovered your data using MyRecover — simple, fast, and safe.
Method 2: Use Windows File History or Backup
If you regularly back up your system using Windows File History, restoring files is easy:
1. Open Settings > Update & Security > Backup.
2. Click Restore files from a current backup.
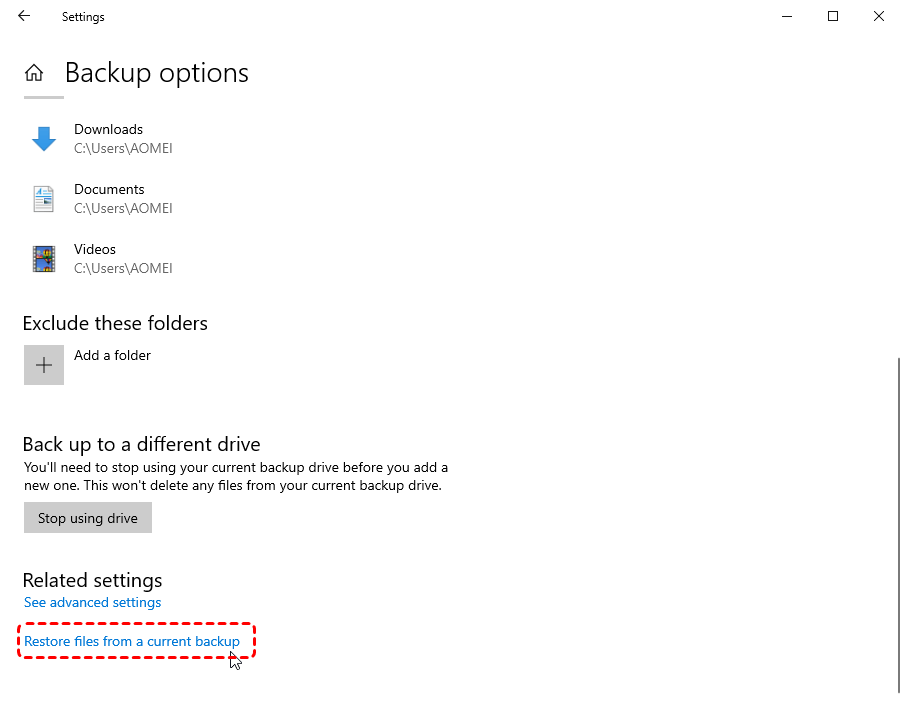
3. Choose your lost files and restore them to your preferred folder.
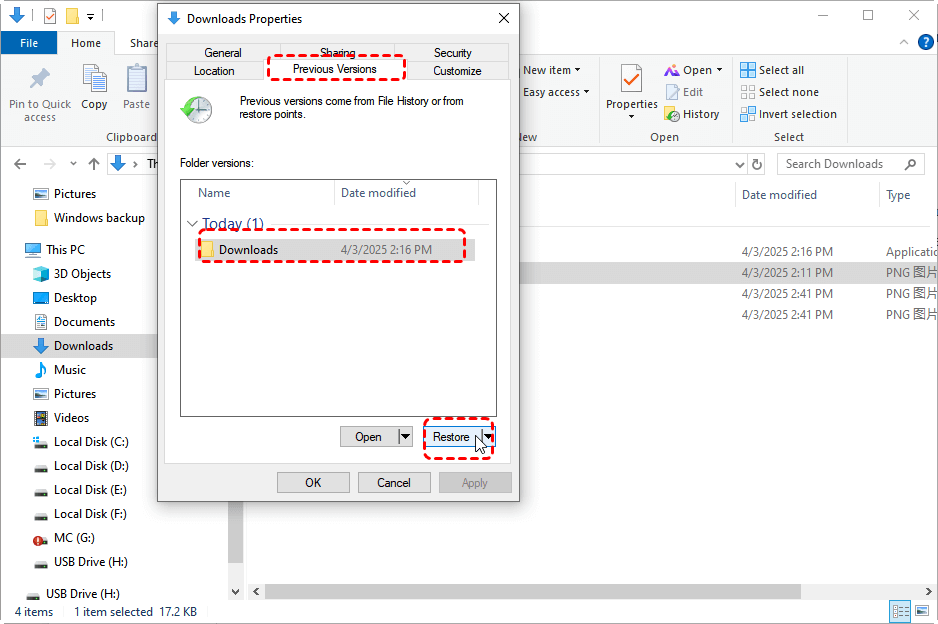
Method 3: Restore Previous Versions of Files
Windows often saves older versions of your files automatically.
1. Right-click the folder where the lost file was stored.
2. Choose Properties > Previous Versions.
3. Select a version and click Restore.
Method 4: Try CMD Command for Basic Recovery
If your drive looks empty or corrupted, this quick fix might help:
1. Open Command Prompt (Admin).
2. Type: chkdsk X: /f
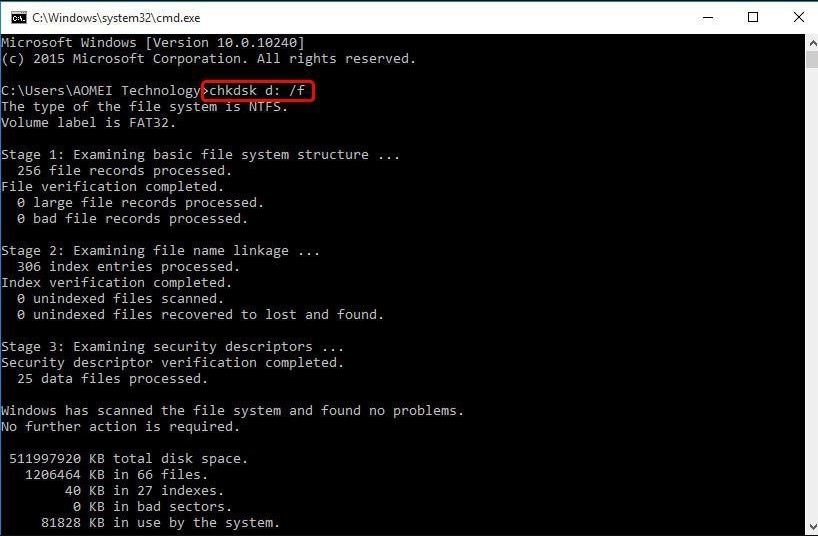
(Replace X with your USB drive letter.)
3. Press Enter and let Windows repair the errors.
Method 5: Contact ADATA Support or a Professional Recovery Service
If software recovery fails, it’s time to call the pros. ADATA offers limited support for malfunctioning drives, or you can use a data recovery lab to extract files from physically damaged USBs.
Tips to Prevent Data Loss in the Future
Regularly Back Up Your Data
Always keep extra copies of important files — on your PC, cloud storage, or another USB.
Always Safely Eject Your USB Drive
Never unplug your drive during file transfers — it can corrupt the file system instantly.
Avoid Physical Damage and Overheating
ADATA drives are durable, but not indestructible. Keep them away from heat, moisture, and pressure.
Keep Antivirus Software Updated
Malware can easily target USB drives. Run regular antivirus scans to stay protected.
How to Repair a Corrupted ADATA USB Drive
If your drive is unreadable even after recovery, try these repair methods.
Option 1: Use Windows Built-in Error Checking Tool
1. Right-click your USB drive → Properties → Tools → Check.

2. Let Windows automatically fix file system errors.
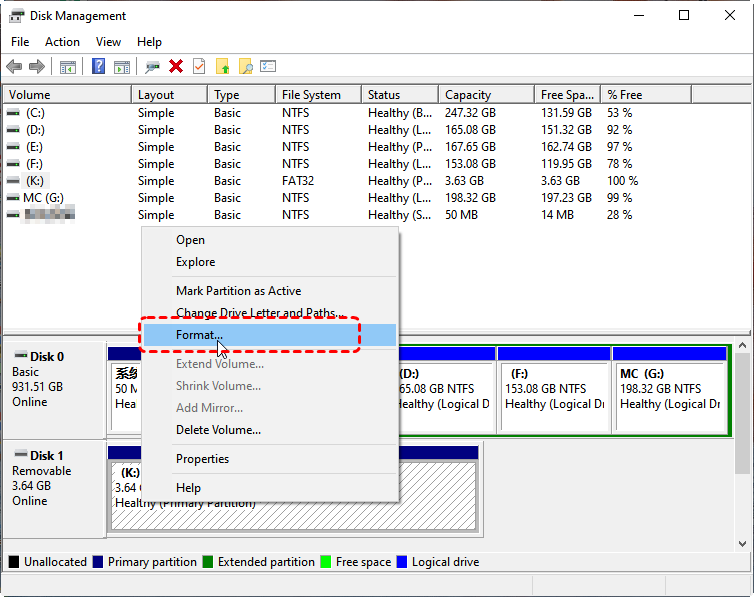
Option 2: Format the Drive (After Recovery)
Once you’ve recovered all your data, formatting can fix deep corruption issues:
Right-click the USB drive → Format → Choose FAT32 or exFAT → Click Start.
Option 3: Use CHKDSK Command
Run this command in Command Prompt:
chkdsk X: /r
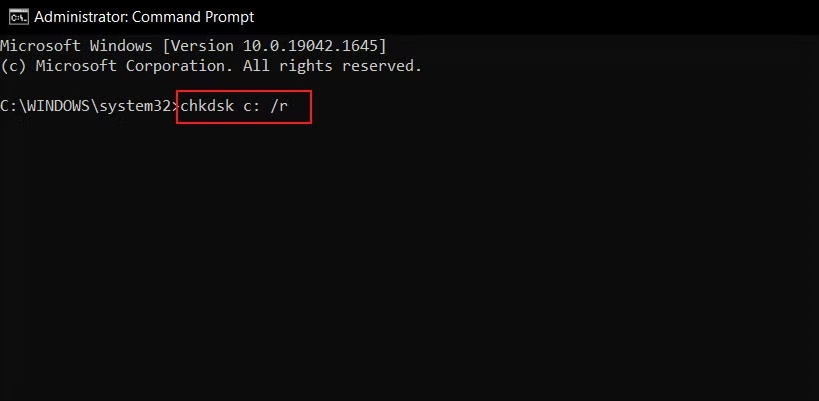
This scans and repairs bad sectors, restoring your drive’s usability.
Conclusion
Recovering lost files from an ADATA USB flash drive doesn’t have to be stressful. With MyRecover, you can bring back deleted or formatted files in minutes — no tech skills required.
Just remember: stop using the drive, avoid overwriting data, and act quickly for the best results. And to prevent future headaches, always back up your data regularly and handle your USB drives with care.


Stay Updated With Our
Latest Tips
Add us as a preferred source on Google to never miss helpful guides.