
ASUS Data Recovery: How to Retrieve Lost Files from ASUS Laptops
Data loss on ASUS laptops can occur due to a variety of reasons. This article explores multiple ASUS data recovery approaches. In addition, it offers essential tips for preventing future data loss, ensuring your important documents, photos, and videos remain protected.
By Aria / Updated on October 28, 2025
Introduction
ASUS has long been recognized as one of the leading laptop manufacturers in the world, known for its reliable performance, innovative design, and wide range of products. However, even the most reliable laptops are not immune to data loss. Accidental deletion, formatting, malware infection, or system crashes can cause valuable data to disappear in an instant. When this happens, many users panic, unsure how to retrieve their lost files safely and efficiently.
This article provides a complete guide to ASUS data recovery, explaining the most common causes of data loss and offering step-by-step solutions to recover your files. You’ll find practical methods and tools to help you get your data back.
How to Recover Lost Data from ASUS Laptop
Once you identify that your data is missing, stop using the laptop immediately to prevent overwriting deleted files. Then, try the following recovery methods one by one to recover the lost data from ASUS laptop.
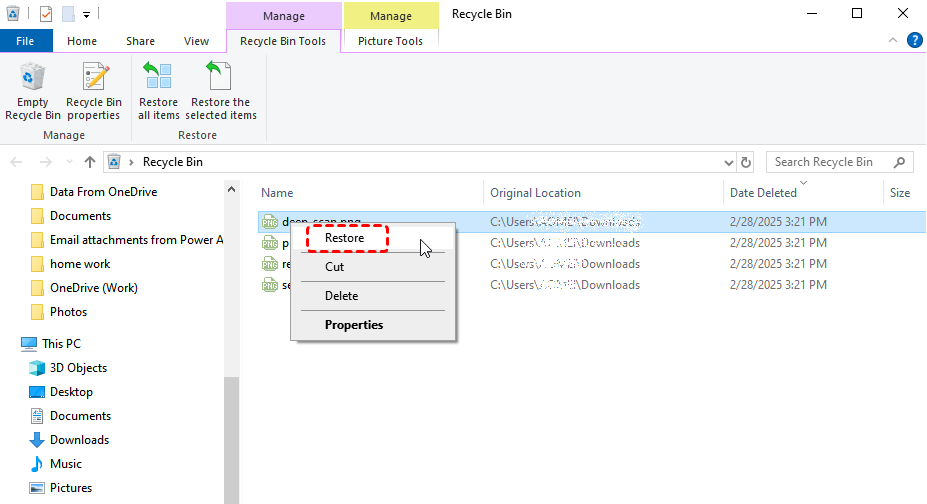
Method 1. Check the Recycle Bin
This is the first and easiest method to recover lost files on computers. The Recycle Bin is a tool built into every computer including ASUS laptop, giving users a chance to reverse deletion of accidentally deleted files. Deleted files on Windows are usually moved to the Recycle Bin unless they were permanently deleted. You can restore them from the Recycle Bin to their original location.
Step 1. Double click on the Recycle Bin icon and open it.
Step 2. Browse through the deleted items and look for the files you wish to recover.
Step 3. Right click on them and choose "Restore" to return them.
If the deleted files aren’t in the Recycle Bin, it may be because they’ve been permanently deleted. Before using a professional data recovery tool, you can check if any backups are available.
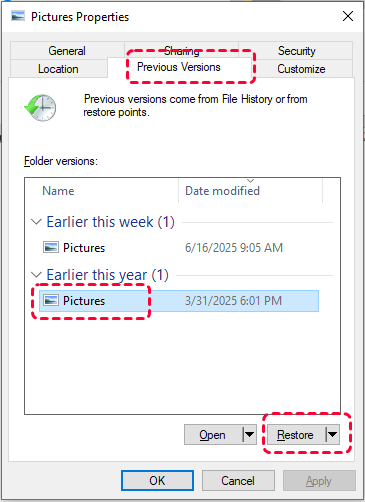
Method 2. Restore Previous Versions
If you’ve accidentally deleted or replaced a file, Windows’ Previous Versions feature may save you. This feature uses File History or Shadow Copies to keep earlier versions of your data. If you have enabled File History on your ASUS laptop before the loss occurred, you can restore the file or folder to previous versions.
Step 1. Navigate to the target file or folder in File Explorer.
Step 2. Right click on it and choose "Restore previous versions" from the context menu. A list of versions will be displayed.
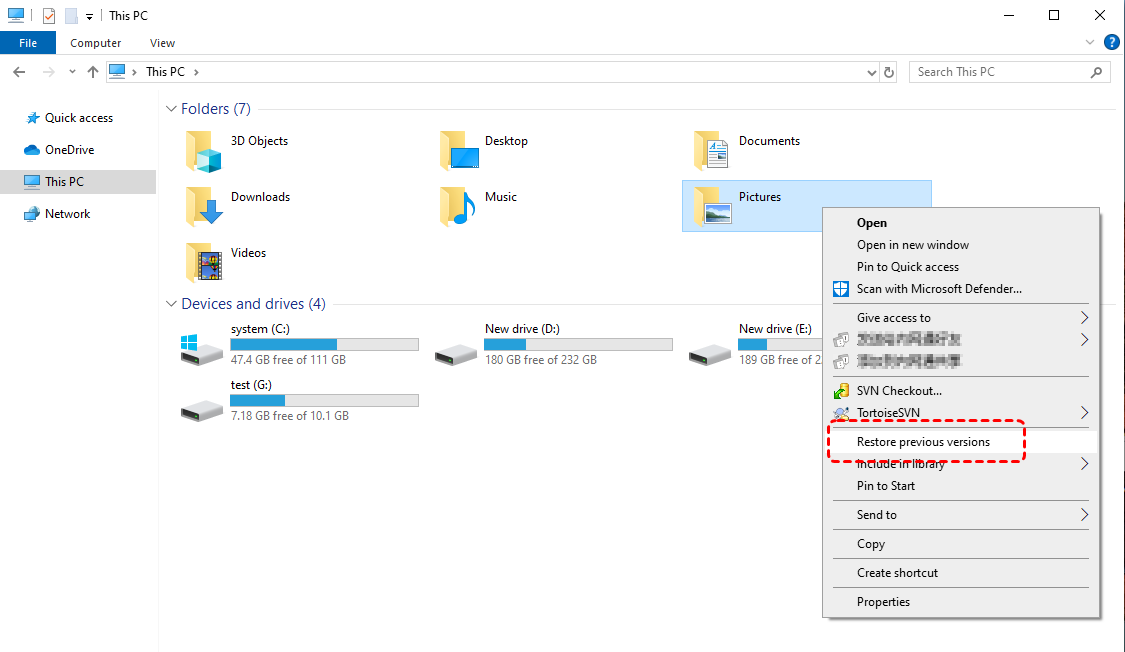
Step 3. Select a desired version and click "Restore" to recover it.
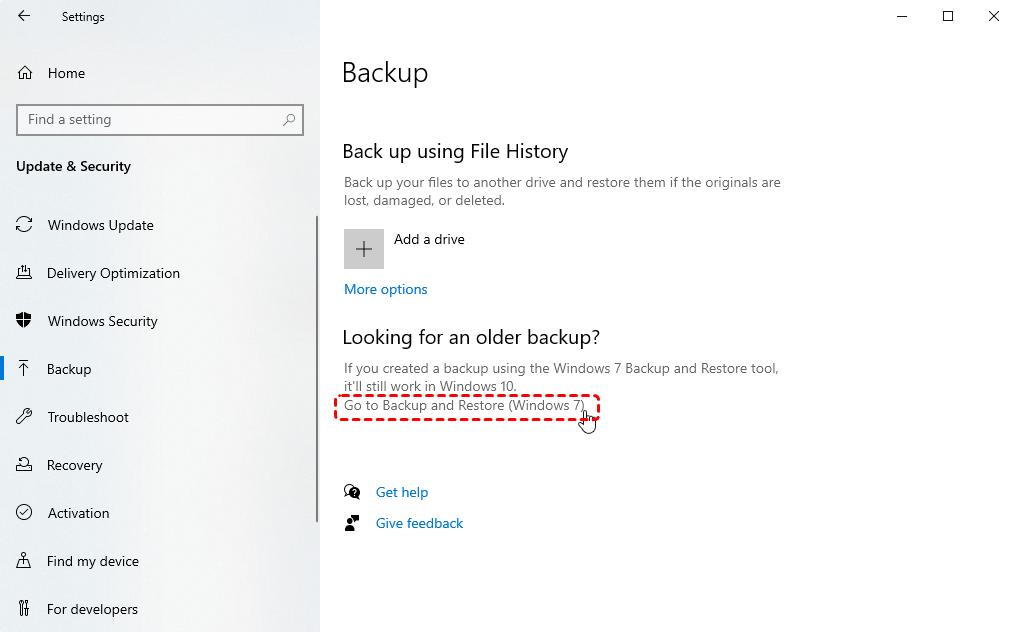
Method 3. Recover from Backup and Restore (Windows 7)
Windows’ built-in Backup and Restore utility (originally from Windows 7) still exists in modern versions of Windows 10 and 11. If you’ve ever backed up your data using this tool, the created backups allow you to recover lost data.
Step 1. Open "Backup Settings" and click "Go to Backup and Restore (Windows 7)".
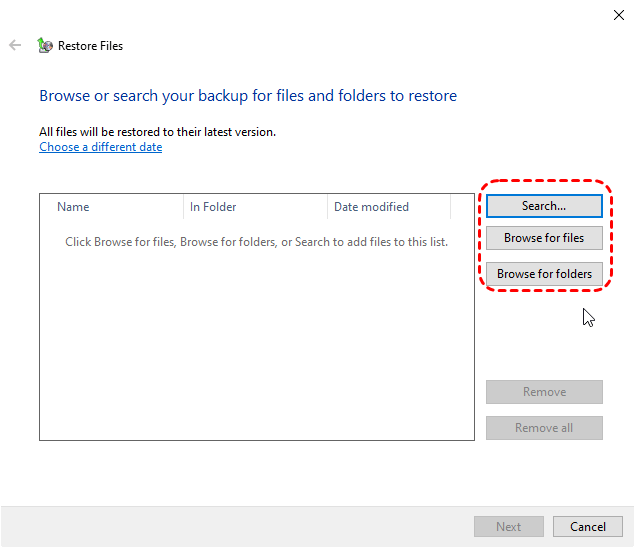
Step 2. Click "Restore my files" and choose files you wish to recover by clicking "Browse for files/folders".
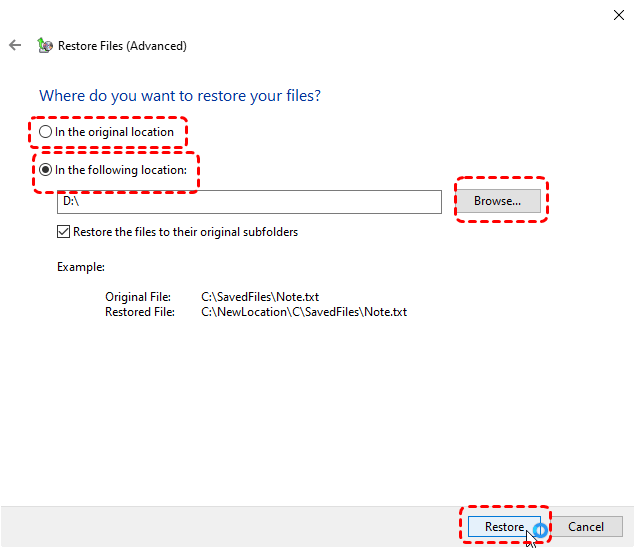
Step 3. Choose a location to save the recovered files and click "Restore" to start the process.
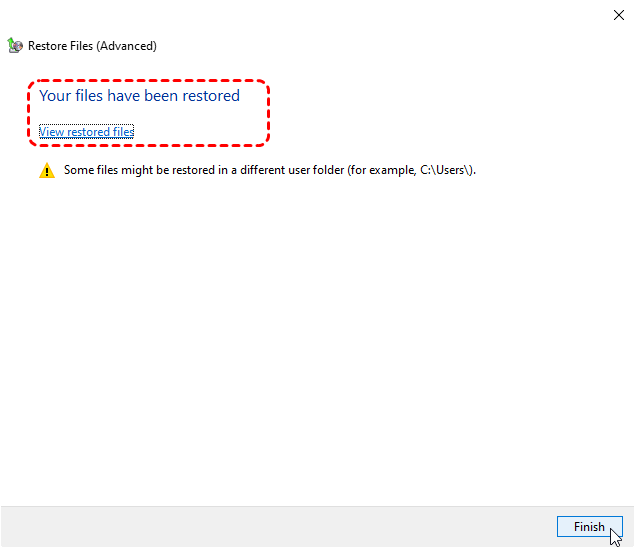
Wait for the process to complete, you'll see the message "Your files have been restored". Then you can check the recovered files by clicking on "View restored files".
Method 4. Restore with Windows File Recovery
If you didn’t create a backup previously, don’t worry, other options can still help. For files permanently deleted from your ASUS laptop, Microsoft provides a command-line data recovery tool—Windows File Recovery. It can restore deleted documents, photos, videos, and more, though it’s a bit technical and may not cover all data loss scenarios.
Step 1. Download and install Windows File Recovery on your ASUS laptop from Microsoft official channel.
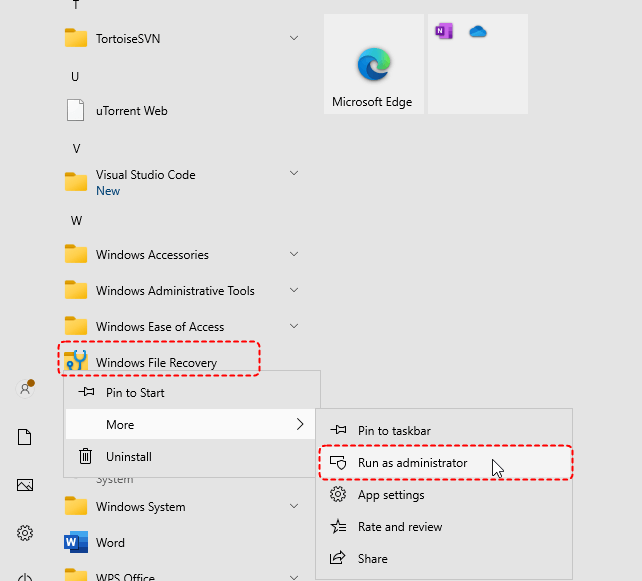
Step 2. Locate Windows File Recovery in the Start menu and right click on it, then choose "Run as administrator".
Step 3. Enter the following command "winfr F: E: /regular" and press "Enter" key. Replace the drive letters "F" and "E" with your actual drive letters.
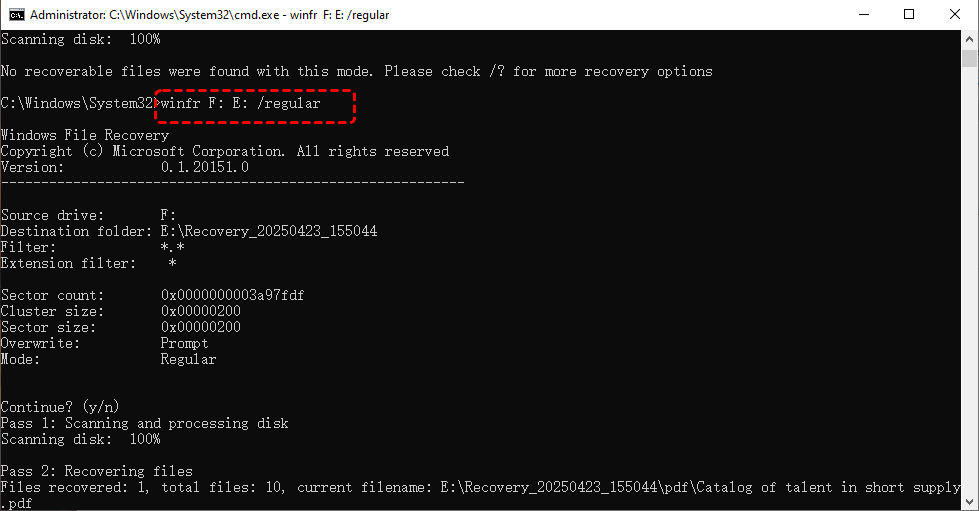
- ★Tips:
- F: the source drive letter.
- E: the destination drive letter.
- /regular: the scan mode. If your files were deleted a long time ago, switching to "extensive" mode may help you find more files.
When the process is finished, you can press "y" to check the recovered files in the destination folder path.
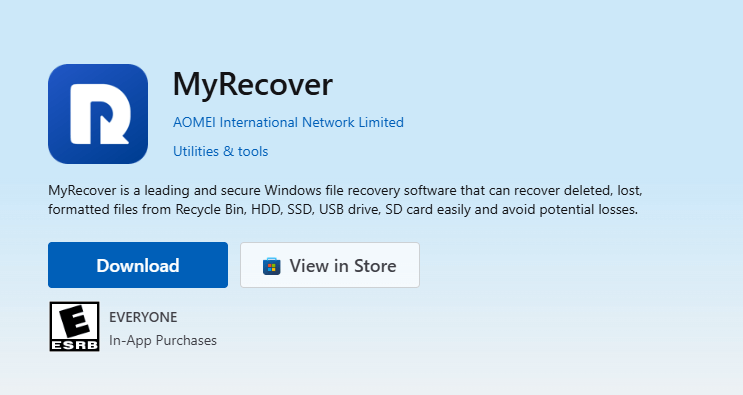
Method 5. Recover Data from ASUS Laptop via MyRecover
When the above manual methods fail, the professional data recovery tool like MyRecover is the most efficient way to perform ASUS laptop data recovery. It doesn’t require advance backups or learning complex command lines, and its intuitive interface allows users of all levels to easily complete data recovery. Additionally, MyRecover supports over 500 Windows data loss scenarios, such as recovering data from formatted HDDs, RAW partitions, deleted drives, and more.

- Intuitive interface requiring no technical expertise.
- Faster scanning compared to command-line tools.
- Higher success rate for permanently deleted files.
- Compatible with all Windows operating systems.
- Work on HDD, SSD, USB flash drive, memory card, etc.
Step 1. Download and install MyRecover on your ASUS laptop from Microsoft Store, avoid installing it on the drive where the lost files were stored.
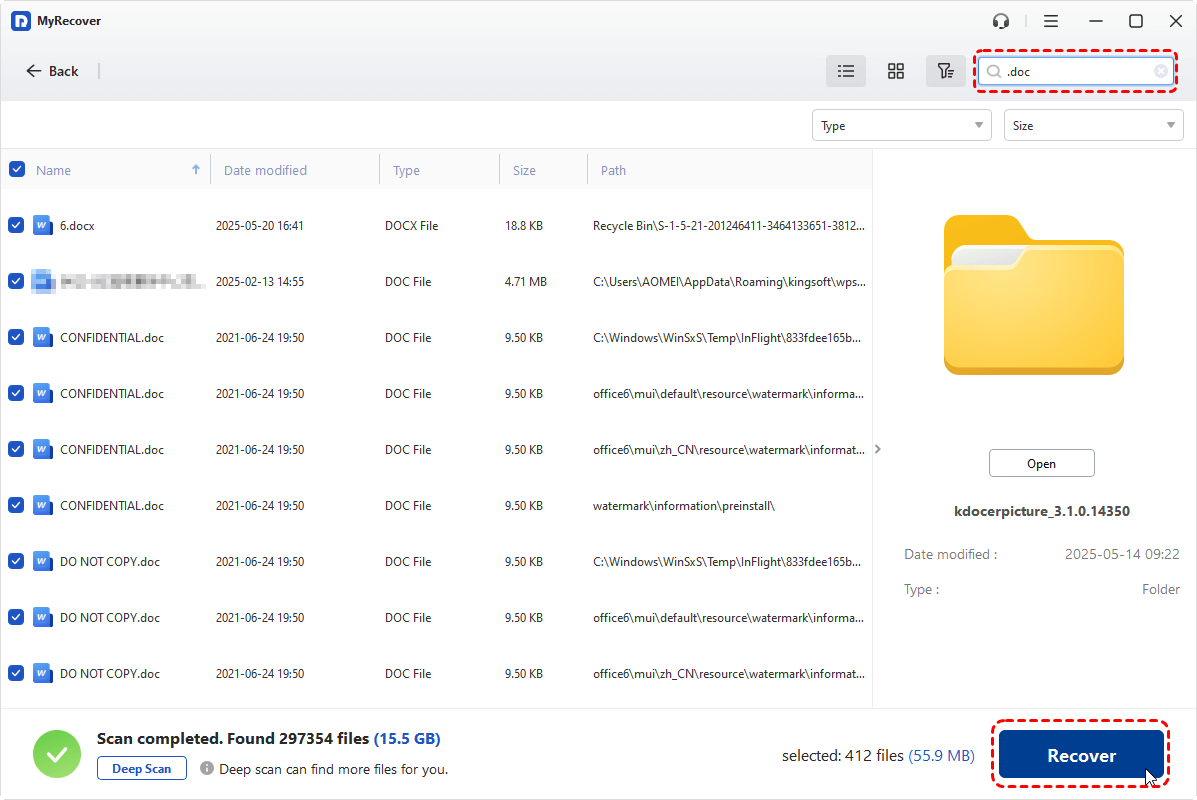
Step 2. Run the program and select the drive or folder including lost data to scan, then click "Scan".

Step 3. Choose the files you would like to recover from the recoverable lists and click "Recover".
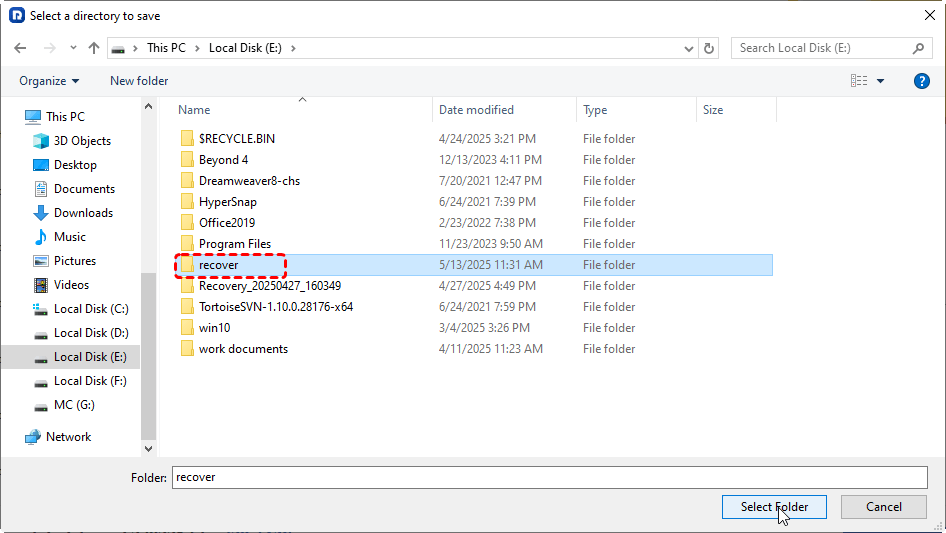
Step 4. Select a location to save the recovered files.
-
Do not save the recovered files to the original drive to avoid data overwriting.
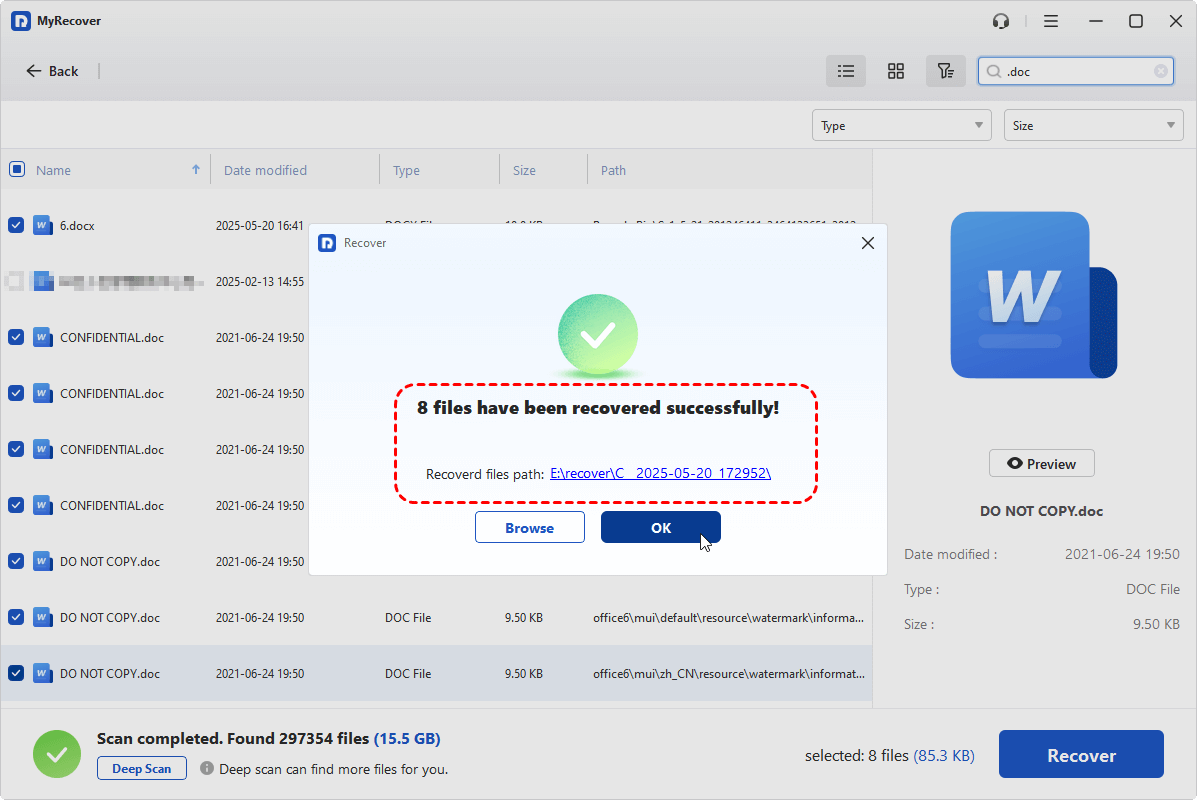
Once completion of the recovery process, the message "Files have been recovered successfully" will pop up. Then you can check the recovered files by click on the destination folder path or "Browse" button.
Method 6. Contact Recovery Service
If your ASUS laptop suffers from severe physical damage, firmware failure, or SSD controller issues, software recovery might not be enough. In such cases, contacting a professional data recovery lab is your best option. Technicians use specialized cleanroom environments and NAND chip readers to safely extract data from severely damaged drives.
How to Prevent Data Loss on ASUS Laptop
While data recovery software is powerful, it isn’t a panacea. After ensuring data security, the more important thing is to prevent future data loss on your ASUS laptop. Here are some essential tips:
- Enable File History or OneDrive backup to keep real-time copies of your files.
- Create regular system backups using Windows Backup or third-party tools.
- Avoid forced shutdowns or unplugging the laptop during updates.
- Install antivirus software and keep it updated.
- Use SSD health monitoring tools to check drive condition periodically.
The End
Losing important files on your ASUS laptop can feel like a nightmare, but recovery is often within reach. From simple Recycle Bin restores to advanced solutions like MyRecover, there’s always a way to get your data back.
For professionals, students, or businesses managing large volumes of data, the MyRecover Professional Edition offers unlimited recovery and file preview function, ensuring no file ever stays lost. So, ASUS data recovery doesn’t have to be complicated, with the right tools, your data is always just a few clicks away.


Stay Updated With Our
Latest Tips
Add us as a preferred source on Google to never miss helpful guides.