
How to Recover Data from HP Recovery Partition | Step-by-Step Guide
The HP Recovery Partition is a hidden partition pre-installed on HP computers, primarily used for system recovery and troubleshooting. This guide provides a detailed explanation of HP recovery partition and demonstrates how to recover data from HP recovery partition.
By Aria / Updated on December 16, 2025
What is the HP Recovery Partition?
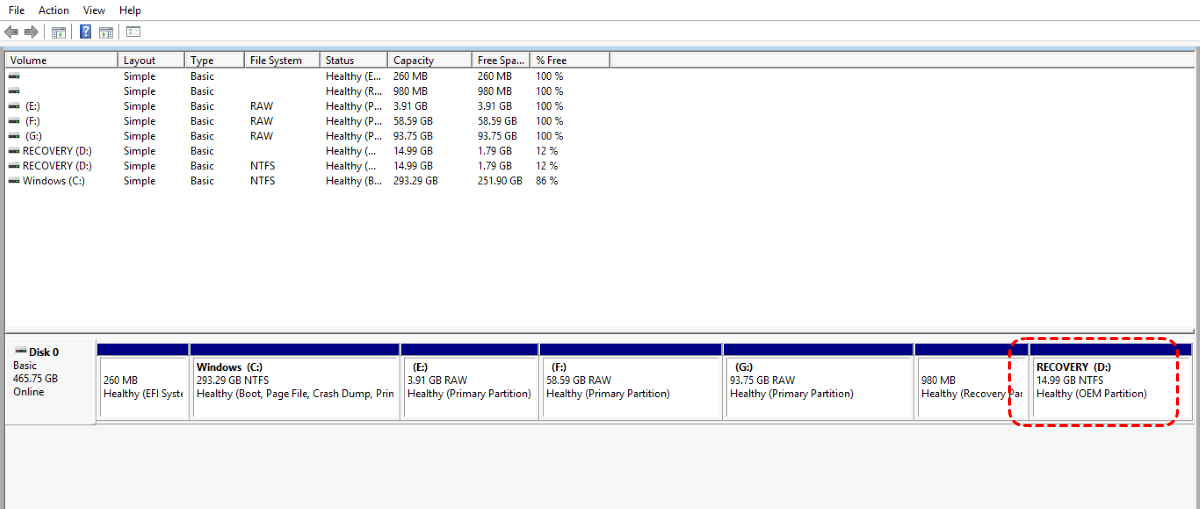
The HP recovery partition is a small-sized partition, typically ranging from 10-20GB. It may show as "OEM Partition" or "Recovery Partition" in Disk Management. It is a hidden section of your HP laptop or desktop’s hard drive (or SSD) that contains all the necessary files to restore your computer to its original factory state or a previous point in time.
HP recovery partition is pre-installed by HP to allow users to reinstall the operating system, drivers, and preloaded software without needing external discs or USB drives. You can access this partition to perform a system recovery, which will essentially wipe your hard drive and reinstall the original software. Here are the key features of the HP Recovery Partition that every user should know.
- Contains Factory Default System Files: It has a full copy of the original Windows OS, preinstalled drivers, software and utilities, etc.
- Used for System Recovery: HP recovery partition allows you to reset your PC if Windows crashes or becomes corrupted, to remove malware by restoring a clean OS or to wipe all personal data.
- Accessed via HP Recovery Manager: HP provides a built-in tool called "HP Recovery Manager" to reinstall Windows, create recovery USB drives, perform system backups.
- Hidden and Protected by Default: It doesn’t appear in File Explorer to prevent accidental deletion, but Visible in Disk Management as "RECOVERY" or "HP_RECOVERY".
How to Recover Data from HP Recovery Partition
As previously mentioned, the HP recovery partition is designed for system recovery not file recovery, so it cannot directly restore users' personal data such as documents, pictures, videos, etc. These personal files will be erased during the recovery procedure, ensuring that only the factory-default settings and applications remain on the restored system.
![]()
It's essential to note that if there are personal files on the device, you must back them up prior to perform the system recovery procedure. Additionally, you can choose to back up personal files during the recovery process, as the HP Recovery Manager will prompt you to back up personal files before the official system recovery process begins.
Solution 1. Launch HP Recovery Manager
HP Recovery Manager is a Windows software program designed for HP consumers. It provides a recovery environment so that we can restore system to an original state. Windows Recovery Environment in HP Recovery Manager serves as a critical troubleshooting and system restoration tool, specifically designed to repair or reset your HP computer. You can use it to recover system data from HP recovery partition.
Recovery Preparation
-
Prepare a USB flash drive or other external hard drive to back up the files you want to keep on the hard drive.
-
Turn off your computer and remove all of the peripheral device and cables that are attached to your computer (except the necessary keyboard, mouse, monitor, and power cord).
-
Launch HP Recovery Manager
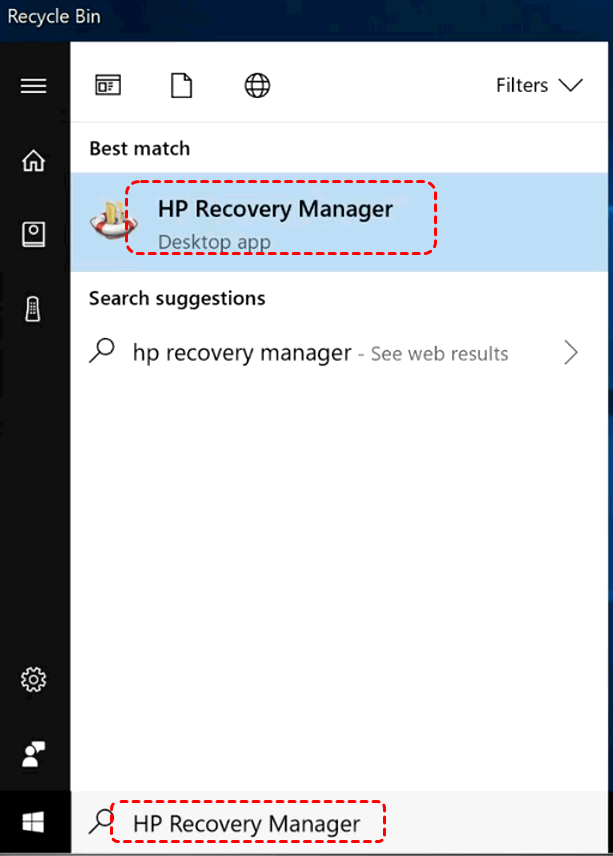
Step1. Turn on your computer and enter "HP Recovery Manager" in the start button to open it.
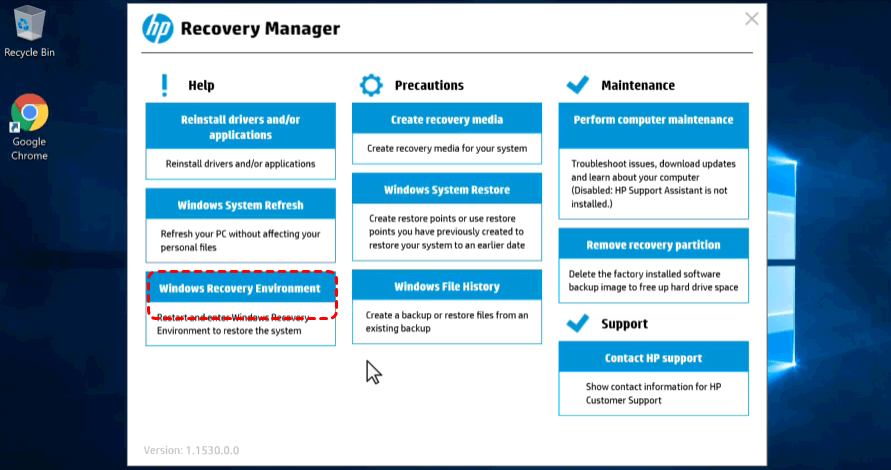
Step 2. Select "Windows Recovery Environment", and click "OK" to restart computer and enter the recovery environment.
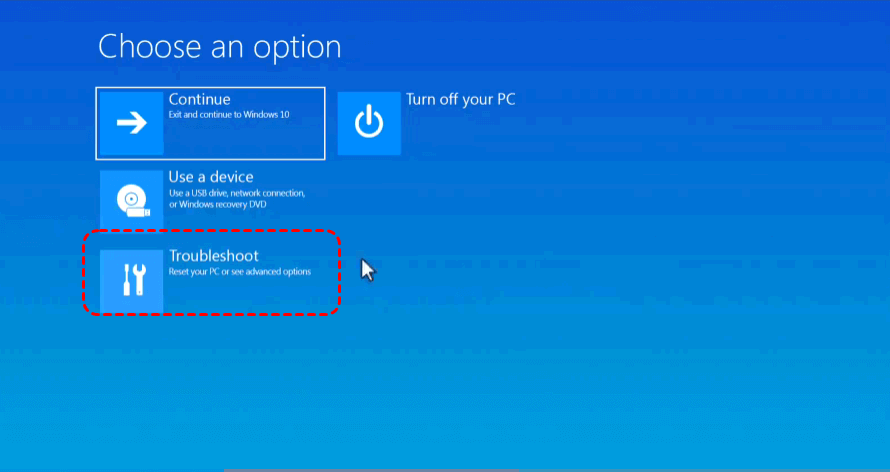
Step 3. Choose "Troubleshoot" and then select "Recovery Manager".
Step 4. Choose "Backup your files first" and then select "Auto selection" or "user selection" according you needs.
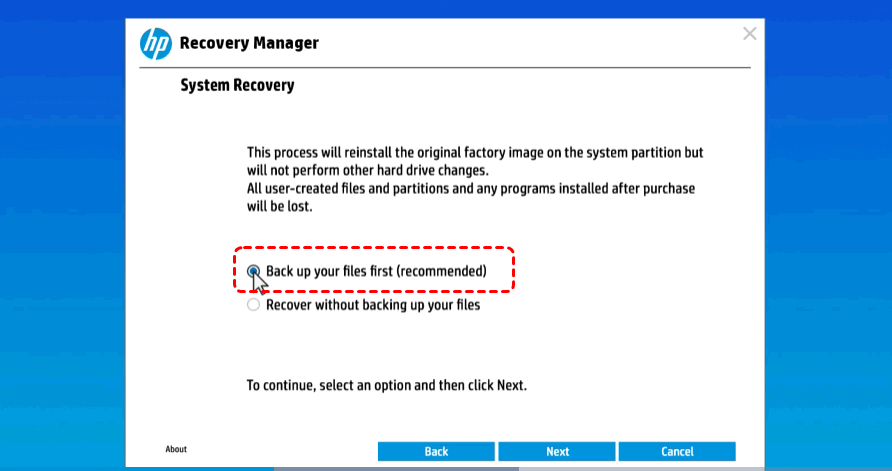
If you don't back up your files first, they will be permanently deleted by the recovery process.
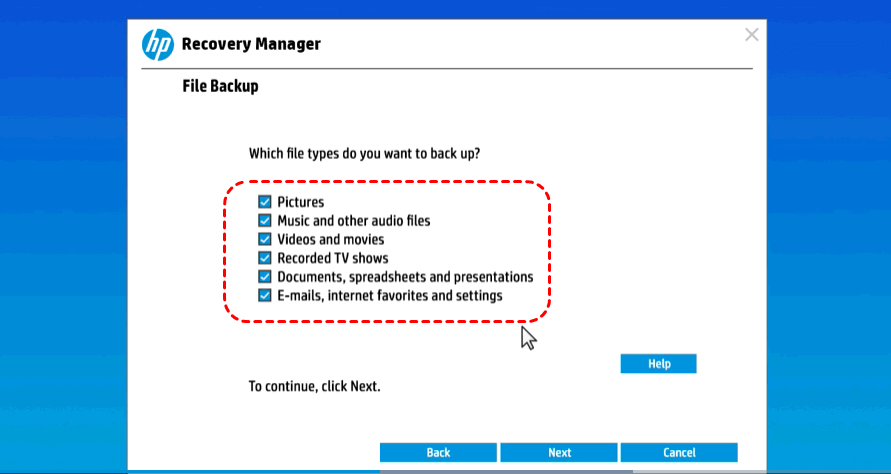
Step 5. Select the types of files to back up. When recovery manager prompts you to choose the destination drive to save the backup, insert the prepared USB drive or external drive into computer.
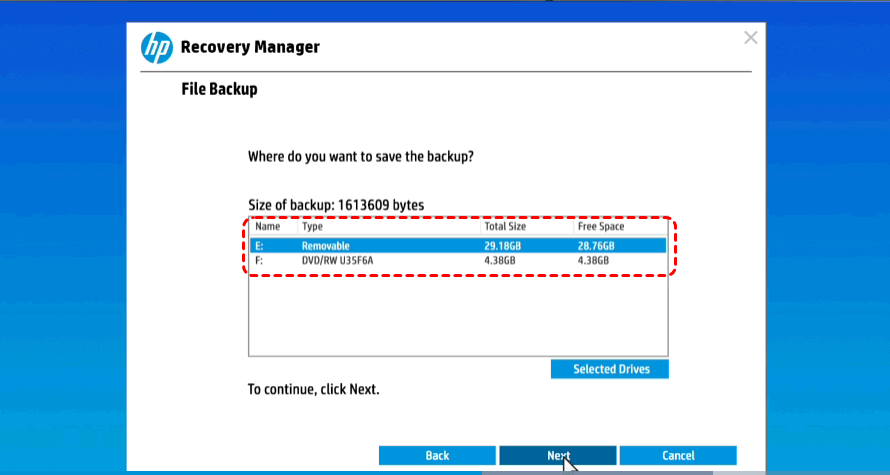
Step 6. Select the USB drive to save your files and click "Next" to create backup to the USB.
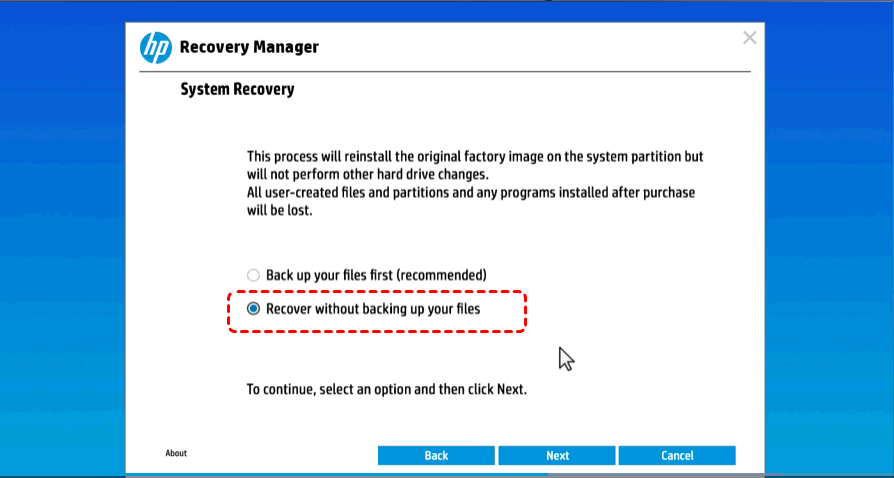
Step 7. Once the process finished, disconnect the backup drive from the computer. Then click "recovery without backing up your files". Recovery manager will clean all files on the hard drive.
Recover Installation
Step 1. When the recovery preparation is completed, click "continue" to restore computer to factory state. With the process completed, the computer restarts.
Step 2. Follow the prompts on the screen to set up your computer. Then you can connect the removed drives or cables.
Step 3. Now you can connect internet, update windows, install other applications and copy the backup files to safe location.
Solution 2. Use HP Cloud Recovery Tool (Unbootable Computer)
If your computer cannot boot up successfully and you lose the access to HP recovery manager, you can turn to the HP Cloud Recovery Tool. It allows users to download and create a recovery USB drive for their HP consumer PCs, enabling them to restore their computer to its factory-fresh state. When the built-in HP recovery partition on the computer is deleted or damaged, you can use it to create a USB recovery drive to recover from unbootable computer.
Step 1. Before the recovery, you should prepare a supported computer with active internet connection, a power cable for the computer, a blank USB drive at least 32 GB, at least 20 GB of free space on windows partition and the second USB drive with NTFS file system for back up (optional).
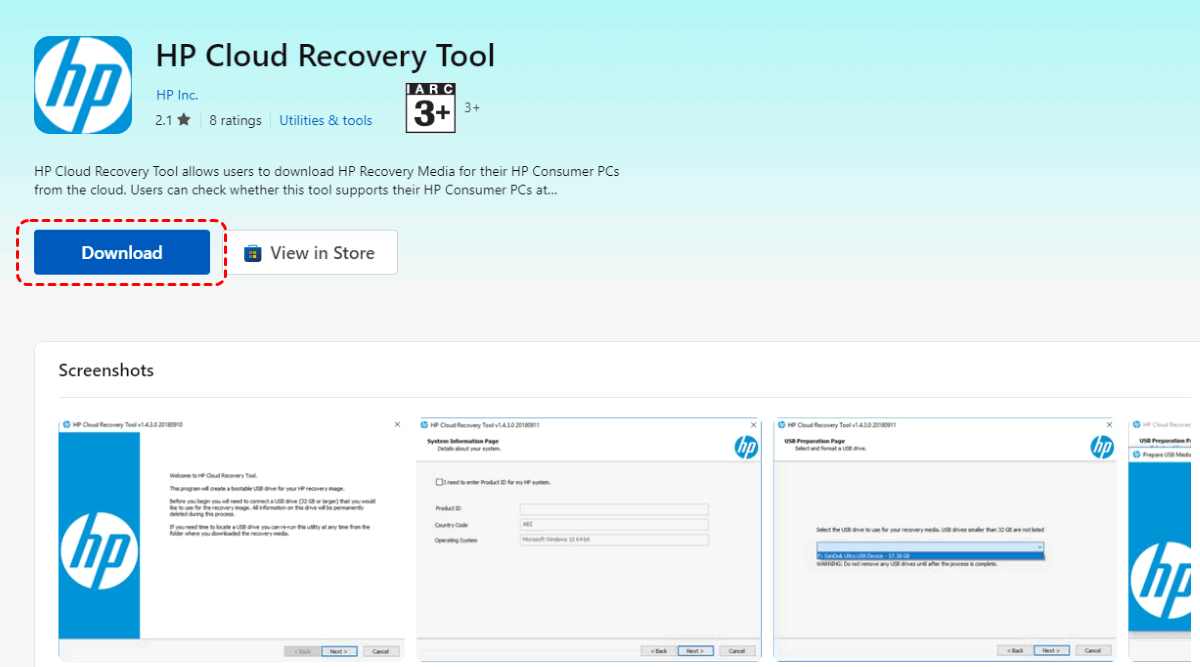
Step 2. Download and install HP cloud recovery tool from official channel on the prepared computer with internet access.
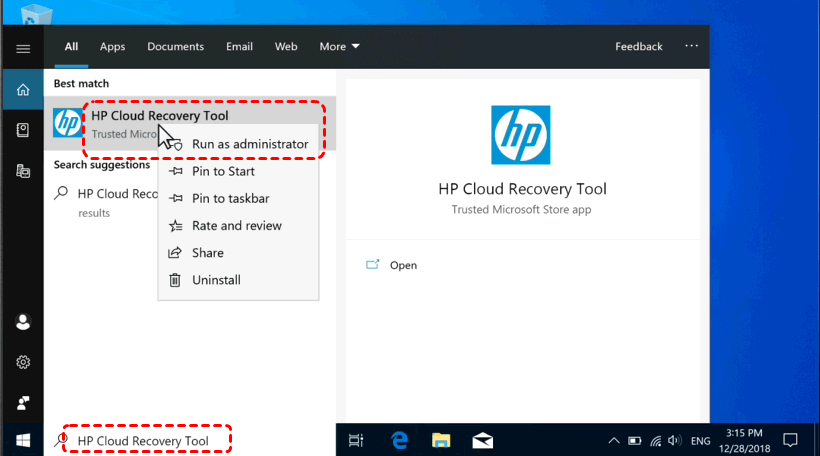
Step 3. Insert the blank USB into the computer, and then type "HP Cloud Recovery Tool" in the start menu to open it and run it as administrator.
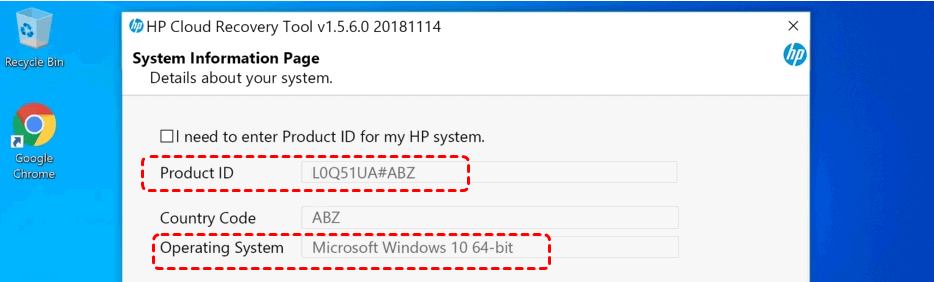
Step 4. HP cloud recovery tool will detect the product ID for your computer and populates the system information page.
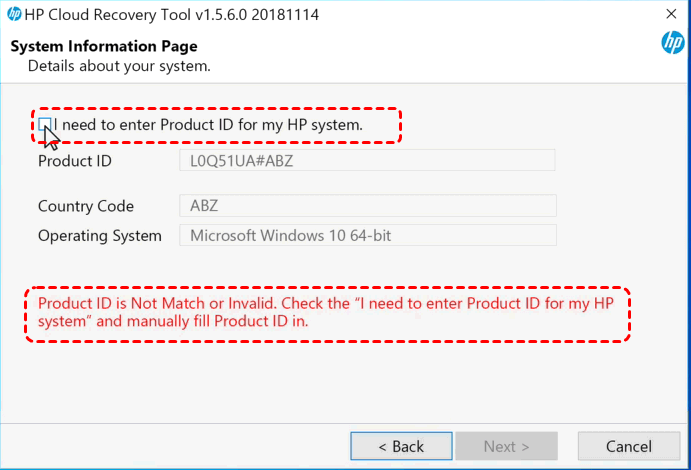
- ★Tips:
- If the message "Product ID is not match or invalid" shows on the screen, you can check the "I need to enter product ID for my HP system" option and manually fill the product information in.
Step 5. Choose the inserted USB drive as the recovery media. When the USB is partitioned, the recovery software downloads and installs on the USB drive. While the drive setup completed, you can boot your system from the USB drive.
Step 6. Disconnect all peripheral device from the crashed computer, insert the USB recovery drive into the computer and turn it on.
Step 7. Press "Escape" key repeatedly until the startup menu opens, press F9 to select boot device options.
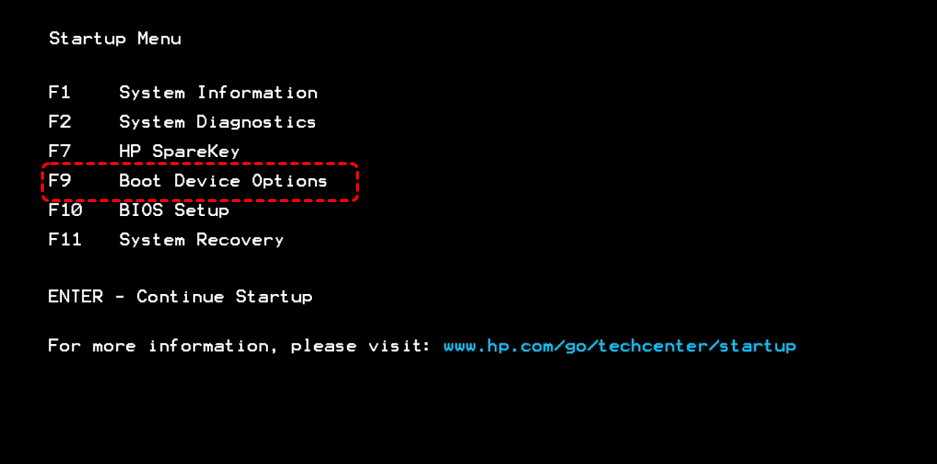
Step 8. Press down arrow key to select the USB recovery drive, then press "Enter".

Subsequently, you can restore system data from the USB recovery drive following the solution 1.
Further Reading: Recover Personal Data After Factory Reset
After completing the factory reset, your computer will have a brand-new system. Although the HP recovery partition can reinstall the system, those fragmented personal files may be lost accordingly. MyRecover brings a glimmer of hope. It is a professional file recovery software that is easy to operate and friendly to beginners. You can use it to recover lost personal data.
Step 1. Download and install MyRecover on your computer (avoid installing on the drive with lost data).
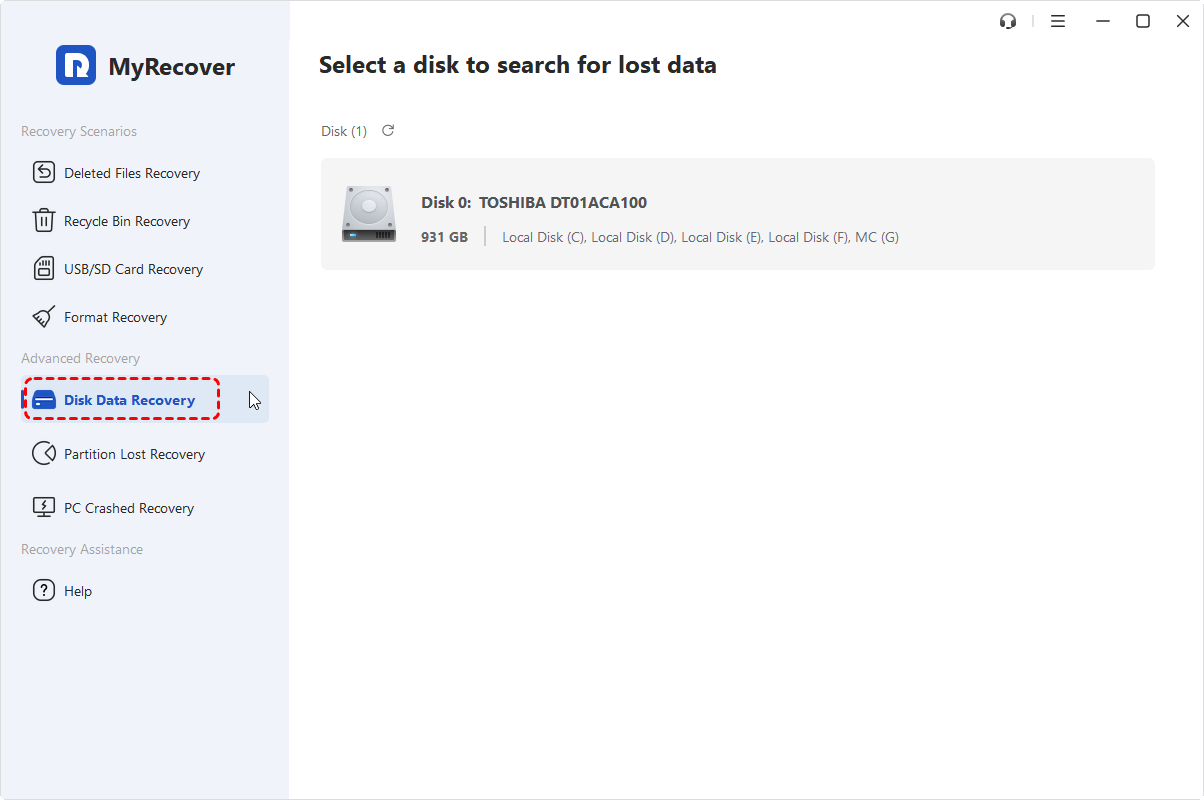
Step 2. Select a drive or disk to scan for lost data (take C drive as example).

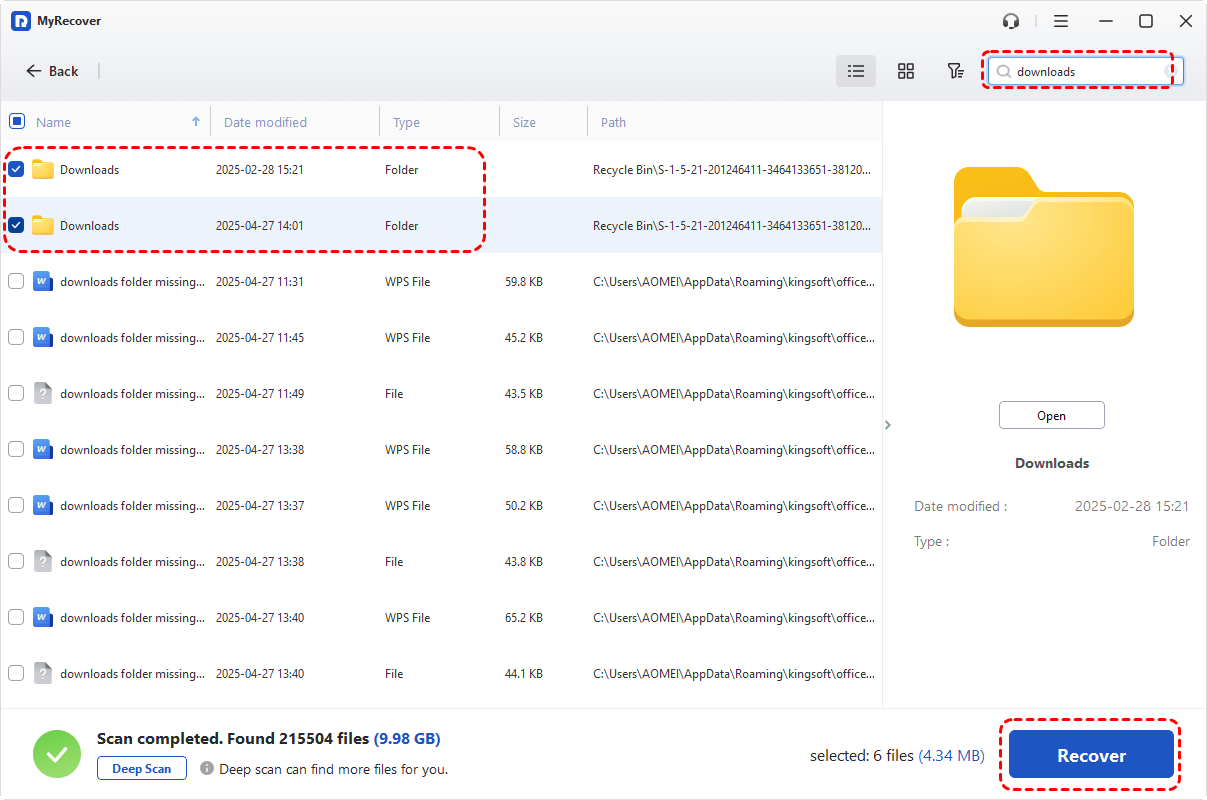
Step 3. Select the files you want to recover from the recoverable lists and click "recover".
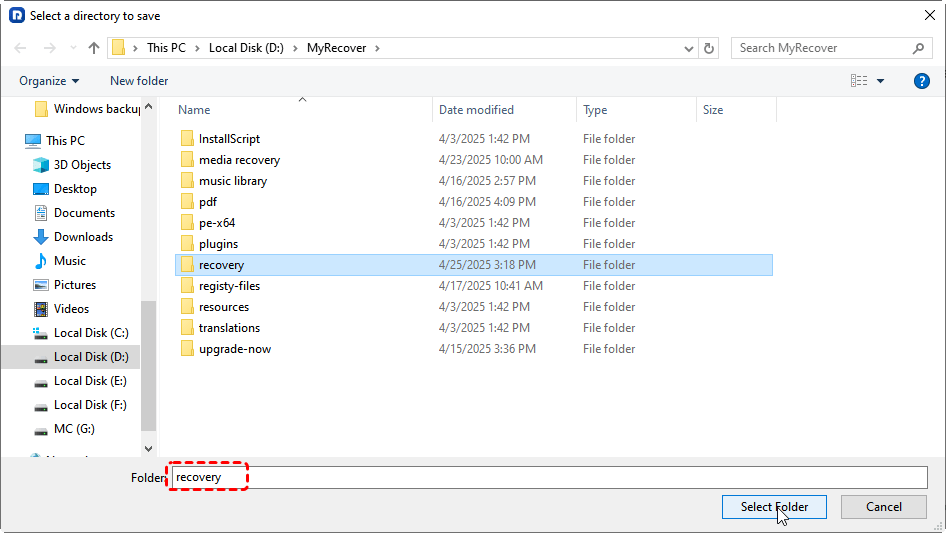
Step 4. Select a different drive to store the recovered files.
Conclusion
By now, you should already understand how to recover data from HP recovery partition the factory settings. Although the system reinstallation function of HP recovery partition is very powerful, it becomes powerless when facing personal data loss. As a data recovery software, MyRecover supports file recovery from various complex scenarios, such as partition loss, drive formatting, system crashes, etc. Additionally, the Professional and Technician versions of MyRecover also allow users to preview file contents before recovery.


Stay Updated With Our
Latest Tips
Add us as a preferred source on Google to never miss helpful guides.