
How to Access Recently Deleted Files on Windows 10/11: 6 Easy Methods
If you’re looking for a way to access recently deleted files on Windows, this article will meet your needs. Whether files were deleted by mistake or lost due to system crashes, you’ll learn simple yet effective solutions to recover your precious data and avoid future losses in this guide.
By Aria / Updated on September 29, 2025
Where the Deleted Files Go on Windows
When files are deleted on Windows, whether it's by accident or intentional, many users wonder where these files go and where to find these deleted files. Understanding the deletion process is essential for quickly retrieving important data that seems to have disappeared.

Under normal circumstances, users mainly use two methods to delete files on Windows: "Delete" and "Shift + Delete". These two different methods also result in the deleted files going to different locations.
💡Delete: Whether you use the "Delete" key or right-click to select "Delete", the deleted files won’t be removed immediately. Instead, they’ll be moved to the Recycle Bin.
💡"Shift + Delete": Files deleted using this method will be permanently removed and won’t show up in the Recycle Bin.
When a file is deleted, it's not actually removed from your hard drive immediately. Instead, it is simply marked as "deleted" in the system's file index, which makes it invisible to you, but the actual data still resides on your hard drive. The space occupied by these deleted files is eventually overwritten by new data. This means that if you act quickly, there's a good chance you can recover your deleted files.
How to Access Recently Deleted Files on Windows
There are several built-in tools in Windows that can help you access recently deleted files or recover data that has been accidentally deleted. Let’s explore these options.
Method 1. "Ctrl + Z" Undo Deletion
If you only accidentally deleted (not permanently deleted) a file from your desktop or a folder on Windows, the easiest way to undo the deletion is to press "Ctrl + Z" before performing any other actions. This method won’t work if you carry out other operations before undoing the deletion.

Method 2. Check the Recycle Bin
As mentioned above, the Recycle Bin is the most common place for deleted files to go before being permanently erased from your system. If you’ve deleted a file, it's likely still sitting there unless the Recycle Bin has been emptied.
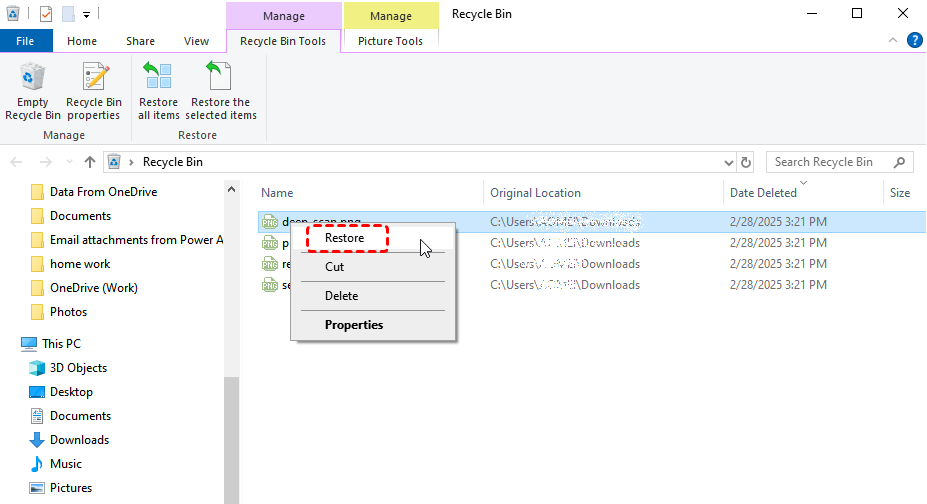
Step 1. Double click the Recycle Bin icon on your desktop to open it.
Step 2. Browse through the deleted items and access the files you wish to recover.
Step 3. Right click on it and choose "Restore" to return it to its original location.
However, accidents can happen sometimes: you might find that the deleted file isn’t in the Recycle Bin, even if you didn’t use permanent deletion. This could be because the file is too large or was deleted from an external hard drive. In this case, you can also try restoring the file from a backup if one is available.
Method 3. Restore from File History
File History is a Windows feature that automatically saves versions of your files to a backup drive. If File History is enabled on Windows before data loss, you can easily restore older versions of files.
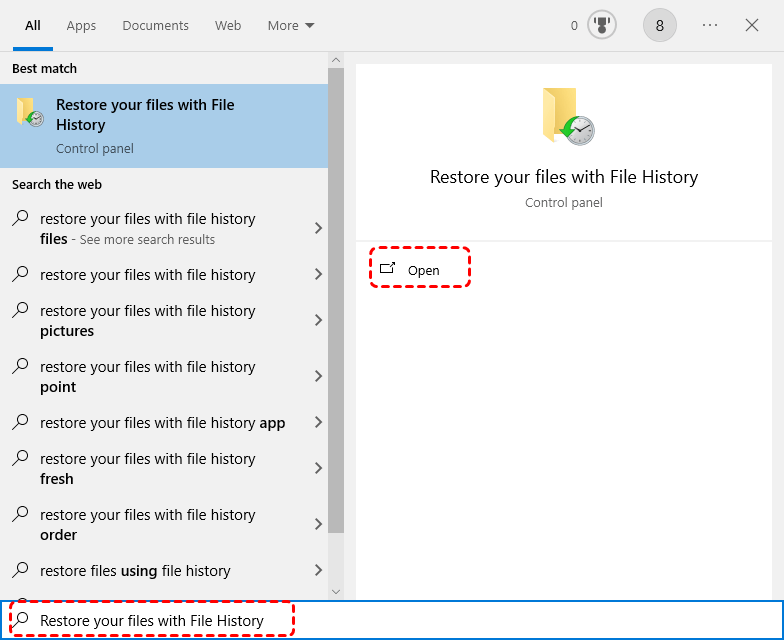
Step 1. Type "Restore your files with File History" in the Start menu and open it.
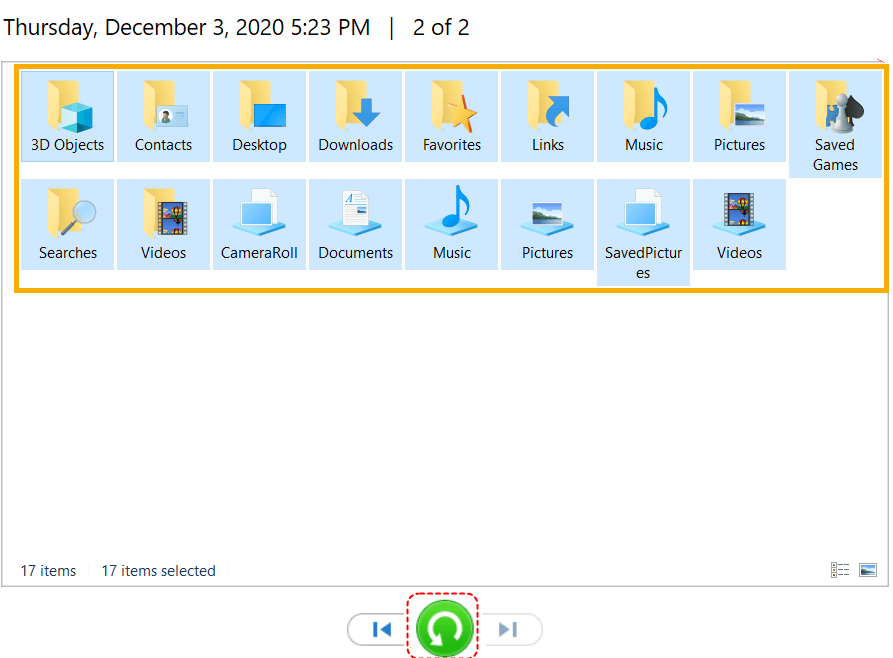
Step 2. Browse through the versions and choose the desired one based on the backup time.
Step 3. Click the green "Restore" button to restore it.
Method 4. Recover from Backup and Restore (Windows 7)
If you have used Backup and Restore in Windows 10/11 which is a feature inherited from Windows 7, you may be able to restore files from a created backup. Here's how:
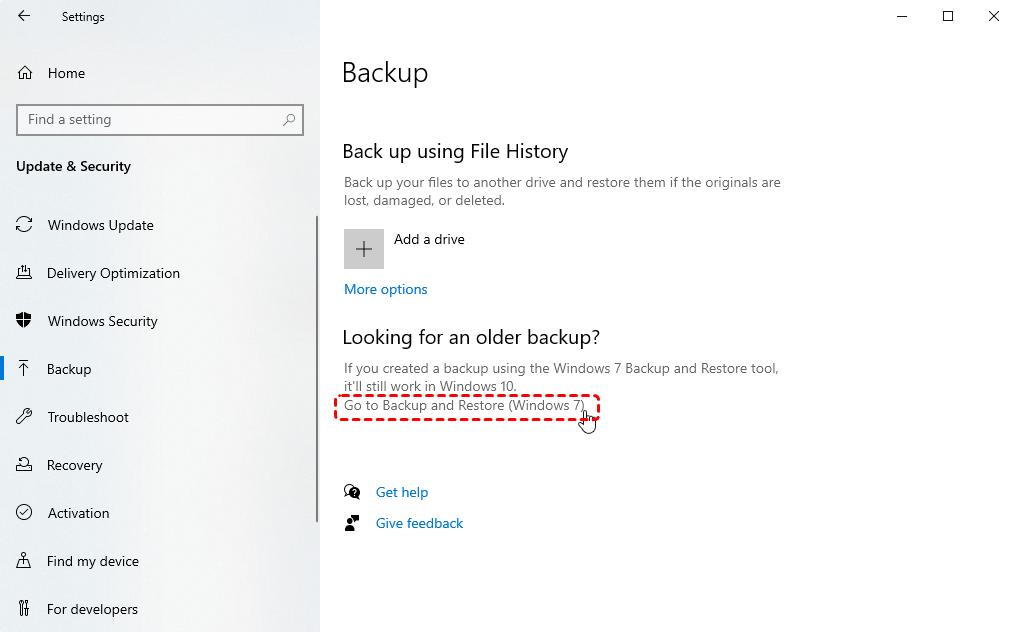
Step 1. Open "Backup Settings" and select "Go to Backup and Restore (Windows 7)".
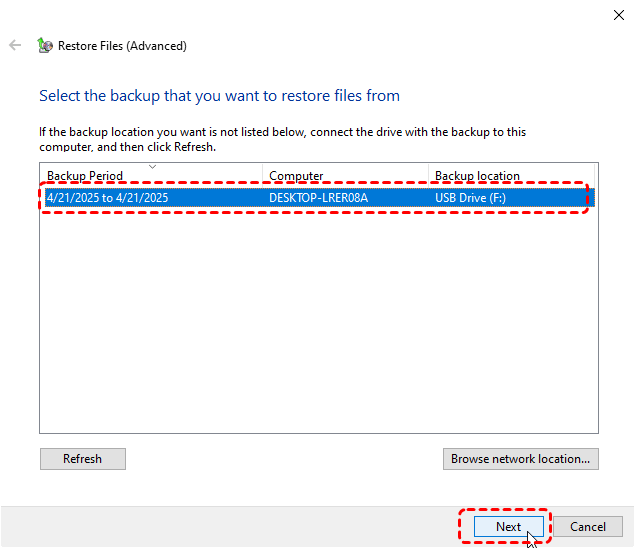
Step 2. Click "Select another backup to restore files from" and choose a created backup to restore files.
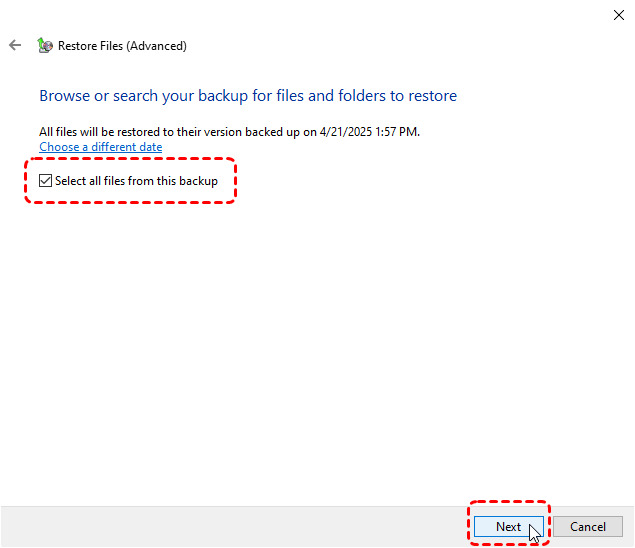
Step 3. Check the "Select all files from this backup" option to recover all files. You can also choose a specific file or folder by clicking on "Browse for files/folders".
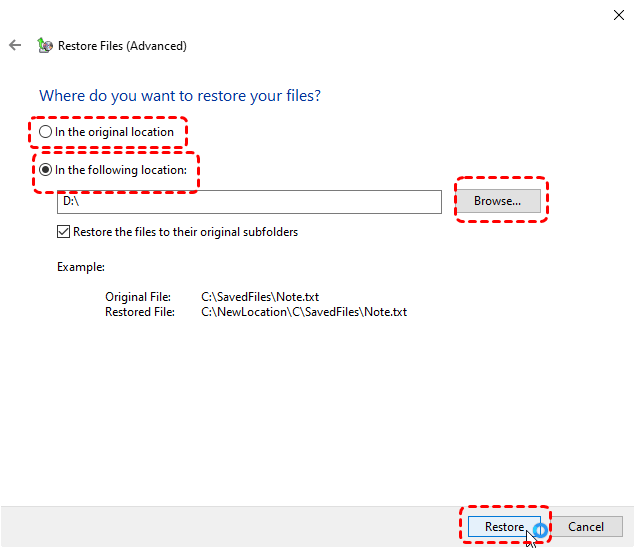
Step 4. Select a destination folder to save the recovered files and click "Restore" to start the process.
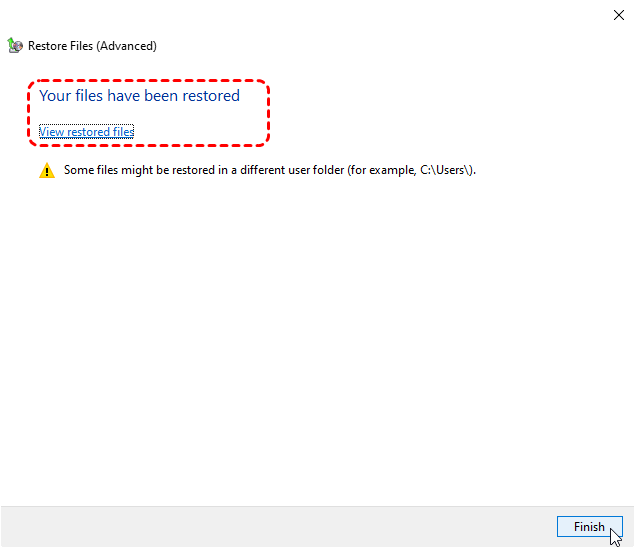
Wait for the process to finish, the message "Your files have been restored" will pop up. You can check the restored files by clicking on "View restored files".
Method 5. Use Windows File Recovery
If the deleted files aren’t in the Recycle Bin and there's no backup available, Windows File Recovery is a tool that can help recover lost files. It's a command-line data recovery tool provided by Microsoft Store and can recover permanently deleted files from local storage devices like USB drives, SD cards, HDDs, etc.
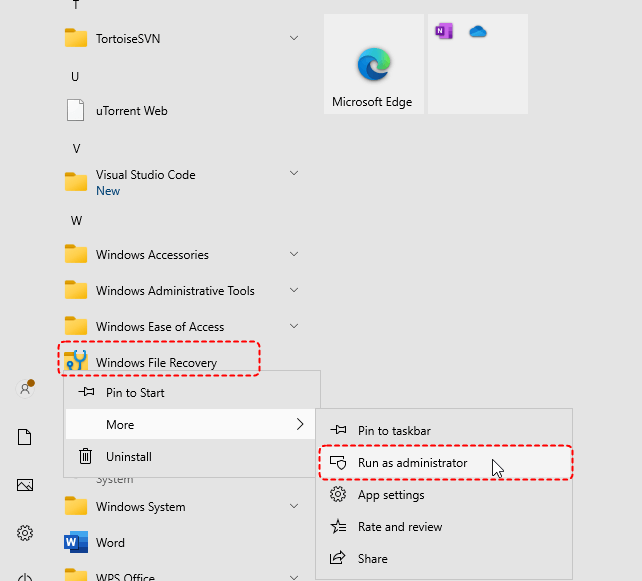
Step 1. Download and install Windows File Recovery on your computer from a Microsoft official channel.

Step 2. Open Windows File Recovery and run it as administrator.
Step 3. Type the following command "winfr F: E: /regular" and press "Enter". Replace the drive letters "F" and "E" with your actual drive letters.
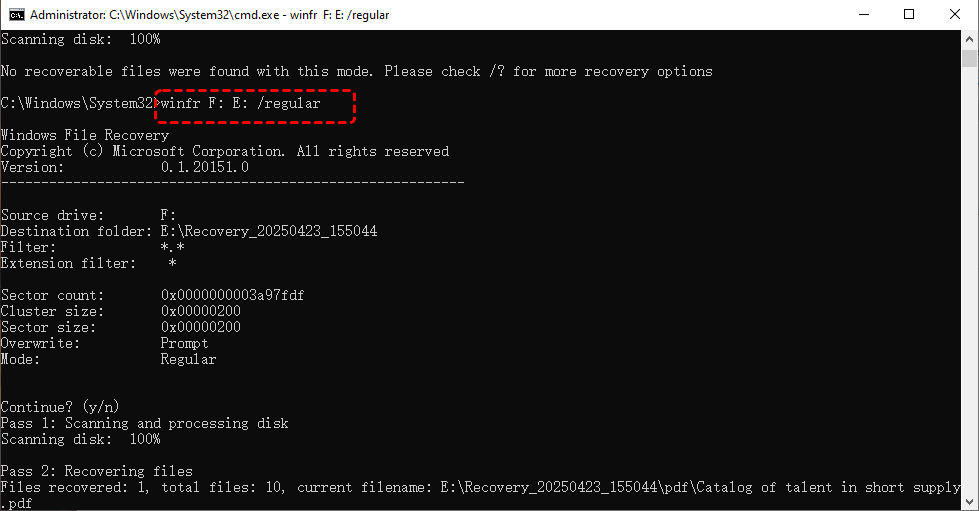
- ★Tips:
- F: the source drive letter.
- E: the destination drive letter.
- /regular: the scan mode. If the file system of the drive is FAT or exFAT, please switch to "extensive" mode.
Once the scan completes, check the recovered files by pressing "y" in the destination folder path.
While Windows File Recovery is effective, it’s often better suited for users who are familiar with command-line operations. For most beginners, a tiny mistake such as missing a space or choosing the wrong scan mode can lead to data recovery failure.
Method 6. Recover Recently Deleted Files with MyRecover
If the built-in tools are unable to recover your deleted files, or if you're looking for a more user-friendly solution, MyRecover is a great alternative. This professional-grade data recovery software is designed to recover deleted files from all types of storage devices, including internal and external drives, SSDs, HDDs and USB drives.
Here’s why MyRecover stands out:
🧿Easy to use: A simple, user-friendly interface that requires no technical expertise.
🧿Advanced recovery algorithms: Capable of recovering deleted files even from a formatted, inaccessible or deleted drive.
🧿Quick & Deep Scanning Modes: MyRecover offers both fast and thorough scanning options to suit your needs.
🧿Supports over 1,000 file types: Including documents, photos, videos, audio, archives, and Outlook data files.
🧿OS Compatibility: Work not only on Windows 11 /10, but also on Windows 8.1/ 8/ 7 and all Servers.
Step 1. Download and install MyRecover on your computer from Microsoft Store, avoid installing it on the drive with lost files.
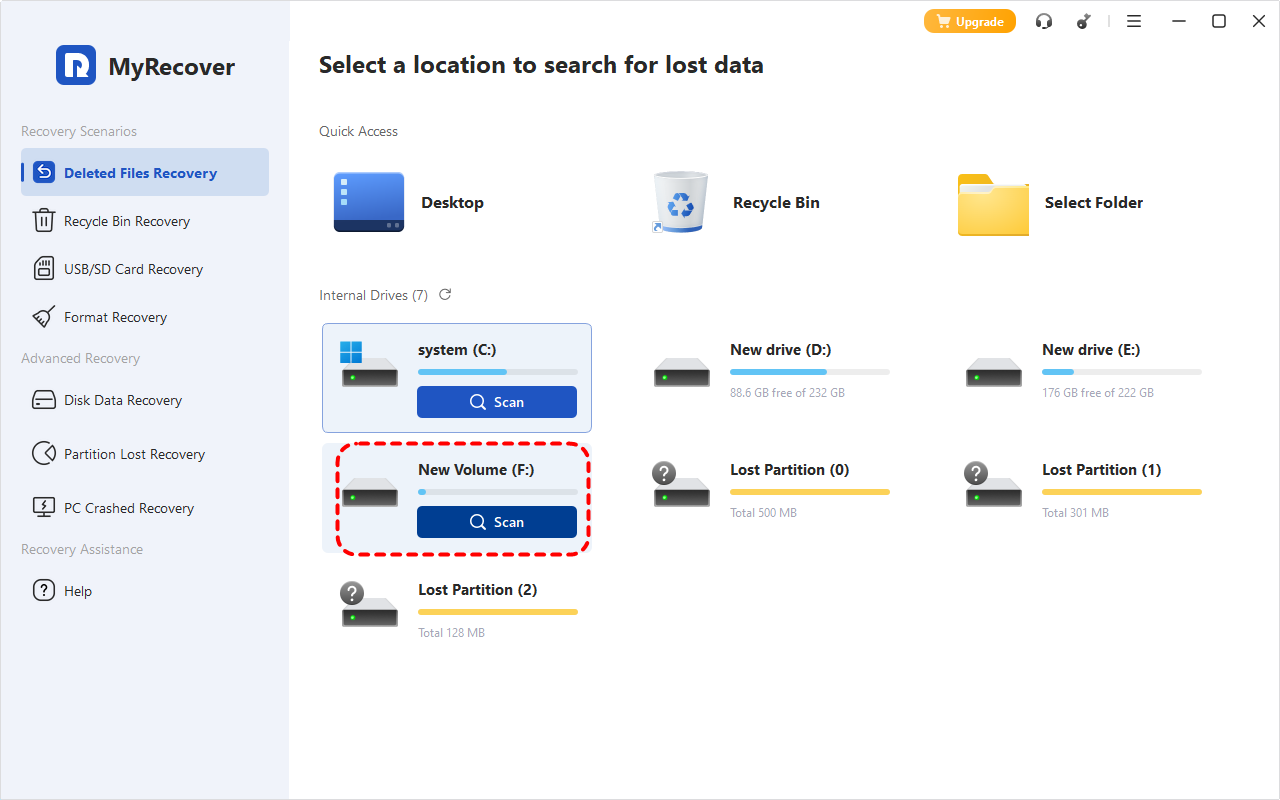
Step 2. Run the program and select the drive where the recently deleted files were stored, then click "Scan".
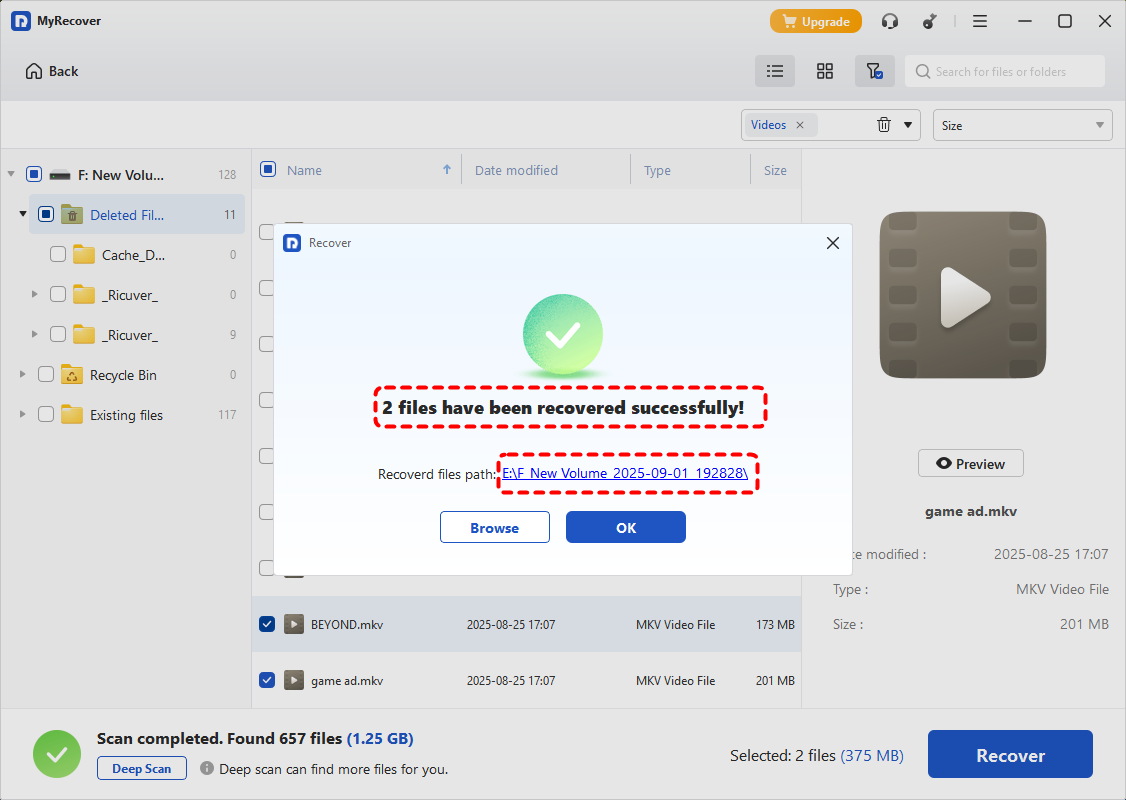
Step 3. Choose the files you would like to recover from the recoverable lists and click "Recover".
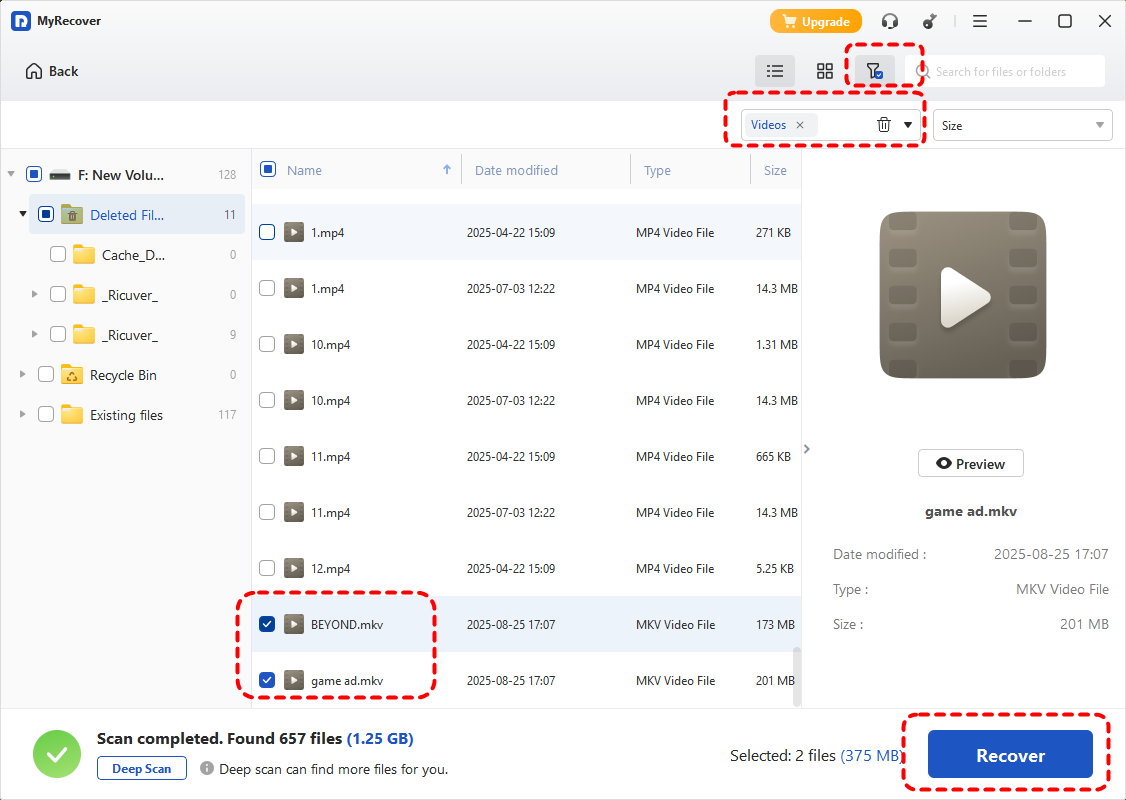
Step 4. Select a safe location to save the recovered files.
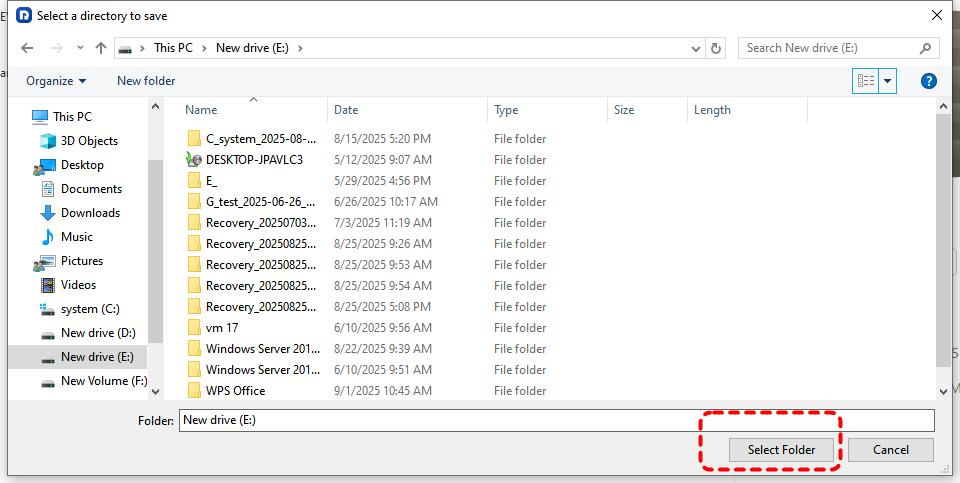
-
Do not save the recovered files on the original drive to avoid data overwriting.
When the process is completed, you can access the recovered files by clicking on the destination folder path or "Browse" button.
Sum Up
When you delete a file on Windows, it doesn’t disappear immediately—it just becomes invisible. Fortunately, with the right tools like the Recycle Bin, File History, Windows File Recovery, and MyRecover, you can retrieve those files quickly and easily. If you ever encounter permanent data loss, MyRecover offers a comprehensive solution to access your deleted files on Windows, even if traditional methods fail.
If you need a more robust recovery plan, MyRecover offers the Professional versions with unlimited data recovery capacity, allowing businesses and technicians to perform data recovery without restrictions. If you've accidentally lost important files or want to protect them in the future, MyRecover provides an excellent, hassle-free solution for both individual users and businesses.


Stay Updated With Our
Latest Tips
Add us as a preferred source on Google to never miss helpful guides.