
How to Undo a Deletion on Windows | 7 Simple Fixes
Undoing deletions is something almost everyone encounters when using Windows. Besides "Ctrl + Z", do you know how to undo a deletion with other methods? This article will guide you through 7 effective methods to recover deleted files. Discover more easy ways to undo deletions today.
By Aria / Updated on July 22, 2025
Are There Any Other Ways to Undo a Deletion on Windows
Hey, can anyone help me? Last night I was trying to clean up my desktop but accidentally deleted my work files. But I didn’t notice right away. When I realized the files were missing, I opened the Recycle Bin right away, but they weren’t there. These work files are really important to me. How do I get them back? Please, thanks a lot!
- Question from Anonymous
Nearly everyone has experienced accidentally deleting important files or folders when using a computer. It’s not really a terrifying thing at all. Precisely because this happens so commonly, Windows offers several built-in ways to recover these deleted files, from quick keyboard shortcuts to cloud backups.

Whether you’re trying to undo text deletion, recover recently removed files, or get back data from a backup, this guide will walk you through all your options.
How to Undo a Deletion on Windows
Actually, when you delete a file or text on Windows, it's not always gone forever. In most cases, the system will move it to the Recycle Bin until the file is restored or the recycle bin is emptied. You can choose the method that works for you based on your actual situation.
Fix 1: Undo Deletion Using "Ctrl + Z"
One of the fastest and most effective ways to reverse a recent action such as deleting a file is the "Ctrl + Z" keyboard shortcut. This shortcut undoes the last action in File Explorer, desktop, or most apps (like Notepad, Word, and Excel).
Step 1. Immediately after deleting a file, right click the blank space in the folder or on the desktop.
Step 2. Choose "Undo Delete" or just press "Ctrl + Z" after deletion. Then the deleted item should reappear in its original location.

- ★Tips:
- This method works best for instant mistakes. If you've done multiple actions after the deletion, it may no longer be possible to undo.
Fix 2: Check in the Recycle Bin
If you delete (not permanent deletion) a file or folder in Windows, it usually goes to the Recycle Bin first instead of being permanently removed. The Recycle Bin holds deleted items temporarily, allowing you to recover them manually.
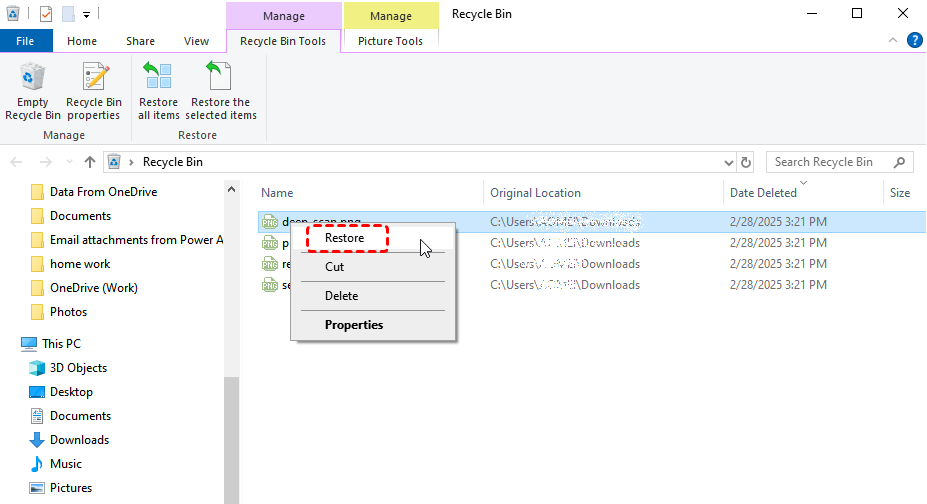
Step 1. Double click the "Recycle Bin" icon to open it.
Step 2. Browse through the items and select the files you wish to recover.
Step 3. Right click the selected files and choose "Restore" to return them to their original location.
Fix 3: Restore Previous Versions with File History
Windows includes a feature called File History, which backup your personal files or folders and allow you to restore earlier versions after data loss. If you have enabled File History on Windows, you can restore previous versions of your files.
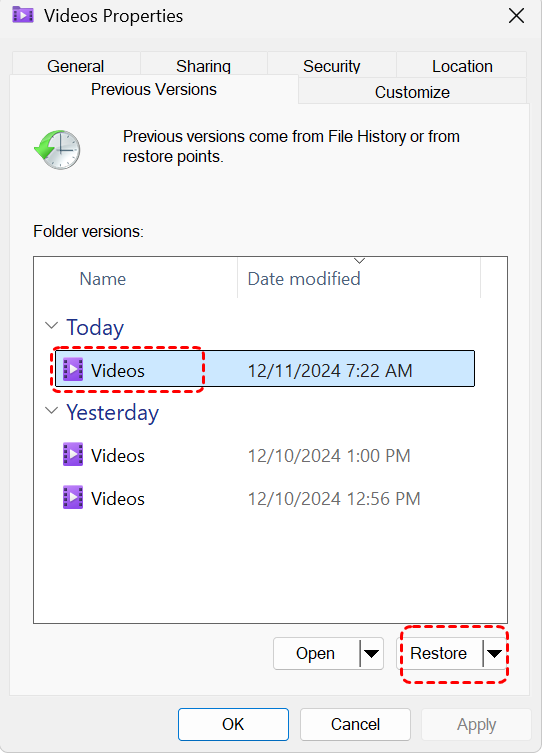
Step 1. Navigate to the folder containing the deleted files in File Explorer.
Step 2. Right click the folder and select "Restore previous versions". Then a list of earlier versions will be displayed.

Step 3. Choose a desired version and click "Restore" to recover it to its original location.
Fix 4. Restore from Backup and Restore (Windows 7)
Backup and restore (Windows 7) is another built-in backup tool, which creates full system or personal file backups that can be restored anytime. Following these steps to recover deleted files from Backup and Restore feature:
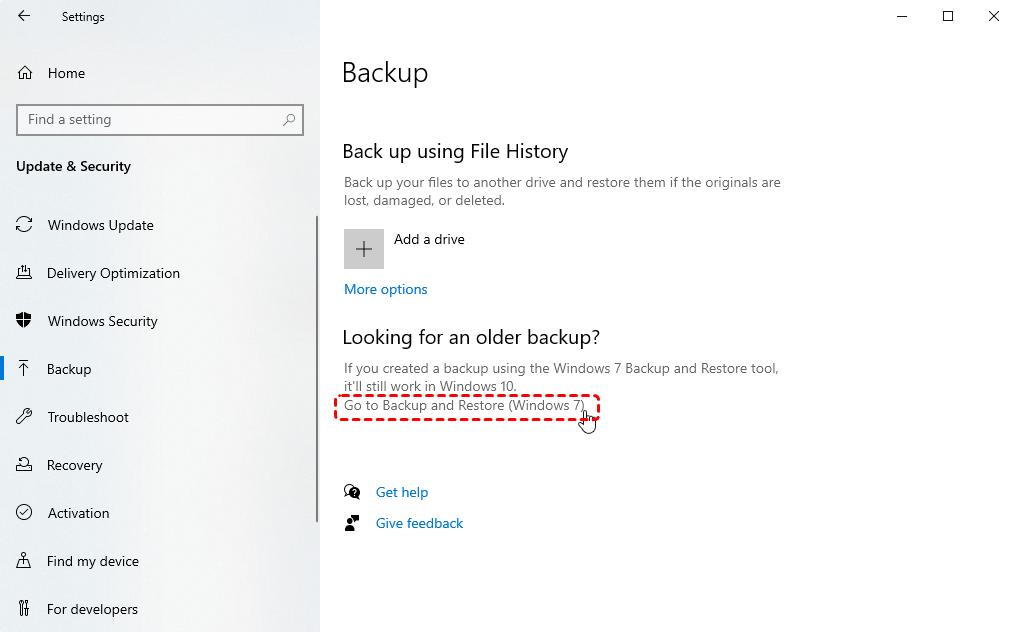
Step 1. Open "backup settings" in the Start menu and choose "Go to Backup and Restore (Windows 7).
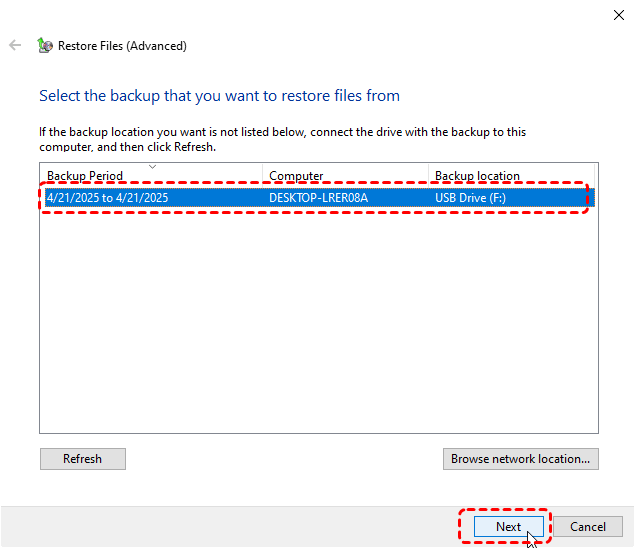
Step 2. Click "Select another backup to restore files from" and choose a created backup including the deleted files, then click "Next".
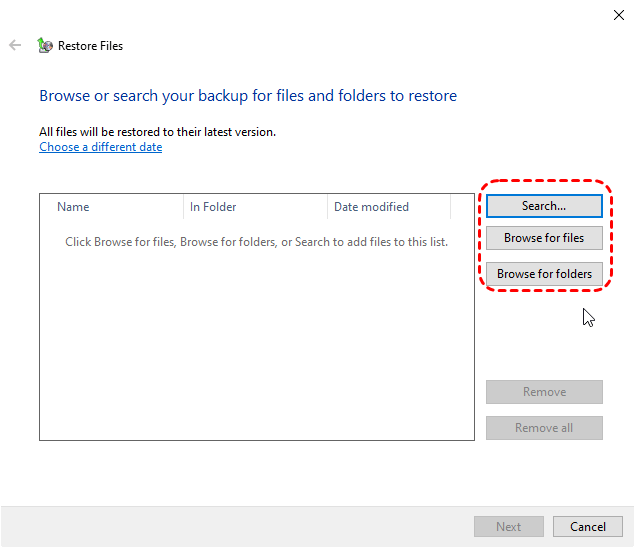
Step 3. Select the files you want to recover by clicking "Browse for files/folder". Similarly, you can select all files to recover by checking the "recover all files in this backup" option.
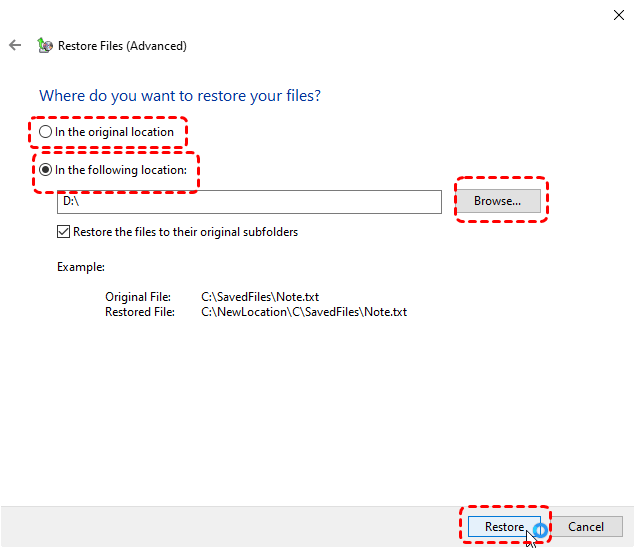
Step 4. Choose a safe location to save the recovered files and click "Restore".
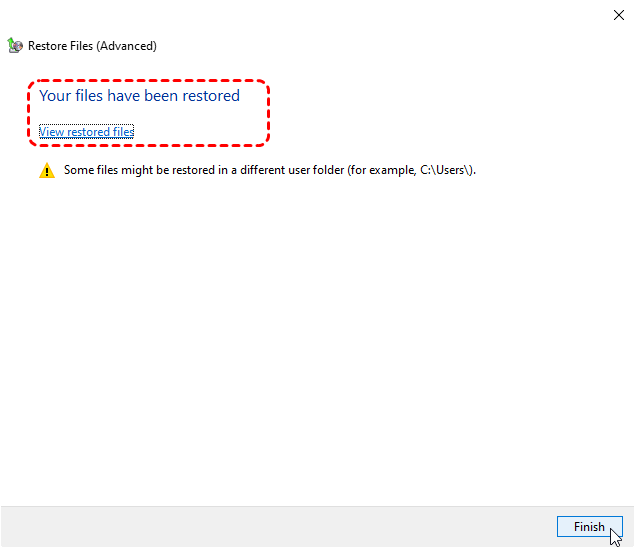
When the restoration process is completed, the message "Your files have been restored" will pop up. You can check the recovered files by clicking "View restored files".
Fix 5: Recover from Cloud Backup
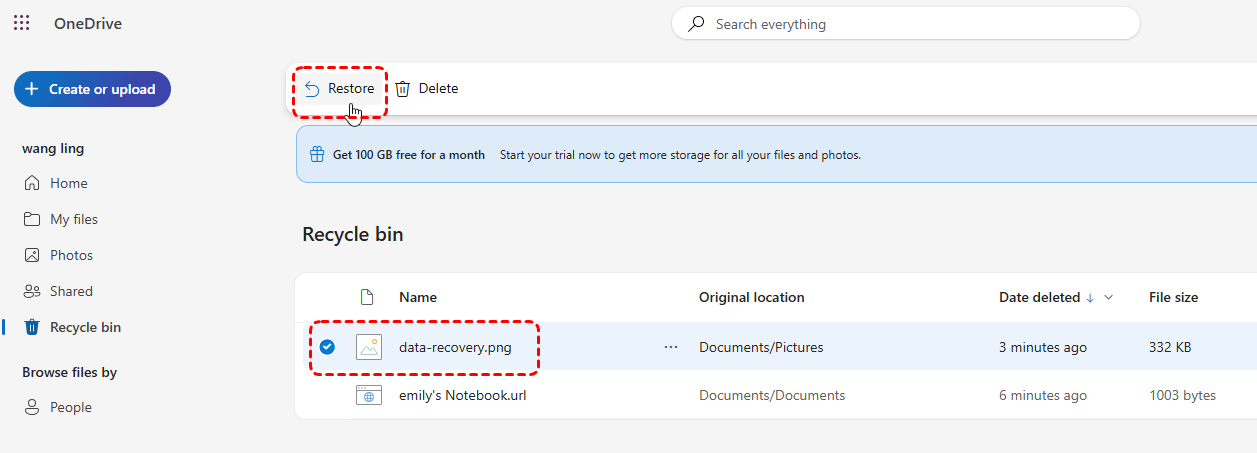
If you’ve synced your files with cloud backup tools like OneDrive, Google Drive, Dropbox, these cloud service may still have a copy of your deleted file. The Recycle Bin of OneDrive usually keeps deleted files for 30 days (take OneDrive as an example here).
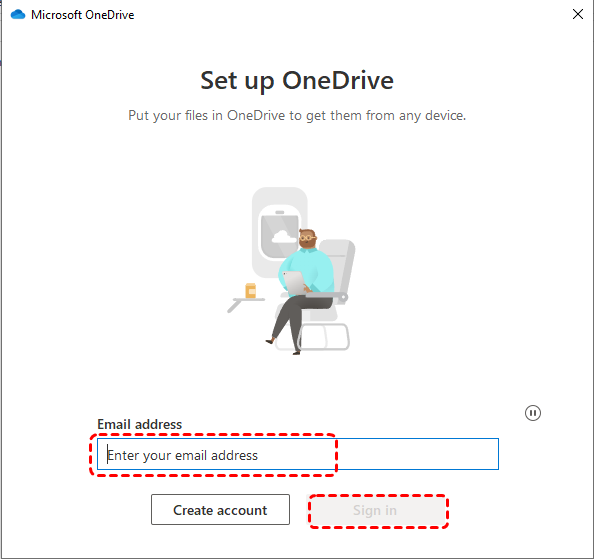
Step 1. Sign in to OneDrive with your account.
Step 2. Select the “Recycle Bin” section in the left sidebar, then choose the deleted files you wish to recover.
Step 3. Click "Restore" to recover them to their original location.
Fix 6: Run Windows File Recovery Command
Windows File Recovery is a command-line utility developed by Microsoft which allow users to recover permanently deleted files from internal and external hard drive. But note that Windows File Recovery only works on Windows 10 and 11. Follow these steps to recover lost files using Windows File Recovery command:
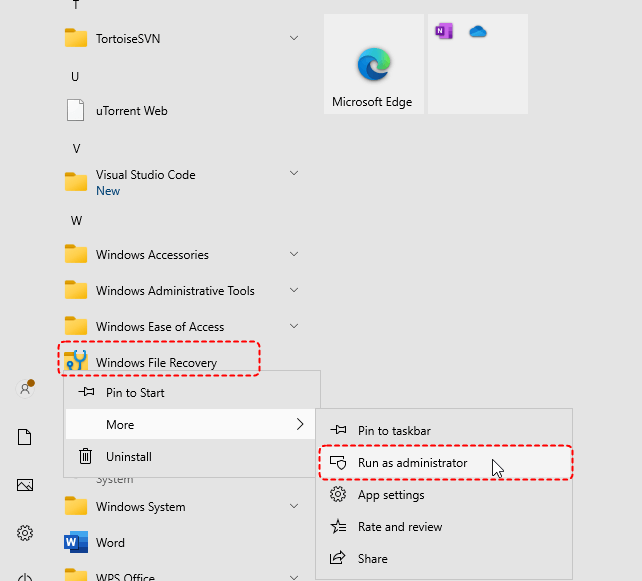
Step 1. Download and install Windows File Recovery on your computer from the official Microsoft channel.
Step 2. Launch it and run it as administrator.
Step 3. Type the command "winfr E: F: /regular" and press "Enter". Replace the drive letter "E" (the source drive letter) and "F" (the destination folder) with your actual drive letters.
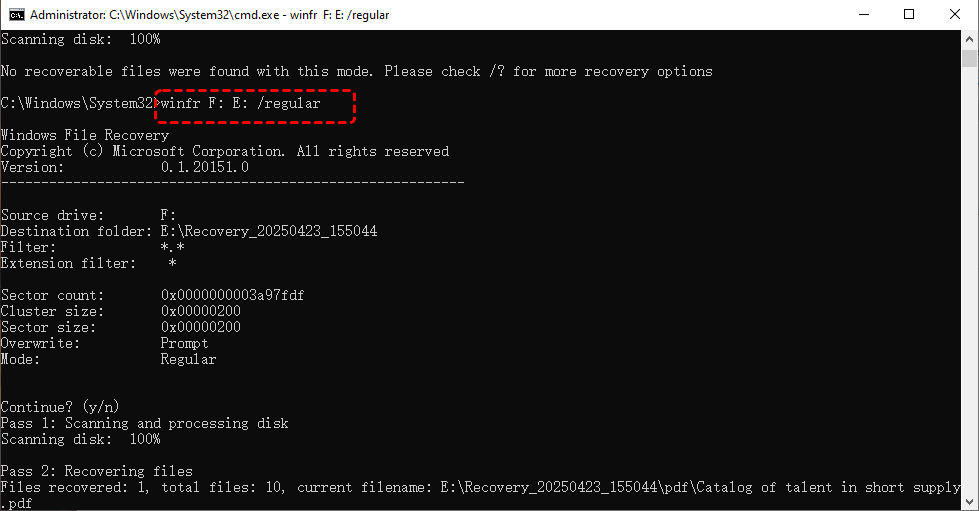
- Notes:✎...
- If you want to find more files, you can switch to "Extensive" mode. It will perform a more comprehensive scan but take more time.
When the process is completed, press "y" to check the recovered files in the destination folder.
Fix 7: Recover with MyRecover [GUI Tool no Backup Required]
If you're not used to command-line tool and don't have any backups, then MyRecover is the tool tailored just for you. MyRecover features a user-friendly graphical interface, so even computer beginners can independently complete data recovery by clicking icons. It supports data recovery from Seagate hard drive and WD hard drives, SD cards, internal hard drives of game consoles, USB drives and more devices.
Discover the compelling highlights of MyRecover below.
✅No Command Line Needed – Simple GUI (graphical interface) for easy file recovery.
✅Higher Success Rate – Advanced deep scan for NTFS/FAT32/exFAT drives.
✅Smart Filtering – Recover files by type, date, or size with precision.
✅500+ Devices Support – Recover files from all types of devices like SSD, HDD, USB flash drive, SD card, cameras and more.
✅Handle 500+ Data Loss Scenarios – Recover from deleted partition, formatted hard drive, emptied Recycle Bin, system crash, virus attack, etc.
✅OS Compatibility – Work not only on Windows 11 /10, but also on Windows 8.1/ 8/ 7 and all Servers.
✅Supports over 1,000 File Types – Including documents, photos, videos, audio, archives, and Outlook data files.
✅Smart Scan Modes – Choose from Quick Scan for recent deletions or Deep Scan for formatted/corrupted drives.
Step 1. Download and install MyRecover on your computer from secure channel, avoid installing it on the drive with lost files.
Step 2. Select the drive where the deleted files were stored to scan, then click "Scan".

Step 3. Choose files you wish to recover from the recoverable lists and click "Recover".

Step 4. Select a secure location (not the original one) to save the recovered files.

When the process is finished, the message indicating recovery success and destination folder will pop out. You can click the destination folder to check them.

Summary
Now that you know how to undo a deletion, you can work confidently knowing there’s usually a way back. With the methods mentioned above, whether you have backups or not, you can find a way you prefer to undo the deletion.
The professional data recovery tool MyRecover comes highly recommended. It’s suitable for data recovery in various scenarios and can fully protect your data security. MyRecover also offers a Professional version and a Technician version, which support data recovery from crashed systems and provide unlimited data recovery capacity.


Stay Updated With Our
Latest Tips
Add us as a preferred source on Google to never miss helpful guides.