
5 Methods: How to Recover Files Deleted by Windows Defender in Windows 10 / 11?
Did Windows Defender delete your important files? Don’t panic—you may still recover them! This guide covers step-by-step methods to restore files deleted by Defender in Windows 10 & 11. Plus, learn how to prevent Defender from deleting safe files in the future.
By Emma / Updated on March 31, 2025
”Please help! Recover deleted file from Windows Defender?”
Yesterday, my Windows Defender suddenly popped up an alert claiming it detected a “suspicious file.” Thinking it was a virus, I immediately clicked “Delete.” Turns out, it was actually my graduation thesis document (.docx)! The file was completely erased—it's not even in the Recycle Bin.
I tried using Windows' built-in File History, but I never enabled backups. Now, with only 3 days left until the submission deadline, is there any way to recover this file deleted by Defender? Please help—I'm desperate!Any help on this topic is appreciated.
About Windows Defender
Microsoft Defender Antivirus, formerly known as Windows Defender, serves as the built-in security solution for Windows 10 and 11 systems. This comprehensive protection tool offers real-time malware scanning, robust virus detection capabilities, reliable firewall protection, and effective ransomware defense.

One of its most valuable features is the automatic threat scanning that runs continuously in the background, quietly protecting your system without requiring user intervention. When potential threats are detected, the software intelligently quarantines suspicious files rather than deleting them immediately, giving users the opportunity to review and restore any false positives. The protection is enhanced by cloud-powered threat detection that leverages Microsoft's constantly updated security database.
How to Recover Files Deleted by Windows Defender Windows 10 or 11?
When Windows Defender removes files it identifies as threats, you have several potential recovery paths depending on your specific situation. In the following part, we will show you how to restore file Windows Defender deleted in Windows computer.
Method 1. Check Defender's Quarantine (Most Immediate Solution)
Windows Defender doesn't immediately delete all detected threats - it first quarantines them, giving you a safety net for recovery. This should always be your first recovery attempt.
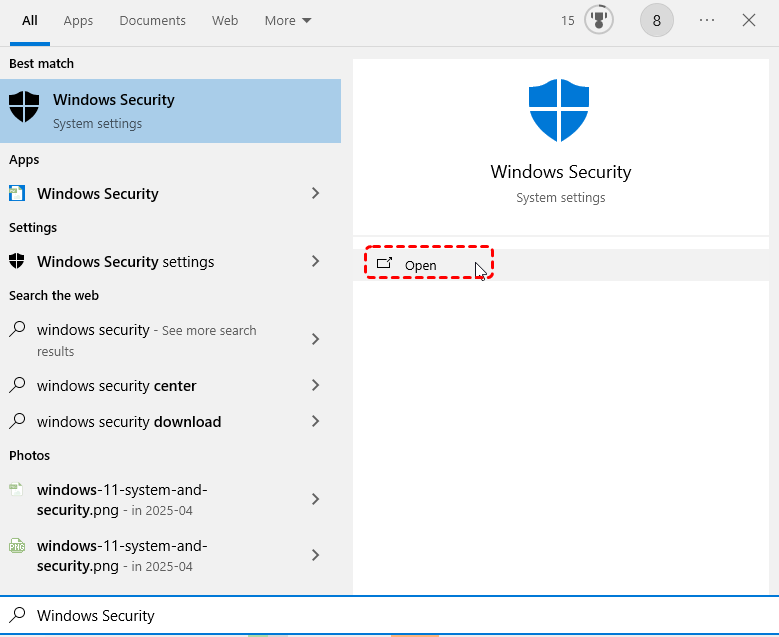
Step 1. Open Windows Security (type "Windows Security" in Start menu search).
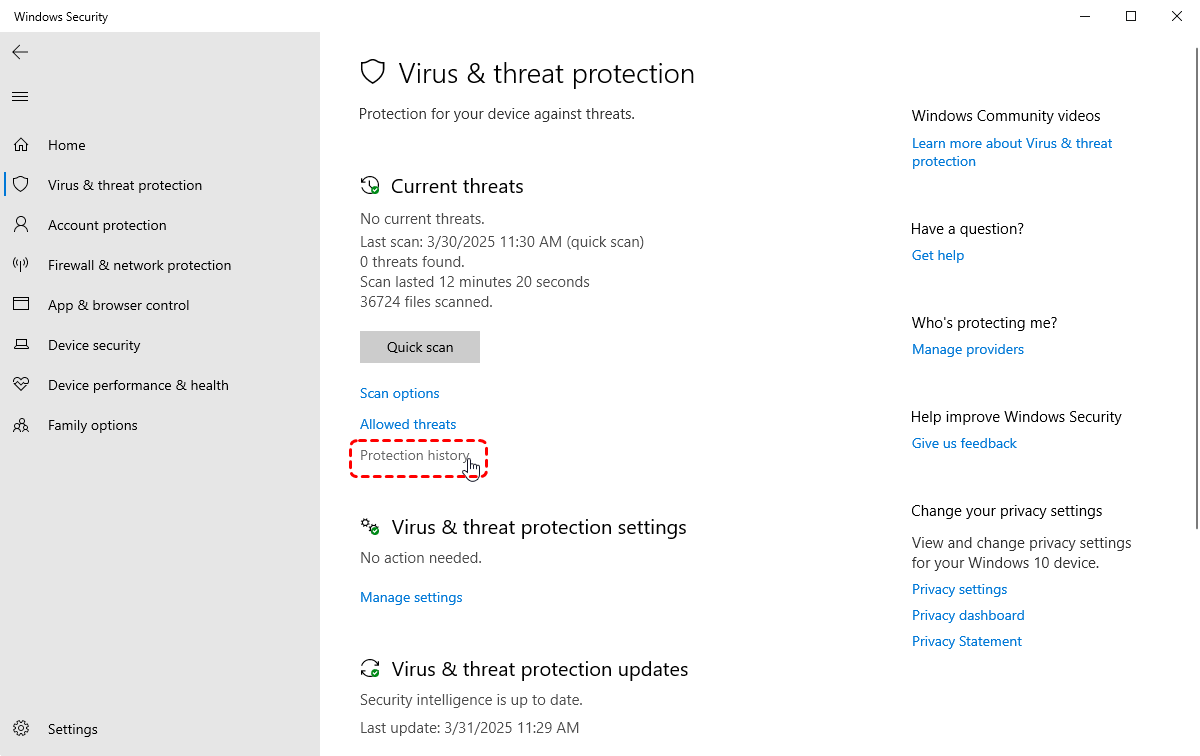
Step 2. Navigate to "Virus & threat protection".
Step 3. Click "Protection history"under "Current threats".
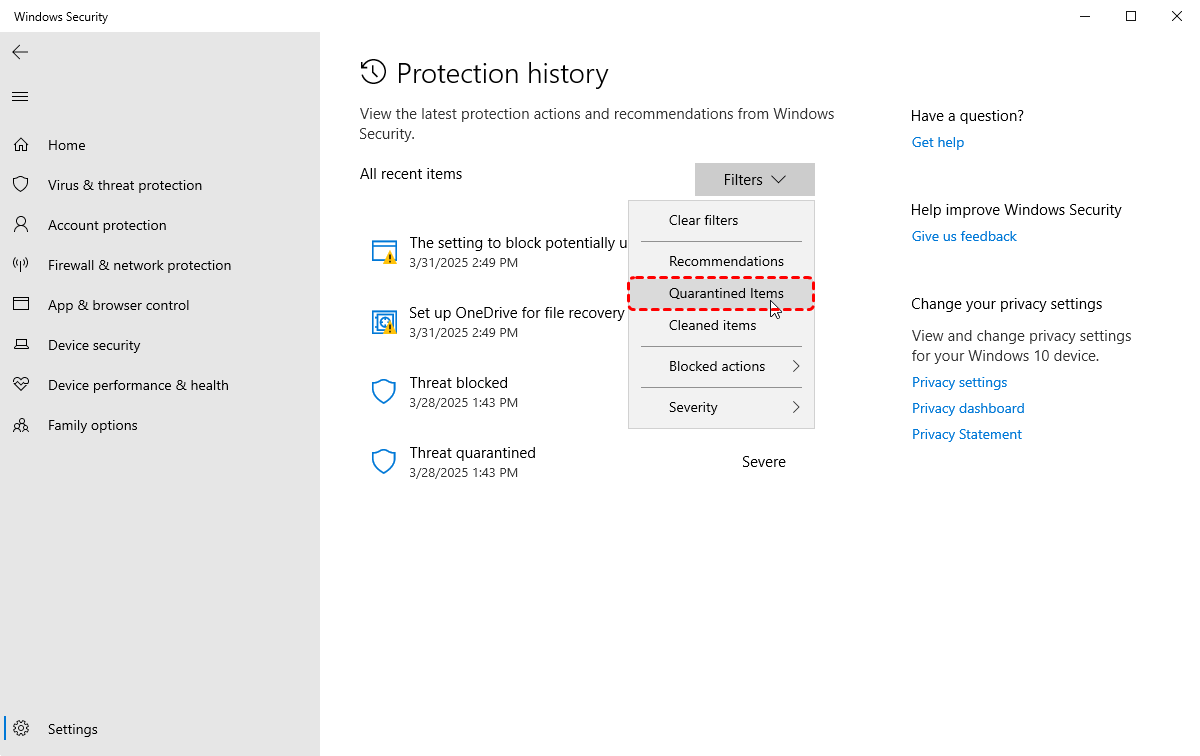
Step 4. Look for your file under "Quarantined threats" by "Filter".
Step 5. Select the file and click "Restore"in the "Actions" drop-down menu.
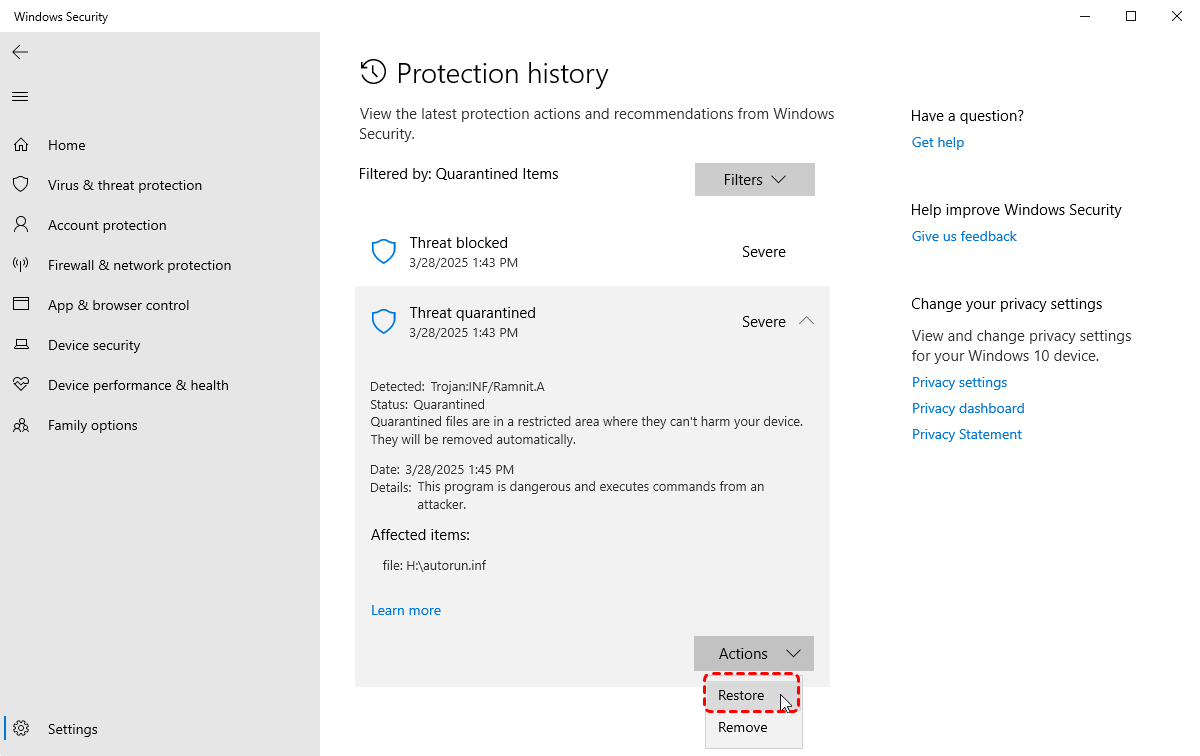
Quarantine is Defender's way of isolating potential threats without permanent deletion. Files remain here for 30 days by default. If you find your file here, restoration is instant and complete.
Method 2. Restore Using MpCmdRun Command Line
For users comfortable with command-line tools, Windows Defender provides direct access to quarantine management through its MpCmdRun utility. This method is particularly useful when the Windows Security GUI is not accessible, you need to restore multiple files programmatically or perform remote system administration.
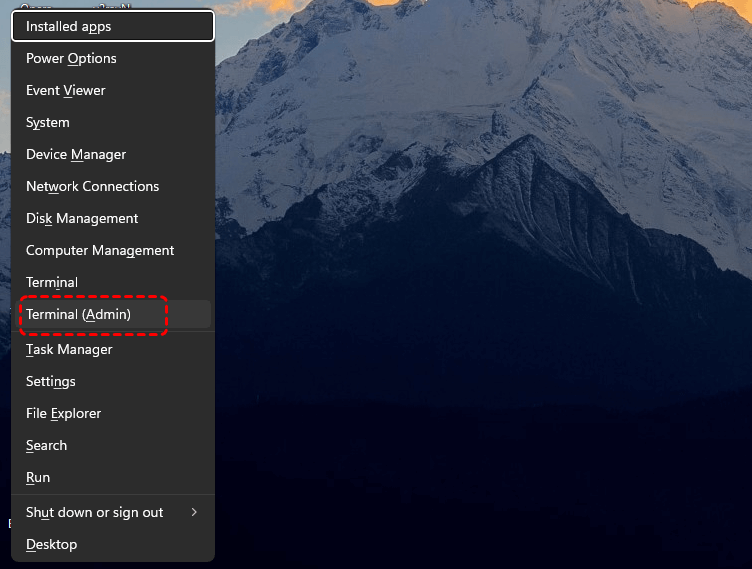
Step 1. Press Win+X and select "Terminal (Admin)" in Windows 11 or "Command Prompt (Admin)" in Windows 10.Alternatively, search for "cmd", right-click and select "Run as administrator"to open Command Prompt as an administrator.
Step 2. Type the following command, and then press Enter:
"%ProgramFiles%\Windows Defender\MpCmdRun.exe" -Restore -Name

- %ProgramFiles%\Windows Defender\MpCmdRun.exe: Invokes the command-line utility located in Windows Defender's installation directory. %ProgramFiles% is a system environment variable that typically points to C:\Program Files\
- Restore: Primary parameter indicating a restore operation. Used to recover files from quarantine.
- Name : Specifies the target file for restoration. must be replaced with the actual threat identifier (not the original filename).
Example usgae: %ProgramFiles%\Windows Defender\MpCmdRun.exe -Restore -Name "Trojan:INF/Ramnit.A"
Method 3. Restore from File History Backup (If available)
If you had File History backup enabled prior to files deletionby Windows Defender, this method can recover your files exactly as they were.
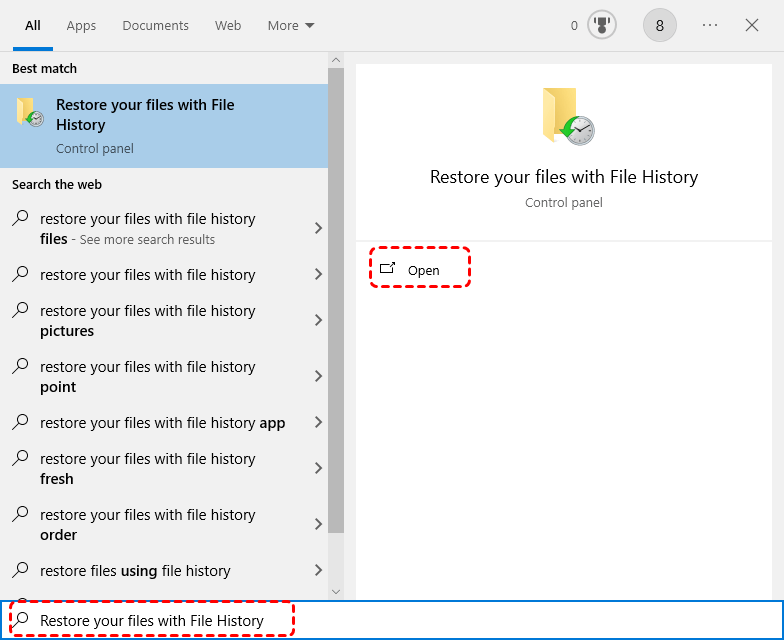
Step 1. Type "Restore Your Files with File Recovery" in Start menu searchbox and click on "Open".
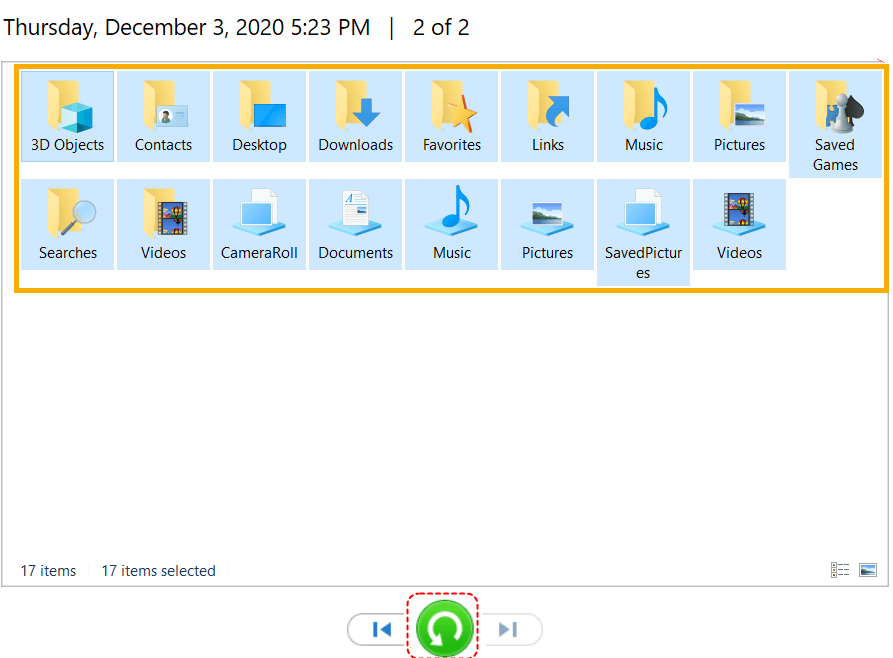
Step 2. In the File History window that opens, select the target files you want to recover and click on "Restore"icon.
This only works if you previously set up File History. Check backup frequency in settings (default is hourly) to know how recent your recoverable version might be.
Method 4. Use Windows File Recovery Command (For Tech-Savvy Users)
Microsoft's command-line tool (Windows File Recovery) can recover files without third-party software, but requires technical comfort.
Step 1. Download Windows File Recovery from Microsoft Store.

Step 2. Open Command Prompt as Administrator.
Step 3. Use basic syntax: winfr source-drive: destination-drive: /n \path\to\file. To recover files deleted by Windows Defender, add /r for segment recovery mode.
winfr C: D: /r /n "\Users\YourName\Documents\text.xlsx"
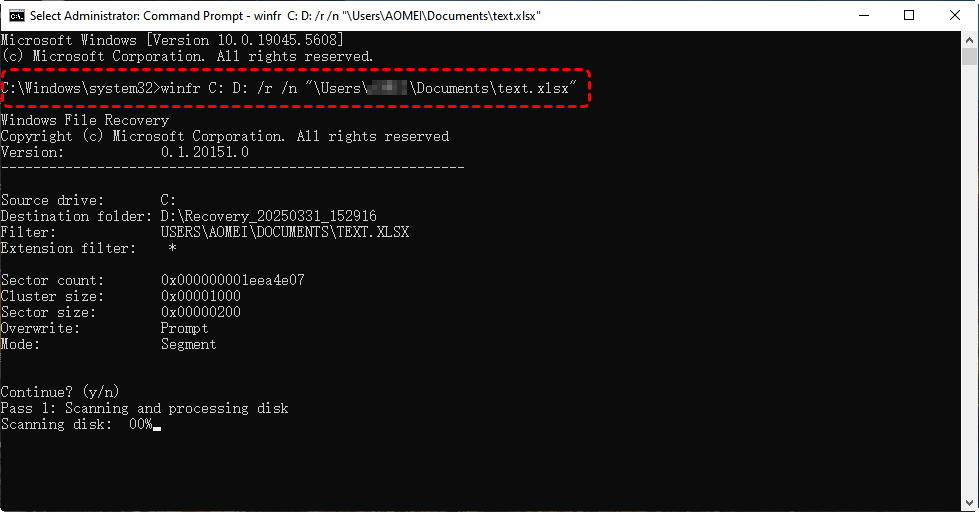
This command attempts to recover the file text.xlxs from the C: drive and save it to the D: drive using Segment Mode.
Method 5. Use Professional Data Recovery Tool (When All Else Fails)
When other methods don't work, professional tools like MyRecoveroffer your best chance.It is a powerful data recovery software designed to recover lost or deleted files from hard drives (HDD/SSD), USB drives, SD cards, and other storage devices, even when Windows Defender or other tools fail.
Key Features:
✅ Deep Scan Technology – Recovers files even after permanent deletion or formatting.
✅ Wide Format Support – Restores documents (DOCX, XLSX, PPTX), photos (JPG, PNG), videos (MP4, AVI), archives (ZIP, RAR), and 1000+ file types.
✅ User-Friendly Interface – No technical skills required (simple 3-step recovery).
✅ Preview Before Recovery – Check files before restoring to avoid unnecessary saves.
✅ High Success Rate – Effective for Windows Defender deletions, accidental formatting, virus attacks, and system crashes.
How It Recovers Files Deleted by Windows Defender?
Step 1. Download MyRecover and install on a different drive than your lost files.
Step 2. Select the original storage location to scan.

Step 3. Choose "Deep Scan" for thorough searchif necessary.
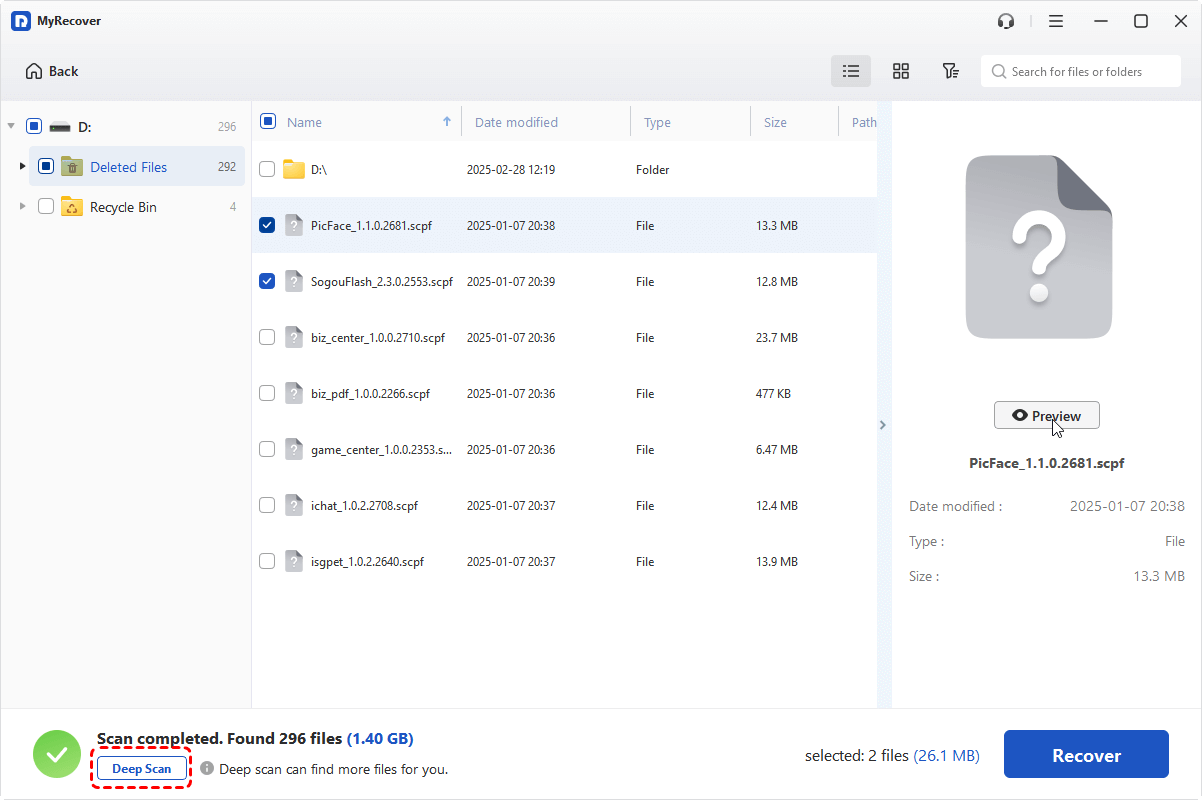
Step 4. Preview found files before recoveryand click on “Recover” once confirmed.

Step 5. Save recovered files to a different drive.

Bonus Tip: How to Prevent Defender from Deleting Safe Files in the Future
Although there is always some chance to restore files deleted by Windows Defender, prevention is always better than recovery. Follow these steps to avoid false positives and accidental deletions in the future:
1. Add Trusted Files/Folders to Defender’s Exclusion List
This prevents Defender from scanning and deleting files you trust:
Step 1. Open “Windows Security”.
Step 2. Go to “Virus & Threat Protection”and then “Manage Settings”.
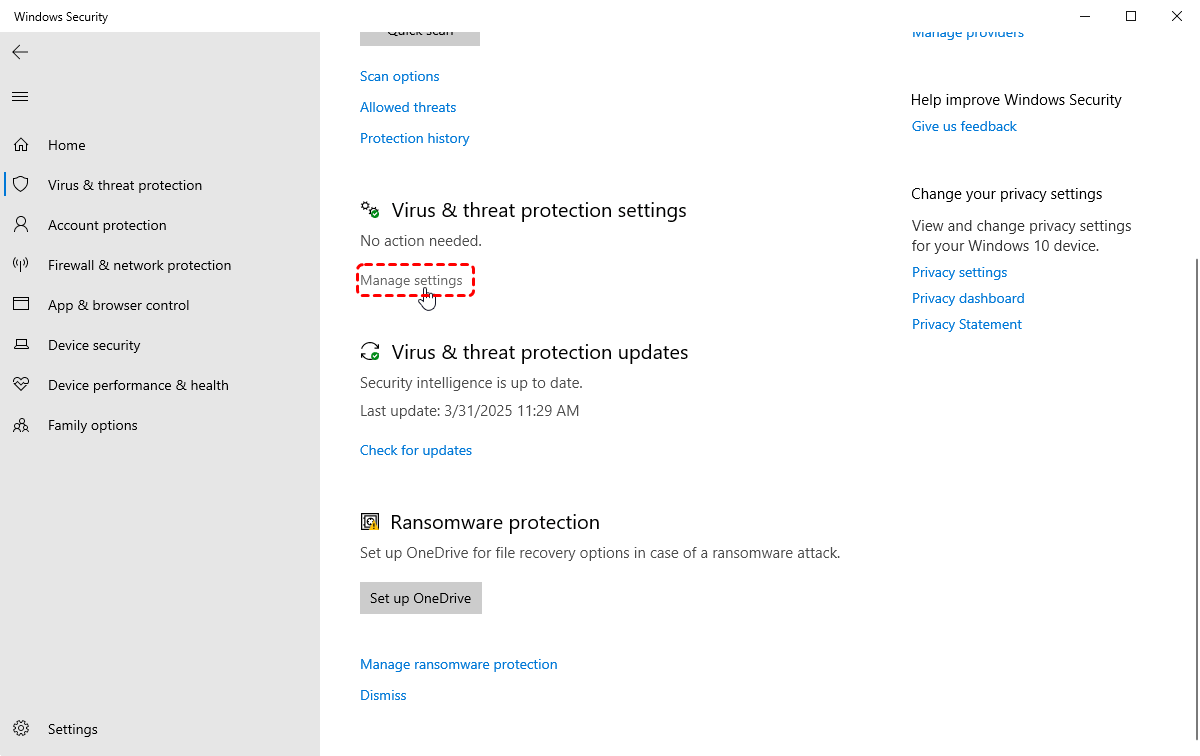
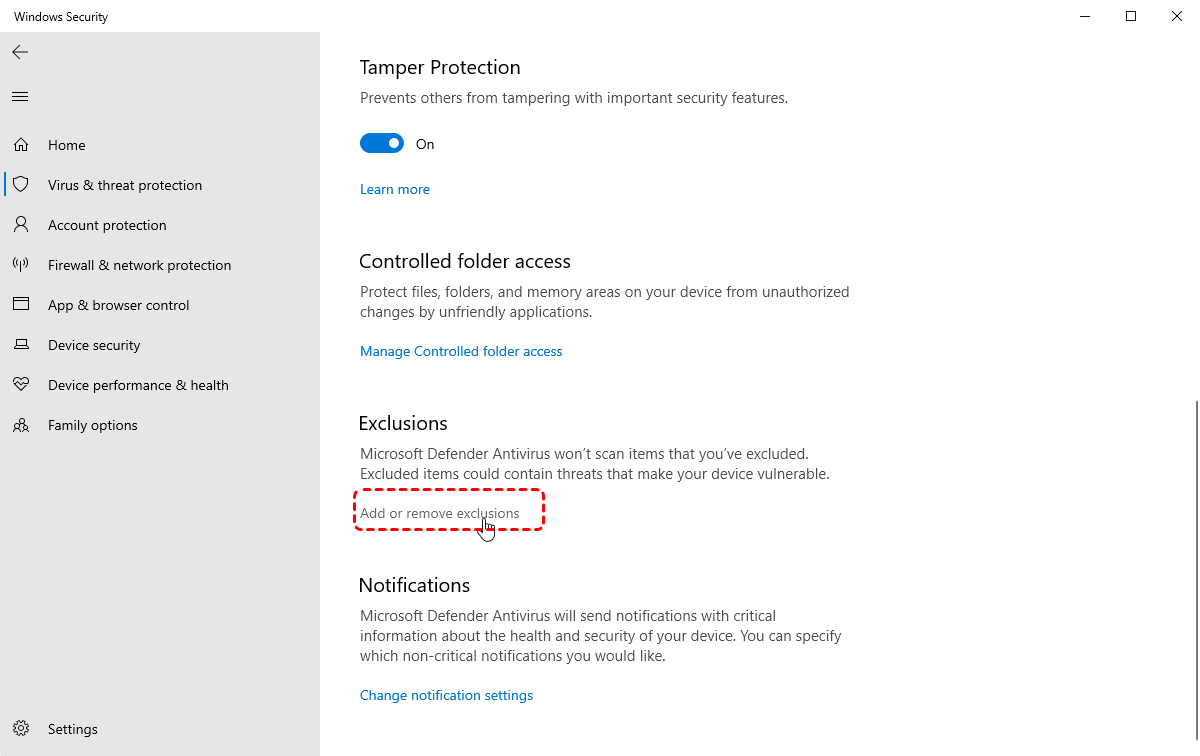
Step 3. Scroll down to “Exclusions”, and click “Add or remove exclusions”.
Step 4. Choose "Add an exclusion". Select File, Folder, or Process.
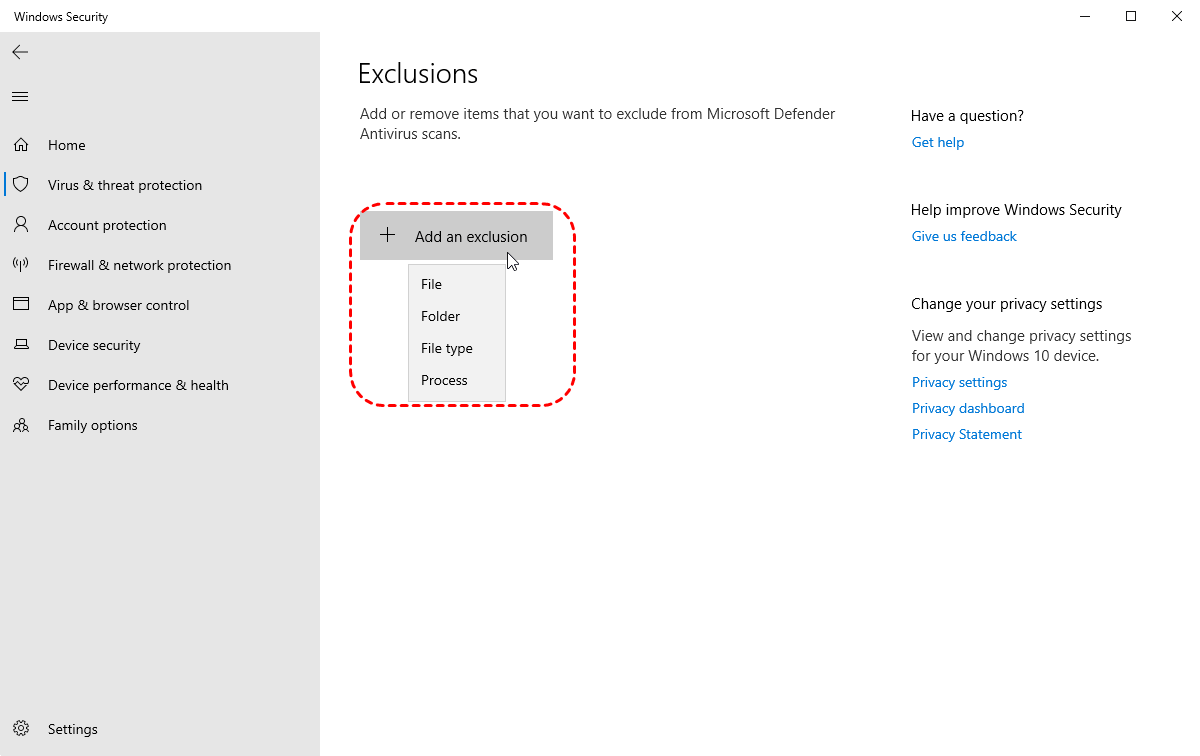
Step 5. Browse and add the files/folders you want to protect.
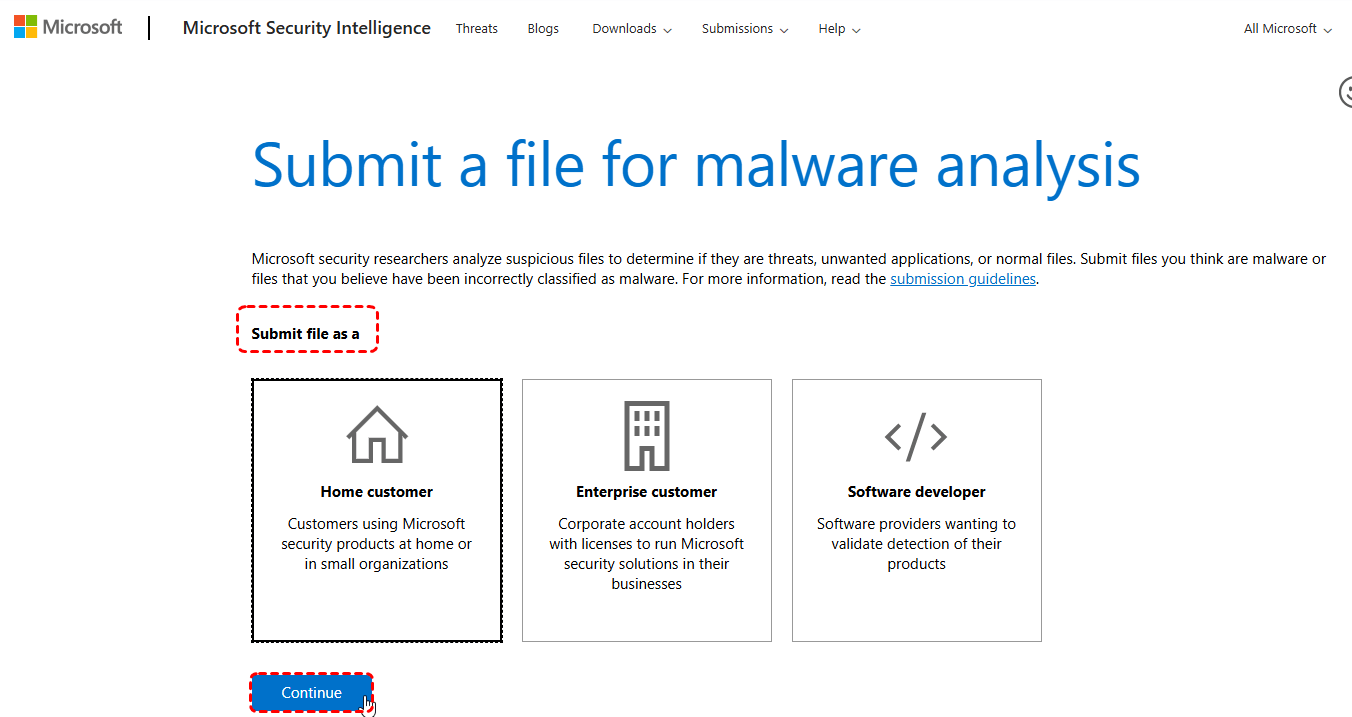
2. Submit False Positives to Microsoft
If Defender keeps flagging a safe file as malware, you can submit files to Microsoft for analysis through the Microsoft Security Intelligence submission site and prevents future false alarms.
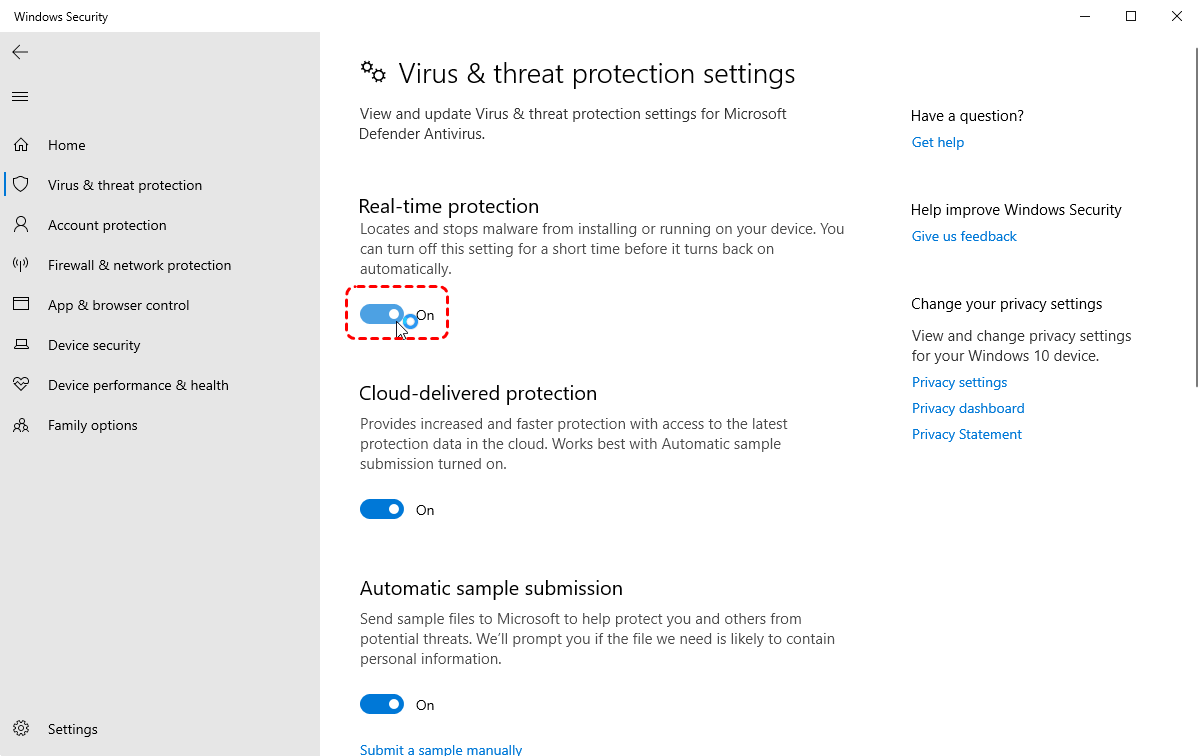
3. Temporarily Disable Real-Time Protection (For Critical Operations)
If you’re working with sensitive files (e.g., scripts, mods, or custom software), you can temporarily turn off Windows Defender.
Step 1. Open "Windows Security" and hit on "Virus & Threat Protection".
Step 2. Click "Manage Settings" and toggle off "Real-time protection".
To Conclude
After reading through the guide, you will learn how to recover files deleetd by Windows Defender. When you find your important data is marked as malware and deleted by Windows Defender by mistake, act quickly and your chances of recovery decrease if new data overwrites the deleted files. With these methods, you can restore lost documents, photos, and more with minimal hassle!
Besides, to prevent future issues, exclude trusted files from scans, submit false positives to Microsoft, and maintain regular backups.


Stay Updated With Our
Latest Tips
Add us as a preferred source on Google to never miss helpful guides.