
How to Update Windows 10 to 11 Without Losing Data
Many users ask, can we upgrade Windows 10 to 11 without losing data? The answer is yes! This detailed guide shows safe upgrade options that protect your files, programs, and preferences. Learn the best practices for a smooth transition to Windows 11 without data loss or system issues.
By Vera / Updated on May 29, 2026
Introduce
How can I upgrade Windows 10 to 11 without losing data and programs on unsupported cpu?
Hey folks, I’m running Windows 10 Pro (22H2) on my old Dell XPS 9570, and apparently, my CPU isn’t "officially supported" for Windows 11. The Upgrade Assistant keeps blocking me even though the laptop runs perfectly fine. I really don’t want to do a clean install — just want to upgrade without losing my apps or files. Has anyone managed to upgrade to Windows 11 on an unsupported CPU and keep everything intact? What worked for you?
- Question from https://techcommunity.microsoft.com/
Transitioning to a new operating system often feels like moving into a new home—you want the upgraded features without the stress of losing your prized possessions. Microsoft designed Windows 11 with an "In-Place Upgrade" logic, allowing users to migrate their entire digital environment seamlessly. However, because an OS upgrade involves deep changes to system registries and partition structures, "safe" doesn't mean "risk-free."
In this guide, we will walk you through the preparation, execution, and safety nets required to ensure your files, apps, and settings remain exactly where you left them.
Is It Safe to Upgrade Without Losing Files?
Yes — Microsoft designed Windows 11 to be installed as an in-place upgrade, meaning your:
- Personal files
- Installed apps
- System settings
…can remain intact.
The logic behind this is "Data Persistence." During the upgrade, Windows moves your old system files into a temporary folder (Windows.old) and maps your user profile to the new environment. However, hardware interruptions, power surges, or software conflicts can disrupt this mapping. That is why the "Checklist" phase is just as important as the installation itself.
Check System Requirements for Windows 11
Before you begin, you must verify if your hardware can "speak" the language of Windows 11. These requirements aren't just suggestions; they are security and performance benchmarks. For instance, TPM 2.0 is mandatory because Windows 11 relies on hardware-based encryption for enhanced security.
-
CPU: 1 GHz, 64-bit compatible processor (Check Microsoft’s supported CPU list)
-
RAM: 4 GB minimum (8 GB recommended for smooth multitasking)
-
Storage: 64 GB minimum (20–30 GB free recommended to avoid update "hangs")
-
Firmware: UEFI + Secure Boot
-
TPM: Version 2.0 required
-
Graphics: DirectX 12 compatible
How to Check Compatibility
1. Download the PC Health Check Tool from Microsoft.
2. Open the tool and click Check now.
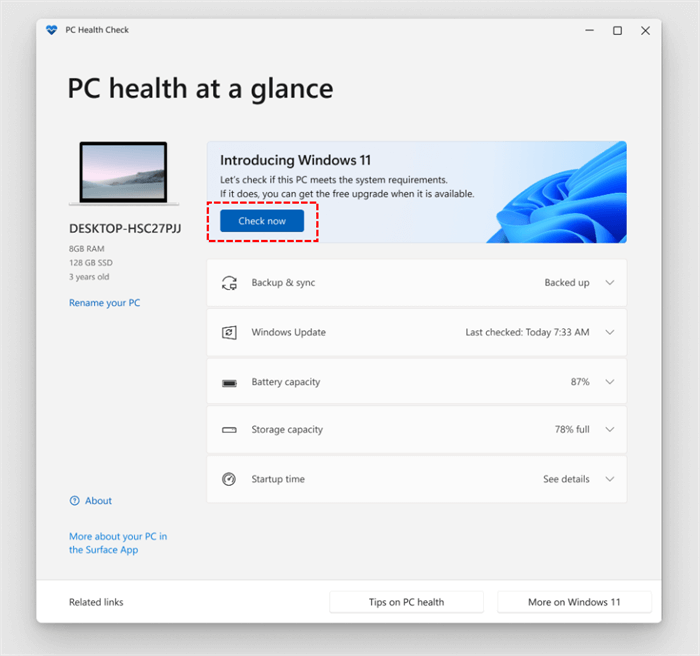
3. Review the results:
- If your PC is compatible, proceed.
- If not, resolve the flagged issues before upgrading (enable TPM/Secure Boot, update drivers, or upgrade hardware if needed).
Pre-Upgrade Checklist: Ensuring a Zero-Risk Environment
Having a backup is the difference between a minor hiccup and a total catastrophe. Before touching the OS, follow these steps to stabilize your environment.
✅1. Backup Your Files
Even though Windows 11 can keep your files, always back up important data.
- OneDrive Cloud Backup:
1. Go to OneDrive Settings → Sync and backup → Manage backup.
2. Turn on Back up folders on this PC (Documents, Desktop, Pictures).
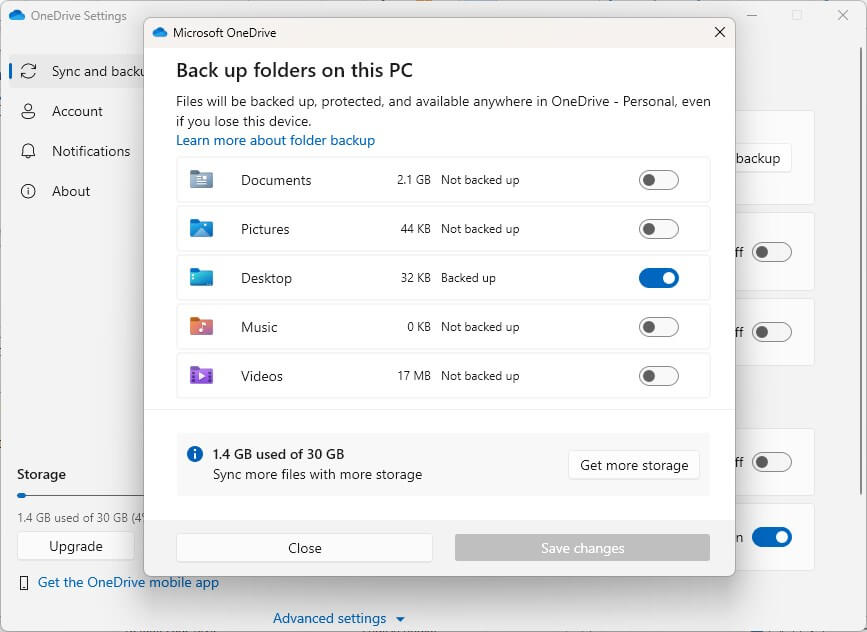
3. Ensure files are fully synced.
- External Drive Backup:
1. Connect an external HDD/SSD.
2. Copy your Documents, Desktop, Downloads, and Pictures folders.
3. Optional: Use a tool like File History to create a versioned backup.
- System Image (Optional):
1. Go to Control Panel → Backup and Restore (Windows 7) → Create a system image.
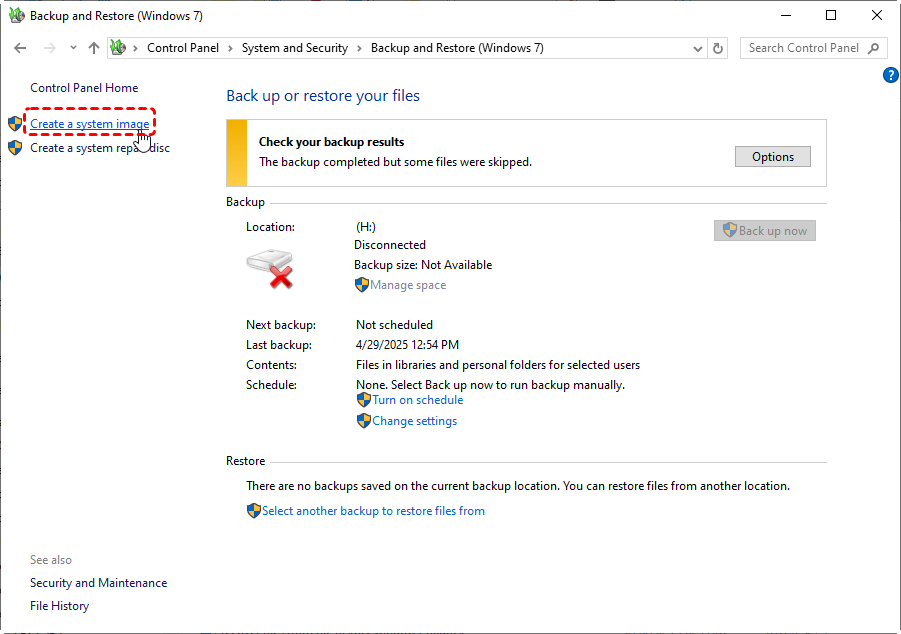
2. Choose an external drive or network location.
✅2. Update Windows 10
An "In-Place Upgrade" works best when the source OS is at its most stable version. Updating Windows 10 ensures that the "migration bridge" between versions is up to date.
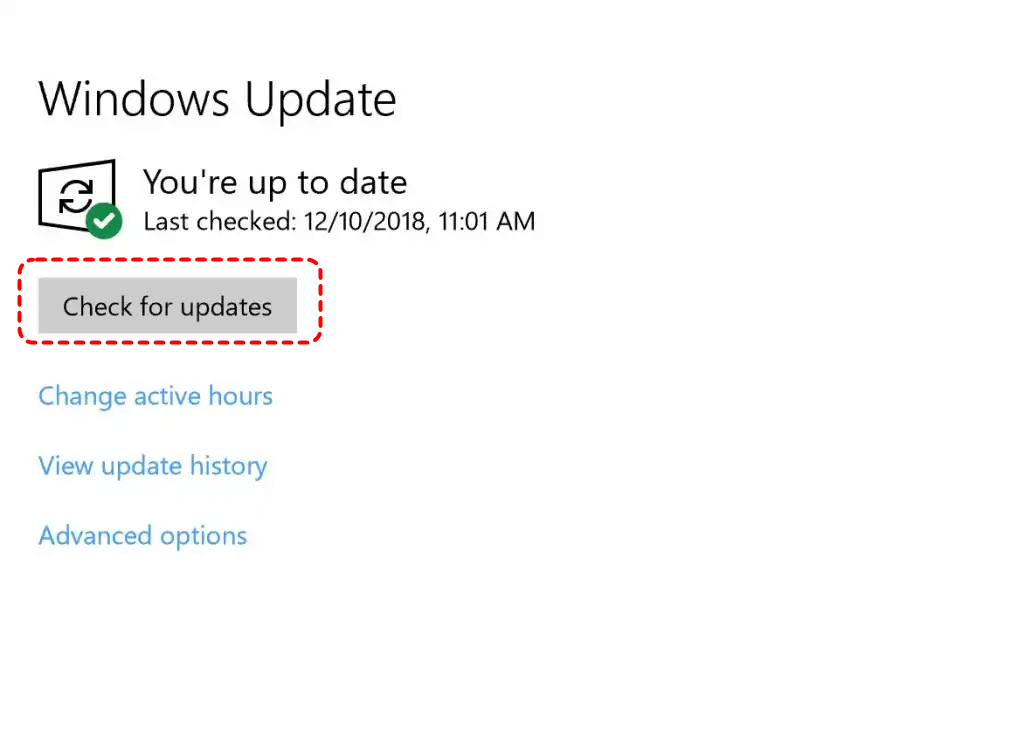
1. Open Settings → Update & Security → Windows Update.
2. Click Check for updates.
3. Visit your PC manufacturer’s site (Dell, HP, Lenovo) to update your BIOS/UEFI and SSD Firmware. Outdated firmware is a leading cause of "Blue Screen" errors during upgrades.
✅3. Free Up Disk Space
- Delete unnecessary files using Settings → Storage → Temporary files.
- Remove unused apps from Settings → Apps → Installed apps.
- Aim for at least 20–30 GB free. The installer needs room to download the new OS, unpack it, and store the backup of your old OS.
✅4. Update Drivers and Firmware
- Graphics, storage, and chipset drivers should be up to date.
- BIOS/UEFI firmware should be the latest version.
- Check the manufacturer’s website or Windows Update for updates.
✅5. Note Software Keys
Write down license keys for apps like Office, Adobe, or specialized software. This ensures you can reactivate apps if needed.
How to Upgrade to Windows 11 Without Losing Data
Once your PC is prepped and your data is backed up, you can choose one of the three methods below. We have categorized them by ease of use and reliability.
Method 1: The Official Way (Windows Update)
This is the most recommended method for the general user. It is the "slowest" to arrive but the safest, as Microsoft only pushes the update to your device once they have verified that your hardware and drivers are 100% compatible.
It uses the standard Windows servicing pipeline, meaning it integrates the upgrade into your normal update cycle with minimal risk of software conflict.
1. On your Windows 10 PC, go to Settings → Update & Security.
2. Select Windows Update from the left sidebar.
3. Click Check for updates.

4. If your PC is ready, you will see a banner saying "Upgrade to Windows 11 is ready." Click Download and install.
5. Follow the on-screen prompts. The PC will handle the rest during a scheduled restart.
Method 2: The Proactive Way (Installation Assistant)
Use this if your PC meets all requirements but you haven't received the "Windows Update" notification yet. It allows you to skip the "waitlist" and upgrade immediately. This tool functions as a standalone installer that bypasses the standard update queue while still performing a full in-place migration of your data.
1. Visit the Microsoft Windows 11 download page.
2. Download Windows 11 Installation Assistant. Run the Assistant as Administrator.
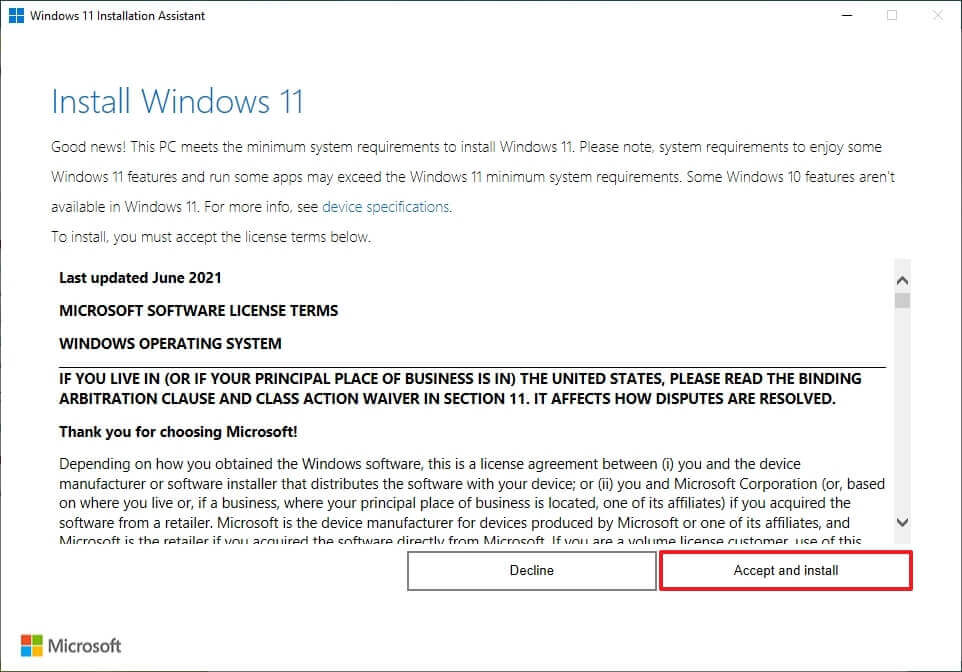
3. The tool will check your system for compatibility. If any requirements are missing, it will alert you.
4. Click Accept and Install. Wait for the download and preparation — this can take 20–40 minutes depending on your PC and internet speed.
5. The PC will restart multiple times automatically.
6. When prompted, log in and confirm all your files and apps are intact.
- Keep your PC plugged into power.
- Do not interrupt the upgrade process.
- Make sure the internet connection is stable.
Method 3: The Manual Way (ISO File)
Best for users with limited internet (you can download the ISO once and use it for multiple PCs) or for those who encountered errors using the previous two methods. This involves downloading the entire "Disk Image" of the OS. By running the setup from an ISO, you provide the system with all the files it needs locally, preventing errors caused by dropped internet connections.
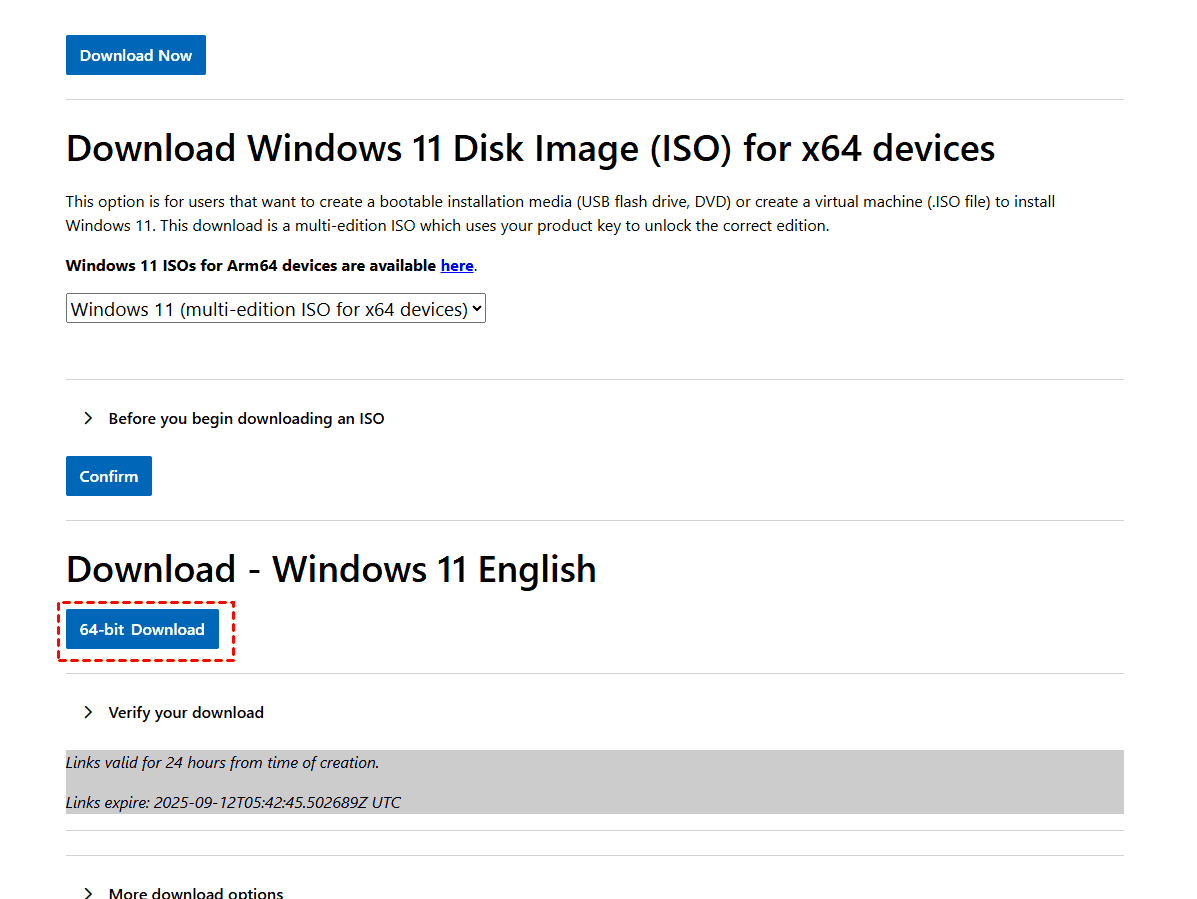
1. Download the Windows 11 Disk Image (ISO) from Microsoft.
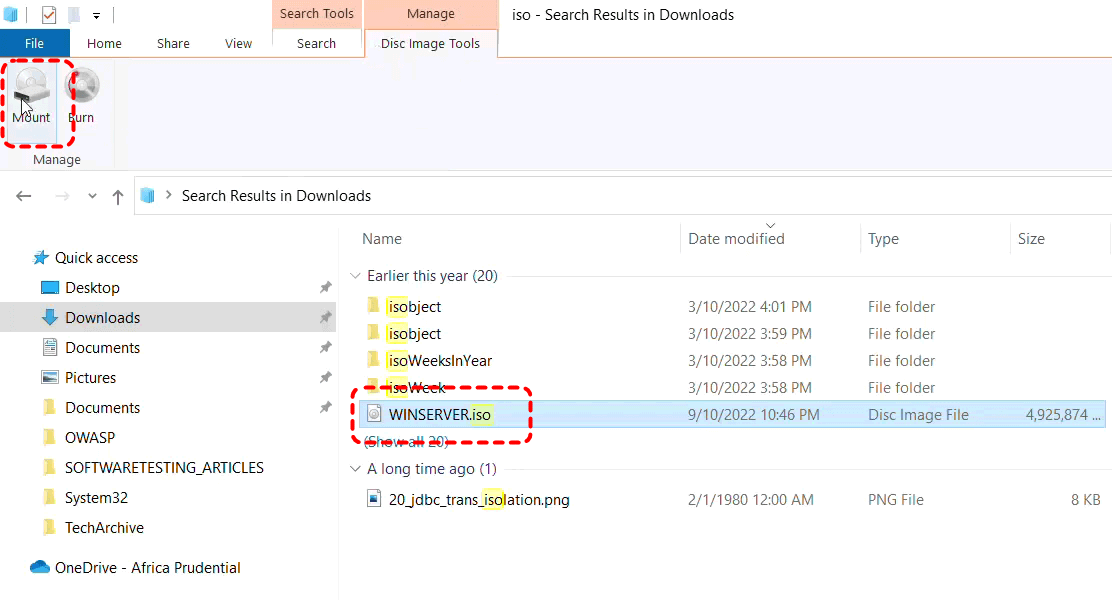
2. Right-click the ISO → select Mount.
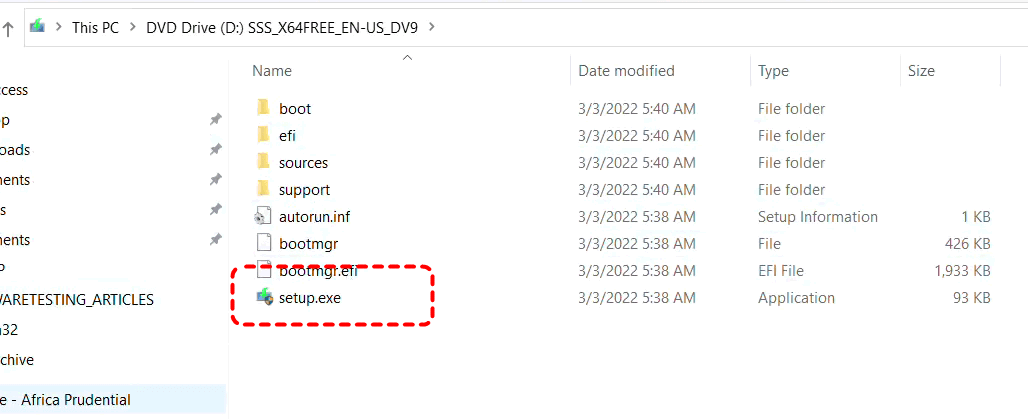
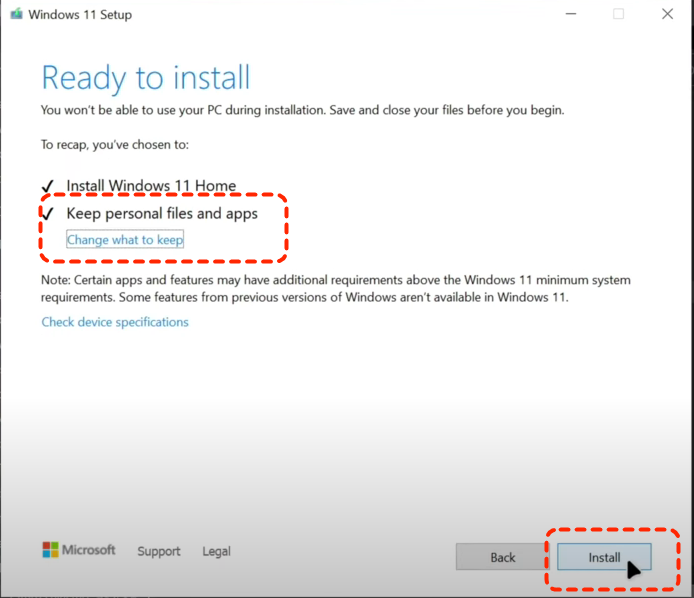
3. Open the mounted ISO drive → double-click setup.exe. The setup wizard will open. Choose Download and install updates.
4. When the "Ready to install" screen appears, verify it says "Keep personal files and apps." If it doesn't, your data will be erased—click "Change what to keep" to fix this.
5. Click Install and let the process finish.
6. Your PC will restart multiple times. After installation, log in and verify all your files and apps.
- Close all running apps before starting.
- If you experience errors, disable third-party antivirus temporarily.
- Keep external backup handy.
- ★Optional: Using Media Creation Tool
- Create a bootable USB with the Media Creation Tool.
- Run setup.exe from the USB without booting from it.
- Choose Keep personal files and apps. This avoids a clean install and preserves your data.
What to Do If Files Are Missing After the Upgrade
lose data when upgrading from windows 10 to 11
i will need to upgrade my computer from windows 10 to windows 11 when it comes to the end of life for updates in October. will i not lose any data or anything from all the drives that are on my computer these are my e drive, c drive and sdd drive
- Question from Reddit
Even with the best preparation, bugs can occur. Sometimes the upgrade creates a "Temporary Profile," making it look like your files are gone, or a partition may become "unallocated" due to a disk error.
If you log into Windows 11 and find your folders empty, do not write any new data to the drive. This is where MyRecover becomes vital. MyRecover is a professional-grade data recovery tool designed specifically to handle the aftermath of complex OS transitions.
Why MyRecover is the Best Choice for Windows 11 Upgrades:

- ✨Post-Upgrade Optimization: It is fully compatible with the new Windows 11 file system and can recover files lost during failed "In-Place" upgrades.
- ✨Partition Recovery: If the Windows 11 installation caused a partition to "disappear," MyRecover can scan the raw disk sectors to retrieve the data.
- ✨High-Speed Deep Scan: It uses advanced algorithms to find over 1000+ file types (including Outlook emails, professional CAD files, and 4K videos) that the standard Windows "Undo" might miss.
How to get your data back:
1. Download & install MyRecover.
2. Open the software and select the partition where your data was originally stored (usually C:).
3. Click Scan. The software will automatically combine "Quick Scan" and "Deep Scan" to find every hidden file.

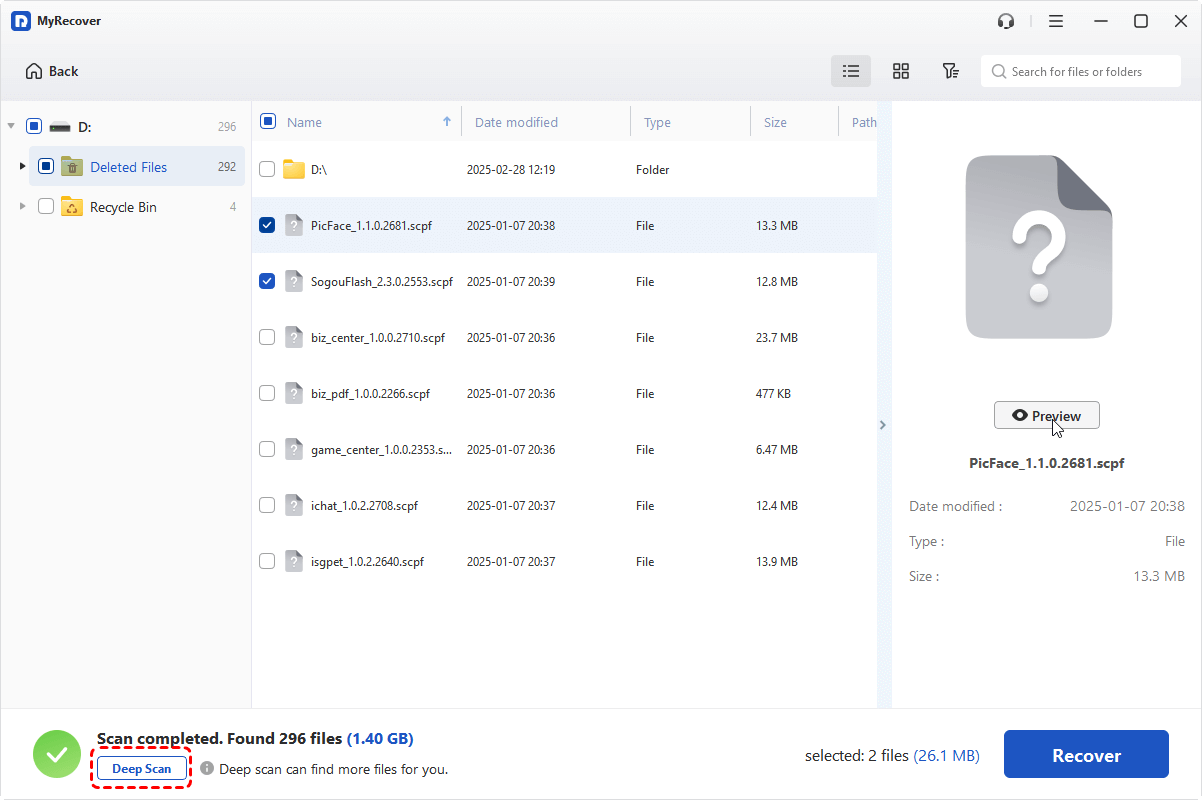
4. Browse the results. You can search by filename or filter by file type. Select your missing folders and click Recover, then save the lost files to another drive. (Tip: Always recover your files to a different drive (like a USB stick) to prevent overwriting the original data.)

This keeps your data safe from overwrite.
Conclusion
Upgrading to Windows 10 to Windows 11 without losing data is safe and straightforward — as long as you prepare properly:
- Check device compatibility.
- Back up important files.
- Choose the right installation method.
- Keep MyRecover in mind for emergencies.
Think of the upgrade like moving houses — pack carefully, check the new place, and keep a recovery plan ready. Do it right and you'll enjoy a smooth upgrade with all your files intact. Enjoy your new Windows 11 experience!
FAQs
1. Will upgrading to Windows 11 delete my third-party apps like Chrome or Photoshop?
No. As long as you choose the "Keep personal files and apps" option during the setup, all installed software remains functional. However, some very old legacy apps may require a "Compatibility Mode" adjustment or a quick reinstall to run on the new Windows 11 kernel.
2. I upgraded, and now my desktop is empty. Are my files gone?
Not necessarily. Sometimes Windows logs you into a "Temporary Profile" if the migration of your user account fails. Try restarting your PC 2-3 times. If the files still don't appear, use MyRecover to scan your user directory; it can often find the files that the system failed to map to the new profile.
3. What is the "Windows.old" folder, and can I delete it?
This folder is a safety net created by the upgrade process. It contains your entire old Windows 10 installation. Windows will automatically delete it after 10 days to save space. If you are sure all your files are safe, you can delete it via "Storage Sense," but we recommend keeping it for at least a week.
4. Can MyRecover help if I accidentally chose "Keep Nothing" during the upgrade?
Yes. Choosing "Keep Nothing" performs a clean install, but it doesn't always "wipe" the hard drive securely; it simply marks the space as empty. MyRecover can perform a deep sector scan to find the data from your previous installation before it gets overwritten by new Windows 11 activity.
5. How long does the upgrade take without losing data?
Depending on your internet speed and SSD/HDD performance, the process usually takes between 30 and 90 minutes. Using an SSD and the "ISO Method" is typically the fastest route.
6. What if my PC gets stuck at 99% during the upgrade?
This often happens due to a driver conflict or a large "SoftwareDistribution" folder. Wait at least 2 hours. If it doesn't move, disconnect all USB peripherals (except mouse/keyboard) and restart the process.


Stay Updated With Our
Latest Tips
Add us as a preferred source on Google to never miss helpful guides.