
How to Use Windows 7 Backup and Restore Step by Step?
Here, you can learn how to use Windows 7 Backup and Restore, including how to enable the feature, create system images, and back up personal files. It also provides quick guidance for using Backup and Restore in Windows 10 and Windows 11, helping users secure important files across all Windows versions.
By Emma / Updated on April 15, 2026
What is Windows 7 Backup and Restore?
Windows 7 Backup and Restore is the built-in data protection utility introduced with Windows 7 to help users safeguard their personal files and system settings. It provides two major functions: file backup and system image creation.
👉File backup: automatically copy documents, photos, videos, and other important data to an external drive or network location.
👉System image: save a complete snapshot of the entire Windows environment—including system files, installed programs, and settings—so the computer can be fully restored to a previous status after serious problems like system crashes, malware attacks, or hardware failures.

Besides, Backup and Restore also supports scheduled backups, allowing users to set recurring automatic backups without manual operation. Although newer versions of Windows introduced updated backup tools, Backup and Restore remains functional in Windows 7, andis still available in Windows 10 and Windows 11 for compatibility, making it a reliable option for users who want a simple, familiar backup solution across different Windows versions.
How to Use Windows 7 Backup and Restore?
Now let’s walk through the details of how to use the Windows 7 Backup and Restore tool step by step, including where to find it, how to enable it, and how to perform different types of backups and restores.
Part 1. Where to Find Windows 7 Backup and Restore?
First of all, we need to know where is Windows 7 Backup and Restore. Generally speaking, we can easily access this feature through the following methods, from the most common to the more advanced options.
1: Through Control Panel (Primary Method)
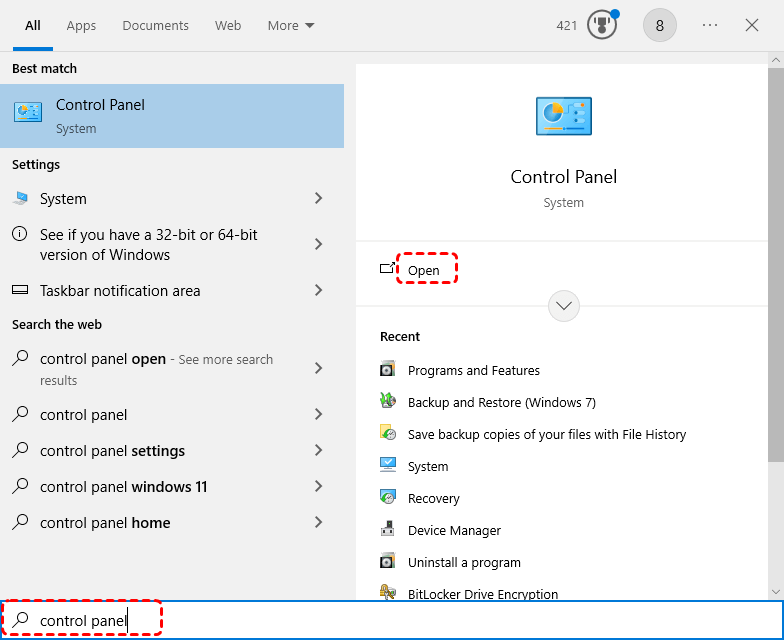
Press "Win+S", input "Control Panel" and click "Open".
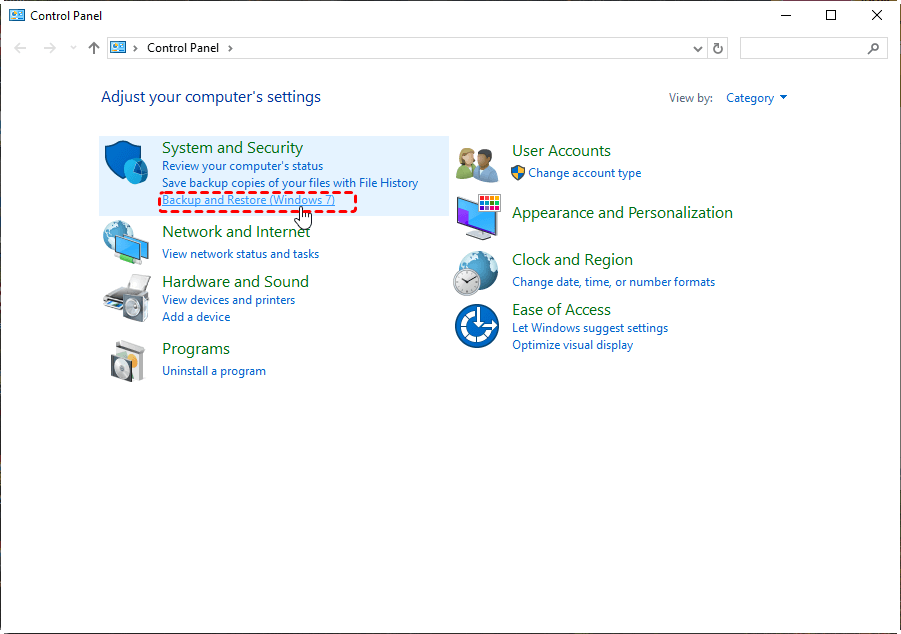
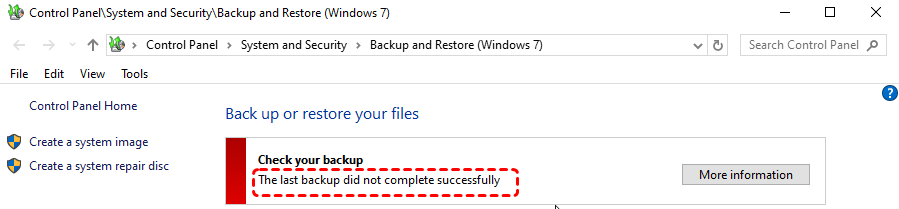
Select "System and Security". Click "Backup and Restore (Windows 7)".
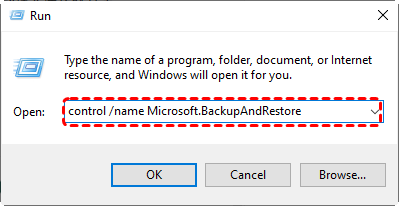
2: Through the Run Command
Press "Windows + R". Type: "control /name Microsoft.BackupAndRestore", and press "Enter".
This method is useful for advanced users and IT professionals.
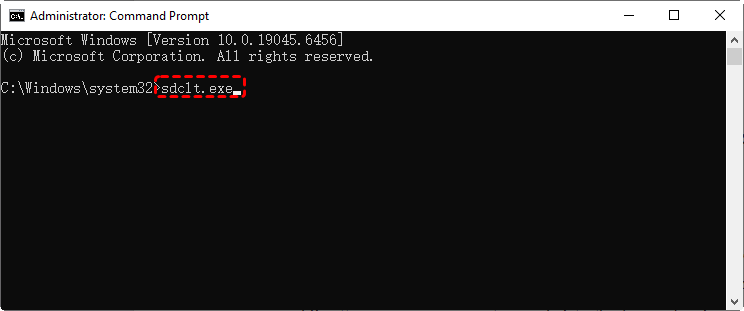
3: Using Command Prompt (CMD)
Press "Start", type "cmd", right-click "Command Prompt" and select "Run as administrator".
Enter the command: sdclt.exe
All those methods can launch the Backup and Restore interface immediately.
Part 2: How to Enable Windows 7 Backup and Restore
After entering the Backup and Restore Windows 7 dashboard, we can enable it and use Backup and Restore to:
👉Back up personal files like documents, pictures, videos, and music
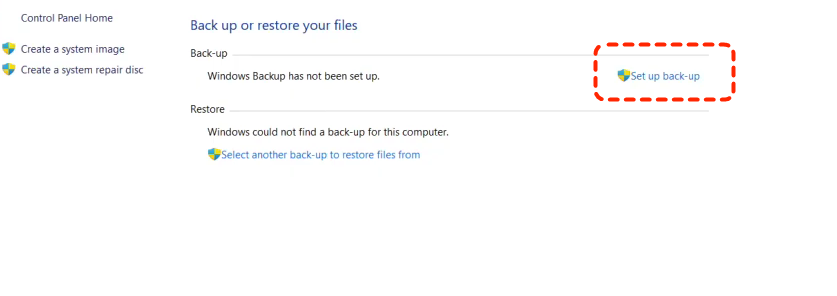
Step 1. Click "Set up Backup now" on the right side.
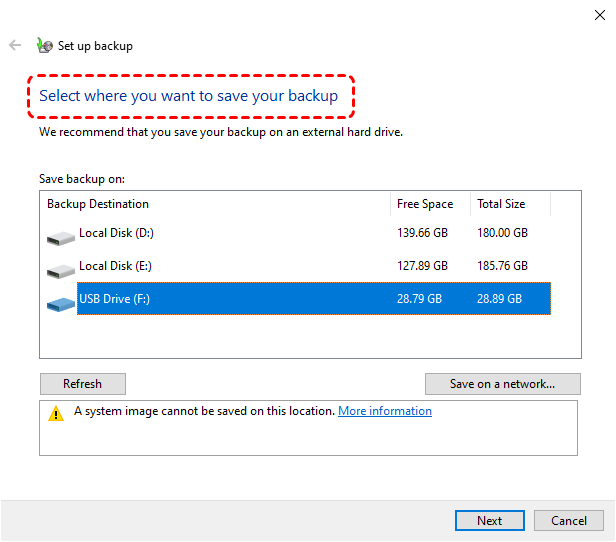
Step 2. Choose where you want to save the backup (external hard drive, or a secondary internal drive).
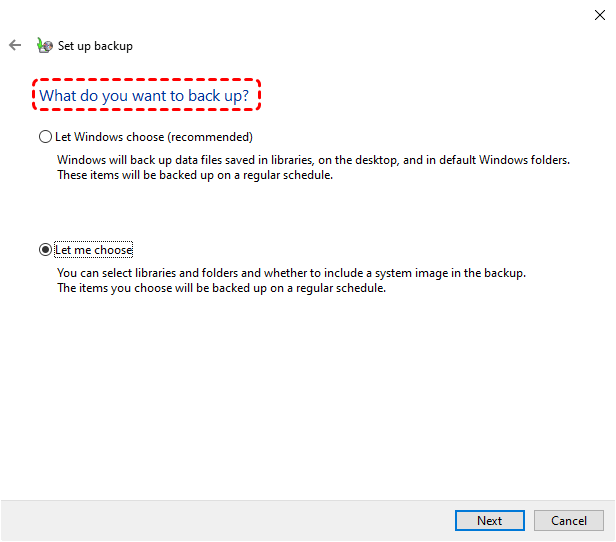
Step 3. Select "Let Windows choose (recommended)" or "Let me choose" to manually pick folders.
Step 4. Review your settings and click "Save settings and run backup".
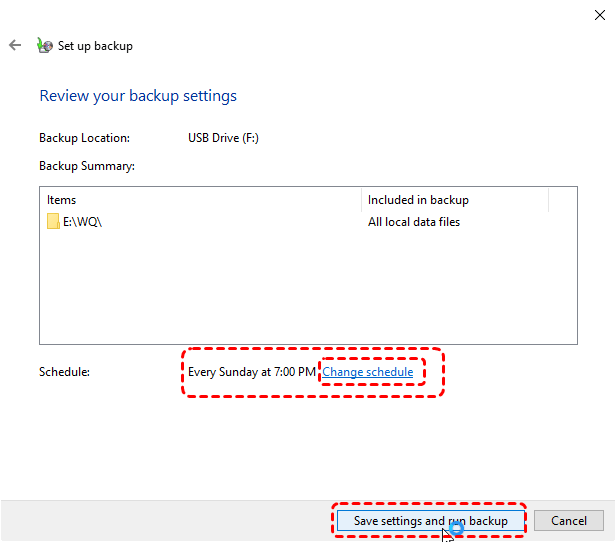
Then Windows will begin backing up your data based on the schedule you set. You can also modify the schedule anytime by selecting "Change schedule".
👉Create a system image to protect the entire operating system
The above shows how to back up your personal files to an external hard drive, similar to how Windows File History works—another built-in backup and restore feature in Windows. If you want to create a system image for emergency OS restoration, use the "Create a system image" in Windows 7 Backup and Restore.
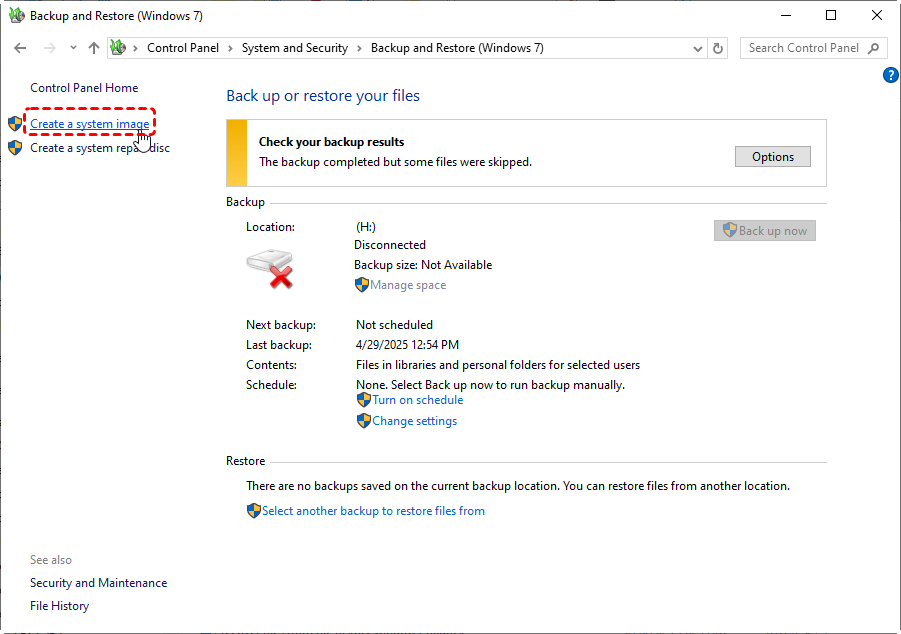
Step 1. Click "Create a system image" in the left pane.
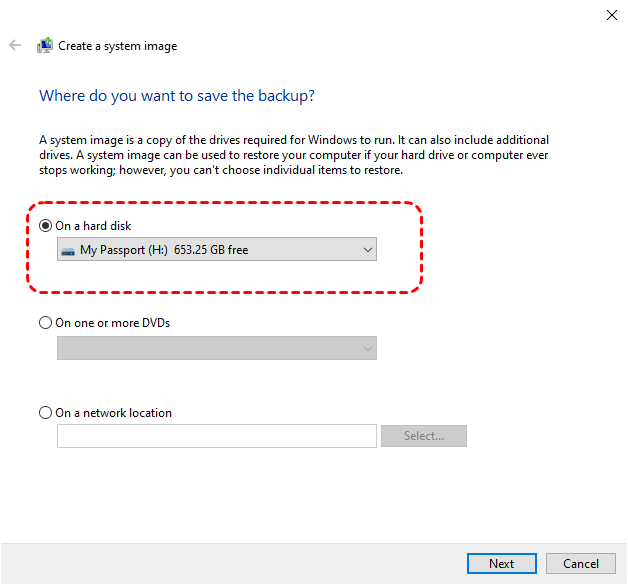
Step 2. Select where to save the image—an external hard drive, DVDs, or a network location.
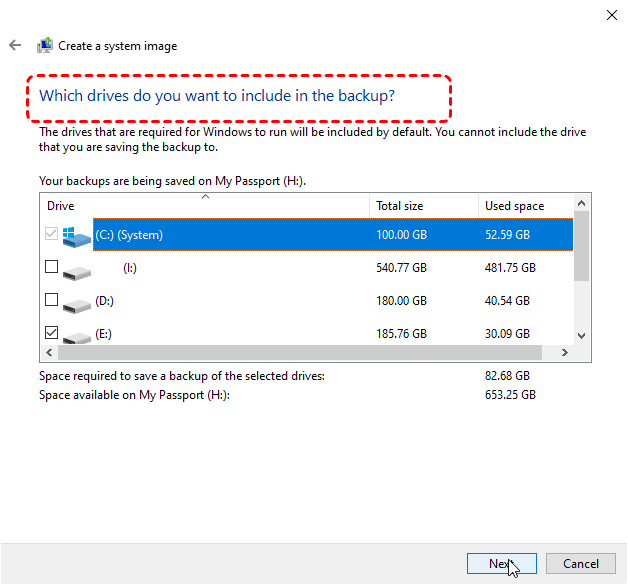
Step 3. Confirm the drives to include and start the process.
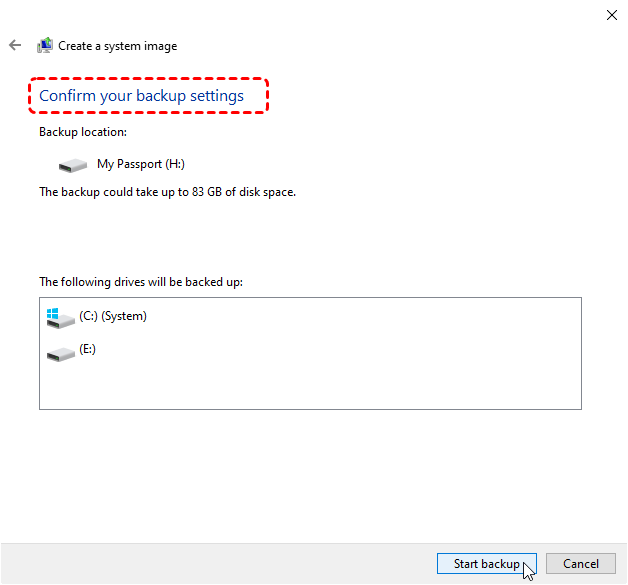
Step 4. Then click on "Start backup".
Part 3: How to Restore from Backup
Now, let’s explore how to use Windows 7 Backup and Restore to retrieve lost files or perform a full system recovery when necessary.
👉Restore deleted or corrupted files
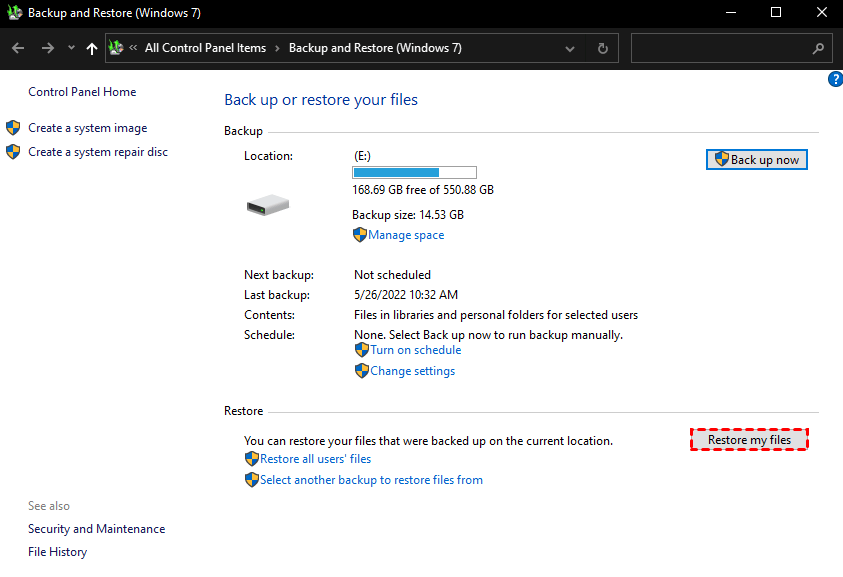
Step 1. Launch Backup and Restore Windows 7. Click "Restore my files"(or "Restore all users’ files" if restoring for multiple accounts).
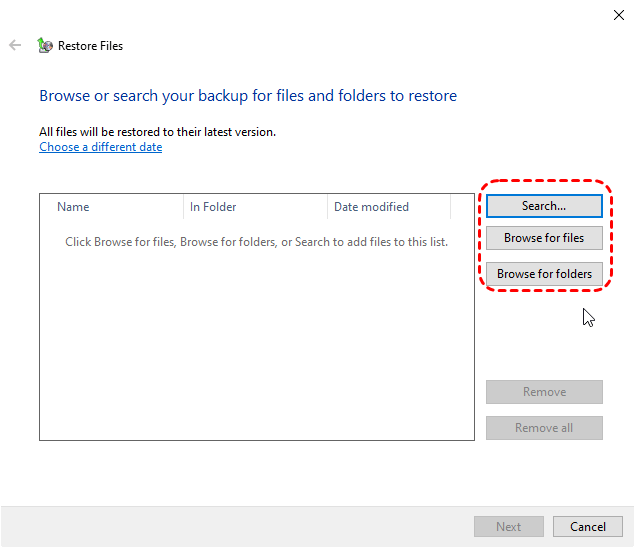
Step 2. Choose how to search for your files:
- Browse for files – select individual files.
- Browse for folders – select entire folders.
Step 3. Choose the restore location:
- In the Original location – replaces the existing file if it exists.
- In the following location – restore files to a different folder to avoid overwriting.
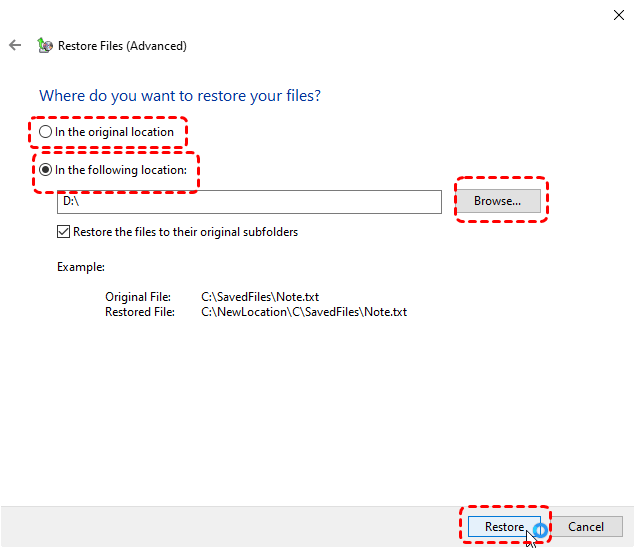
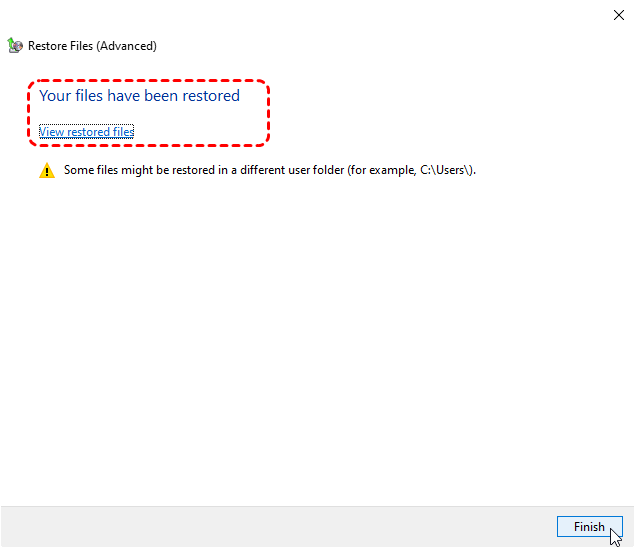
Step 4. Once confirm the correct backup, click "Restore". Wait until the process completes, then check the restored files to ensure they are intact.
👉Recover your PC using a previously created system image
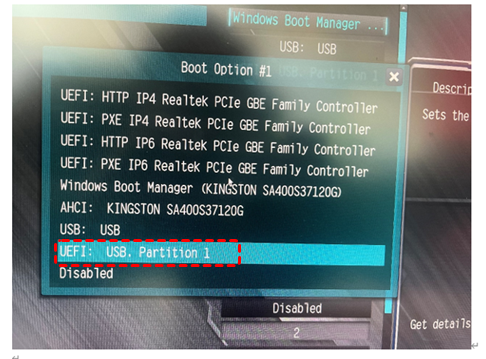
Step 1. Insert your System Repair Disc or Bootable USB Recovery Drive into the computer.
Step 2. Restart your PC and boot from the disc/USB (you may need to change the boot order in BIOS/UEFI). Select your language and keyboard settings, then click "Next".
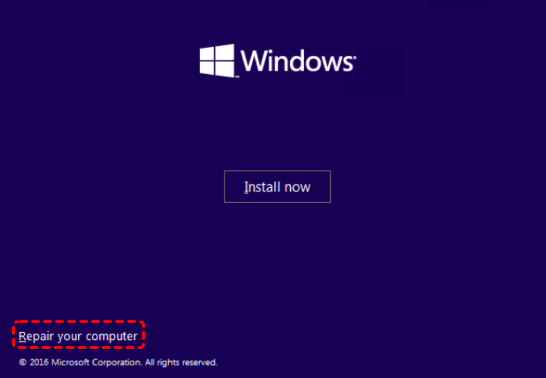
Step 3. Click "Repair your computer".
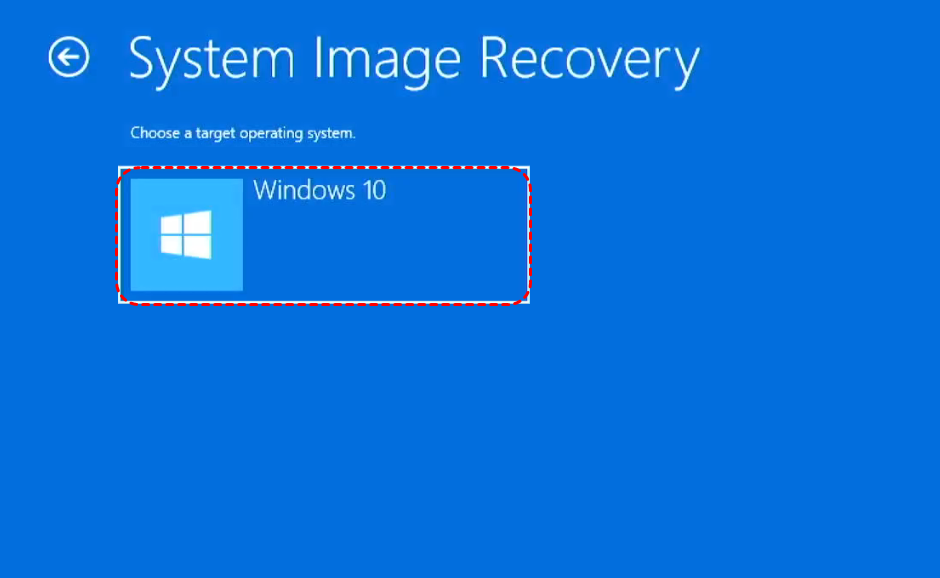
Step 4. Select the operating system to repair (usually your Windows installation).
Step 5. Choose "System Restore".
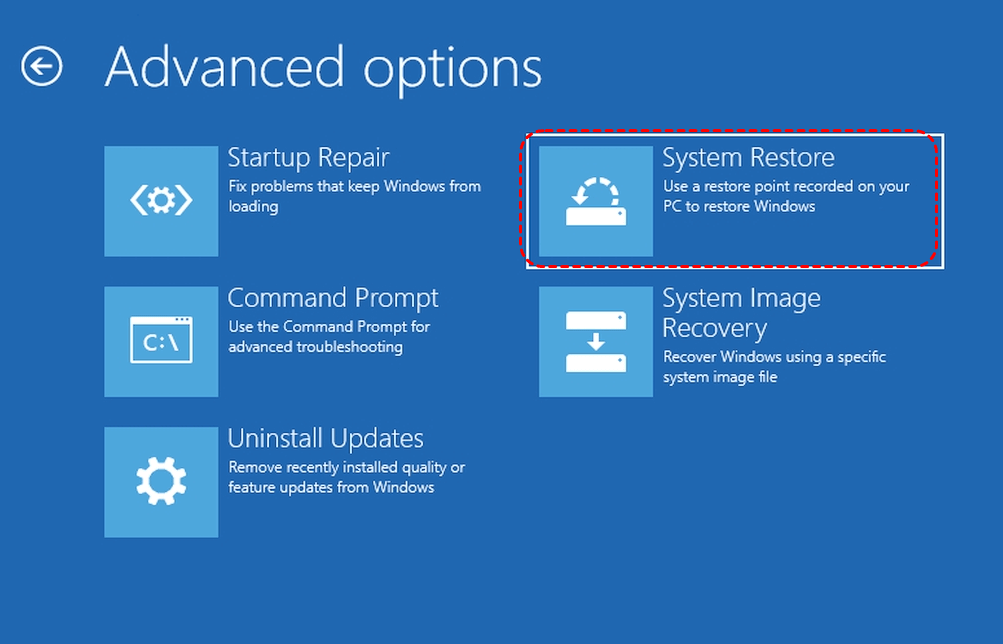
Step 6. Choose an account, enter the password, select a restoration point, and click "Finish" to revert system files.
Common Windows 7 Backup and Restore Errors + Fixes
Even though Windows 7 Backup and Restore is reliable, users may occasionally encounter errors. Below are the most common issues and solutions:
⭕Backup Fails Due to Insufficient Disk Space
Backup cannot complete because the target drive doesn’t have enough free space.This usually happens when the external hard drive or network location you selected for the backup is nearly full, or when multiple previous backups and system images are taking up significant space. In such cases, you can:
- Delete old backups or system images to free up space.
- Use a larger external hard drive or network location.
- Compress large folders before backing up (if manually selecting files).
⭕Network Location Not Accessible
If thenetwork location is unavailable, the network connection is unstable, or the user does not have sufficient permissions to access the shared folder.Backing up to a network drivein Windows 7 Backup and Restoremay fail with errors such as "location not found" or "access denied."
- Ensure the network drive is online and connected.
- Check folder permissions and login credentials.
- Map the network drive and verify it works in Windows Explorer.
⭕System Image Creation Fails
Creating a system image may stop unexpectedly or display an error during the processwhen there is a problem with the source drive, insufficient space on the target drive, or interference from third-party software such as antivirus programs. Other causes include corrupted system files, disk errors, or including unsupported drives in the image.
- Run "chkdsk x: /f /r" on the source drive to fix disk errors.

- Disable third-party antivirus or firewall temporarily.
- Make sure the destination drive is formatted correctly and has enough space.
- Avoid including unnecessary drives in the system image.
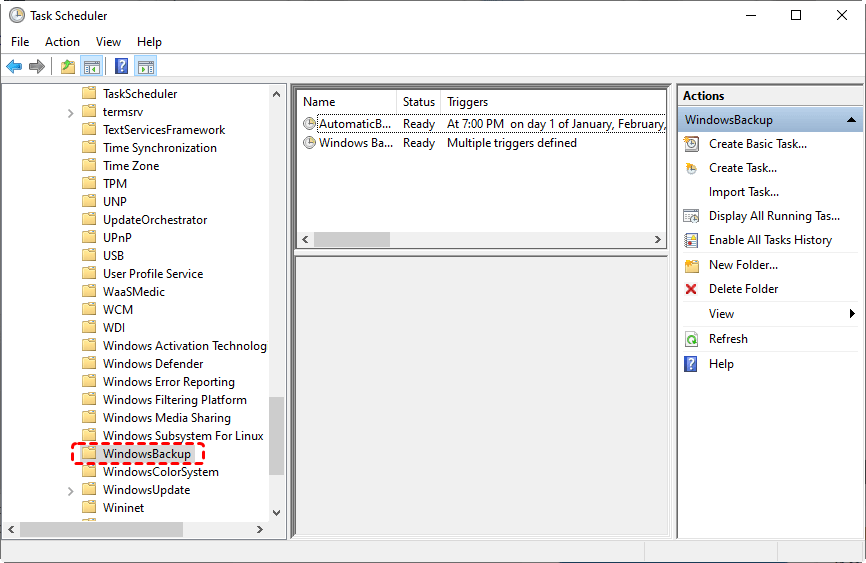
⭕Backup Schedule Not Running
Automatic backups do not execute according to the schedule.
- Click the Start button, type "Task Scheduler"into the search box.Click "Task Scheduler"in the search results to open it. Access"Task Scheduler Library → Microsoft → Windows → WindowsBackup"and ensure tasks are enabled.
- Make sure your PC is turned on and not in sleep mode during scheduled backup times.
- Check for conflicts with other scheduled tasks or third-party backup software.
⭕Backup Stuck or Very Slow
Sometimes, the backup process may freeze or take an unusually long time to completedue to large file sizes, insufficient system resources, unstable network connections (for cloud backups), or interference from antivirus software. To resolve this:
- Pause and resumethe backup
- Disconnect unnecessary external drives to reduce interference.
- Perform backups when the system is idle.
- Avoid backing up very large files over network locations during peak traffic.
Closing Thoughts
Windows 7 Backup and Restore is a powerful, built-in tool that helps you protect your personal files and system settings, whether through routine file backups or full system images. While it’s generally reliable, occasional errors such as insufficient disk space, slow backups, or system image failures can occur.
For users who want an extra layer of protection or a more user-friendly recovery option, MyRecover offers professional file recovery solutions that complement Windows’native tools. Whether you accidentally delete files, experience a system crash, or need to retrieve lost data from SSD, HDD, USB, SD card or other storage drives, it allows you to restore your important data without the hassle, no prior backup required.

- ✨No Backup Needed: Effortlessly recover files in various scenarios without relying on prior backups.
- ✨Easy-to-use interface: No command-line navigation or keyboard-based selection required.
- ✨AI-Powered Recovery: Uses AI recognition and deep scanning technology.
- ✨Wide file support (1000+): Photos, videos, documents, audio files, archives, and more.
- ✨Supports all common devices (500+): HDDs, SSDs, USB flash drives, SD cards, external drives, etc.
- ✨Cover 500+ Scenarios: deletion, formatted disk, emptied Recycle Bin, system crashes and more.


Stay Updated With Our
Latest Tips
Add us as a preferred source on Google to never miss helpful guides.