
How to Perform Windows Recovery to a Previous Date: A Complete Guide
Want to fix errors or undo unwanted changes? This guide explains everything about Windows recovery to previous date in simple steps. Learn how to restore your system, keep your data safe, and bring your PC back to peak performance.
By Vera / Updated on May 29, 2026
Introduce: Why Turn Back the Clock?
How can I restore to a previous date?
- Question from Microsoft
Ever wished you could turn back time on your PC — like undoing a mistake or reversing a bad system update? Many users often ask, "How do I restore my computer to a past date?" That is exactly what the System Restore feature is designed for.
Computers are complex ecosystems. A single driver update or a minor registry change can trigger a domino effect, leading to the "Blue Screen of Death" (BSOD), sluggish performance, or software crashes. Rather than spending hours troubleshooting individual files, performing a Windows restore to previous date allows you to bypass the current chaos by reverting your PC to a state where it worked perfectly.
In this guide, we will explore the logic behind system recovery, the best methods to execute it based on your PC's health, and how to protect your files if the recovery process goes south.
What Does "Windows Recovery to Previous Date" Actually Do?
At its core, Windows recovery to previous date utilizes System Restore, a built-in utility that creates "snapshots" of your system files and registry settings. These snapshots are known as Restore Points.
When you trigger a restore, Windows doesn't just "delete" new files. It compares the current system state with the chosen restore point and replaces corrupted or modified system files, registry keys, and drivers with the older, stable versions.
What Happens to Your Content:
- Reverted: System settings, Windows Updates, Registry entries, and hardware drivers.
- Uninstalled: Programs or apps installed after the restore point was created.
- Untouched: Your personal files—documents, photos, emails, and videos—remain exactly where they are.
Why You Might Need to Recover Windows to a Previous Date
Before diving into the "how-to," identify if your situation matches these common scenarios where you'd need to restore my computer to an earlier date:
- ☹️Software or Driver Problems: Installed a new app or driver, and suddenly your system starts crashing or freezing? Rolling back to a date before that installation often fixes it instantly.
- ☹️System Update Gone Wrong: Windows updates are great… until they break something. If a recent update (e.g., Windows 10 to 11) causes instability, reverting to a point before the update can restore normal performance.
- ☹️Malware or Virus Infection: Some malware can mess with your system configuration. Restoring to a previous date can help remove its effects — though you should still run a full antivirus scan afterward.
- ☹️Accidental System Changes: Tweaked system settings or deleted an important file by mistake? System Restore can undo those unwanted changes quickly.
(Top 4) How to Perform Windows Recovery to Previous Date
The method you choose depends entirely on whether your computer can reach the desktop.
Method 1: Using System Restore (When Windows Can Boot)
Use this method if you can still log into your desktop but notice the system is acting "weird," slow, or showing error pop-ups. This is the least invasive method. It works within the Windows environment to swap out the current system configuration for a previous, stable one.
Step 1: Open System Restore
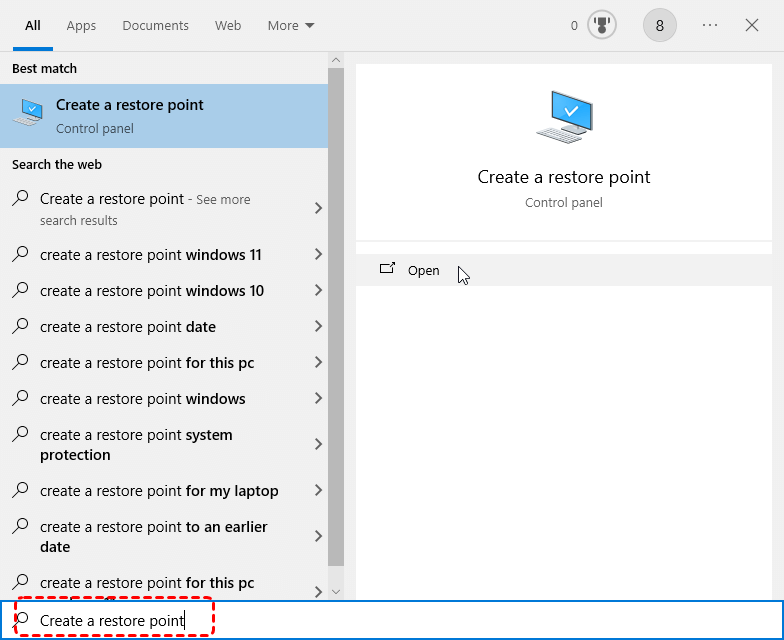
To start the process of Windows restore to previous date, type "Create a restore point" in the Windows search bar and open it.
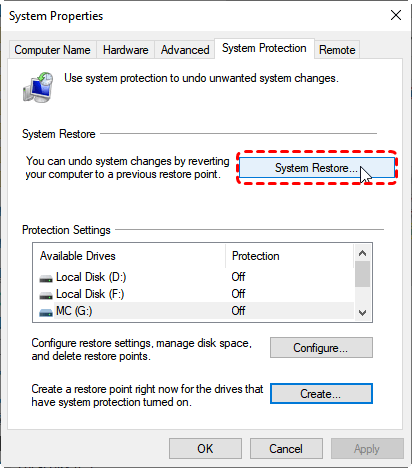
Under the "System Protection" tab, click the System Restore button.
Step 2: Choose a Restore Point
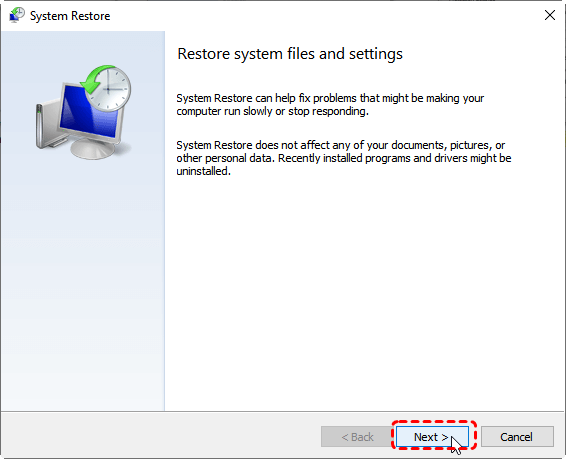
Click Next to see a list of available restore points.
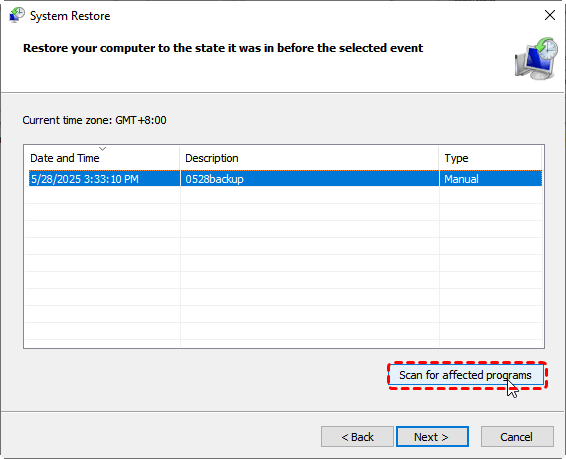
Select one created before the issue began. Click Scan for affected programs to see what changes will be made.
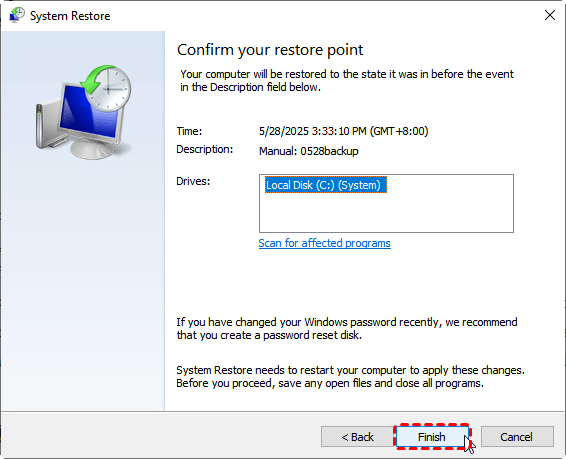
Step 3: Confirm and Start Restore
Click Next > Finish. Windows will restart and begin restoring your system. This process may take 10–30 minutes depending on system size and data.
Method 2: System Restore via Windows Recovery Environment (WinRE)
But what if you can't even reach the search bar to ask, "How do I restore my computer to a past date"? If your PC is stuck in a boot loop, you must access the recovery tools from outside the Windows environment.
Windows includes a "hidden" operating system called the Windows Recovery Environment (WinRE). This environment runs independently of your main Windows installation, allowing you to fix the "main" system even if it’s broken.
Step 1: Entering the Recovery Environment
Turn the PC on and off three times abruptly using the power button. On the third time, Windows should enter "Automatic Repair" mode.
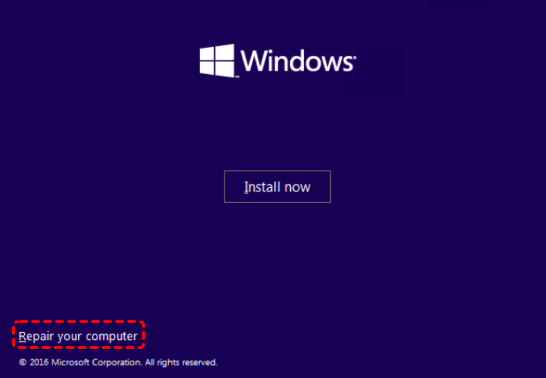
If that doesn’t work, boot from a Windows installation USB or DVD and choose Repair your computer.
Step 2: Navigating the Advanced Menu
From the "Choose an option" screen, navigate to: Troubleshoot > Advanced options > System Restore.
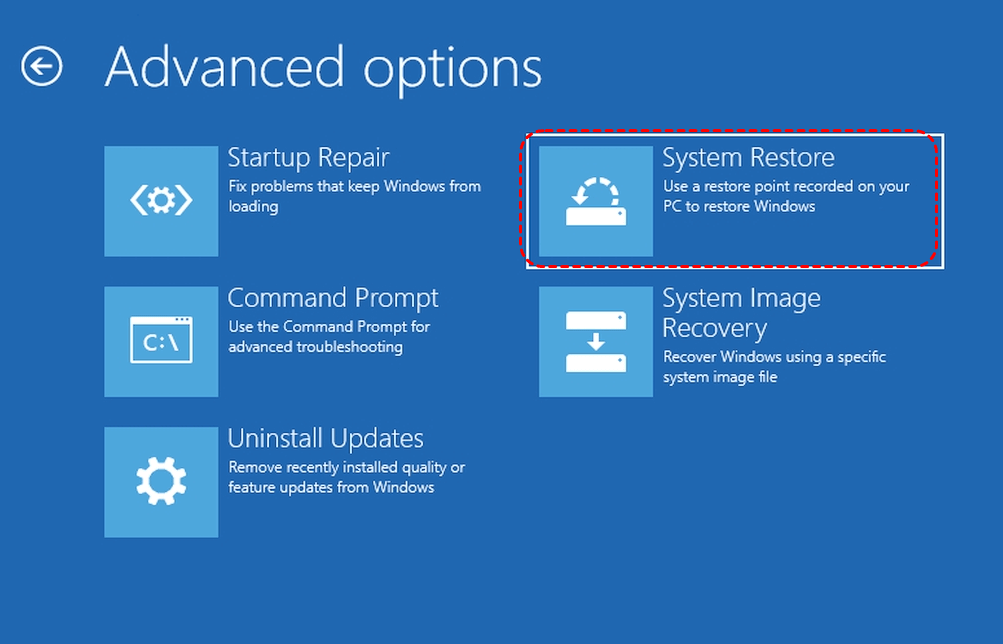
Step 2: Access System Restore
Once inside the recovery environment, select your operating system. Click System Restore from the list of advanced tools.
Step 3: Complete the Restoration
Choose a restore point and follow the on-screen prompts. After the process finishes, restart your computer. Your system should now be back to the state it was in before the problem occurred.
Sometimes, System Restore fails because no restore points were created. In these cases, you need more robust tools to achieve a successful Windows recovery to previous date.
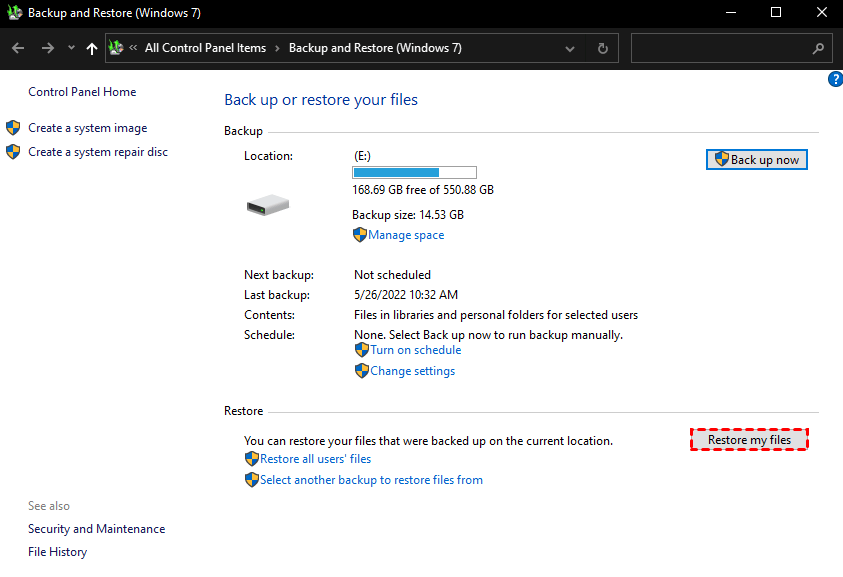
Method 3: Use Backup and Restore (Windows 7) - The System Image Method
Windows 10 and 11 still include the classic Backup and Restore (Windows 7) tool. While System Restore only changes system files, a System Image is a complete "clone" of your entire drive. This way is best for hardware failure or total OS corruption.
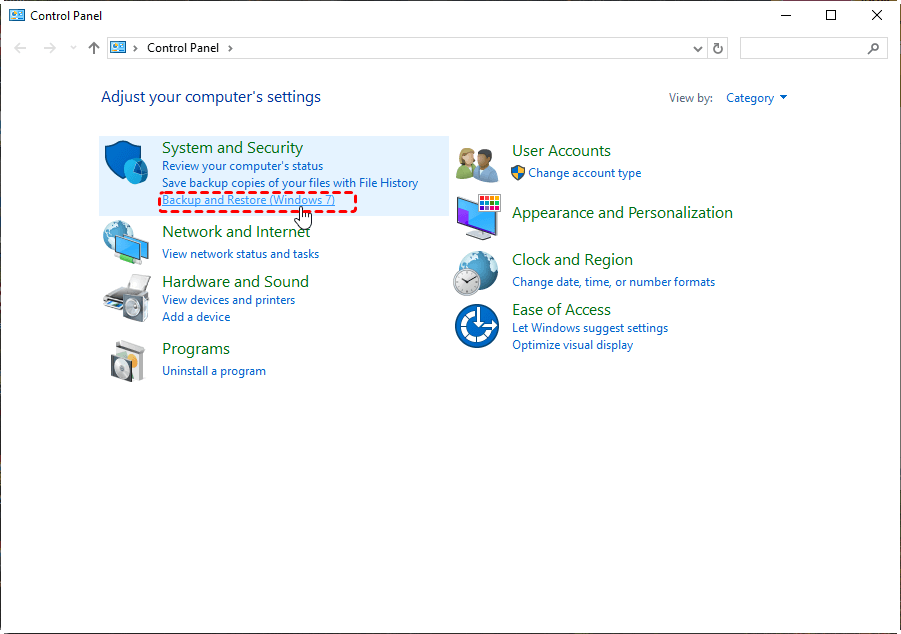
You can find it under Control Panel > System and Security > Backup and Restore (Windows 7).
If you’ve previously created a system image backup, you can use it to restore your system entirely — including apps, drivers, and settings.
Method 4: Reset This PC - The "Fresh Start" Logic
If the registry is too damaged for a restore, "Reset This PC" essentially performs a clean installation of Windows while giving you the option to keep your user folder.
Here’s how:
1. Go to Settings > System (or Update & Security) > Recovery.
2. Under Reset this PC, click Get Started.
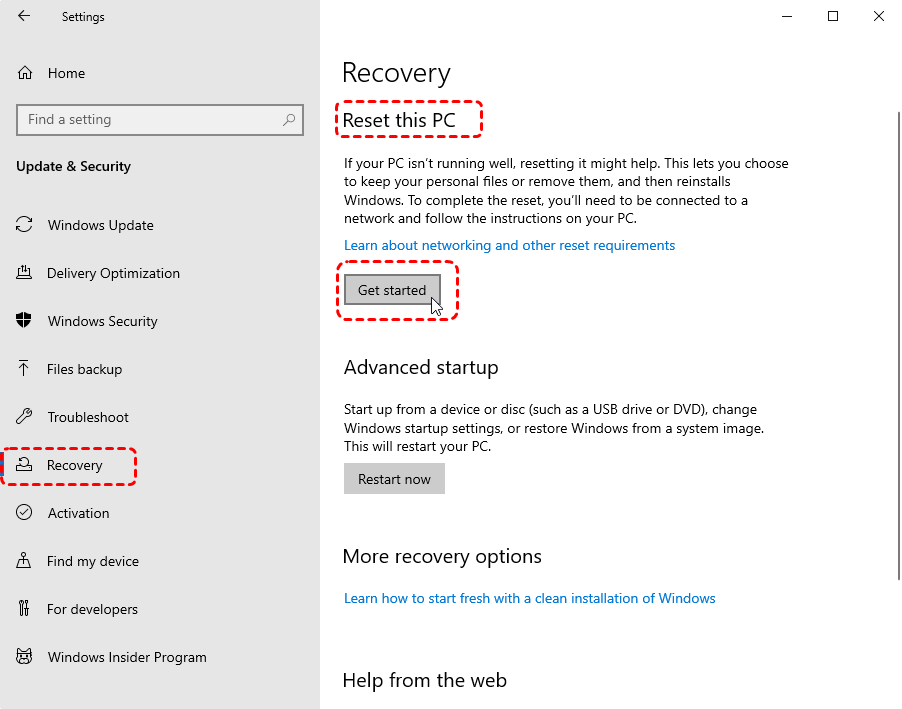
3. Choose Keep my files (or Remove everything for a clean start).
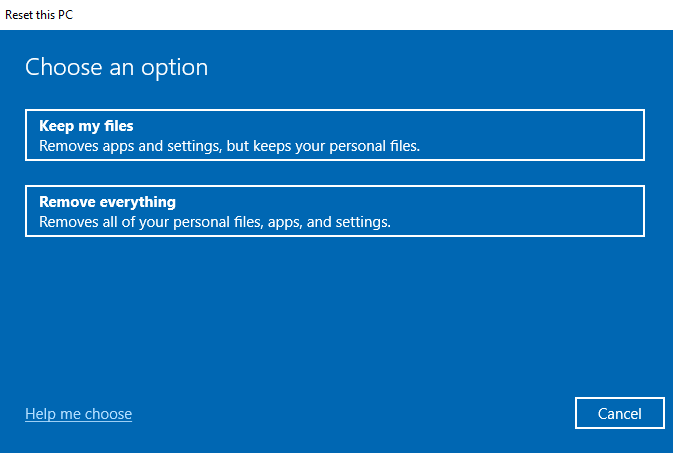
4. Choose Cloud download if you suspect your local Windows files are corrupted. It will download a fresh 4GB copy from Microsoft.
It reinstalls Windows and resolves most performance or corruption issues.
Critical Safeguard: Recovering Data After System Recovery with MyRecover
While the goal is to restore my computer to an earlier date without losing data, the reality of disk operations is that things can go wrong. A failed restoration or a system crash during the process can lead to missing documents. When Windows recovery to previous date fixes the OS but loses your personal files, MyRecover is your essential second line of defense.
System restoration involves heavy writing on your hard drive. If a file was in a temporary state or stored in a directory affected by a software rollback, it might vanish. MyRecover is specifically optimized to handle data loss stemming from system recovery issues.
- 💡Restoration Error Recovery: If a System Restore failed halfway through and corrupted your user profile, MyRecover can extract your files from the drive.
- 🔍 Deep Scan: Did a Windows update delete your desktop files? MyRecover’s Deep Scan can locate those missing file paths even after a system change.
- 💾 High Recovery Rate: It supports over 1000+ file formats (DOCX, JPG, MP4, etc.), ensuring your memories remain intact even if the OS changed.
- 💡 Simple, User-Friendly Interface: Perfect for beginners and professionals alike.
- 💻 Supports All Storage Devices: Works on HDDs, SSDs, USB drives, SD cards, and external hard drives.
How to Recover Lost Files Post-Restoration:
Follow these simple steps to bring your lost files back to life:
1. Download and install MyRecover on your Windows computer.
2. Launch the program and select the drive or partition where data was lost.
3. Click Scan — MyRecover will automatically perform a quick scan.
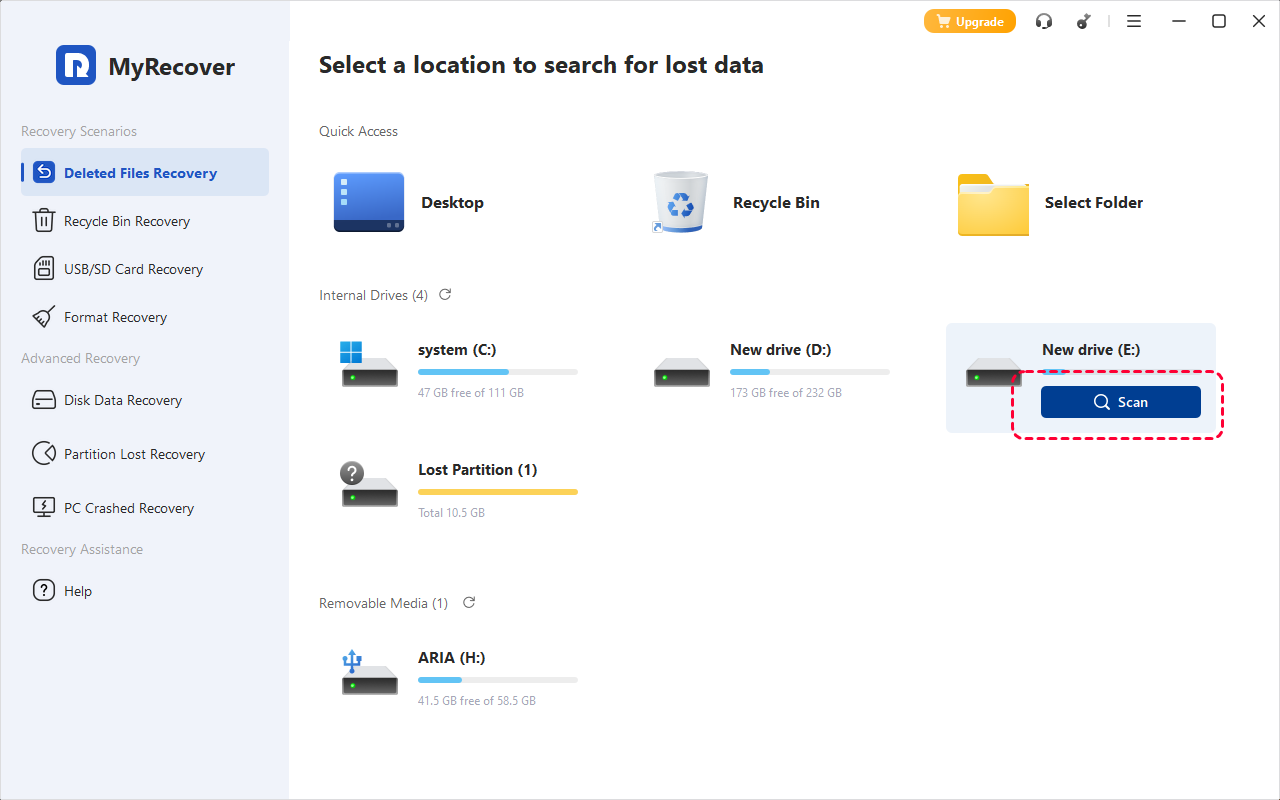
4. Preview and select the files you want to recover.
5. Click Recover and save your data to a safe location (preferably not the same drive).

In just minutes, you’ll have your missing files back — no complicated setup, no data loss panic.
If you’re looking for a fast, reliable, and user-friendly solution for recovering deleted or lost files, MyRecover is the way to go. It’s like having a safety net for your digital life — always ready to catch your data when things go wrong.
Tips to Prevent System Issues in the Future
A little prevention goes a long way in avoiding future system headaches.
Regularly Create Restore Points
System Restore usually does this automatically, but creating one manually before major updates or software installs is a smart move.
Keep System Updated
Microsoft releases patches that fix bugs and vulnerabilities. Always stay updated to ensure your system remains stable and secure.
Use Reliable Antivirus Protection
Malware can easily corrupt system files. Keep a trustworthy antivirus running and schedule regular scans.
Backup Your Data Frequently
Use external drives or cloud storage for backups. Tools like OneDrive or Google Drive make it simple to protect your data.
Final Thoughts
Learning how do I restore my computer to a past date is an essential skill for every PC user. Whether you use the standard Windows restore to previous date or more advanced recovery environments, the goal is stability. By understanding the logic of these tools and keeping a safety net like MyRecover for your personal data, you can troubleshoot with total confidence.
Whether your system boots normally or not, you’ve got options to get things back to normal without losing your personal files. Just remember: always create restore points and back up regularly — future you will thank you!
Frequently Asked Questions (FAQ)
1. Does System Restore delete my photos or Word documents?
No. A Windows restore to previous date is designed to affect only system files, programs, and drivers. However, it will uninstall any apps installed after the restore point was created. For safety, back up critical data before starting.
2. Why are there no restore points on my Windows 10/11 PC?
System Protection is often turned off by default. You must manually enable it by going to Create a restore point > Configure > Turn on system protection. Without this, you cannot restore my computer to an earlier date.

3. What should I do if System Restore gets stuck on "Initializing"?
Wait for at least an hour. If it's truly frozen, you may have to force a restart. If this causes data loss, use MyRecover immediately to scan your drive and retrieve any documents that disappeared during the interrupted process.
4. How do I restore my computer to a past date if I don't have a restore point?
If no restore points exist, you cannot use System Restore. Your best options are to "Reset This PC" or restore from a System Image backup created with Windows 7 Backup and Restore.
5. I accidentally did a Factory Reset instead of a Restore, can I get my files back?
Yes, but you must act fast. A Factory Reset wipes your data. Stop using the drive and use MyRecover to perform a Deep Scan to recover files after a Factory Reset. It is often able to reconstruct files from a wiped partition as long as they haven't been overwritten.
6. Can I undo a System Restore?
Yes. If you performed the restore within Windows, you can open the System Restore wizard again and select "Undo System Restore."


Stay Updated With Our
Latest Tips
Add us as a preferred source on Google to never miss helpful guides.