
[Free Download] Professional MTS Video Recovery Software
Accidentally deleted or lost your MTS video files? Stay calm! This guide introduces reliable MTS video recovery software designed to recover MTS videos from any device safely and efficiently. Whether files were deleted, formatted, or lost due to corruption, this tool can help you bring them back in just a few clicks — no technical skills required.
By Emma / Updated on November 4, 2025
What is MTS Video Format?
The MTS file format is a video container used primarily for high-definition video recordings. It’s based on the AVCHD (Advanced Video Coding High Definition) standard developed jointly by Sony and Panasonic for digital camcorders.

✔️File Extension: .mts (and sometimes .m2ts)
✔️Video Codec: H.264 / MPEG-4 AVC (for high compression and quality)
✔️Audio Codec: Dolby AC-3 or Linear PCM
✔️Resolution Support: Up to 1080p (Full HD) and even 4K in some cases
✔️Typical Devices: Sony, Panasonic, Canon, and JVC HD camcorders
What Makes MTS Video Recovery Software Necessary?
MTS video recovery software is essential because MTS files are often large, high-quality videos recorded on camcorders or SD cards — and they’re prone to data loss for several reasons. Unlike ordinary files, MTS videos are complex and can easily become corrupted or unreadable when interrupted during recording, transfer, or formatting.
- Accidental Deletion: It’s easy to delete MTS files while clearing space on a camera or computer.
- Formatting Mistakes: If you accidentally format your SD card or external drive, the MTS files aren’t gone immediately.
- File Corruption or Transfer Errors: MTS files can become corrupted if a recording is interrupted or if the device loses power during transfer.
In short, MTS video recovery software is crucial for safely retrieving irreplaceable video memories — whether from accidental deletion, formatting, or corruption.
Free Download MTS Video Recovery Software [Windows PC]
If you’ve lost important MTS video files, several reliable tools can help you bring them back. Below are 3 effective options ranging from free open-source utilities to advanced professional recovery software.
- ★Notice (Read First):
- Immediately stop any write operations to the storage card/hard drive containing the lost videos (do not record new footage, format, or copy new files onto it).
- Remove the storage card from the camera and connect it to a computer using a card reader or the card slot if available.
- Recovery results are not guaranteed to be 100% successful; the sooner you act, the higher the success rate.
- Recovered files MUST be saved to a different disk (a different drive letter or an external drive).
1. TestDisk (Free & Open Source)
TestDisk is a powerful, open-source data recovery tool capable of restoring lost MTS videos from SD cards, external drives, and camcorders. Although it doesn’t have a graphical interface, it can deeply scan partitions, fix file system errors, and recover deleted files effectively.
👍Pros:
- 100% free and open source
- Works on multiple operating systems
- Can recover lost partitions and formatted drives
👎Cons:
- Command-line interface (not beginner-friendly)
Steps to Recover Deleted MTS Video
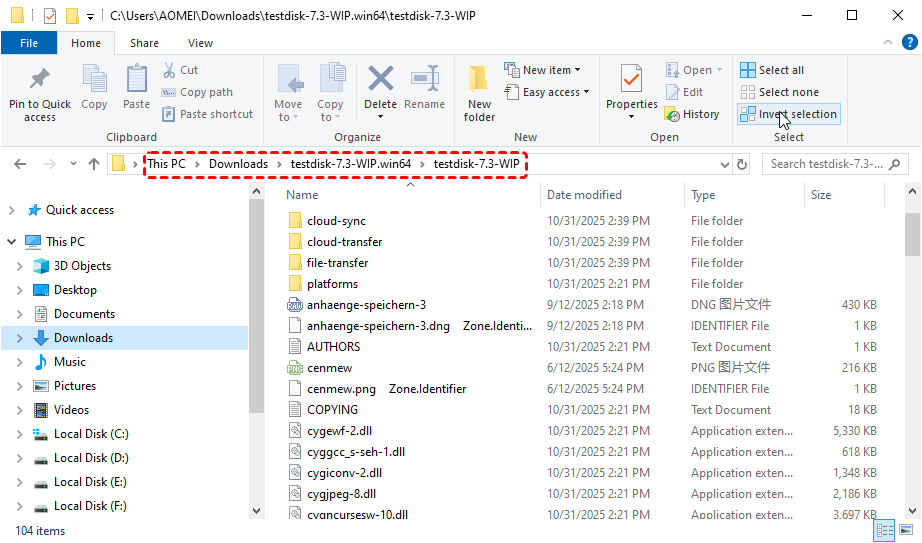
Step 1. Download and extract TestDisk on your computer (Windows users download testdisk_win.zip and extract it).
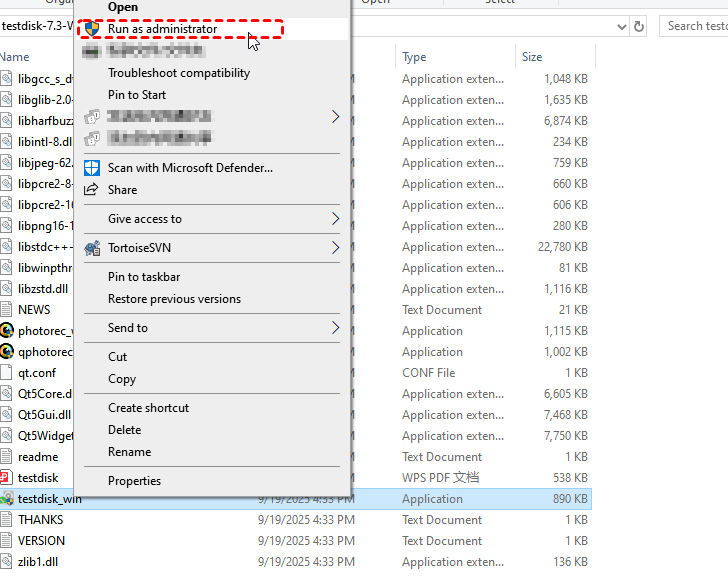
Step 2. Right click testdisk_win.exe and select "Run as administrator"(a command window will appear).
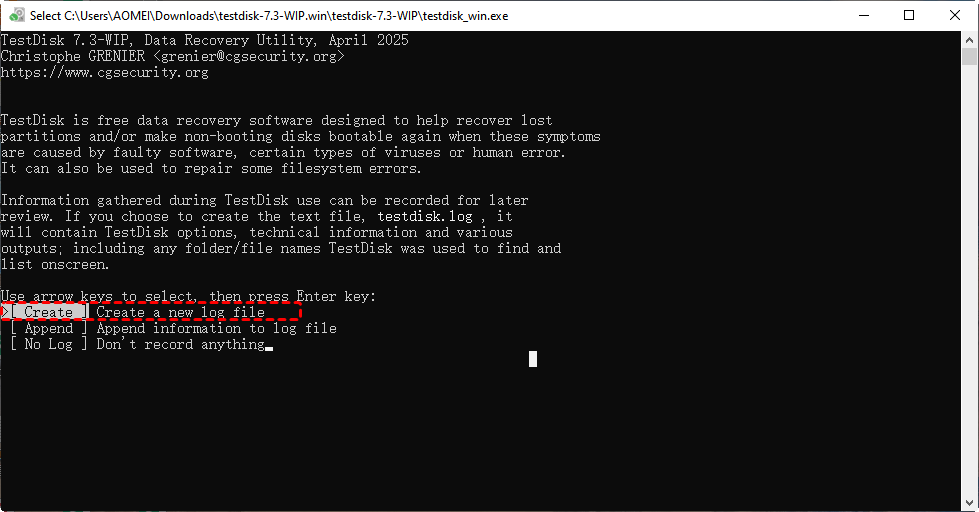
Step 3. The program will ask about creating a log (Create / Append / No). Select "Create" (press Enter).
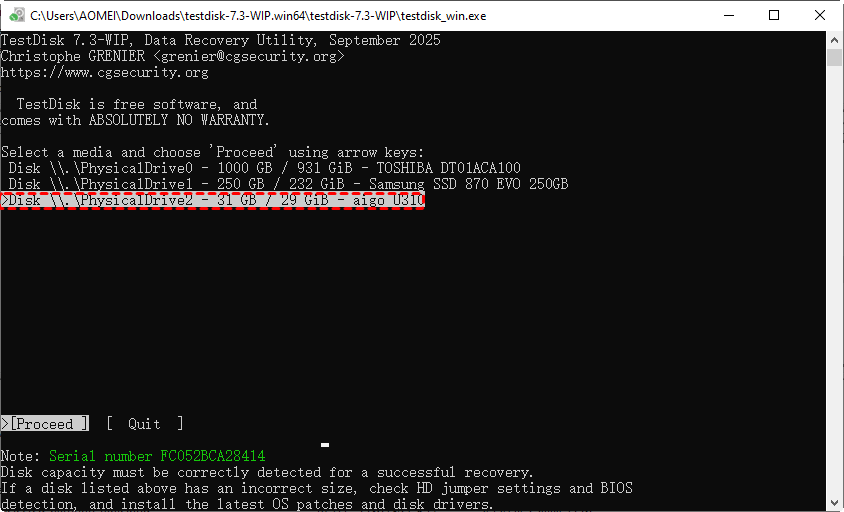
Step 4. Use the arrow keys on your keyboard to select the SD card or hard drive containing the lost MTS files (judge by disk size/model). Press Enter after selection.
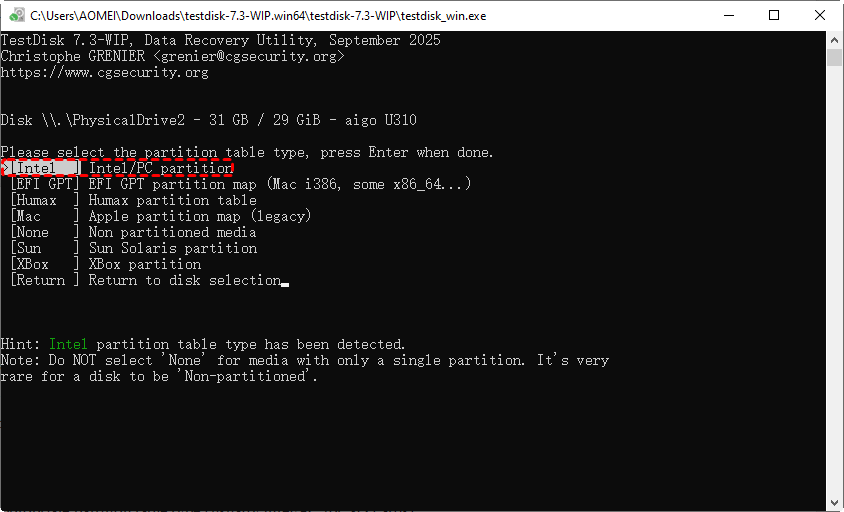
Step 5. Select Partition Table Type (TestDisk usually recommends automatically). Press "Enter" directly to accept the default suggestion (if you are unsure).
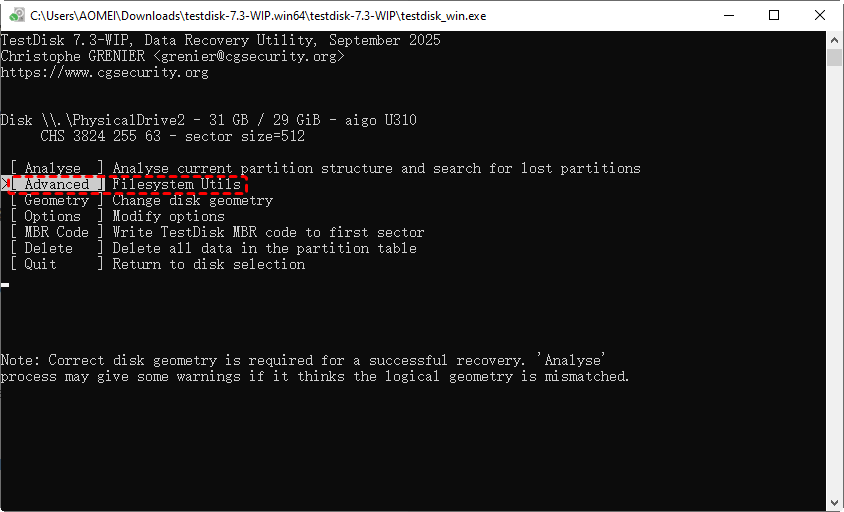
Step 6. In the main menu, use the arrow keys to select "Advanced" and press Enter to proceed (this allows direct file recovery operations on specific partitions).
Step 7. The partitions on the disk will be listed (e.g., FAT32 / NTFS / exFAT, etc.). Select the partition where your MTS files were originally stored and press Enter.
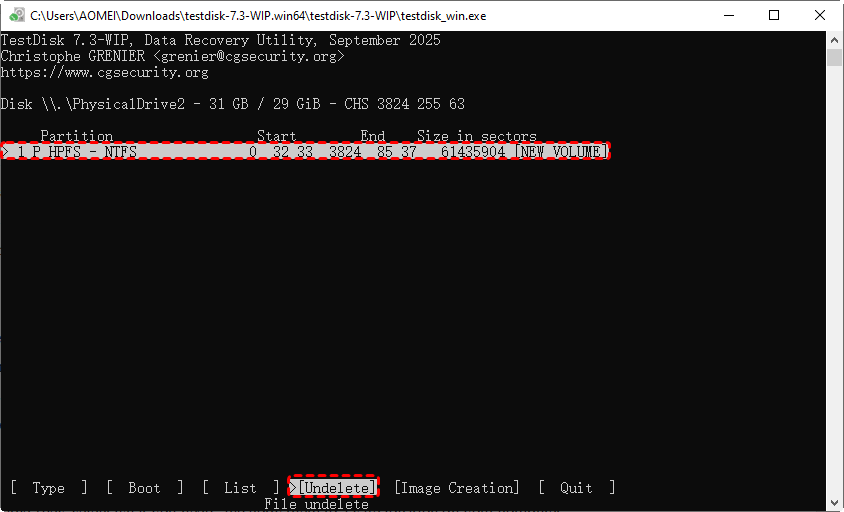
Step 8. Enter File System Operations, select "Undelete" option (to recover deleted files). T
Step 9. TestDisk will display recoverable/deleted files. Use the arrow keys to navigate to the .mts files you want to recover. Press ":" (or "a", depending on the prompt on the interface) to mark/select the files for recovery.
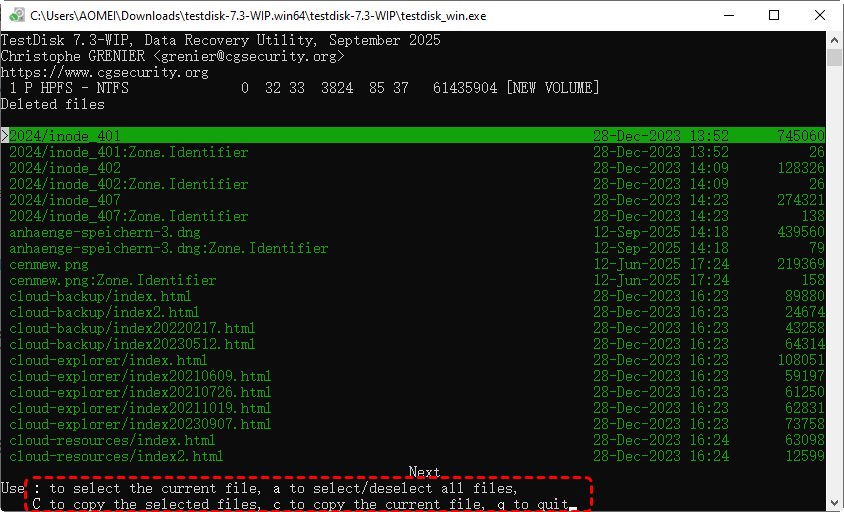
Step 10. Press "c" to start copying.
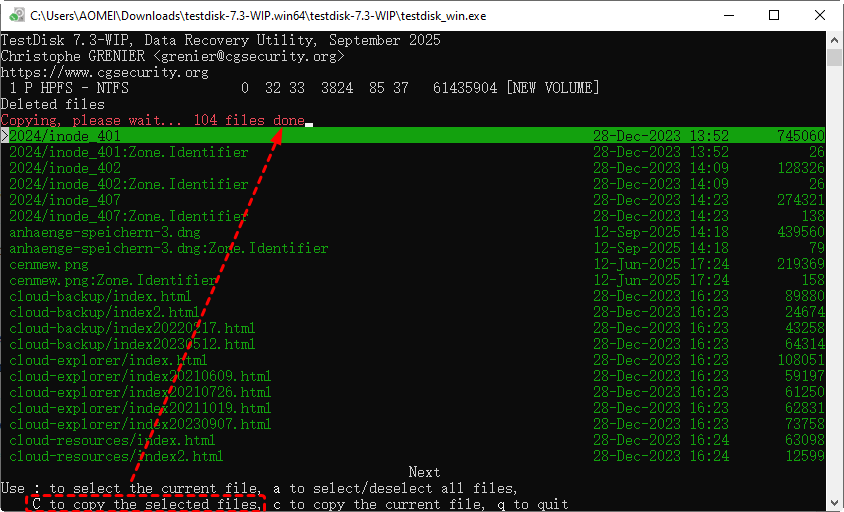
Step 11. The program will prompt for a destination directory. The default is usually the directory where TestDisk was started (often not what you want). You MUST switch to another drive or external hard drive as the destination.
The recovery process will begin. After copying is complete, a success message will be displayed.
2. Windows File Recovery(Free)
Windows File Recovery is Microsoft’s official file recovery utility. It can restore deleted MTS files from hard drives, SD cards, and USB devices via Command Prompt with simple commands.
👍Pros:
- Free and trusted by Microsoft
- Supports deep and signature-based recovery modes
👎Cons:
- Command-line only, no preview before recovery
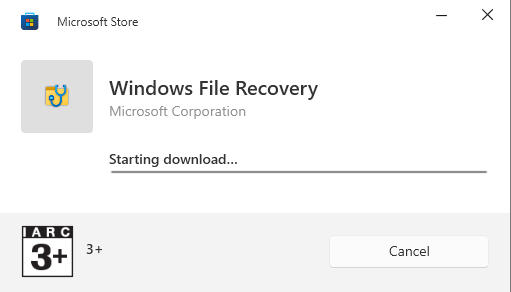
Step 1. Download it from the Microsoft Store.
Step 2. Confirm source drive and destination for recovery: Identify the drive letter (e.g., E:) where the MTS files were lost, and specify the drive where you want to recover and save the restored files. The source and destination drives must be different.
Step 3. The correct recovery mode depends on the file system of the drive where the files were lost. Right click the drive in the File Explorer, click “Properties” and check the file system type on the "General" tab.

Then refer to the table below to select the appropriate mode. If you are unsure, starting with Extensive mode is a safe choice.
| File System | Scenario | Recommended Mode |
| NTFS | Recently deleted files | Regular |
| NTFS | Deleted a while ago, formatted, or corrupted disk | Extensive |
| FAT, exFAT | Any scenario (common for SD cards and USB drives) | Extensive |
Step 4. Press the “Win +R” key, type “cmd”, then right-click on "Command Prompt" and select "Run as administrator".

Step 5. Now, let's operate with specific commands. The basic command structure is: winfr source-drive: destination-drive: [/mode] [/switches].
Example: winfr J: H: /extensive /n *.mts (recover all files with the .mts extension from drive J: to drive H:)
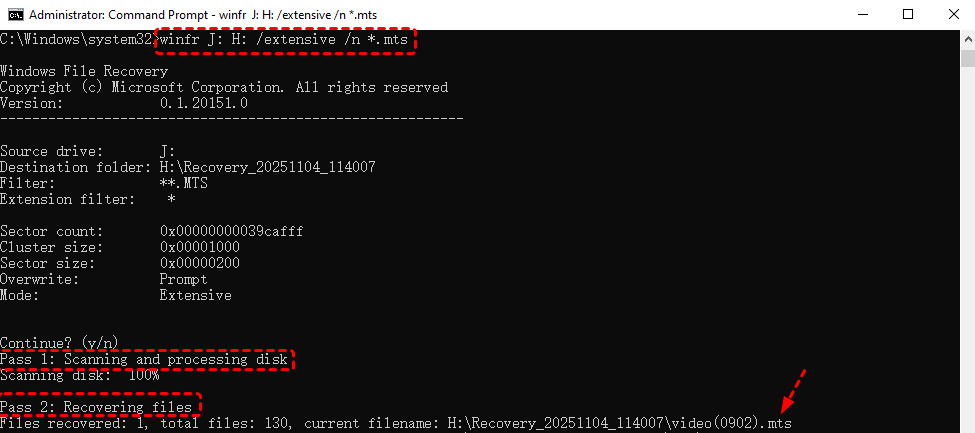
Step 6. After entering the command, press Enter. The tool will ask for confirmation, type "Y" to continue. The recovery process may take some time. Once completed, the recovered files will be saved in a folder named Recovery_[date and time] on the destination drive and you can type "Y" again to directly access the recovered MTS videos.
3. MyRecover (Free & Paid Available for Selection)
Compared with the two command-line tools above, MyRecover (free edition) provides an intuitive interface and advanced video recovery algorithms, enabling you to easily retrieve deleted, lost, or formatted MTS video files from any device.
👍Pros:
- Easy to use with 99% high success rate
- Recovers videos after deletion, formatting, or corruption
- Maintains original MTS video quality
- Supports file preview before recovery if you upgrade to Professional or Technician.
👎Cons:
- Free version limits the amount of recoverable data (500MB).
A step-by-step guide for using MyRecover to recover MTS videos from hard disk.
Step 1: Download and install MyRecover from its official website, then launch the software.
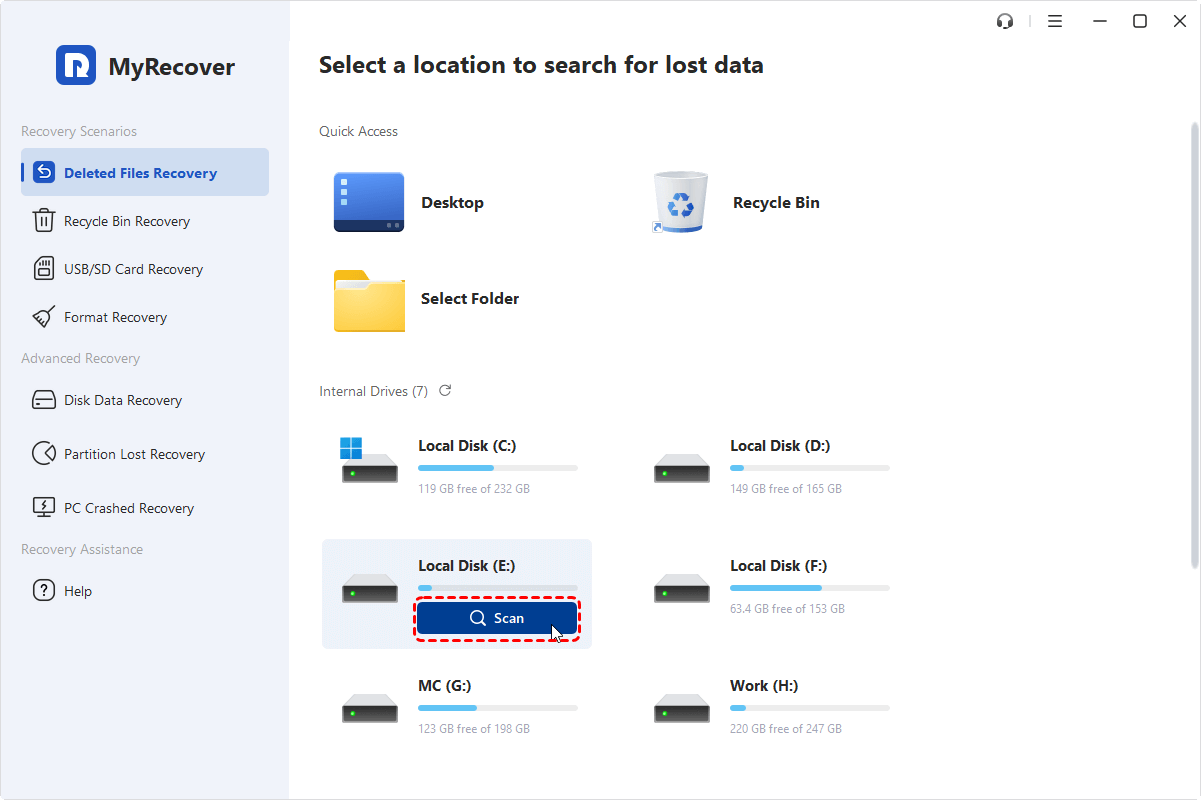
Step 2: Select the specific drive or device from which you lost your MTS files. Carefully choose the correct disk partition based on its label and capacity.
Step 3: Initiate the scanning process by clicking the "Scan" button. The software will automatically perform a quick or a deep scan to find recoverable files.
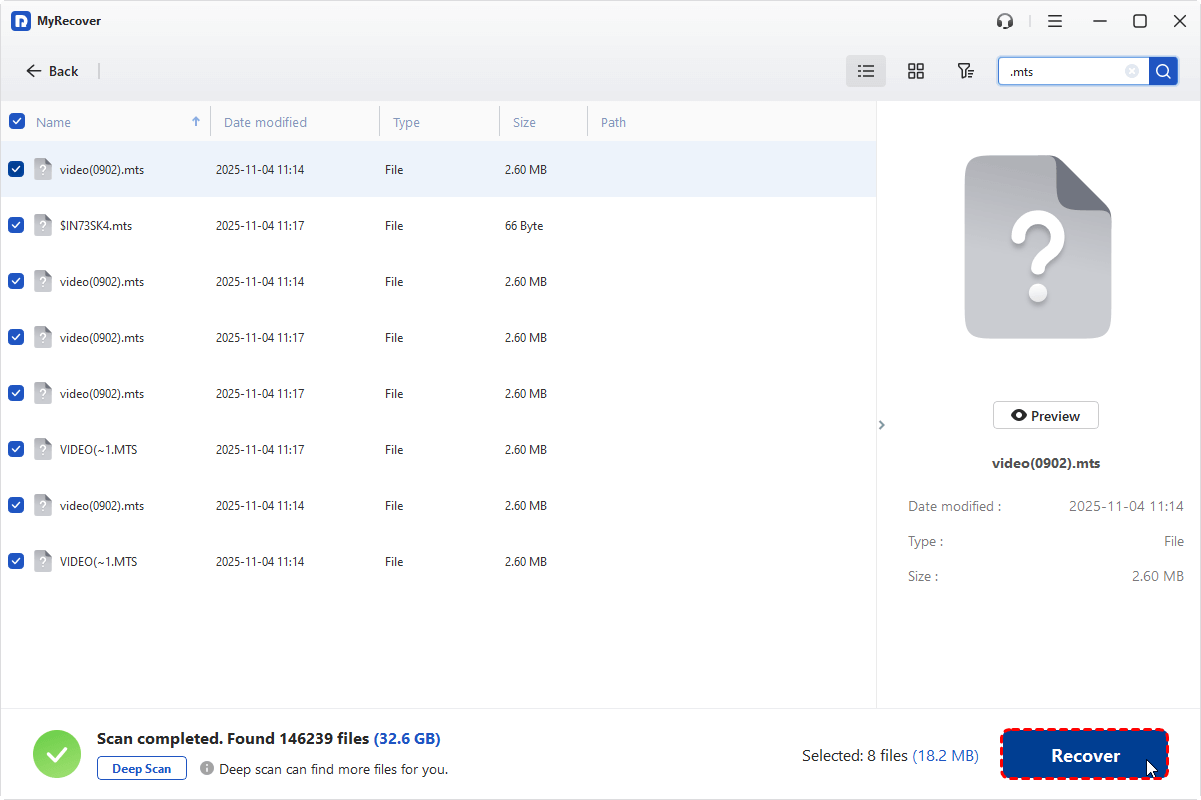
Step 4: Once the scan is complete, browse through the results and use the search function to display only .MTS video files. You can preview the files if you have the Professional or Technician edition.

Step 5: Select the desired MTS files you want to recover, then click "Recover" to restore them.
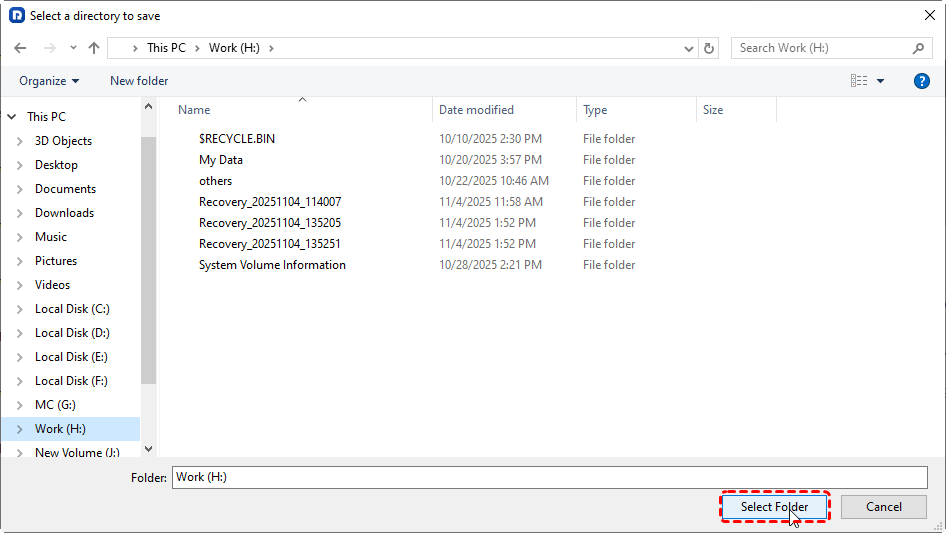
Step 6: Remember to save these files to a different drive or partition to prevent data overwriting.
The software will now finalize the process and copy your selected files to the specified location. Wait patiently for the recovery operation to complete, and do not interrupt the process.
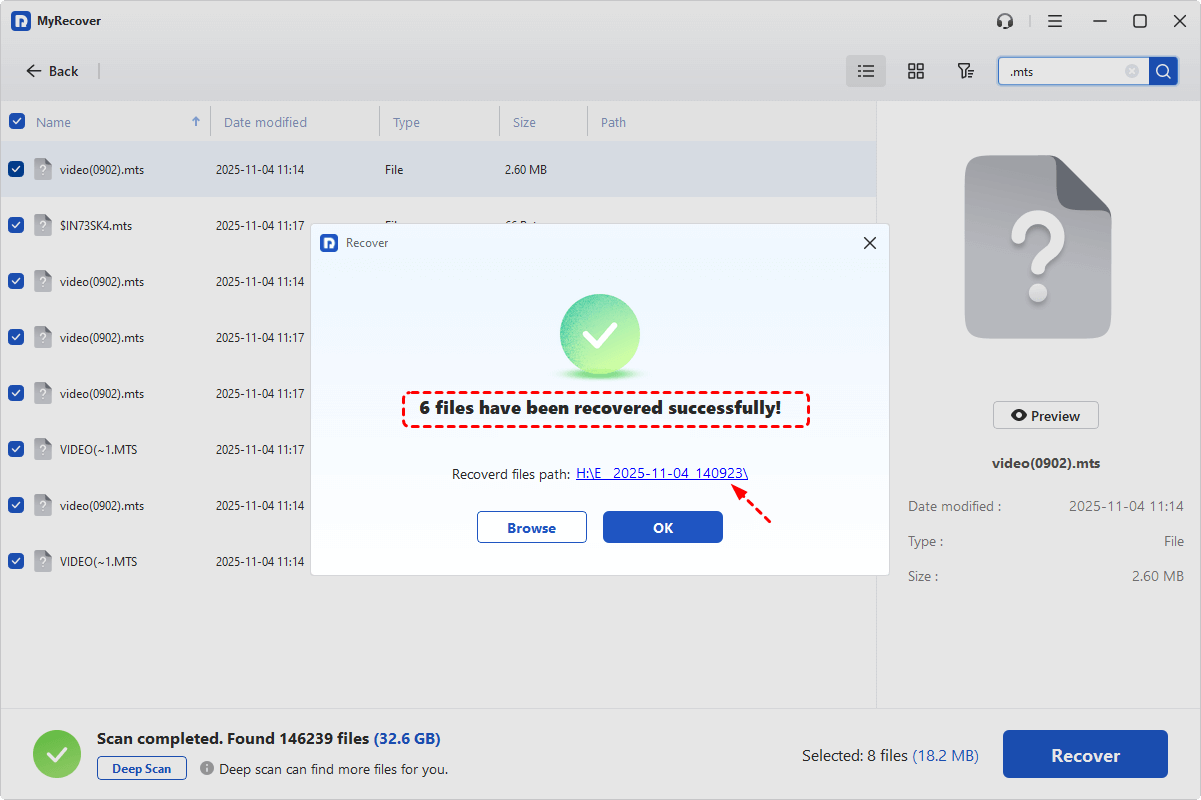
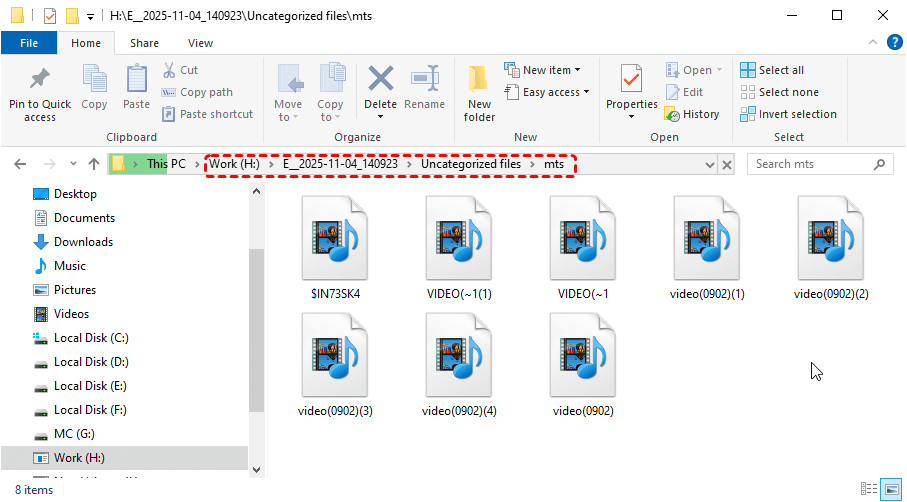
After a successful recovery message appears, navigate to the target folder you selected earlier. Open the recovered MTS files using a media player like VLC to verify they play correctly and are intact.
Closing Thoughts
So, recovering MTS video files doesn’t have to be complicated — whether you choose TestDisk, Windows File Recovery, or the more user-friendly MyRecover, each tool offers a way to retrieve valuable footage back.
If you prefer free, technical MTS video recovery software and don’t mind command-line operations, TestDisk or Windows File Recovery are solid choices. But for most users who want a simple, intuitive process with higher recovery accuracy and preview options, MyRecover provides the best balance between ease of use and effectiveness.

- ✨500+ Devices Supported | SSD, HDD, USB Flash Drive, SD Sard, etc.
- ✨1000+ File Formats Supported | PNG, MP4, MP3, TXT, ZIP, MSG, etc.
- ✨500+ Data Loss Scenarios | Deletion, Format, System Crash, Virus Attack, etc.


Stay Updated With Our
Latest Tips
Add us as a preferred source on Google to never miss helpful guides.