
[2026 List] Best Free VHDX Recovery Tools
VHDX files can become lost due to accident deletion, power failures, disk errors, or improper shutdowns. Choosing the right recovery tool is essential to restore your valuable data. This article reviews the best free VHDX recovery tool of 2025. Learn how to safely recover files from damaged virtual hard disks using reliable VHD/VHDX recovery software.
By Emma / Updated on January 5, 2026
What is VHDX?
A VHDX file is a type of virtual hard disk created by Microsoft. It works just like a real hard drive inside your computer, but instead of being a physical device, it’s stored as a single file on your system. You can think of it as a digital version of an external hard drive that lives inside your computer.
- Note:✎...
- A VHD file (short for Virtual Hard Disk) is the older version of Microsoft’s virtual hard drive format — the one that came before VHDX.
The VHDX format is mainly used by virtual machines (Microsoft Hyper-V) that let you run another computer system (such as Windows or Linux) inside your current one. For example, if you want to test software or try a different version of Windows without affecting your main system, you can create a virtual machine that uses a VHDX file as its hard drive.
Free VHDX Recovery Tools
Sometimes, your VHDX file may be lost or corrupted due to issues like sudden power loss, hardware failure, system crashes, accident deletion, partition corruption, or improper shutdowns. When this happens, the virtual machine may fail to start, or your important files stored inside the VHDX may disappear.
That’s where VHDX recovery software come in. These programs are specially designed to scan and recover data from damaged or deleted VHDX and VHD files. Here are some of the best free VHDX recovery tools you can try in 2025.
1: MyRecover [Free & Paid]
MyRecover is an easy-to-use tool that can scan mounted VHD or VHDX drives just like any other physical device on your computer. Once the VHDX file is mounted, MyRecover will automatically detect it and perform a scan to locate lost or deleted files inside the virtual disk.

- Supports recovery from mounted VHD/VHDX virtual drives, physical disks, USB drives, and SD cards.
- Recovers documents, photos, videos, and more from deleted or formatted VHDX partitions.
- Works with Windows 11, 10, 8, 7, and Windows Server.
- Simple "Scan → Preview → Recover" workflow for all users.
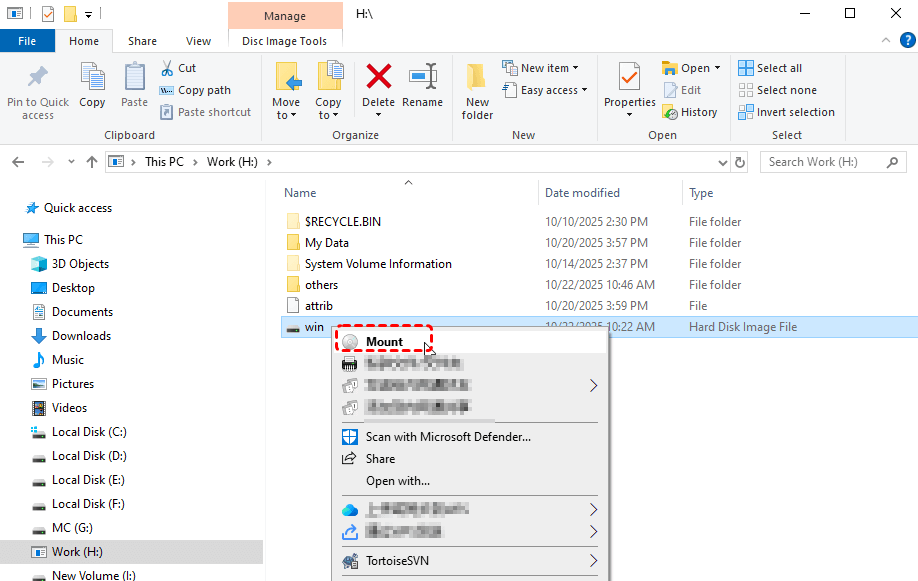
Step 1: Mount your VHDX file in Windows. Right-click the file and select "Mount." The virtual hard drive will appear as a new drive under "This PC."
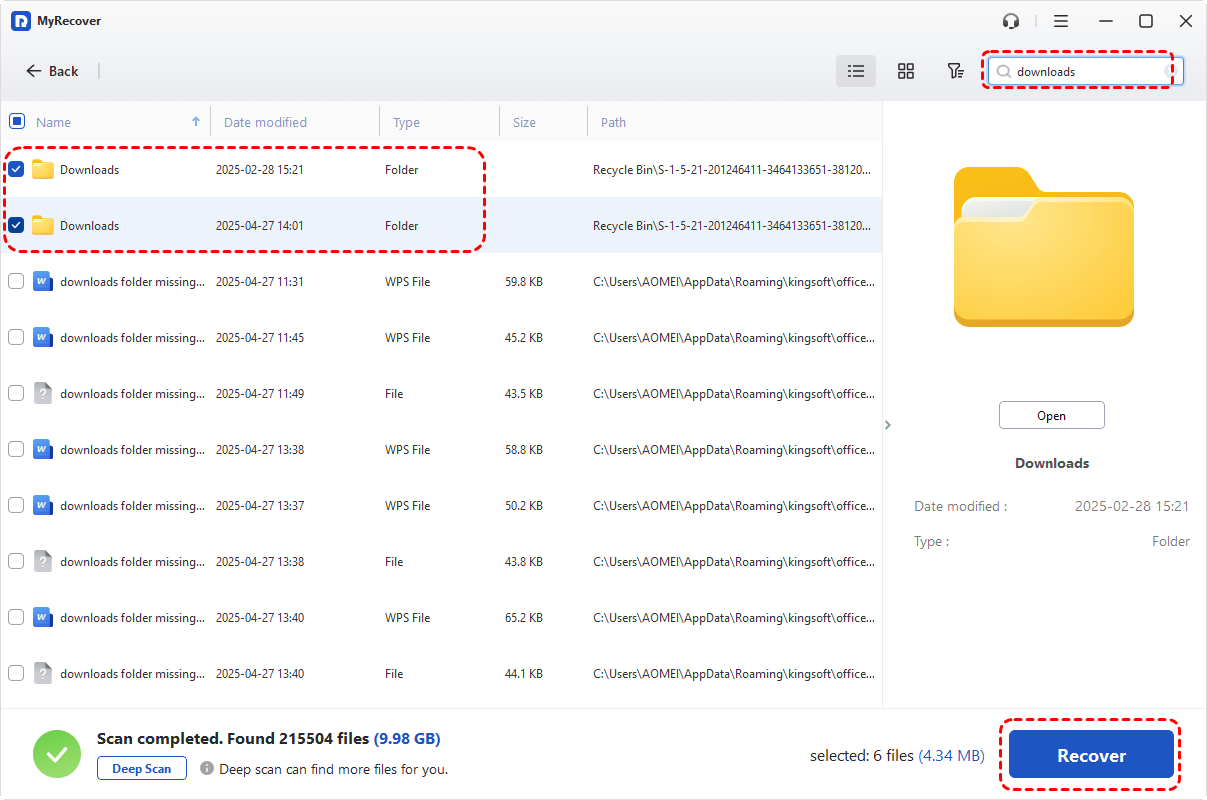
Step 2: Open the MyRecover software. You will see all available drives and disks on your computer. Find the mounted VHDX drive in MyRecover and click "Scan". The program will perform a quick scan followed by a quick or deep scan to locate lost or deleted files inside the virtual disk.

Step 3: After scanning, filter and choose what to restore safely to another location.
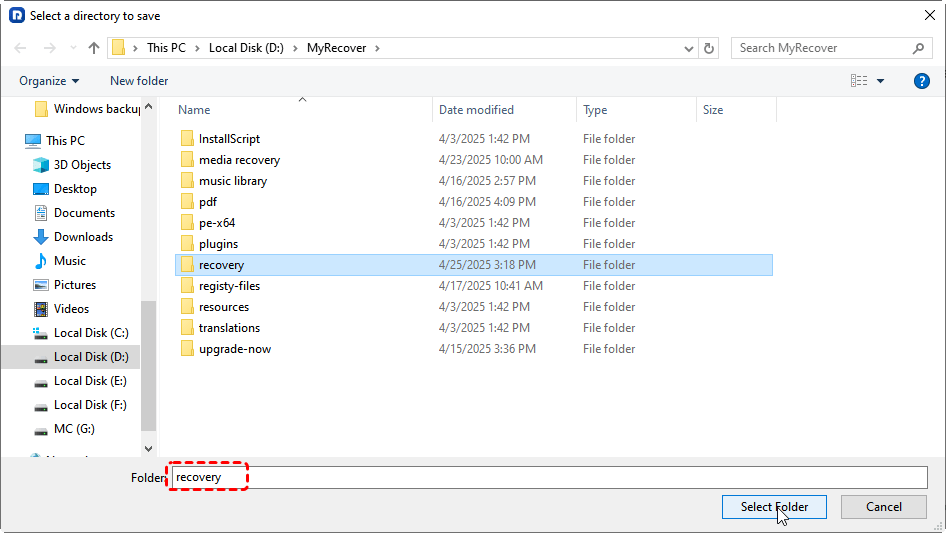
Step 4: Click "Recover" to restore the selected files or folder. Make sure to save them to a different location than the original VHDX to avoid overwriting any data.
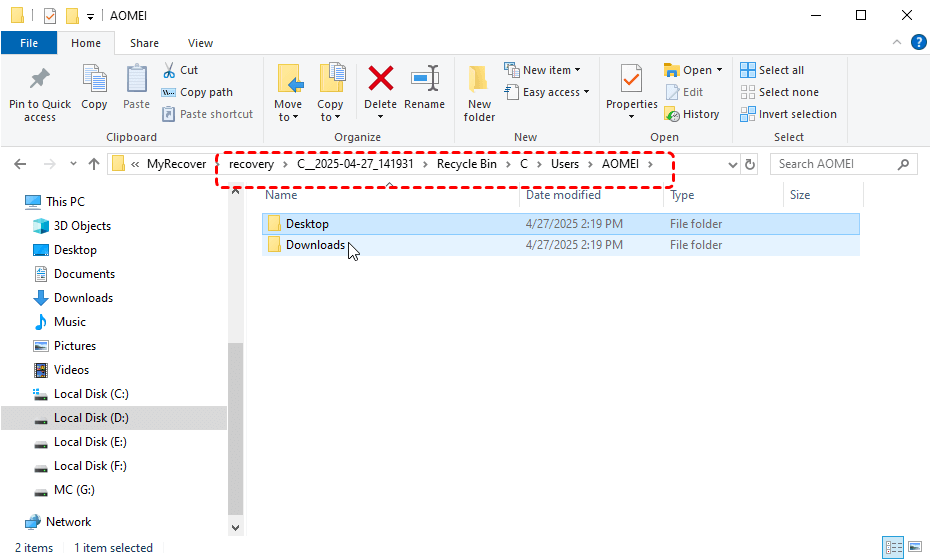
Step 5: After recovery is finished, access your recovered files in the location you chose.
If you need to recover more than 500 MB of data, please upgrade to the Professional edition, which supports unlimited data recovery.
2: DiskInternals VMFS Recovery[Only Paid, from $699 ]
DiskInternals VMFS Recovery is a VMware recovery tool which offers a safe, easy way to recover information stored on VMFS-formatted disks.
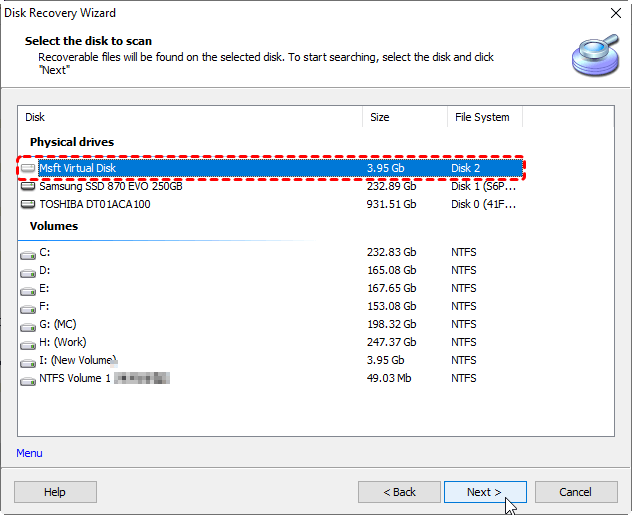
Step 1: Launch VMFS Recovery on your computer.Select the target object you want to recover, such as a VMware VMFS datastore, volume, disk, or VMDK file.
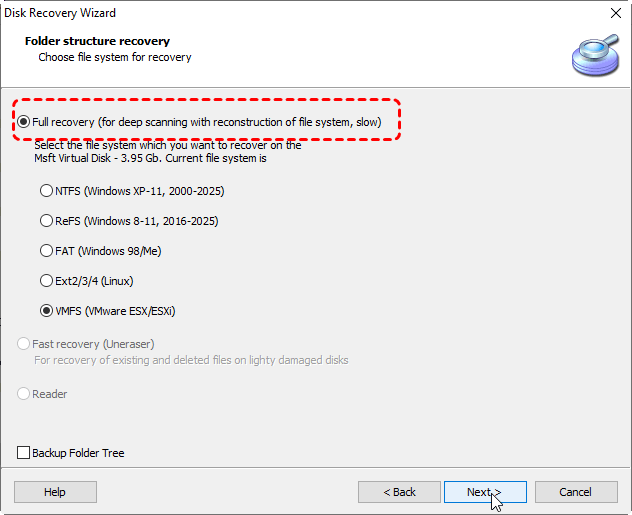
Step 2: Choose the recovery mode. Start with "Fast Recovery Mode" for a quicker scan. If the data is not fully recovered, switch to "Full Recovery Mode" for a deeper scan.
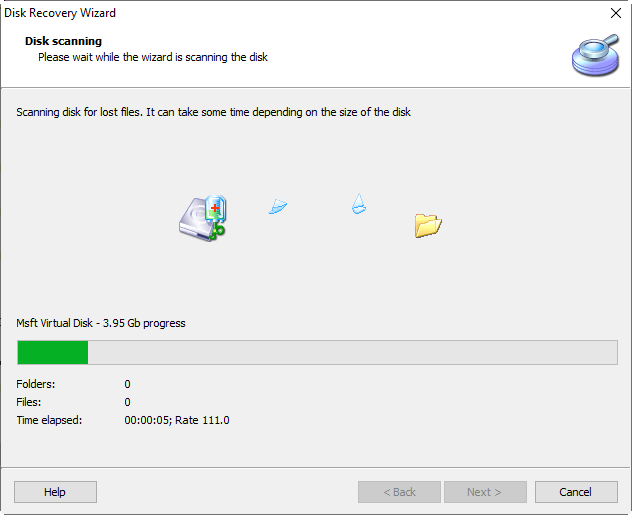
Step 3: Once the scan is complete, you will have read-only access to the recovered files. Browse and preview the files to verify that the data is intact.
Step 4: When you are confident the data is correct, purchase a license for VMFS Recovery to unlock access to the files and export the ones you need.
After exporting, check your recovered files in the chosen location. Remember that this process provides preview access first, and full access requires a valid license.
3: SysTools VHDX Recovery [Only Paid, from $99]
SysTools VHDX Recovery is a reliable tool designed to recover lost or deleted files from VHDX and VHD virtual hard disks. It works with both fixed and dynamic VHDX disks and can restore documents, images, videos, and system files. While it cannot repair a corrupted virtual disk itself, it is highly effective at safely recovering data from formatted, accidentally deleted, or virus-infected VHDX files.
step 1: Download hyper-v vhdx recovery software and install.
step 2: Browse vhd or vhdx files into software panel.
step 3: Start the recovery process and wait for completion.
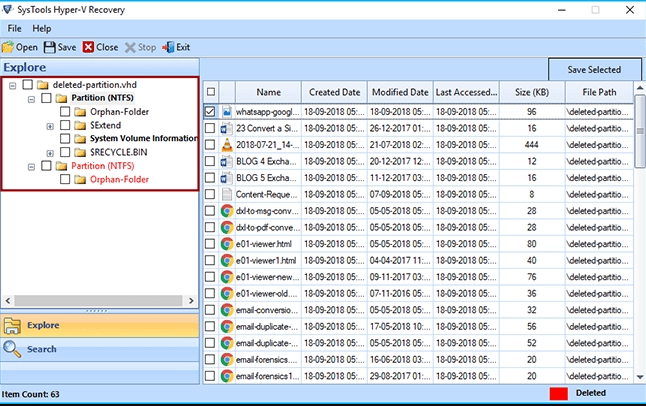
step 4: Browse location path to save the recovered data.
step 5: Navigate to same location and verify data.
Bonus Tip: VHDX Repair Methods
The above VHDX file recovery tools can effectively recover lost data caused by accidental deletion, formatting errors, virus or malware attacks, unexpected shutdowns or power loss, etc. However, they cannot repair damaged or corrupted VHDX files. If your VHDX files are damaged, the following methods are worth trying.
1:Use CHKDSK to Repair VHDX Bad Sectors
When a VHDX file has bad sectors or minor file system errors, CHKDSK can help detect and repair these issues to make the virtual disk accessible again.Open Command Prompt as Administrator and run: chkdsk X: /f /r
(X: is the drive letter of the mounted VHDX. The "/f"parameter fixes errors, and "/r"locates bad sectors and recovers readable information.)

After running CHKDSK, the VHDX should be free of logical file system errors, and you may regain access to the data. Keep in mind CHKDSK may not restore deleted files, but only repair minor corruption.
2: Repair VHDX Using PowerShell
PowerShell provides a direct way to attempt a repair on a VHDX file, especially for minor logical corruption.
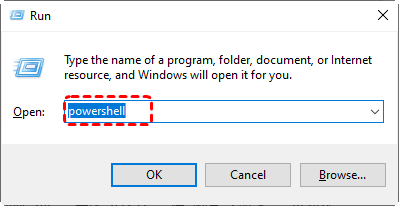
Open PowerShell as Administrator: Press "Windows + R" to open the "Run" dialog. Type "powershell" and press "Ctrl + Shift + Enter". Click "Yes" on the UAC prompt to open it as Administrator.
Run the command: Repair-VHD -Path "C:\path\to\file.vhdx" (replace the path with your actual one)
The command analyzes the VHDX file and attempts to fix structural issues. After the repair, the virtual disk may become accessible without data loss.
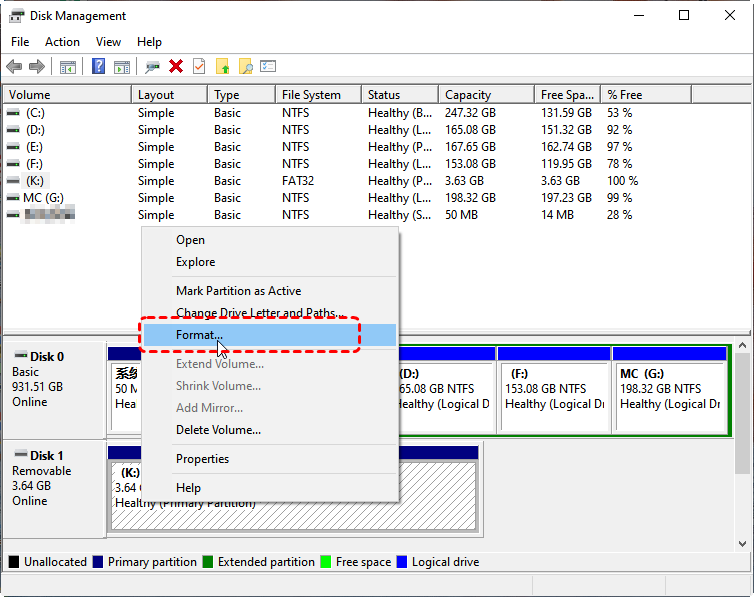
3: Format the VHDX to NTFS
If the file system is corrupted beyond repair, formatting the VHDX to NTFS can reset the disk structure, though it will erase all existing data.
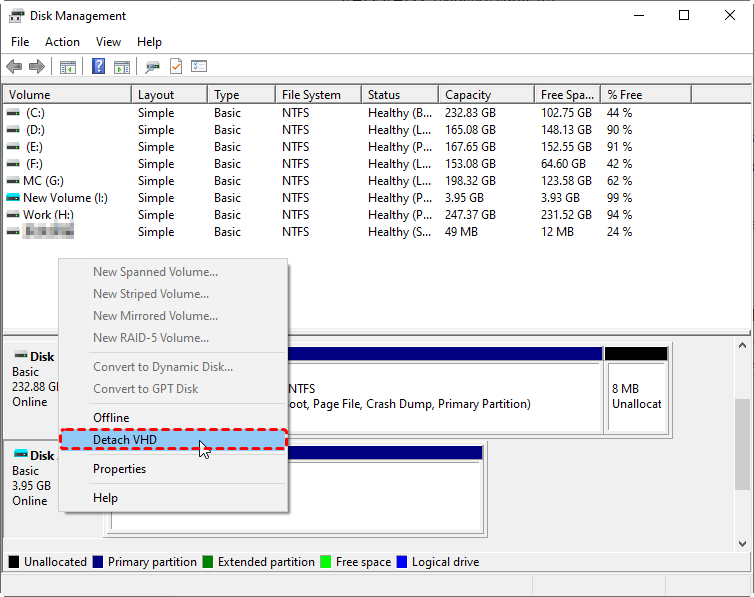
Right-click the VHDX drive in Disk Management, select "Format", and choose NTFS as the file system. Follow the prompts to complete the formatting process. After formatting, the VHDX will be usable again, but all previous data will be lost. Therefore, this method should only be used if you have backups or have already recovered important files.
Closing Thoughts
VHDX files are a convenient way to store and manage virtual hard drives for Hyper-V and other virtual machines, but they are not immune to data loss or corruption. Using the right VHDX recovery tools, such as MyRecover (supporting 500+ devices recovery, even including SSD data recovery), DiskInternals VMFS Recovery, or SysTools VHDX Recovery, you can safely recover lost or deleted files and minimize downtime.
For minor corruption issues, built-in methods like CHKDSK or PowerShell’s Repair-VHD command can help restore the virtual disk to a usable state, while formatting may be necessary in more severe cases. Always remember to back up your VHDX files regularly to prevent permanent data loss.


Stay Updated With Our
Latest Tips
Add us as a preferred source on Google to never miss helpful guides.