
How to Recover Data Using CMD: Recover Deleted /Lost Files Through Command Prompt
If you've lost important files, you can recover data using CMD without third-party software. This guide explains how to recover deleted files or lost data by running correct commands in various situation. Follow these steps for data recovery through Command Prompt Windows.
By Emma / Updated on December 17, 2025
What is CMD?
CMD (Command Prompt) is a command-line interpreter application in Windows that allows users to interact with the operating system by typing text-based commands. It provides direct access to system functions, file management, disk operations, and troubleshooting tools without a graphical interface.
Key Features of CMD:
✔ File & Folder Management – Create, delete, copy, and move files.
✔ Disk Operations – Format drives, resize, clean disk and check disk errors.
✔ Network Troubleshooting – Test connections (ping, ipconfig, tracert).
✔ System Administration – Manage processes, services, and user permissions.
✔ Data Recovery – Use commands like chkdsk, attrib, and recover to restore lost files.
How to Recover Data Using CMD?
As mentioned above, data recovery is one of the CMD key features. While CMD has limitations compared to professional data recovery software, it can help in some cases, especially with system file repairs and retrieving hidden/deleted data. The following sections will provide a detailed breakdown of how CMD can assist with data recovery in various situations, along with practical implementation methods.
Preparation: Launch Command Prompt As Administrator
1. Search Command Prompt in the Window Start menu, right-click the matching result and select “Run as Administrator.”

2. Press Win + R (Windows key + R) simultaneously to open the Run command window, input cmd and press Enter. If a User Account Control (UAC) prompt appears, click "Yes" to allow the program to run with administrative privileges.
Method 1: Unhide Files Using attrib Command
This method is designed to restore files that have been hidden—either accidentally, by system settings, or due to malware activity. The attrib command in CMD modifies file attributes, allowing you to recover data using CMD by unhiding files, removing read-only restrictions, and clearing system file flags.
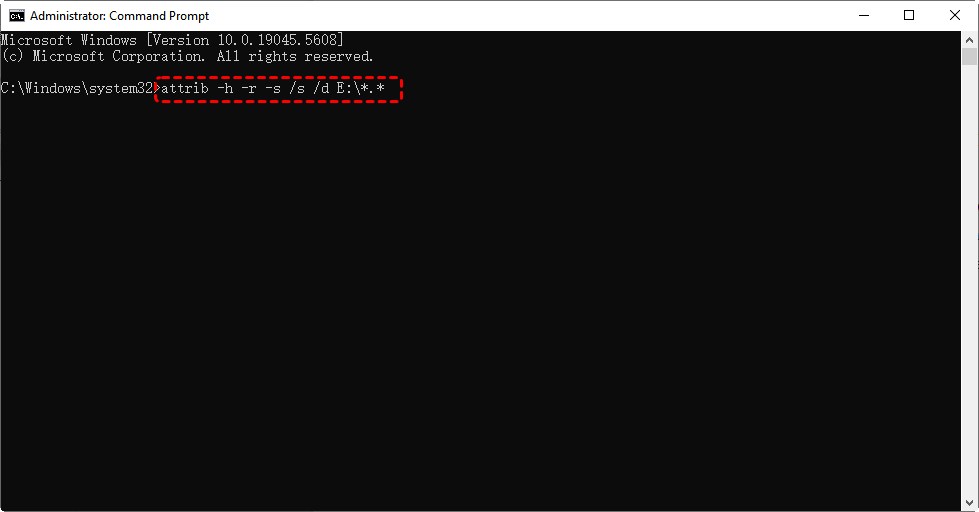
Just input the following command and then press Enter on your keyboard:
attrib -h -r -s /s /d :\*.*
For instance: attrib -h -r -s /s /d E:\*.*
- ★Tips:
- Attrib: The main command for viewing/changing file attributes
- -h: Removes the Hidden attribute from files/folders
- -r: Removes the Read-only attribute from files/folders
- -s: Removes the System attribute from files/folders
- /d: Includes directory/folder names in the processing (without this, only files would be affected)
- E:\*.*: Applies to all files (.) on drive E: (can be replaced with any path)
Then you can open File Explorer (Win + E) and check the drive. See if the hidden files now are visible. If you still cannot see them, proceed to the next method.
Method 2: Repair Drive Errors with CHKDSK Command
The chkdsk (Check Disk) utility is a built-in Windows tool that scans and repairs file system errors, bad sectors, and logical corruption on storage drives. This method is particularly useful when:
- A drive becomes RAW or inaccessible
- Files/folders disappear or cannot be opened
- Windows shows errors like "The file or directory is corrupted" or "Drive not accessible"
Just run the command chkdsk : /f/r. For example: chkdsk g: /f /r

The “/f:” fixes errors automatically. And “/r:”locates bad sectors and recovers readable data.
Method 3: Restore Previous File Versions (Shadow Copies)
If you have enabled System Restore/File History before losing the data, you can recover data using CMD shadow copies.
Type “vssadmin list shadows”in the Command Prompt windowand press Enter.
The command will output a list of shadow copies, including their IDs, creation time, original volume, shadow copy volume, and other relevant information.
Then input “robocopy "\\?\GLOBALROOT\Device\HarddiskVolumeShadowCopy1\Path\To\Folder" "C:\Recovery" /e” in the Command Prompt window and press Enter.
- ★Tips:
- robocopy: Windows' advanced copy utility (more reliable than regular copy).
- "\\?\GLOBALROOT\Device: This is a special Windows device namespace path that provides direct access to physical and virtual devices at a low level, bypassing some Windows file system restrictions.
- \HarddiskVolumeShadowCopy1\...: Refers to the first shadow copy (may be 2, 3, etc.).
- C:\Recovery: Destination folder where files will be copied.
- /e: Copy all subdirectories, including empty ones.
Method 4: Restore By Winfr CMD
Windows File Recovery (winfr) is a Microsoft-developed CMD tool for recovering deleted files from NTFS, FAT, and exFAT drives. Unlike basic CMD commands, it can perform deep scans to find lost dataand recover them then.
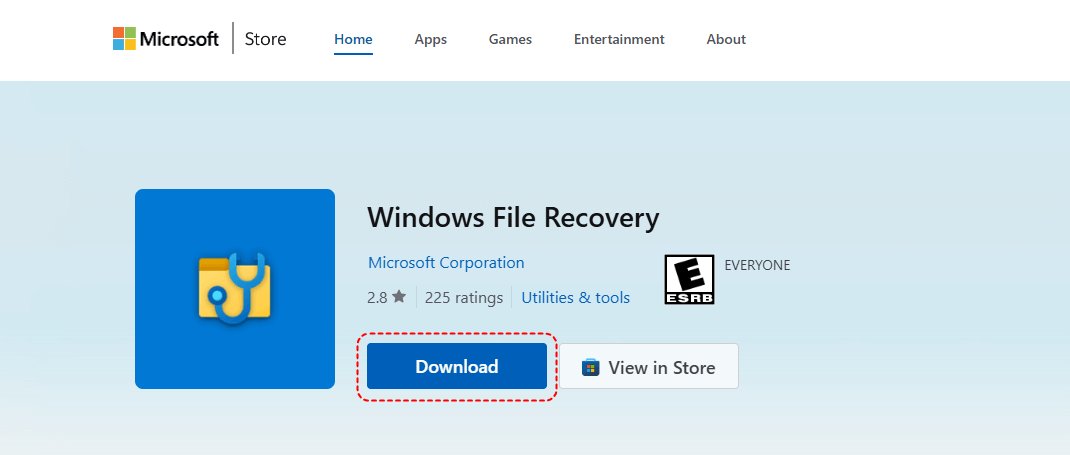
Before running related command, it is necessary to download and install Windows File Recovery app from Microsoft Store. Then install it on your computer.
To recover data using Winfr command prompt, you can execute the command: winfr C: D: /regular /n \Users\username\Downloads\*.xlsx. This command will recover Excels files from your Downloads folder to the D: drive.

To recover entire Downloads folder from C: drive to the D: drive, use the following command instead:
winfr C: D: /regular /n \Users\username\Downloads\
Easily Recover Data from Hard Drive via CMD Alternative: MyRecover
Above we have listed 4 different methods to recover data through Command Prompt. If they let you down and you still don’t get your lost data back, we recommend using alternatives like MyRecover. Compared with restoring data using command, this free professional data recovery tool is much easier to use with a quite user-friendly interface. Besides, it can deal with more complex data loss scenarios, even when you lost data due to partition deletion, format, corruption, system crash, virus attack, etc.
Step 1. Download and install the freeware.
Step 2. Open MyRecover, select the partition where the files were stored, but disappear now and click “Scan”.

Step 3. When the scanning process completes, you can see all recoverable files. Tick the target files or folder and click on “Recover”.

🔔If you want to preview the files, please upgrade to Professional or Technician edition.
Step 4. Choose a safe location to save the recovered files.

The duration of the recovery process is primarily determined by the volume of data being restored. Processing times may vary significantly depending on storage medium type (HDD/SSD), interface bandwidth, and system resources allocation during the operation.
Conclude
Data recovery using CMD commands can be effective for basic scenarios like unhiding files or repairing logical errors, but has significant limitations. These built-in tools work best for recently hidden files or recoverable system errors, not permanent deletions or physical drive damage.
For reliable data protection, we recommend enabling System Restore and maintaining regular backups as your primary safeguards. When CMD methods prove insufficient, professional recovery software typically offers more comprehensive solutions for complex data loss situations.


Stay Updated With Our
Latest Tips
Add us as a preferred source on Google to never miss helpful guides.