
Where Are System Restore Points Stored in Windows11, 10?
This guide answers the core question: where are system restore points stored? We cover the default directory path, how to access it, and the specific location for where are system restore points stored windows 11. You'll also learn how to manage disk space used by these critical recovery files.
By Delores / Updated on November 25, 2025
How Can I Find My System Restore Points on a Windows Computer?
Where are system restore points stored? You might go poking around in File Explorer, expecting to find a neat folder full of backups, only to come up empty-handed.
Don't worry, you will learn everything about system restore points, and find "where the system restore points are stored" in Windows 11 and 10 computers. Then bring things back to normal.

About System Restore Points
A system restore point is a snapshot (Use Volume Shadow Copy Service (VSS) to create a snapshot) of your Windows system files, installed applications, Windows Registry, and settings at a specific point in time. It is used to revert your computer to a previous working state if software installations, updates, or driver changes cause instability or errors. Personal files, such as documents and emails, are generally not affected by using a restore point.
The system restore points are created by a Windows feature called System Protection. It's not always turned on by default for every drive, which is a common reason people find themselves without any restore points when they need them most.
Windows creates restore points automatically before significant system changes like installing a new program, driver, or Windows update. It also creates one every 7 days if no other automatic restore point has been made, and you can create them manually at any time.
Where Are System Restore Points Stored
If you're searching for a simple folder called "System Restore Points" in your C: drive, you're going to be disappointed. Microsoft intentionally hides and protects these files to prevent you from accidentally deleting or corrupting your only path to recovery.
So, where is the actual hiding spot? System restore points live in a hidden, protected, and system-owned directory on the root of the drive they are protecting. For most people, this is the C: drive. The precise path is C:\System Volume Information.
Now, before you rush off to navigate there, a word of caution: even if you have "Show hidden files and folders" enabled, you will be denied access. This folder is locked down tight by Windows for your own protection. This is the universal answer for users wondering where restore point files are stored, regardless of whether they are on Windows 10 or 11.
Inside the System Volume Information folder, you'll find a series of subfolders with long, cryptic names like {c7c67ee3-89a9-11ed-8f93-806e6f6e6963}. These are GUIDs (Globally Unique Identifiers), and each one corresponds to a specific restore point or other shadow copy data. The files inside aren't simple .ZIP archives you can browse; they are complex data blocks managed by the VSS. Trying to manipulate them directly is a recipe for disaster, which is precisely why Windows slams the door in your face when you try to access them.
How to Find Restore Points in Windows 11/10?
Since you can't just open the folder in File Explorer, how can you verify and manage these points? Windows provides legitimate, safe tools for this. The journey to discover where System Restore is located in Windows 10 and Windows 11 starts with the System Properties window.
If you have no system restore point on your computer, try the following steps to create a system restore point:
1. Right-click on 'This PC' and select 'Properties'.
2. Then, click on 'System protection'.
3. A dialog box will open. Here, under the 'Protection Settings' section, check "C: (System)" and click 'Configure'.
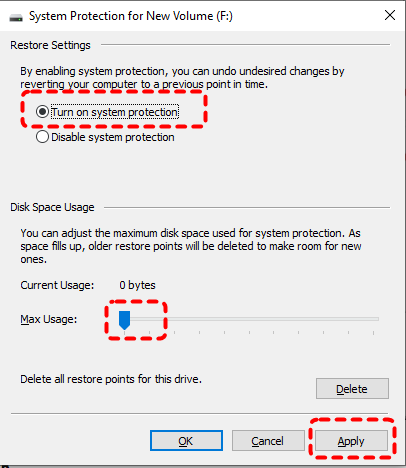
4. Tick Turn on system protection and adjust the maximum amount for disk usage, and hit Apply > OK.
5. Now, hit Create... to create a system restore point for your C system drive. Input the restore point name and hit Create.

6. Wait for it to complete.
If you have a system restore point, you can directly find it:
1. Right-click on 'This PC' and select 'Properties'.
2. Then, click on 'System protection'.
3. Hit System Restore..., and hit Next.
4. Then choose the restore point. Now, you can find the restore point you created before.
Manage Your System Restore Point Storage
Now that you know where they live, how do you keep this system from getting out of hand? Left to its own devices, System Protection can eat up a surprising amount of disk space.
Way 1. View and Control Disk Space Usage
Going back to that 'System Protection' settings dialog and clicking 'Configure' is your control panel. You'll see a slider that lets you set the 'Max Usage' for the restore points. When this limit is reached, Windows will automatically delete the oldest restore points to make room for new ones. If your drive is running low on space, reducing this percentage can be a quick way to reclaim several gigabytes without losing your most recent restore points.
Way 2. Delete Old Restore Points to Free Up Space
How to easily delete system restore points? Here is how it works:
1. Right-click on 'This PC' and select 'Properties'.
2. Then, click on 'System protection'> Configure.
3. Click Delete to delete all system restore points for your drive.
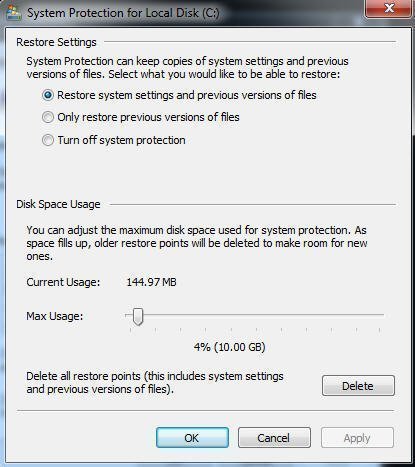
Clicking this will remove all restore points on that drive, freeing up all the allocated space immediately. It's a drastic measure, but useful if you've just cleaned up your system and want to start fresh with a new, clean baseline snapshot.
FAQs About System Restore Points
Can I move system restore points to another drive?
A: No. Restore points are permanently tied to their original drive. They contain system-specific files that would be useless on another drive. You can enable System Protection on other drives, but each drive stores its own restore points separately.
Why does the System Volume Information folder appear empty?
A: This is a security feature. While you might see the folder, you don't have permission to view its contents. The files are protected by system-level permissions to prevent accidental damage. Trying to force access could corrupt your restore points.
Do restore points use significant disk space?
A: They can use 3-10% of your drive's space (up to 100GB on a 1TB drive). However, the system uses smart differential storage and automatically deletes old points when space is needed. You can adjust the maximum space allocation in System Protection settings.
How long do restore points remain available?
A: They don't expire by time, but by space. Windows keeps the most recent points and deletes older ones as needed. Manual restore points typically last longer than automatic ones. With ample space, points can last months; on crowded drives, just days.
Can System Restore recover deleted personal files?
A: No. System Restore only affects system files, registry settings, and installed programs. It doesn't recover documents, photos, or other personal files. For deleted files, use the Recycle Bin, file recovery software, or backups.
What's the difference between a restore point and a full backup?
A: A restore point is like a blueprint of your system's configuration, while a full backup is a complete copy of everything. Restore points are smaller and faster for fixing system issues, but only full backups protect against hardware failure or catastrophic data loss. You need both for complete protection.
Recover Files After A System Restore
If you lost critical files after a system restore, you can try professional data recovery software to recover files quickly. Here comes the powerful Windows data recovery software MyRecover to do you a big favor.
Key Features of MyRecover:
- Deep Scan Technology: It goes beyond simple file table scans to perform a deep, sector-by-sector analysis of the drive. Then, recover files easily.
- User-Friendly Interface: With its clear, graphical interface, MyRecover is accessible to users of all technical levels.
- Powerful File Preview: The ability to preview files (images, documents, text files) before recovery is a critical feature. It saves time and storage space by allowing you to verify that the file is the correct one and is not corrupted, ensuring you only recover what you need.
- Preserves Original Structure and Filenames: MyRecover does an excellent job of reconstructing the original folder hierarchy and filenames whenever possible.
- Wide File Format Support: It supports the recovery of a vast array of file types, including photos (JPG, PNG, CR2), documents (DOCX, PDF, XLSX), videos (MP4, MOV, OGM), and archives (ZIP, RAR), covering virtually all common files a user might lose.
Here is how to recover files after a system restore with MyRecover:
1. Download and install MyRecover on a different drive than the one you are trying to recover from.
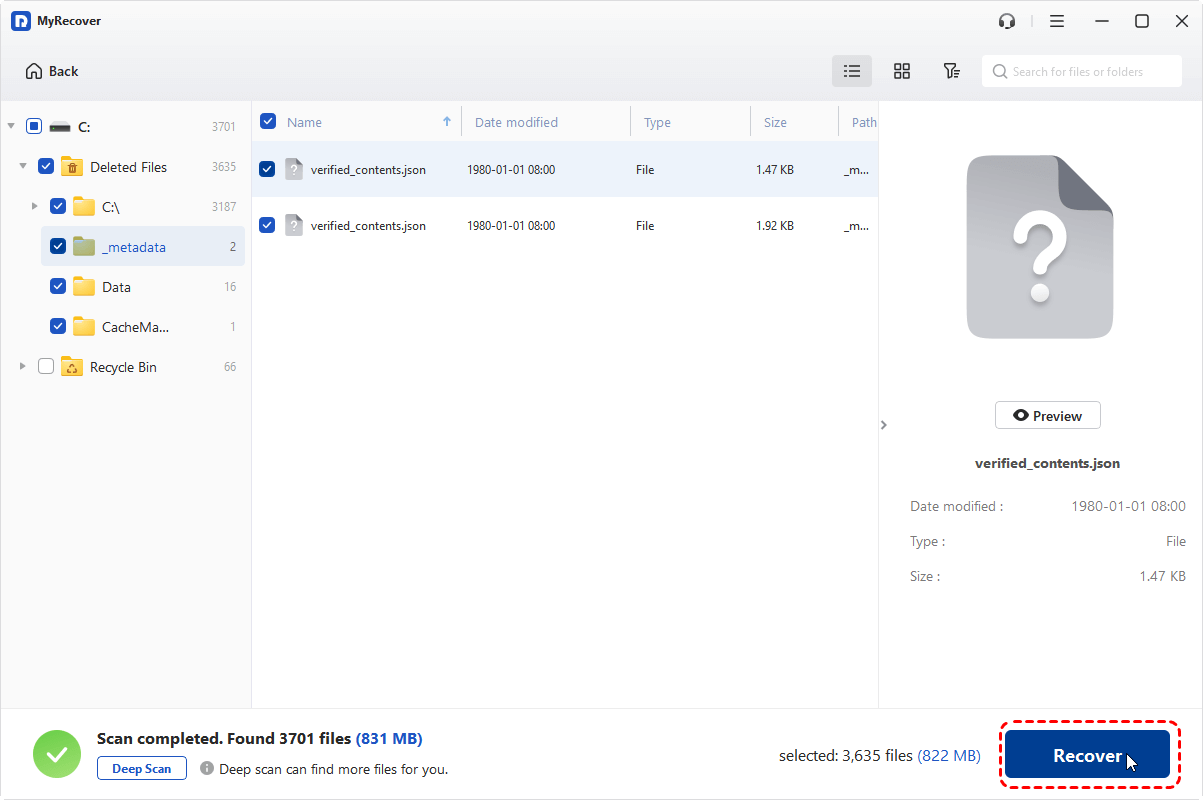
2. Open MyRecover, tap Deleted Files Recovery, choose the drive (typically the C: drive), and hit Scan.

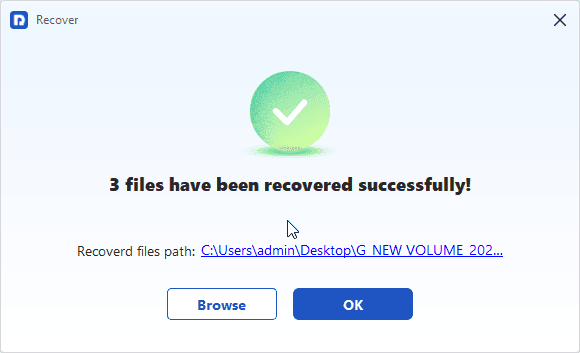
3. Hit OK when it’s done.
4. Select the missing files you need, and hit Recover.
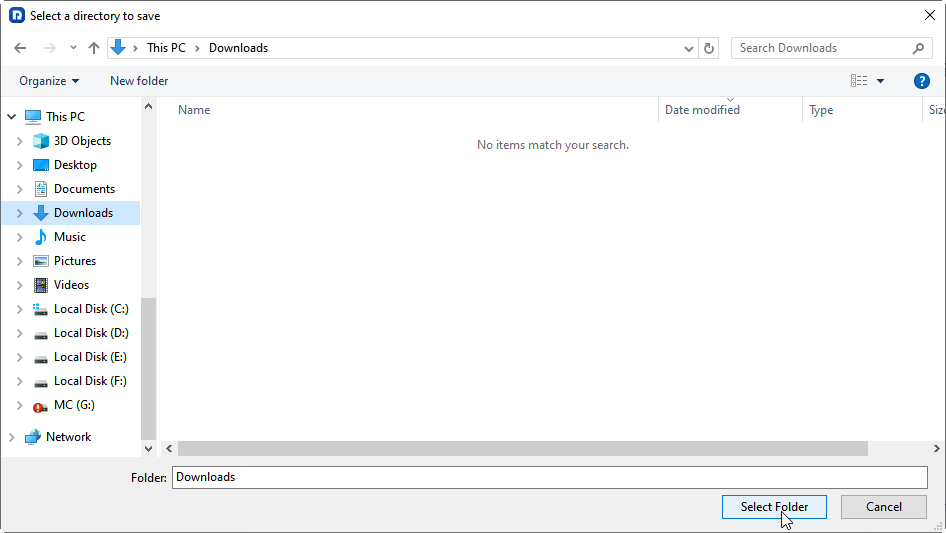
5. Choose a safe location and hit Select Folder to save.
- Notes:✎...
- MyRecover provides two scan modes, a quick and a deep scan, to meet your different demands. Deep scan costs much more time and finds more files.
- You can filter files by their original folder structure, type, or date modified,, even the file name. Besides, you can also search the files on the top right.
- Preview files by clicking on them to ensure they are intact before recovery.
- Save the recovered files to a different physical drive (like an external hard drive or USB). Do not save them back to the original C: drive, as this could overwrite other deleted data you might want to recover later.
- Enjoy MyRecover Technician if you need to recover files from unlimited computers.

- Recover Deleted Files Easily with Simple Clicks
- 1000+ File Formats Supported
- Support HDD, SSD, External Hard Drive, USB Drive, SD Card, etc.
- Quickly Find Files Using File Types, Name, Size, etc.
- Preview Files Before Recovering
- Recover Unlimited Data


Stay Updated With Our
Latest Tips
Add us as a preferred source on Google to never miss helpful guides.