
Free Windows File Recovery Alternatives [CMD and GUI Options]
Explore the best free alternatives to Windows File Recovery for both CMD and GUI. Perfect for Windows 10 and 11 users looking for reliable file recovery alternatives.
By Emma / Updated on November 19, 2025
Why You Should Consider Windows File Recovery Alternatives?
Windows File Recovery is Microsoft’s free tool for recovering deleted or lost files on Windows 10 and 11. While it can retrieve files from local drives, external storage, and even corrupted disks, it’s not always the easiest tool to use.

Many users struggle with its command-line interface, confusing commands, and limited support for certain file systems like Extor ReFS. On top of that, there’s no file preview, so you can’t confirm which files will be recovered before running the process. Because of these challenges, more and more users are looking for Windows File Recovery alternatives.
Top Windows File Recovery Alternatives
So, if you’re not comfortable running complex command-line instructions, need to preview files before recovering them, or keep encountering errors such as "There was an error parsing your command" or "No recoverable files were found with this mode," then using an alternative tool becomes essential.
In this section, we will share you with 3 different alternatives to Windows File Recovery: TestDisk, PhotoRec and MyRecover. The first two are command-line based tools, but don’t require you to type any commands, just simple clicks; while the last one, MyRecover, is a full GUI-based data recovery tool. Check them one by one and pick your own alternative.
1: TestDisk
TestDisk is an incredibly powerful, free, and open-source data recovery software. While it is fundamentally a command-line tool, it interacts with the user through a simple, text-based menu interface. This means you don't need to memorize or type complex commands; you simply navigate using your keyboard's arrow keys and the Enter key.
- Recover Lost Partitions: Restore entire disk partitions that have "disappeared" due to partition table corruption or accidental deletion.
- Fix Boot Issues: Repair certain disk issues that prevent booting into Windows.
- Recover Files from Inaccessible Partitions: Can perform a deep scan to recover deleted files even if the partition itself is still present but inaccessible.
- Wide Filesystem Support: Supports a vast range of filesystems, including NTFS, FAT32, exFAT, ext2/ext3/ext4 (Linux), and more.
For the best recovery results, install and run TestDisk from a different healthy disk or a USB drive. Do NOT run it from the partition you are trying to recover data from.Next is how to recover a lost partition step by step for reference.
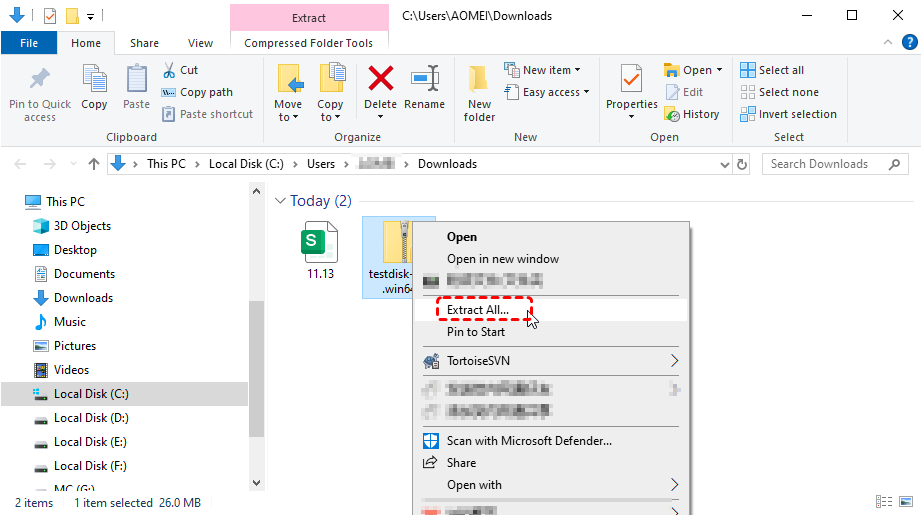
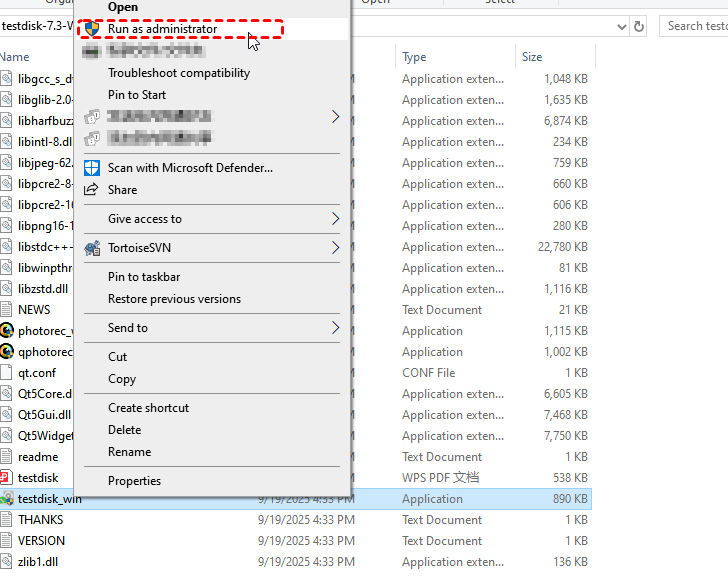
Step 1: Download TestDisk (choose the version matching your system, typically 64-bit) from the official CGSecurity.org website. The download is a compressed archive; extract it to a folder. Navigate into the extracted folder, right-click the "testdisk_win.exe" file and select "Run as administrator". This will open a command prompt window, which is the TestDisk main interface.
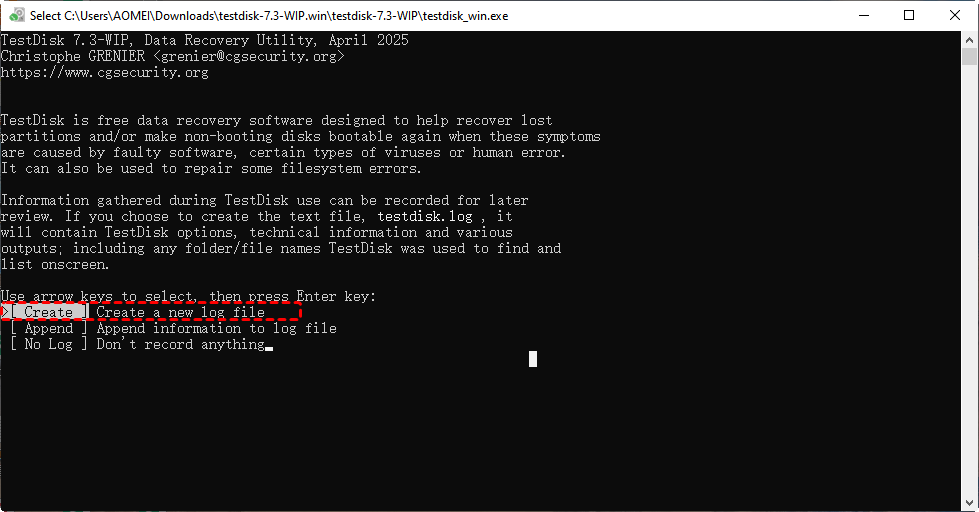
Step 2: Upon startup, TestDisk will prompt you to create a log file. Press "Enter" to select "[Create] a new log file". This log helps with troubleshooting. Use the arrow keys to navigate and "Enter" to confirm selections.
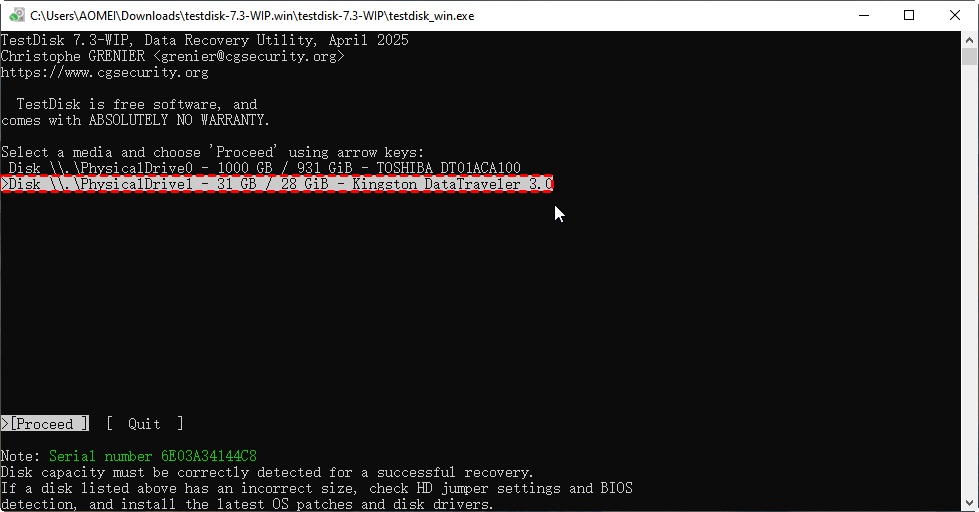
Step 3: You will now see a list of all physical drives and partitions. Use the "Up" and "Down" arrow keys to select the physical disk or the specific partition where you lost the data.
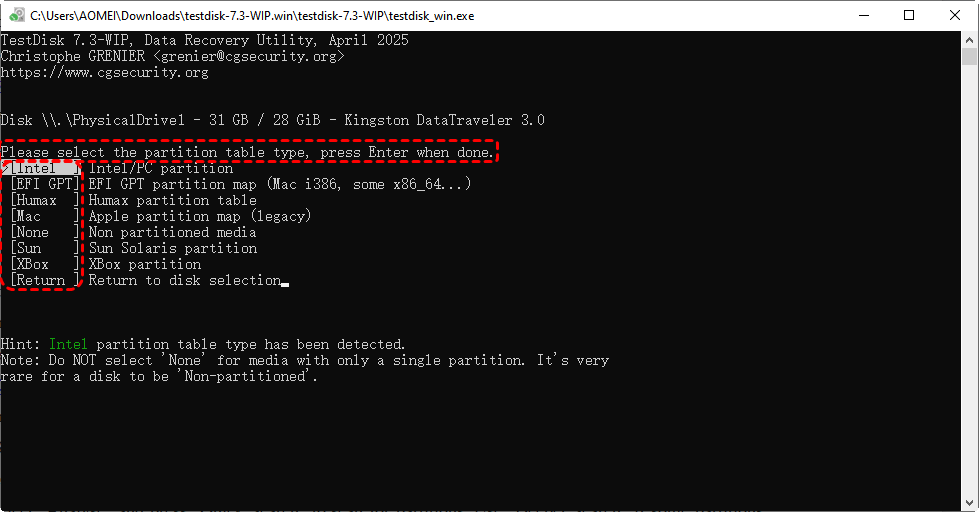
Step 4: TestDisk will automatically detect the partition table type. In most cases, for modern Windows computers, this will be "[Intel]"(which represents the MBR/GPT standard). The pre-selected type is usually correct, so simply press "Enter" to continue.
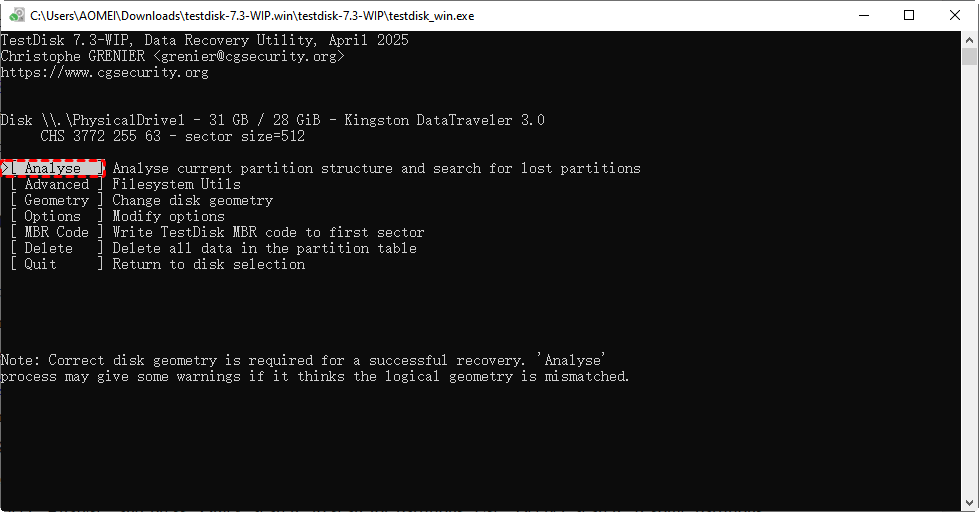
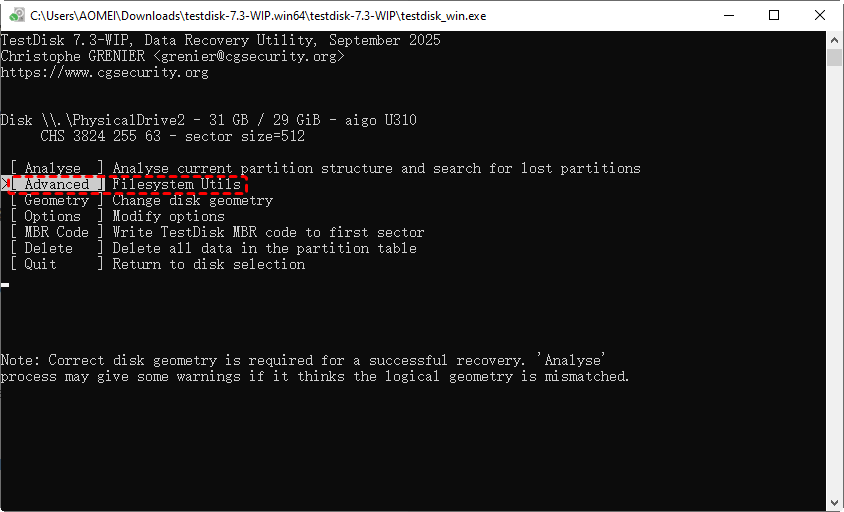
Step 5: You will now see the main menu with several options. For recovering a lost partition, select "[Analyse]" and press "Enter". This will analyze the current partition structure and search for lost partitions. For a deeper scan for deleted files, you would later choose "[Advanced]".
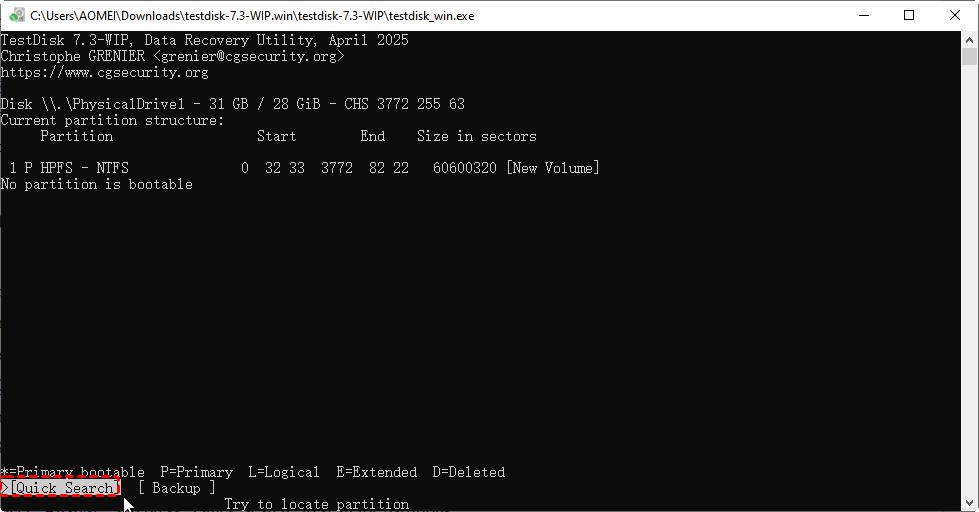
Step 6: After the initial analysis, press "Enter"to perform a "[Quick Search]". TestDisk will quickly scan the disk for existing and lost partitions. The found partitions will be listed.
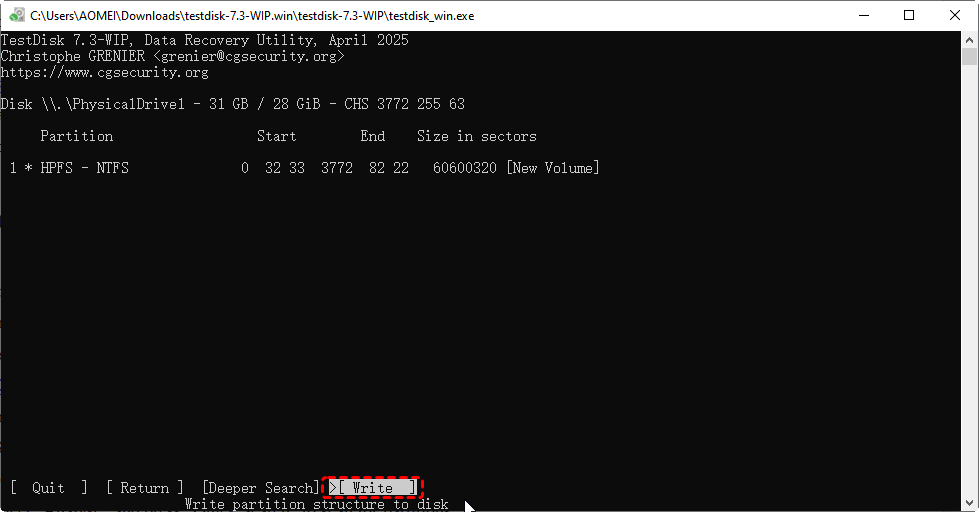
Step 7: If the lost partition is found and listed correctly in the results, ensure its partition type (e.g., P for Primary, L for Logical) is correct. Use the "Left" and "Right" arrow keys to select "[Write]" at the bottom and press "Enter". Confirm by typing "Y"to write the new partition table.
This step restores the partition, making your data accessible again in Windows Explorer. A final message will inform you that you need to reboot for the changes to take effect. Follow the instruction and restart your computer.
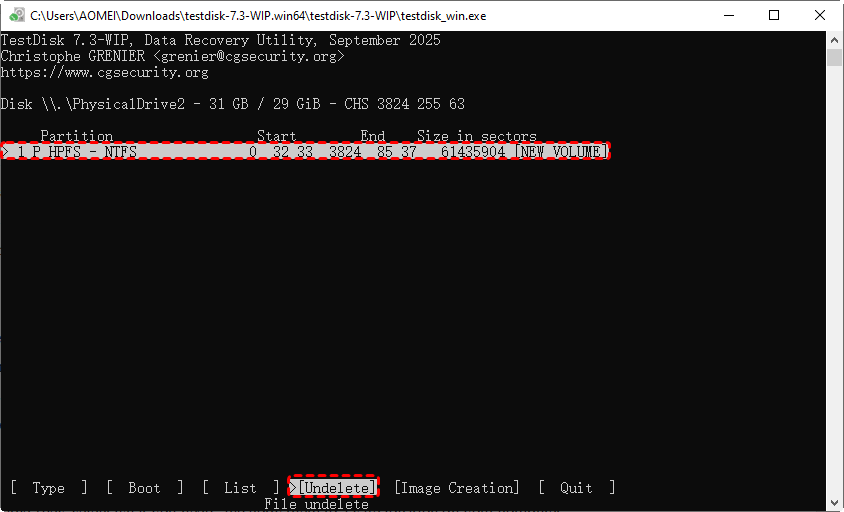
If your goal is to recover deleted files from an existing partition, in Step 5, instead of "[Analyse]", choose "[Advanced]". Then, select the desired partition. From the next menu, choose "[Undelete]"to scan for and recover deleted files and directories to another safe location.
2: PhotoRec
PhotoRec is a dedicated file recovery tool designed to reclaim lost files such as photos, videos, documents, and archives from hard disks, CD-ROMs, and other storage media. It is developed by the same team as TestDisk and shares its command-line interface with a text-based menu.
Crucially, PhotoRec ignores the filesystem and operates at a deeper level, performing a carving recovery. This makes it exceptionally powerful for recovering files from formatted drive or corrupted drives, as it searches for known file headers and footers.
- Recover Deleted Files: Restore files that have been accidentally deleted and are no longer in the recycle bin.
- Recover from Formatted Drives: Retrieve data from drives that have been reformatted, even with a different filesystem.
- Recover from Corrupted Filesystems: Salvage files when the partition is damaged and cannot be mounted.
- Wide File Format Support: Includeall major photo, video, document, and archive formats.
Just like with TestDisk, you must run PhotoRec from a different drive than the one you are recovering from. Always recover your files to a separate, healthy drive to avoid overwriting the lost data.
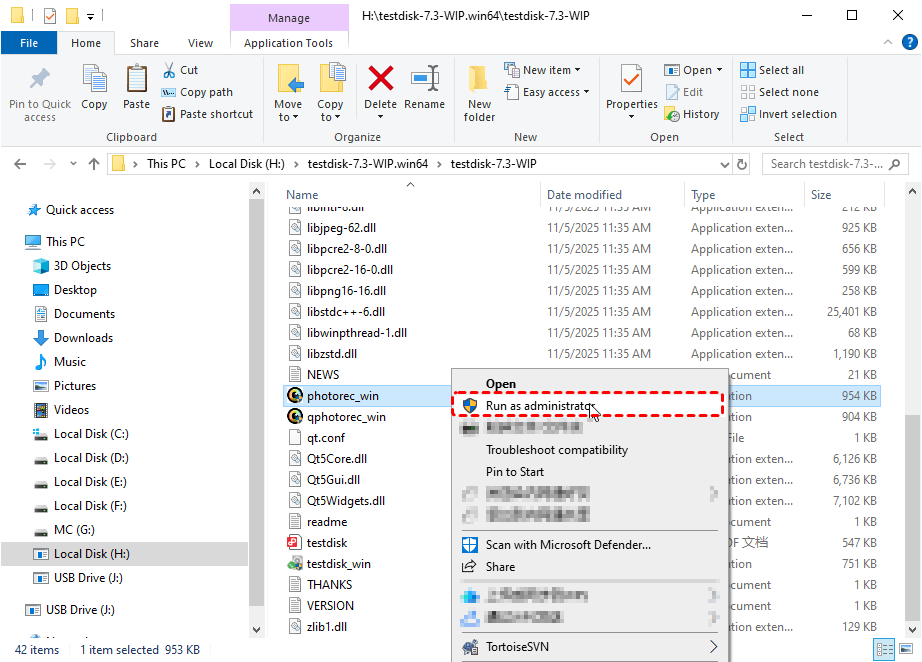
Step 1: Since it is bundled with TestDisk, just right click the "PhotoRec.exe" file and choose "Run as administrator" in the extracted TestDisk folder.
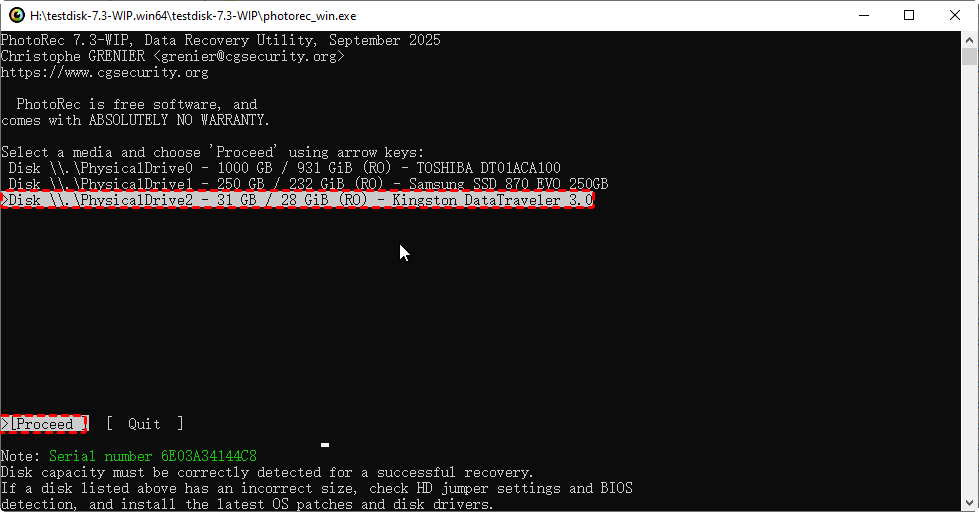
Step 2: PhotoRec will present a list of all available physical drives and partitions. Use the arrow keys to highlight the specific disk or partition that contains your lost files. Highlight [Proceed] and hit on "Enter" to confirm your selection.
Step 3: You will now see a list of partitions on the selected disk. Use the arrow keys to choose the specific partition where you lost your files. Highlight [Search] and press "Enter" to continue.

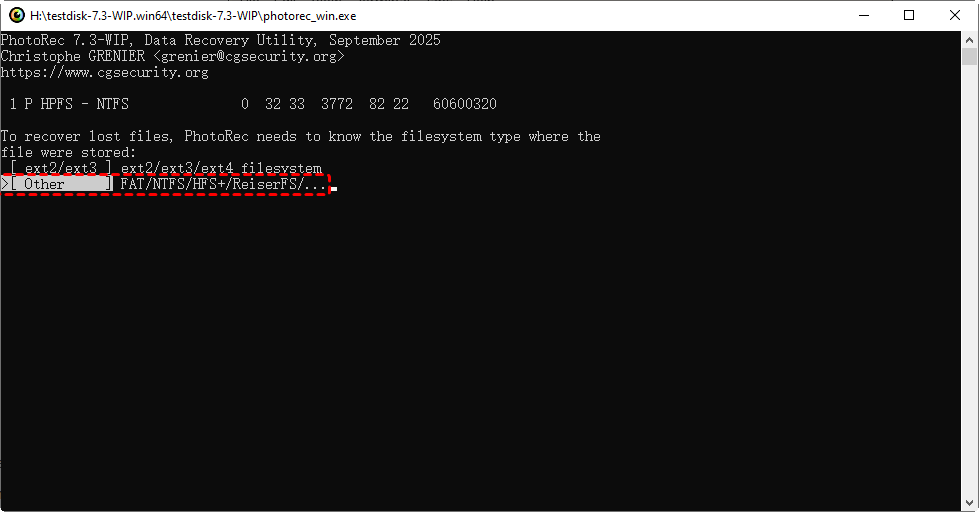
Step 4: Next, you need to specify the filesystem. Use the Right arrow key to switch between [Ext2], [FAT], [NTFS], [exFAT], and [HFS+]. Press "Enter" to set your choice.
Step 5: PhotoRec will ask you where to save the recovered files. You must choose a folder on a different physical drive. Use the arrow keys to navigate to a safe destination and press "C" to confirm. A prompt will appear; type "Y"to confirm the file recovery path.

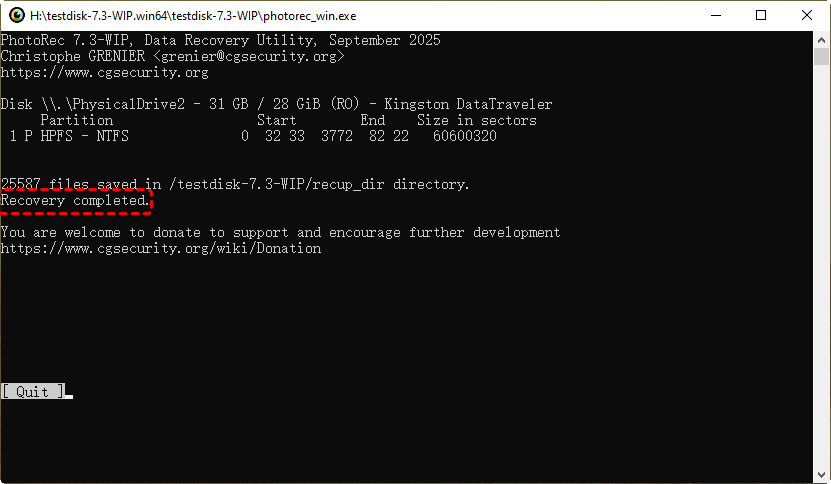
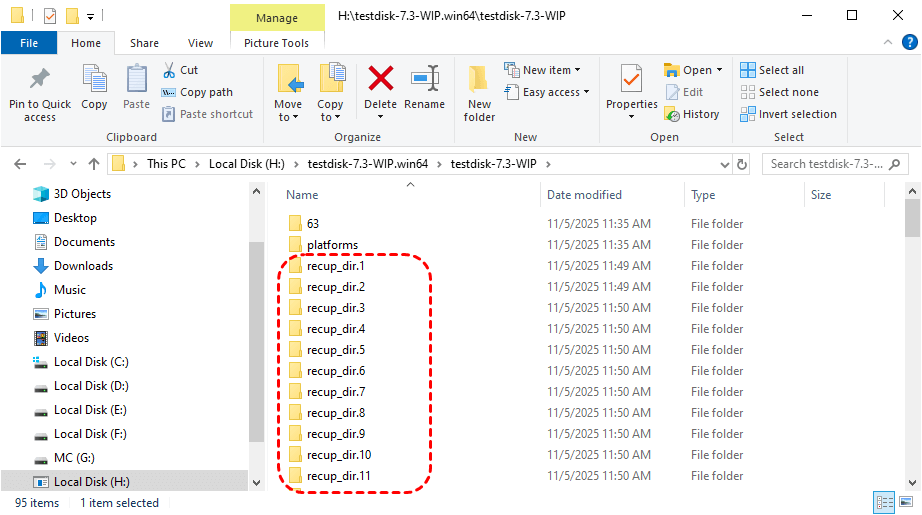
Step 6: Here you can select files to recover. The process may take a long time depending on the disk size. Once it is completed, PhotoRec will display a summary of the files recovered. You can now exit the program and navigate to the destination folder you selected in Step 5 to find your recovered files.
3: MyRecover
MyRecover stands out as a modern, fully graphical user interface (GUI) baseddata recovery solution designed for simplicity and efficiency. Unlike command-line tools or utilities with text-based menus, MyRecover allows users to perform complex data recovery through an intuitive point-and-click interface.
This makes it particularly accessible for users of all experience levels who are not comfortable with command-line operations. Its core strengths include a straightforward recovery process, the ability to preview files before recovery, and support for a wide range of data loss scenarios.
- User-Friendly GUI: Its completely visual interface makes data recovery a simple, guided process, eliminating the need for technical expertise or memorizing commands.
- Preview Before Recovery: This feature allows you to view recoverable files (like photos, documents, and videos) during and after the scan, ensuring you recover exactly the right data.
- Broad Data Recovery: Capable of recovering data lost due to accidental deletion, power failure, formatting, system crashes, or virus attacks.
- Wide Compatibility: Supports recovery from HDDs, SSDs, USB drives, SD cards, and works across Windows 11, 10, 8, 7and all Server.
Step 1: Download the MyRecover software from its official website. Run the installer and follow the on-screen instructions to install it on a drive that does not contain your lost data.
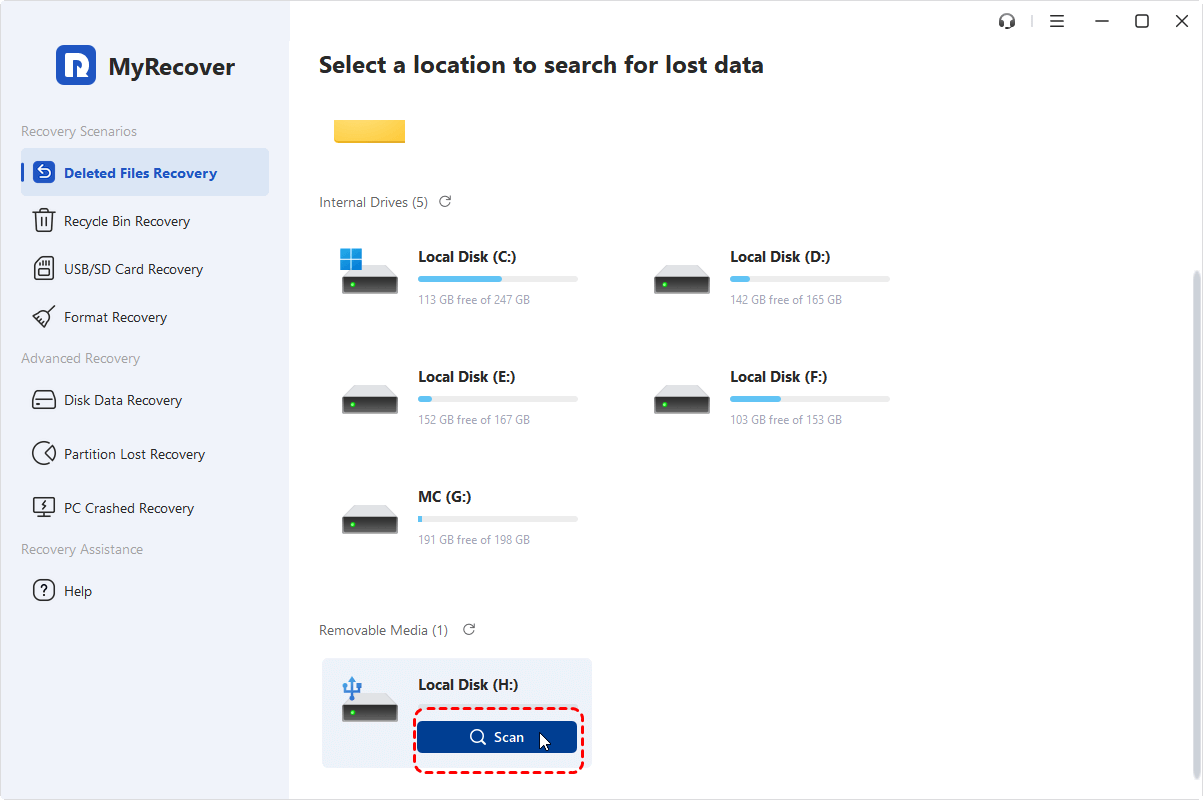
Step 2: Open MyRecover to enter its main interface. You will be presented with a list of all available drives and partitions. Select the specific drive or partition from which you need to recover your lost files and start the scan. Click the "Scan" button.
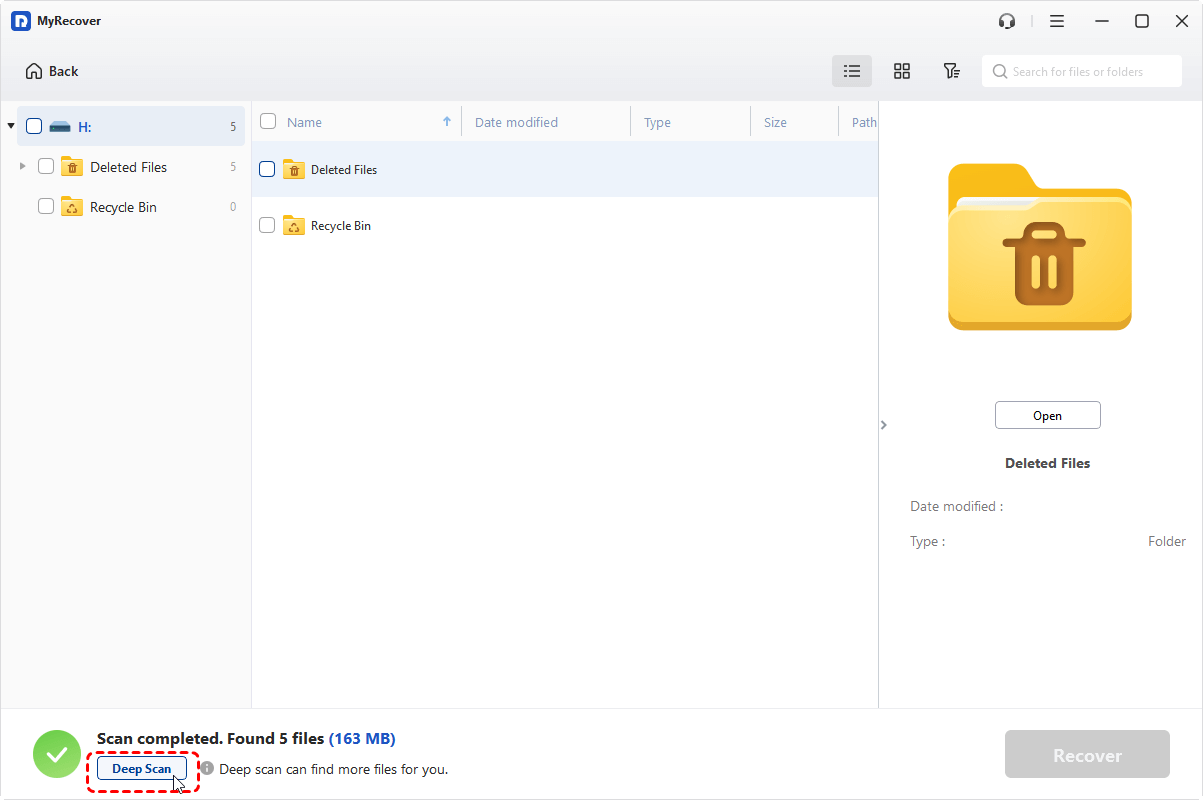
Step 3: MyRecover will automatically initiate aquick or deep scan based on the "recovery scenario" you select in the left pane before clicking "Scan" button. If a Quick Scan is started first, you can manually switch to a "Deep Scan" to thoroughly search for recoverable data.
Step 4: Once the scan is complete or during the process, you can browse or preview the found files.You can also filter results by file type,or search by file name/extensionsto quickly locate specific items.
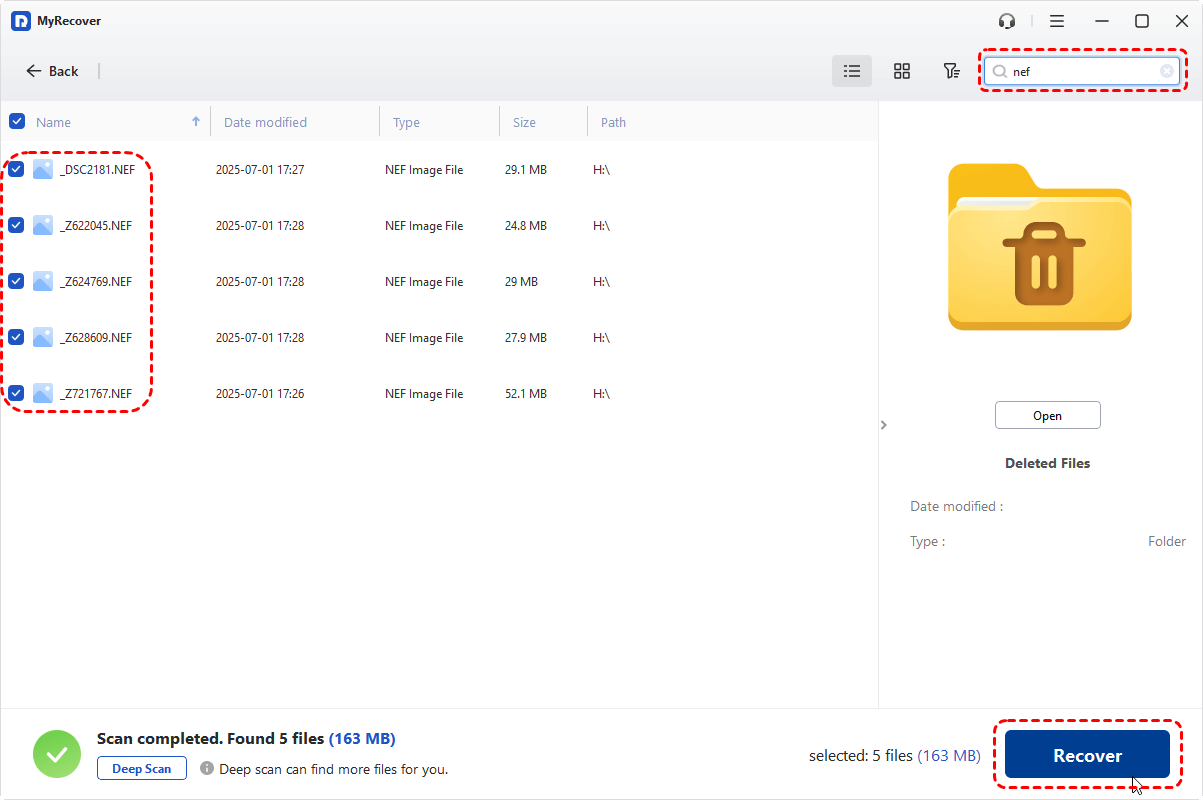
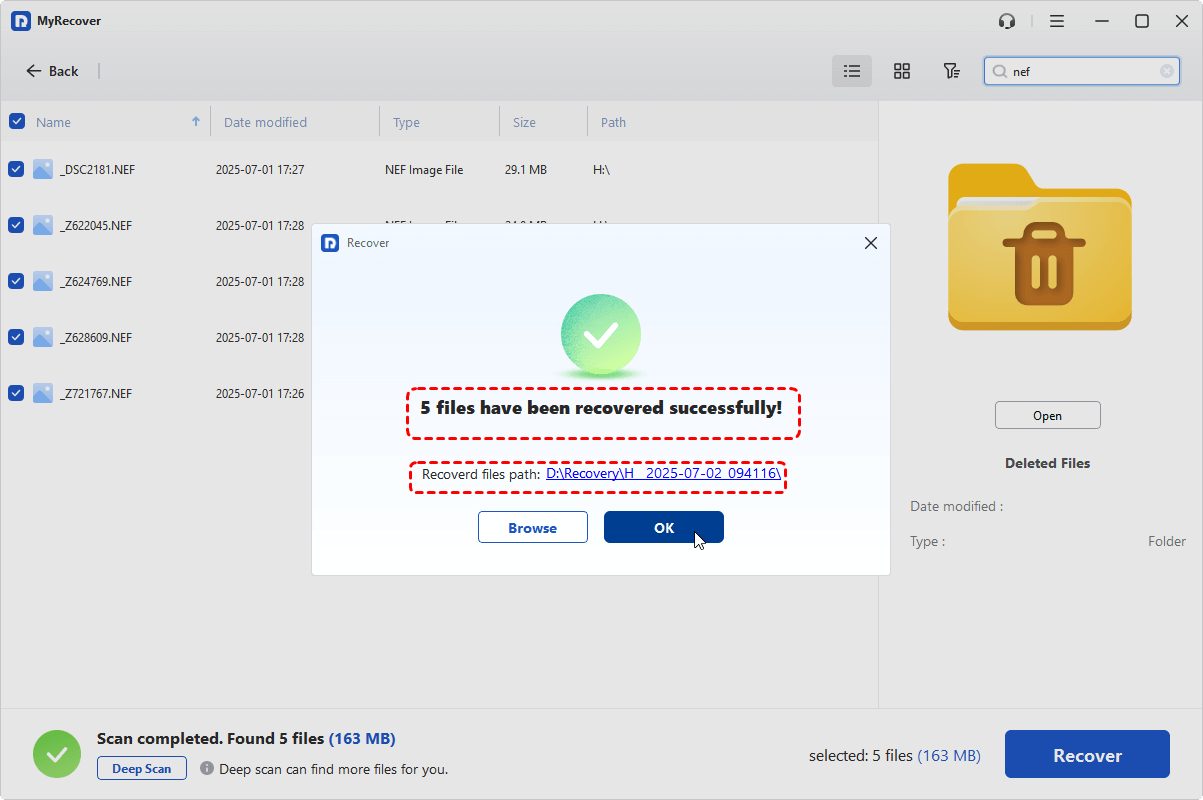
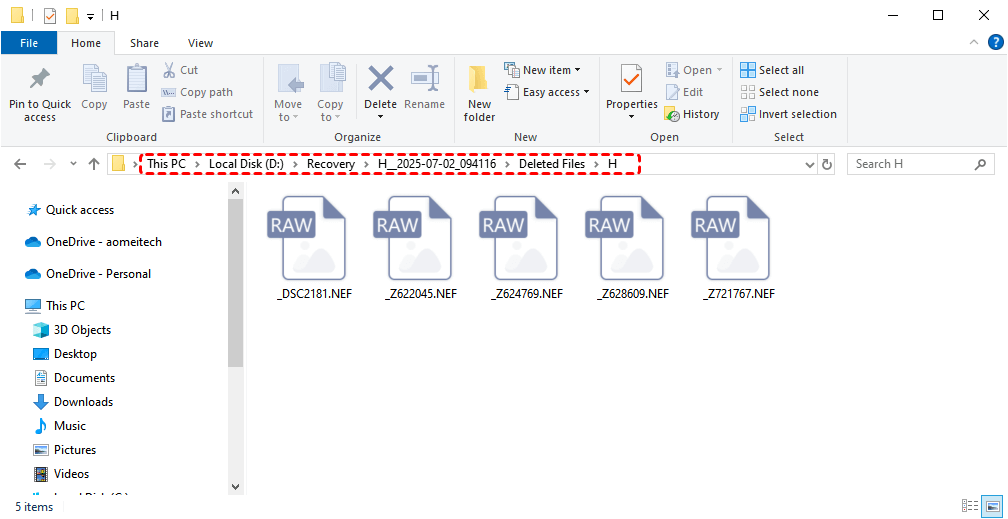
Step 5: After selecting the files and folders you wish to recover, click the "Recover" button. You will then be prompted to choose a destination folder to save your recovered data. Remember to select a folder on a different physical drive to ensure the safest recovery and protect the original data.
Summary
With these three capable Windows File Recovery alternatives at your disposal, you're equipped to handle various data loss scenarios - from TestDisk's partition restoration capabilities and PhotoRec's comprehensive file carving to MyRecover's user-friendly interface with file preview functionality. The right solution awaits based on your specific recovery needs and technical comfort level.
If you regularly handle data recovery for numerous devices across different systems, consider MyRecover Technician. This specialized version is designed for professional use, offering critical features like:
⭐Unlimited Usage: Perform an unlimited number of data recovery operations.
⭐License for Commercial Use: Legally use the software to provide billable services to multiple clients.


Stay Updated With Our
Latest Tips
Add us as a preferred source on Google to never miss helpful guides.