
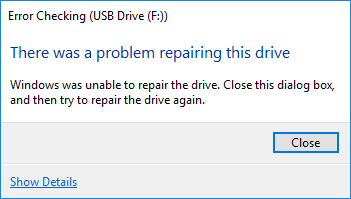
Windows Was Unable to Repair the Drive? How to Resolve
When you encounter the error message "Windows was unable to repair the drive", it can prevent you from accessing important files and applications. In this article, we explore the possible causes of this error and provide effective solutions to fix the error, and explain how to recover data from the problematic drive.
By Aria / Updated on December 3, 2025
Introduction
Encountering the "Windows was unable to repair the drive" error can be a frustrating experience, especially when you're unable to access files or important data. Whether the issue occurs with your internal hard drive, external USB drive, or SD card, the message indicates that there’s an underlying problem with the drive that Windows couldn’t resolve automatically.
Fortunately, there are several ways to troubleshoot and fix this issue, and in cases where data loss has occurred, recovery software can help retrieve your lost files.
The Possible Reasons of the "Windows was Unable to Repair the Drive" Error
Let's explore the potential causes behind this error. The "Windows was unable to repair the drive" error can be triggered by a variety of reasons. Here are some common causes:
🛠️Corrupted File System: If the file system on the drive becomes corrupted, Windows may fail to repair it using built-in tools like CHKDSK.
🛠️Bad Sectors on the Drive: Physical damage to the drive, such as bad sectors, can prevent Windows from being able to repair it. This is especially common in external hard drives or USB drives that are regularly unplugged or dropped.
🛠️Hardware Failures: Mechanical issues, overheating, or physical wear and tear can cause a drive to become unreadable. If the drive's internal components fail, no software repair will work.
🛠️Malware or Virus Corruption: Malicious software can corrupt files or system settings, leading to errors like "Windows was unable to repair the drive".
🛠️Drive Letter Conflicts or Partition Errors: Conflicting or missing drive letters, or improperly configured partitions, can also contribute to this error message.
🛠️Driver Problems: Outdated or faulty drivers can also cause Windows to struggle in recognizing or repairing the drive.
The Most Urgent Step: Recover Data from the Problematic Drive
Before attempting any repairs, it’s crucial to recover data from the drive, especially if it’s inaccessible or corrupted. In some cases, attempting repairs without backup can cause further damage, leading to permanent data loss. That’s where MyRecover comes in.
MyRecover is a powerful data recovery tool designed to help you recover files from inaccessible or corrupted drives. It can restore files from internal hard drives, external USB drives, and even SD cards that are showing errors like "Windows was unable to repair the drive." Follow these steps to recover data using MyRecover:
Step 1. Download and install MyRecover on your computer from Microsoft Store. If the faulty hard drive is an external one, connect it to your computer using a suitable data cable or port.
Step 2. Open MyRecover and select the problematic drive to scan, then click "Scan" to start the scanning process. It will search for recoverable files from the drive.

Step 3. Once the scan is complete, you can select the files you attempt to recover from the recoverable list and click "Recover".

MyRecover Free offers up to 500MB of data recovery at no charge, perfect for small recoveries. If you're looking for unlimited recovery and real-time file previews, MyRecover Professional edition gives you everything you need to ensure your data is safe.
Step 4. Save the recovered files to a different drive to prevent overwriting any data on the original drive.

When the process is done, the message "Files have been recovered successfully" will pop up. Then, you can check the recovered files by clicking on the destination folder path or "Browse" button.

How to Repair "Windows Was Unable to Repair the Drive" Error
Once your data is safely recovered, you can proceed with troubleshooting the issue without the risk of data loss. This section will offer several ways to repair the "Windows was unsable to repair the drive" error. You can try them one by one until the problem is resolved.
Run CHKDSK Command
When a drive malfunctions, the CHKDSK command is the first solution that comes to mind. The CHKDSK utility is a powerful built-in tool in Windows that can scan your drive for logical errors and attempt repairs.
Step 1. Locate Command Prompt in the Start menu and right click on it, then select "Run as administrator".

Step 2. Input the command "chkdsk G: /f /r" and hit the "Enter" key. Replace the drive letter "G" with your actual drive letter.

The command will automatically scan you drive to detect errors and attempt to repair any detected ones.
Run DISM and SFC Command
The DISM (Deployment Imaging Service and Management Tool) and SFC (System File Checker) commands can fix system file corruption that might be causing "Windows was unable to repair the drive" issue. Try to fix it using the two commands:
Step 1. Open Command Prompt and run the as administrator.
Step 2. Enter the command "DISM /Online /Cleanup-Image /RestoreHealth" and press "Enter" key.
Step 3. Wait for the command to finish. Then, run SFC command to scan and fix corrupte system files "sfc /scannow".
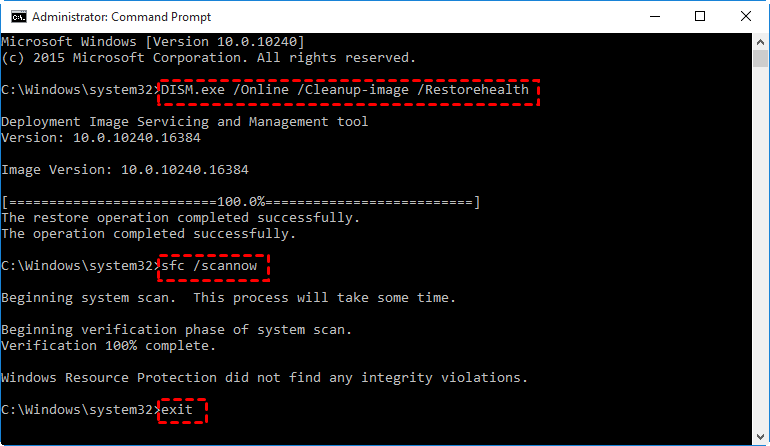
Both of these commands work together to resolve issues that may prevent the drive from being repaired.
Run the Hardware Troubleshooter Command
Sometimes, the problem may be related to the hardware rather than the drive itself. Windows has a built-in Hardware and Devices Troubleshooter command that can help identify and fix hardware-related issues.
Step 1. Press "Win" + "X" to choose "Windows PowerShell (Admin)" to open it.

Step 2. Type the following command "msdt.exe -id DeviceDiagnostic" and press "Enter".
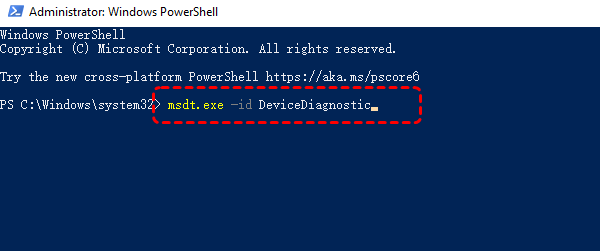
Step 3. This command will directly launch the "Hardware and Devices" troubleshooter window. Click "Advanced" and check the "Apply repairs automatically" box, then click "Next" to detect hardware problems.

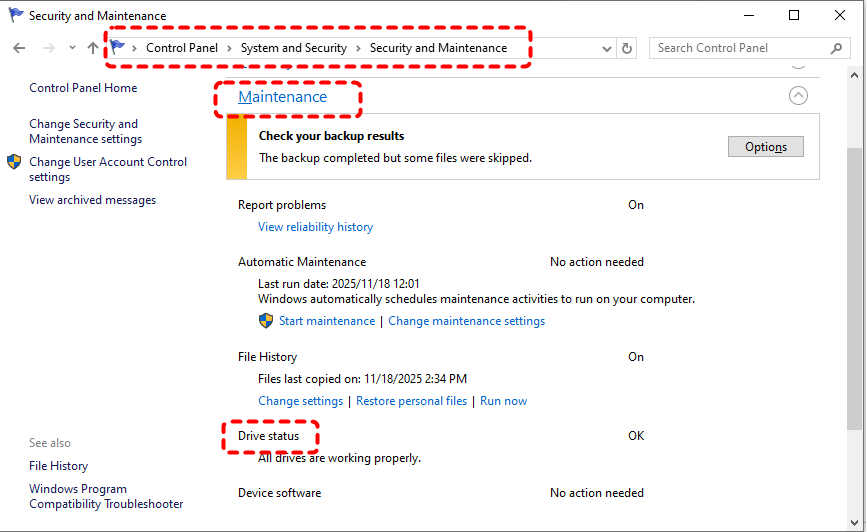
Check Drive Status
Examining the drive status enables the identification of any existing issues related to hardware and software components. Here's how:
Step 1. Navigate to "Control Panel" > "System and Security" > "Security and Maintenance".
Step 2. Expand "Maintenance" to check for drive status.
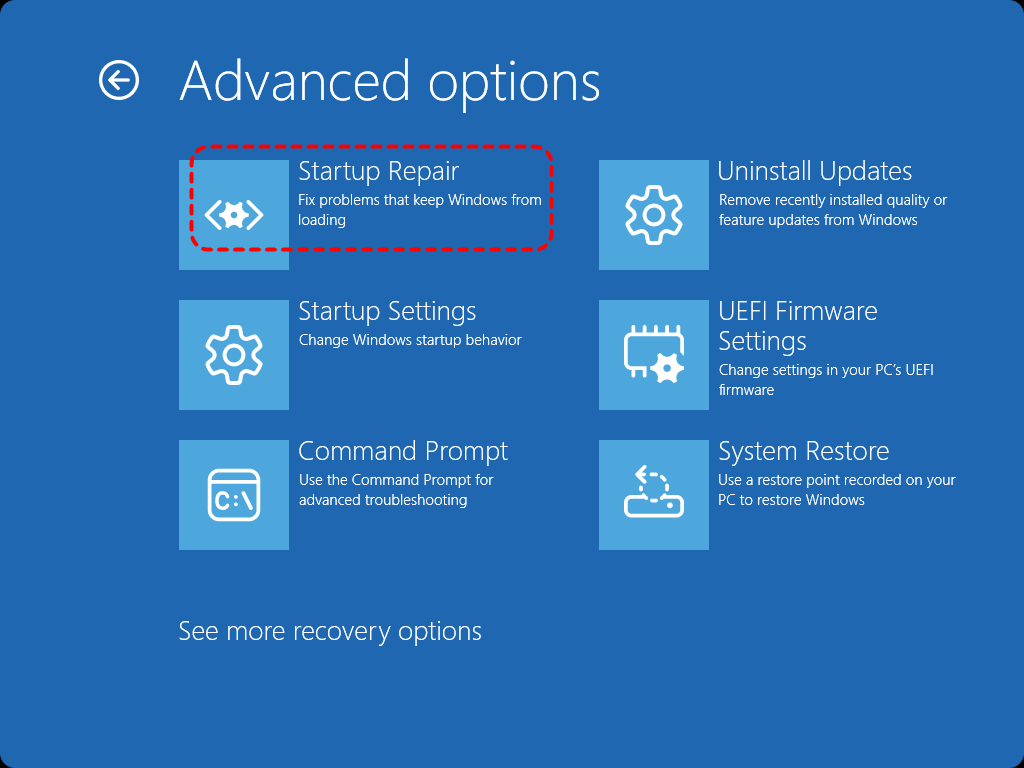
Run Startup Repair
If the issue persists after trying the above solutions, you can run Startup Repair. This tool can fix boot-related problems that may cause errors like "Windows was unable to repair the drive."
Step 1. Go to "Settings" > "Update & Security" > "Recovery" > "Advanced startup" and click "Restart now" to boot into WinRE.
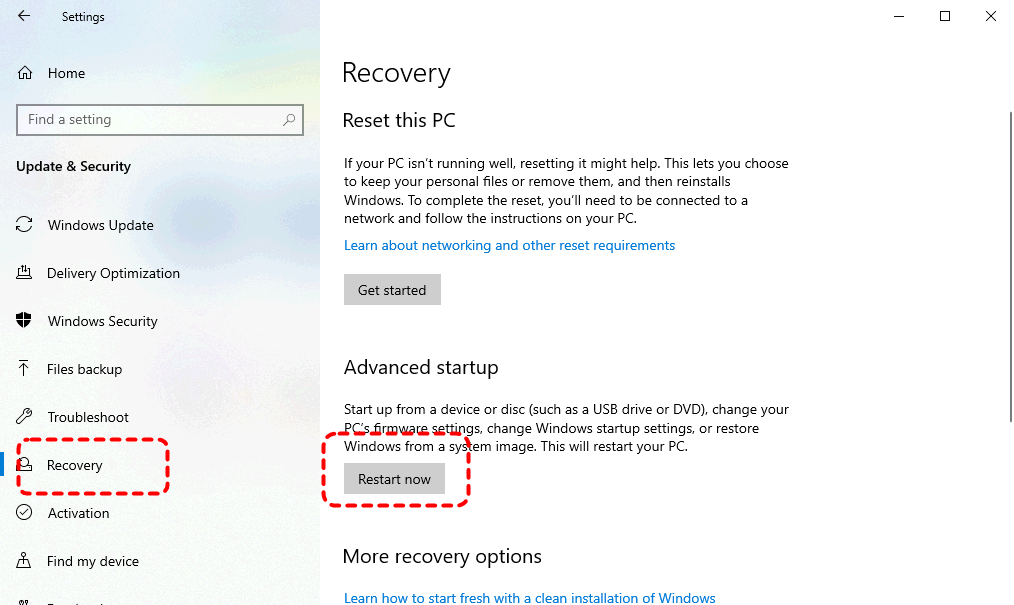
Step 2. Select "Troubleshoot" > "Advanced options" > "Startup Repair". Wait for the process to finish and restart your computer.
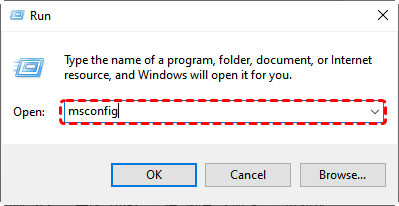
Perform Clean Boot
A clean boot can help rule out software or driver conflicts that might be preventing the drive from being repaired. If the "Windows was unable to repair the drive" error disappears in the clean boot state, it indicates the problem may be caused by a background program or service.
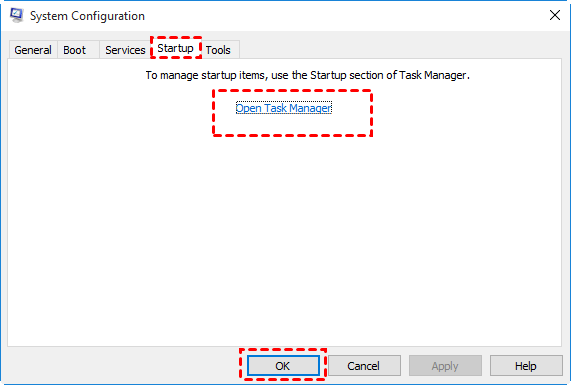
Step 1. Press "Win" + "R" and input "msconfig" in the Run dialog to open System Configuration.
Step 2. In the opened System Configuration window, locate the "Service" tab, check the "Hide all Microsoft services" and click "Disable all" to disable all non-Microsoft services at startup.
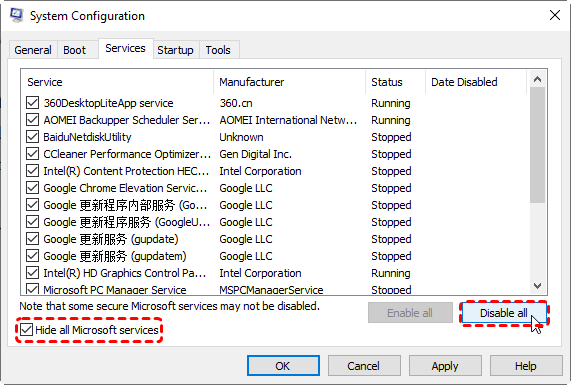
Step 3. Click "Apply" and "OK" to save the changes.
Step 4. Then, click "Open Task Manager" under the "Startup" tab, disable all apps.
Step 5. Restart your computer to see if the issue is resolved.
Format the Drive
If none of the above solutions work and you still can't repair the drive, formatting it might be your last resort. Formatting will erase all data, so ensure you've recovered your important files before proceeding. Even if you haven’t recovered the data in advance, you can still retrieve the files after formatting using a data recovery tool like MyRecover.
Step 1. Press "Win" + "X" and choose "Disk Management" to open it.
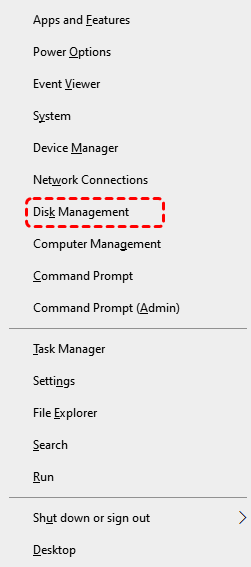
Step 2. Locate the problematic drive and right click on it, then select "Format".
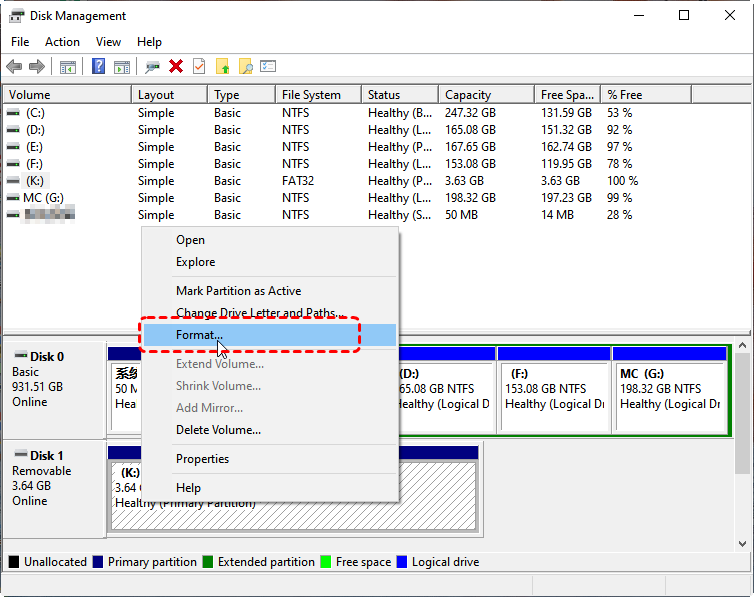
Step 3. Set the appropriate file system (NTFS is recommended for most drives) and check the "Perform a quick format" option, then click "Start" to begin the process.

The Bottom Line
"Windows was unable to repair the drive" can be a tricky error to deal with, but with the right steps, you can fix the issue and recover your data. Always prioritize recovering your important files before attempting any repairs, especially if formatting is involved. MyRecover is a reliable tool for data recovery in these situations, ensuring you don’t lose your files permanently.
With its Professional edition, you even can retrieve data from unbootable Windows. Don’t let this error stop you from accessing your important files. Take action today to troubleshoot and fix the issue while protecting your valuable data for the future.


Stay Updated With Our
Latest Tips
Add us as a preferred source on Google to never miss helpful guides.