
How to Recover Data from an Internal Hard Drive (Deleted, Crashed, or Dead)
Wondering how to recover data from an internal hard drive? Whether your files were deleted accidentally, lost due to a system crash, hard drive corruption, or formatting, this guide has you covered. We’ll walk you through proven methods, including using professional data recovery tools, built-in Windows features, to retrieve data from internal hard drives, even if the drive won’t boot.
By Aria / Updated on May 27, 2026
Common Data Loss Reasons on Internal Hard Drive
Whether you're using a Windows desktop, a gaming laptop, or a business workstation, data loss on an internal hard drive (HDD or SSD) can happen unexpectedly and often at the worst possible time. But this doesn’t mean the data will be permanently lost. If you're seeking solutions on how to recover data from an internal hard drive, this guide is for you.

Before diving into recovery methods, it's important to understand why data loss happens on internal hard drives. It can help you prevent future disasters and act swiftly when recovery is needed. Here's a breakdown of the most frequent reasons:
🔔Accidental Deletion: Users unintentionally delete important files or folders, often bypassing the Recycle Bin using "Shift + Delete" or through command-line operations.
🔍Drive Formatting: Formatting a partition (or the entire drive) intentionally or by mistake wipes the file system structure, making files inaccessible.
💡File System Corruption: The internal structure that organizes your files (NTFS, exFAT, etc.) becomes damaged. The drive and files stored on it may be unreadable.
🔒Malware or Ransomware Attacks: Viruses, trojans, or ransomware can encrypt, hide, or delete files stored on your internal hard drive.
⛏️Hardware Failure: Mechanical parts (in HDDs) or memory chips (in SSDs) degrade or malfunction over time.
🛠️Operating System Crashes or Boot Errors: The OS fails to load due to system file corruption, registry errors, or bootloader issues, and the internal drive is intact but inaccessible through standard boot.
How to Recover Deleted Data from an Internal Hard Drive When Windows Boots Normally
No matter the cause, stopping the use of the internal hard drive with lost data immediately can help minimize the risk of data being overwritten, especially when the internal hard drive is an SSD with TRIM enabled. Whether the internal hard drive is a system disk or data disk, you can find suitable internal hard drive data recovery methods here. The following sections elaborate on these solutions. Let's explore them one by one.
Method 1. Check the Recycle Bin [For Accidentally Deleted]
Checking the Recycle Bin is one of the fastest and most effective ways to recover lost data from internal hard drive. Unlike external drives, deleted files on internal disks go to Windows Recycle Bin before restoration, excluding the too large files for Recycle Bin.
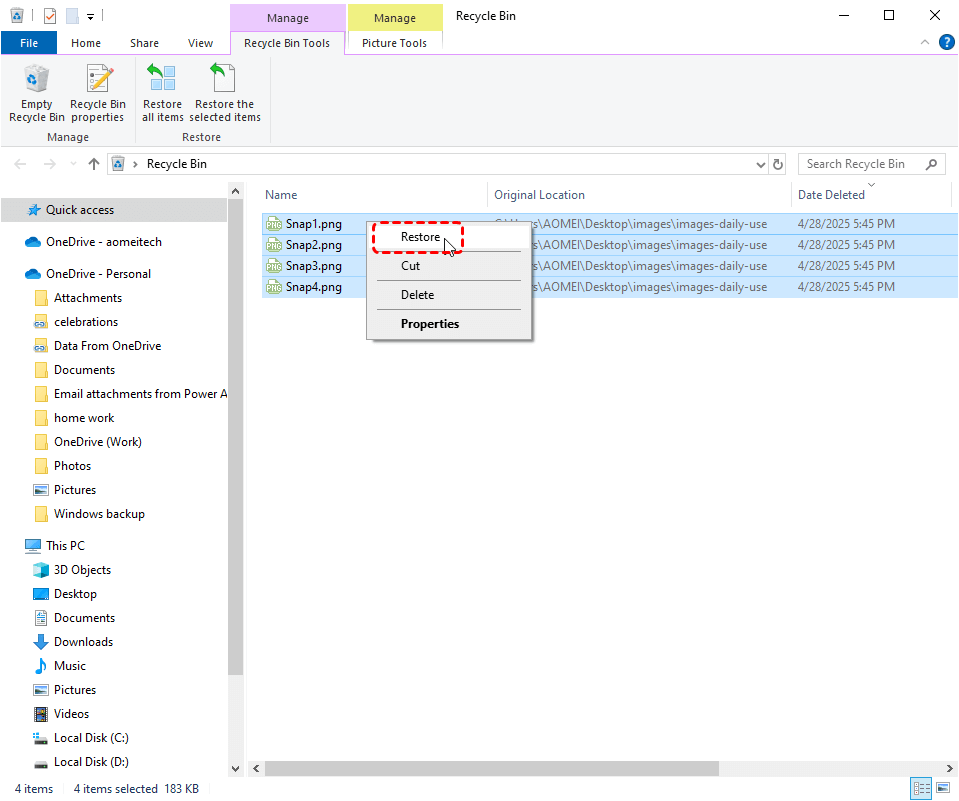
Step 1. Double click the Recycle Bin icon on your desktop to open it.
Step 2. Browse through the items and select the files you wish to recover.
Step 3. Right click on them and choose "Restore" to return them to their original location.
Method 2. Restore from Backups [Backup Required]
If you have ever backed up the files you want to recover, whether using Windows' built-in backup tools or cloud backup tools, you can directly restore the desired data from the backup. Here, we’ll take Windows' built-in tool—Backup and Restore—as an example.
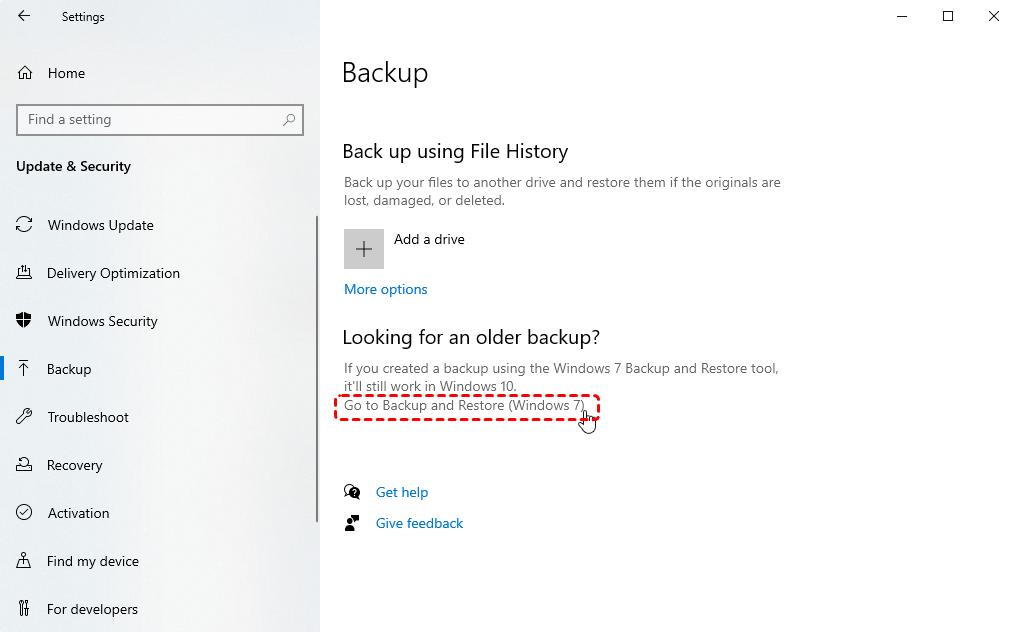
Step 1. Open "Backup settings" in the Start menu and click "Go to Backup and Restore (Windows 7)".
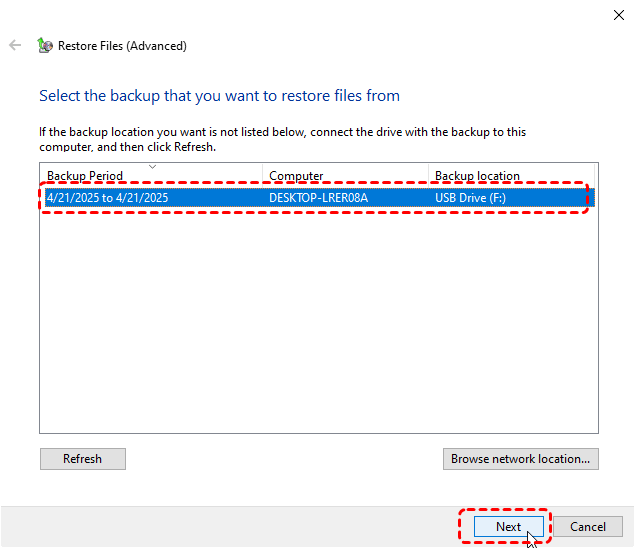
Step 2. Choose "Select another backup to restore files from" and select a backup including the lost files. You can also click “Restore my files” to recover lost data from the latest backup.
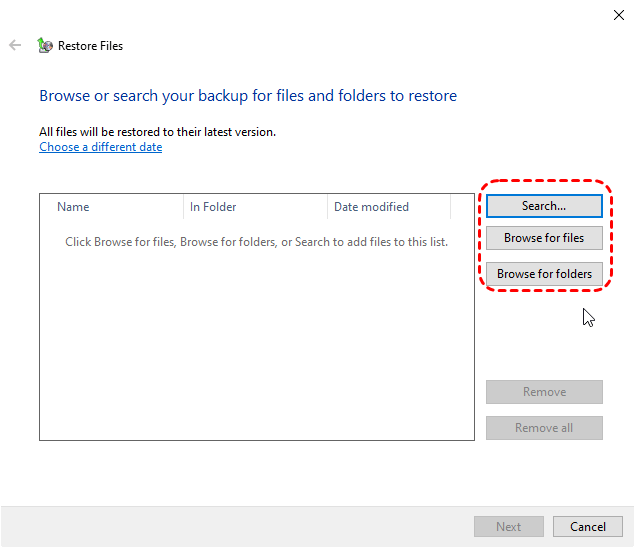
Step 3. Select the files you want to recover by clicking on "Browse for files/folders".
Step 4. Choose a destination folder to save the recovered files and click "Restore" to begin the process.
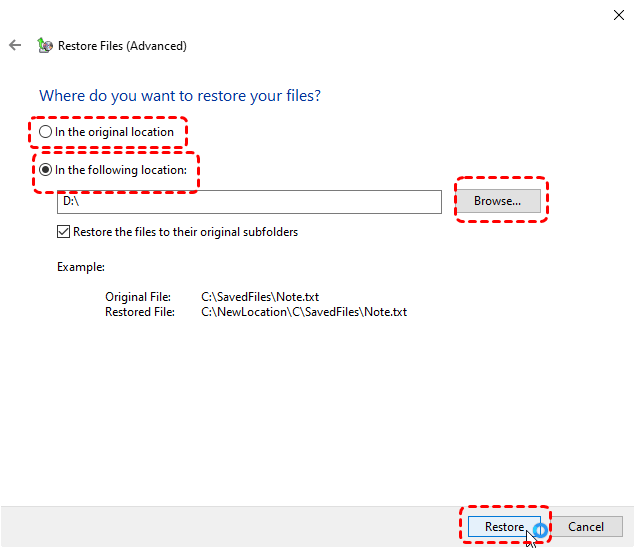
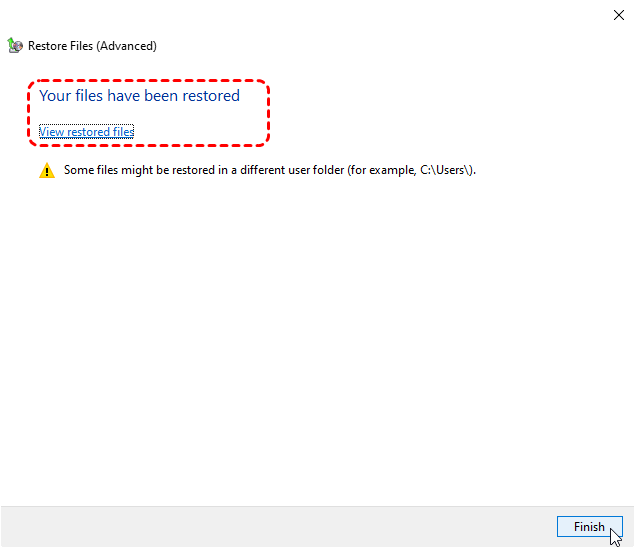
When the process is completed, the message "Your files have been restored" will pop out. You can click "View restored files" to check the recovered files in the destination folder.
- ★Tips:
- Similar to Backup and Restore, you can only recover files from File History if you backed them up before the data loss occurred.
- Additionally, you can also restore deleted files from OneDrive and more cloud backup tools, provided that they have been enabled.
Method 3. Run Windows File Recovery Command [For Permanently Deleted]
Windows File Recovery is a command-line data recovery tool provided by Microsoft. It supports recovering data from internal and external hard drive. It's powerful but requires a basic understanding of the command line. Follow these steps to recover data from internal hard drive with command:
Step 1. Download and install Windows File Recovery on your computer from Microsoft official channel.
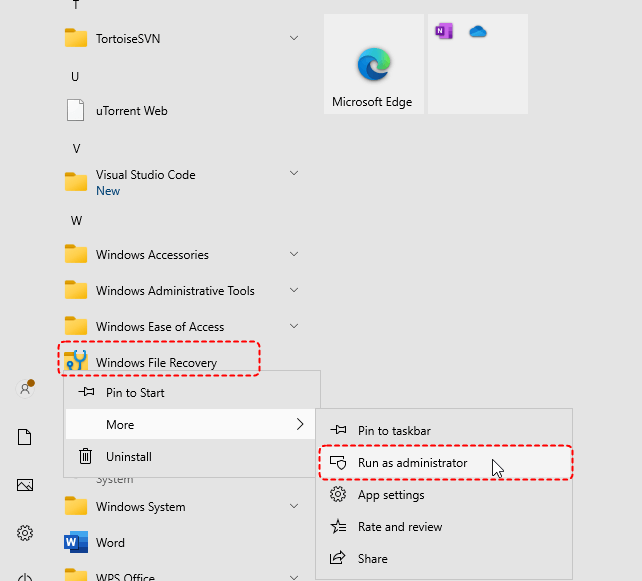
Step 2. Open Windows File Recovery and run it as administrator.
Step 3. Type the following command "Winfr F: E: /regular" and press "Enter". Replace the drive letters "F" and "E" with your actual drive letters.
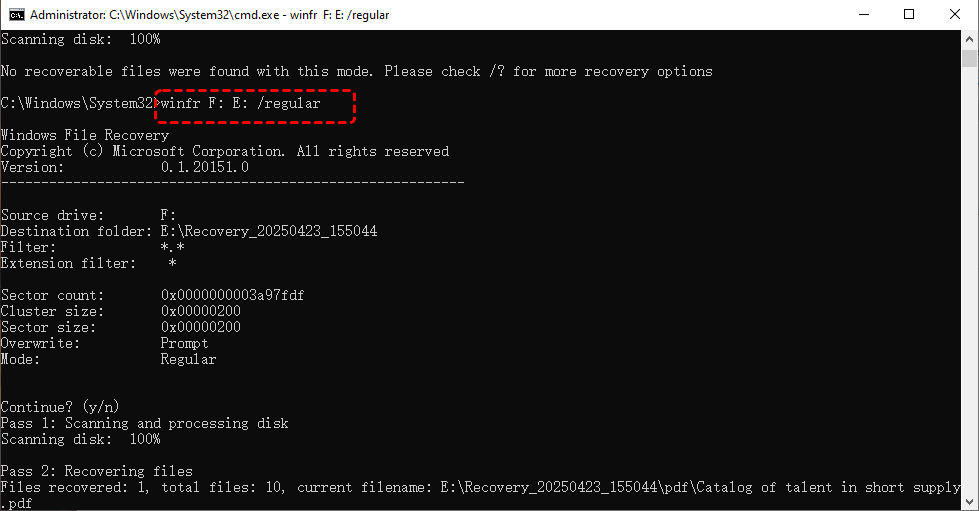
When the process is finished, you can press "y" to check the recovered files in the destination folder.
Method 4. Try Protessional Data Recovery Tool: MyRecover [Cover All Scenarios]
While the methods above work well in specific situations, they may have limitations when dealing with formatted drives, corrupted partitions, accidental deletion without backups, or inaccessible internal hard drives. If your files are still missing or the drive has become unreadable, a dedicated recovery tool like MyRecover provides a higher chance of successful recovery.
It is designed to handle a wide range of internal hard drive data loss scenarios, including deleted files, formatted partitions, RAW drives, system crashes, and corrupted storage devices. It offers a visual interface and allows users to locate recoverable files more efficiently before restoring them.

- Easy to use, no technical skills required.
- "Quick Scan" for recently deleted files while "Deep Scan" for thoroughly searching lost data from formatted, corrupted, or inaccessible drives.
- Supports over 1000+ file types recovery, including documents, photos and videos (JPG, PNG, MP4, etc.), emails, compressed files, and more.
- Works on all modern windows versions like Windows 11, 10, 8, 7 and Server 2025, 2022, 2019, 2016.
Step 1. Download and install MyRecover on your Windows supported computer from Microsoft Store or its official website.
Step 2. Run the application and select the drive where the lost data were stored to scan, then click "Scan".

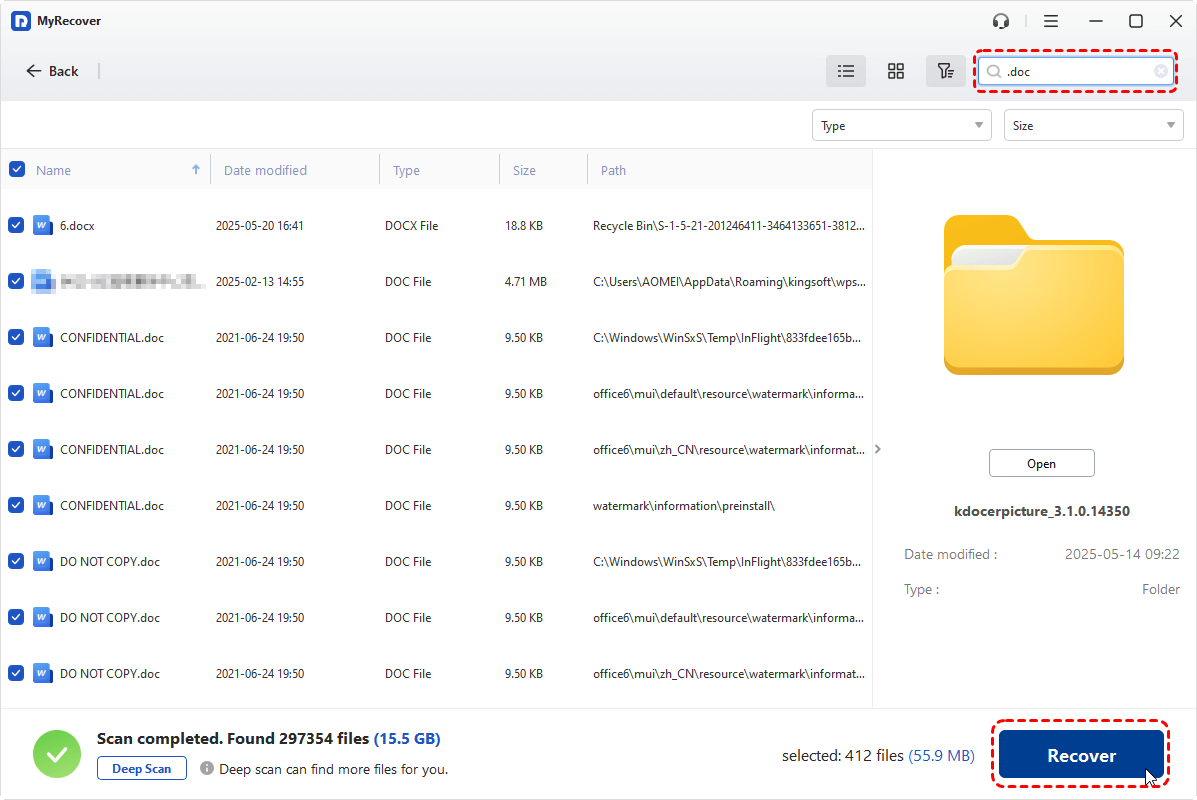
Step 3. Choose the files you intend to recover from the recoverable lists and click "Recover". You can preview the file content in the right panel to verify it's the one you want.
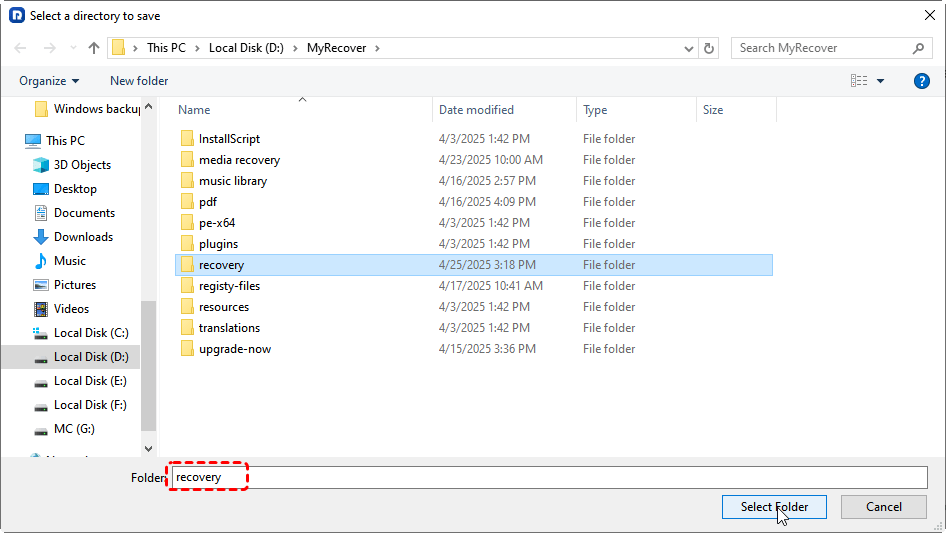
Step 4. Select a safe location to save the recovered files to avoid overwriting original files.
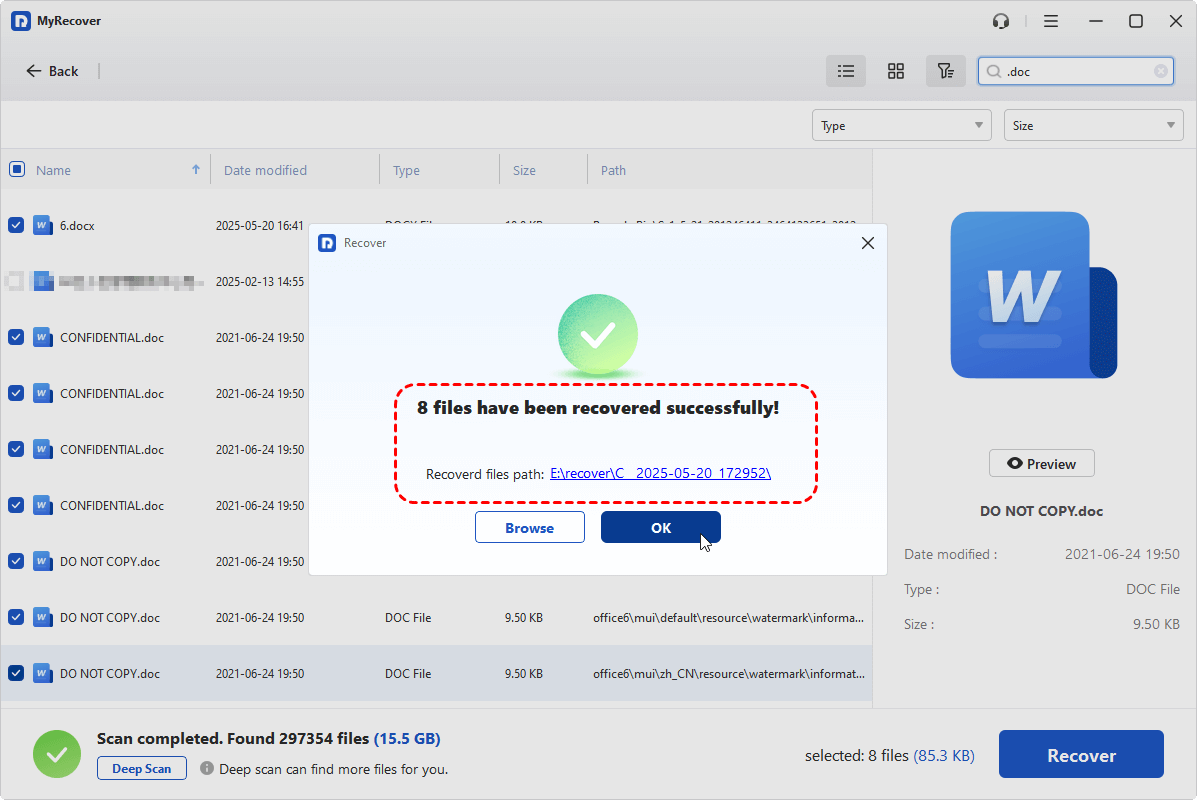
Once the process is completed, the message indicating successful recovery will pop out. You can check the recovered files by clicking on the destination folder path or "Browse" button.
How to Recover Data from a Crashed Internal Hard Drive When Windows Cannot Boot Normally
Recovering data becomes more complicated when the crashed internal hard drive is your system drive, and Windows fails to start. In such a case, the data on the drive is still intact but the operating system can no longer access it. Before reinstalling Windows or formatting the drive, prioritize recovering important files first. The following methods progress from simpler solutions to more advanced recovery approaches depending on your situation.
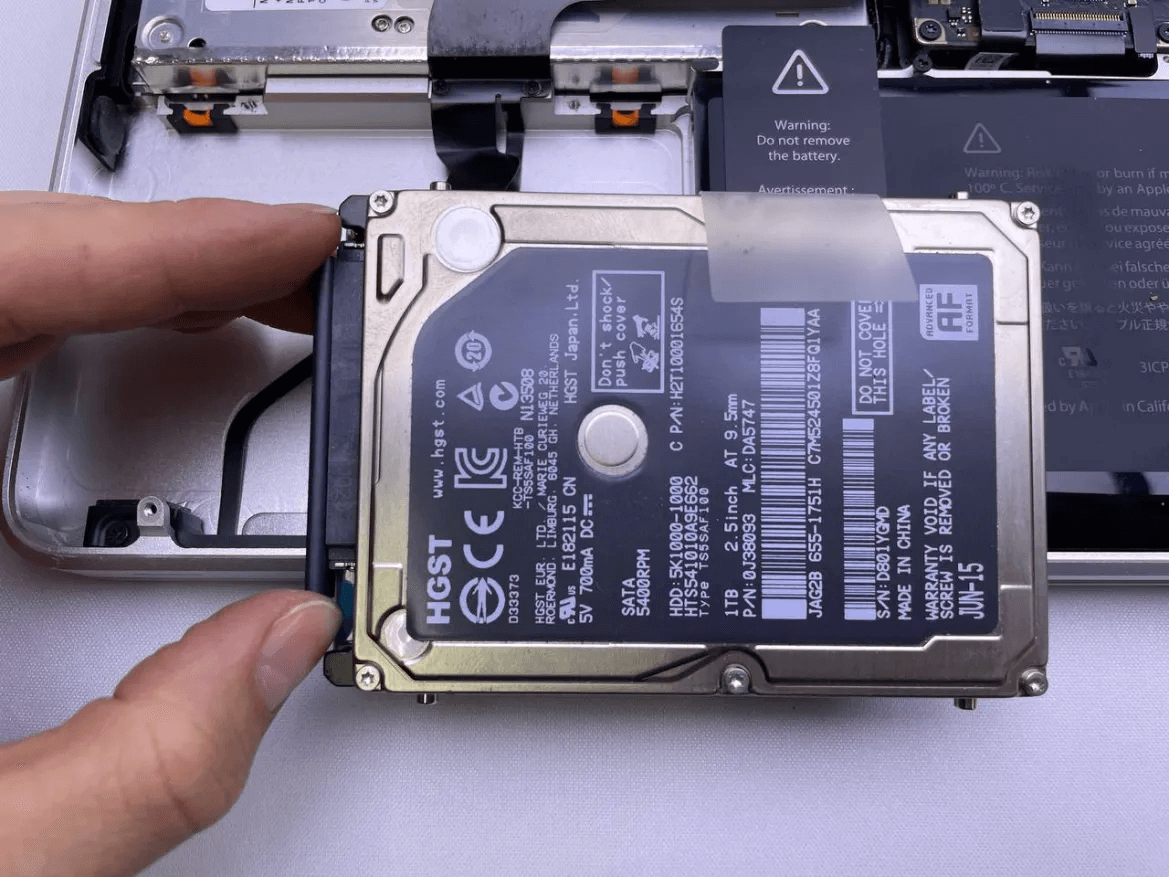
Method 1. Connect the Internal Drive to Another Computer
If the drive itself is healthy and only the Windows installation is corrupted, removing the internal drive and connecting it to another working PC is often the fastest way to access your files. This method works well for laptops and desktops affected by startup failures, boot loops, or OS corruption.
Step 1. Power off the computer completely and remove the internal HDD or SSD carefully.
Step 2. Connect the drive to another working PC using a SATA-to-USB adapter, external enclosure, or secondary drive slot.
Step 3. Open File Explorer or Disk Management on the working computer to check whether the drive is recognized.
Step 4. Copy important files (documents, photos, videos, etc.) to another storage device. Avoid writing new data to the crashed drive.
- Notes:✎...
- If the drive appears as RAW, inaccessible, or asks to be formatted, stop using it and try professional recovery tools like MyRecover instead.
Method 2. Restore Files from a System Image Backup
If you previously created a Windows System Image Backup, you may recover files without needing the original operating system to boot. System images store a complete snapshot of Windows, including personal files, installed programs, and settings. This method is suitable when the current system becomes unbootable but backup images remain available on the computer.
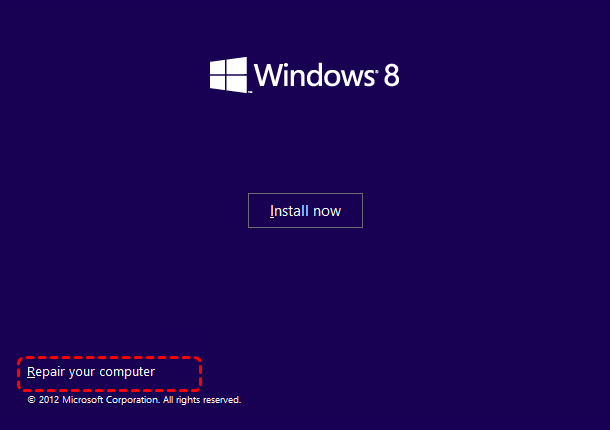
Step 1. Boot the computer using Windows installation media or recovery media.
Step 2. Once the computer boots up, select "Repair your computer" instead of "Install now".
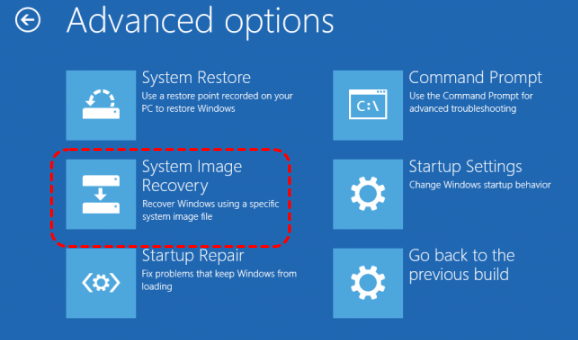
Step 3. Go to "Troubleshoot" > "Advanced options" > "System Image Recovery".
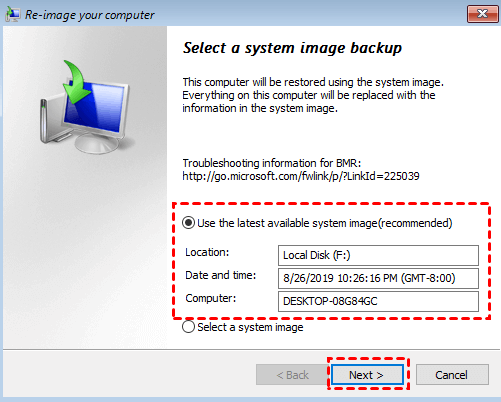
Step 4. Choose the latest available system image backup and follow on-screen instructions to restore your files and settings.
Method 3. Use MyRecover Bootable Media
When Windows cannot boot and no system images are available, MyRecover allows you to access and recover files directly from an unbootable computer without reinstalling Windows first. It provides bootable recovery capabilities for scenarios including OS crashes or startup failures. Follow these steps to create a bootable drive with MyRecover and recover lost data from crashed internal hard drives:
Step 1. Download and install MyRecover on a working computer from secure channel and prepare a blank USB.
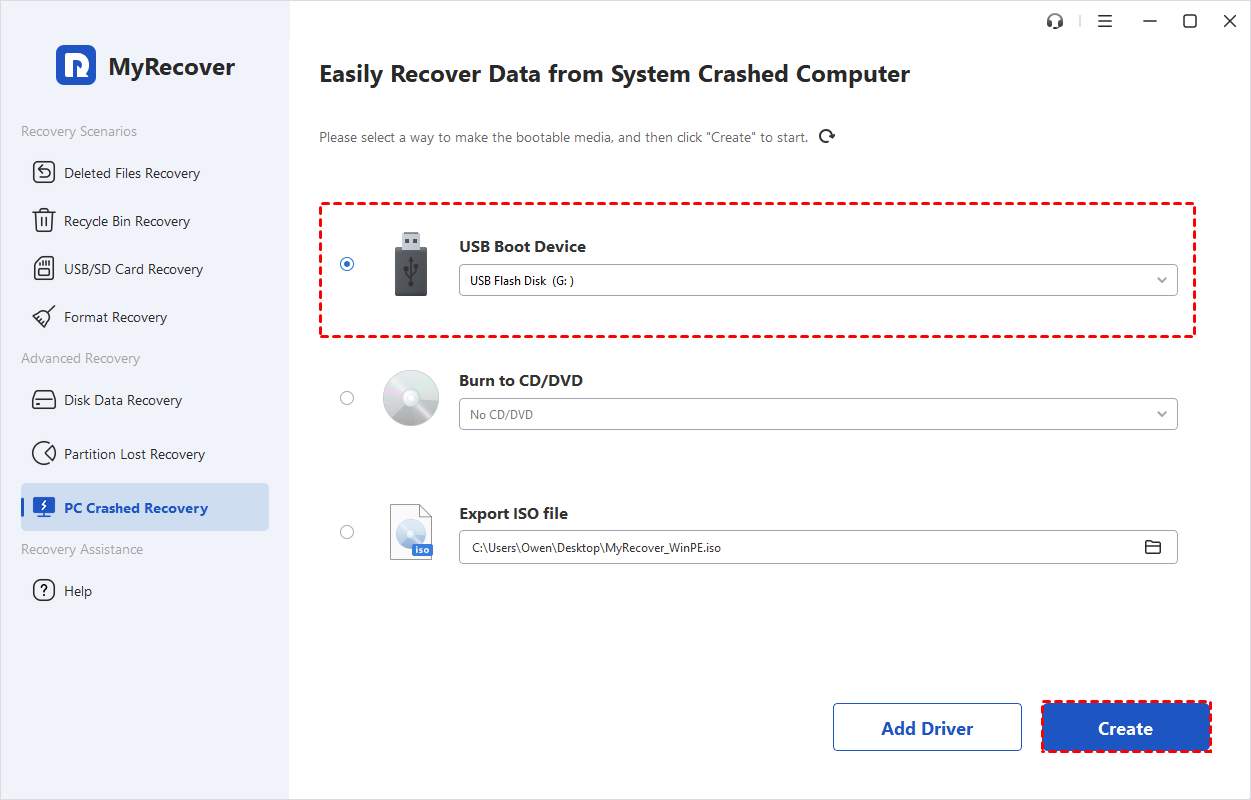
Step 2. Launch MyRecover and connect the USB on the computer, then select "PC Crashed Recovery" section.
Step 3. Choose "USB Boot Device" and click "Create" to make the bootable media. Back up important data on the USB first, as the drive will be formatted during the process.
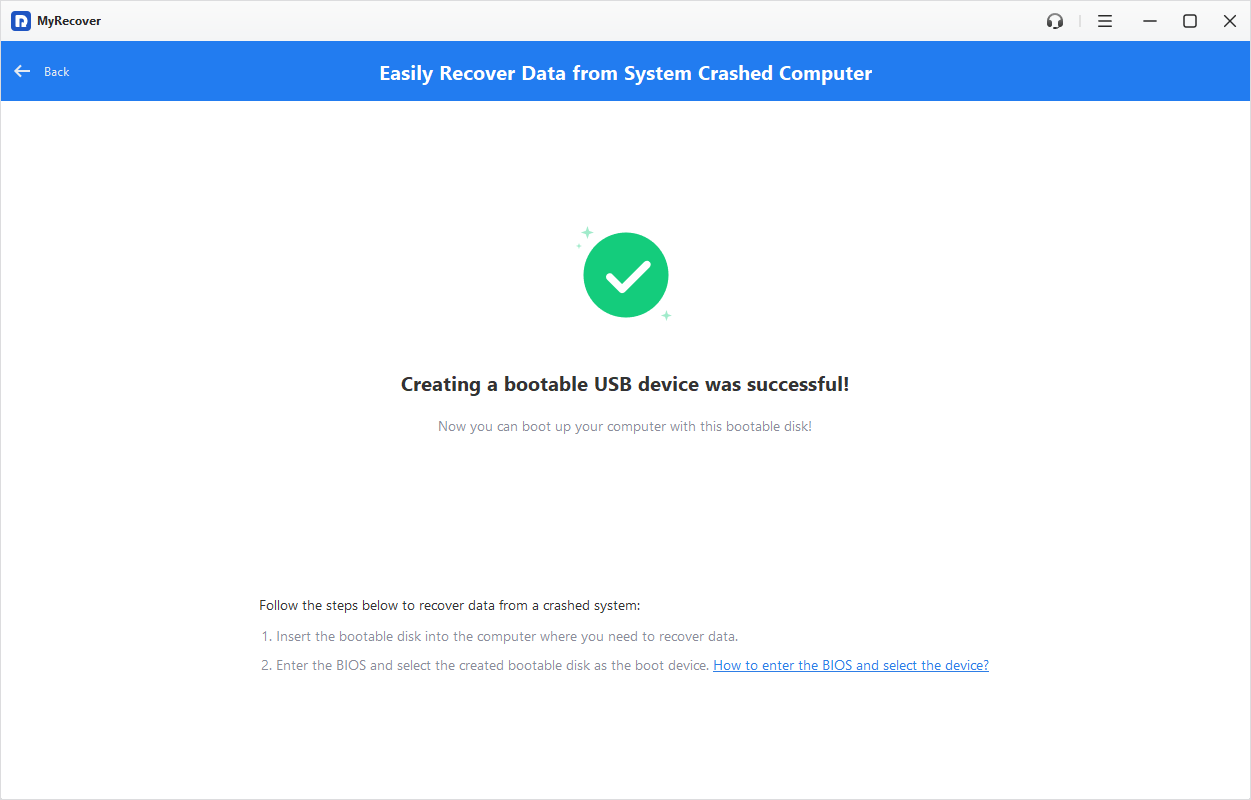
Step 4. Wait several seconds until the USB bootable media created successfully. Insert the bootable media into the unbootable computer.
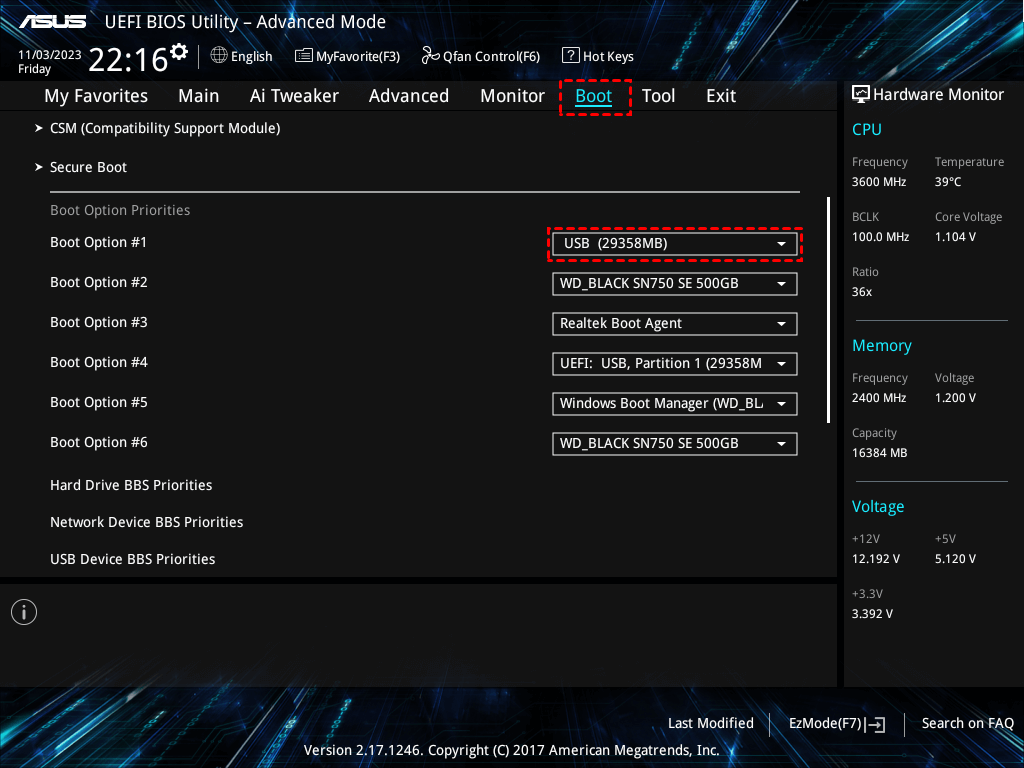
Step 5. Enter the BIOS system and choose the created USB bootable media to boot the computer.
Then, you will automatically get into the interface of MyRecover and you can get the internal hard drive recovery with the steps mentioned eariler.
Other Ways you can try to Repair Internal Drive Errors
If your computer can start up but you can’t access the files stored on the drive, it means your hard drive may have corrupted. The safest approach is to first use MyRecover to recover data from the hard drive following the methods mentioned earlier (starting from step 6), and then use the methods below to repair the crashed hard drive. This is because the repair process could potentially cause you to lose data permanently.
Run CHKDSK Command
CHKDSK is a Windows utility used to scan a hard drive for file system error or bad sectors and attempt to automatically repair them. You can run CHKDSK Command to check the logical errors for your internal hard drive.
Step 1. Open "Command Prompt" and run it as administrator.

Step 2. Type the command "chkdsk G: /f /r" and hit "Enter" key. Replace the drive letter "G" with your actual drive letter. Then it will automatically fix detected errors.

Scan with Windows Defender
Some viruses and malware can block access to drives and files, or even delete important files. You can use Windows' built-in Windows Defender to remove them.
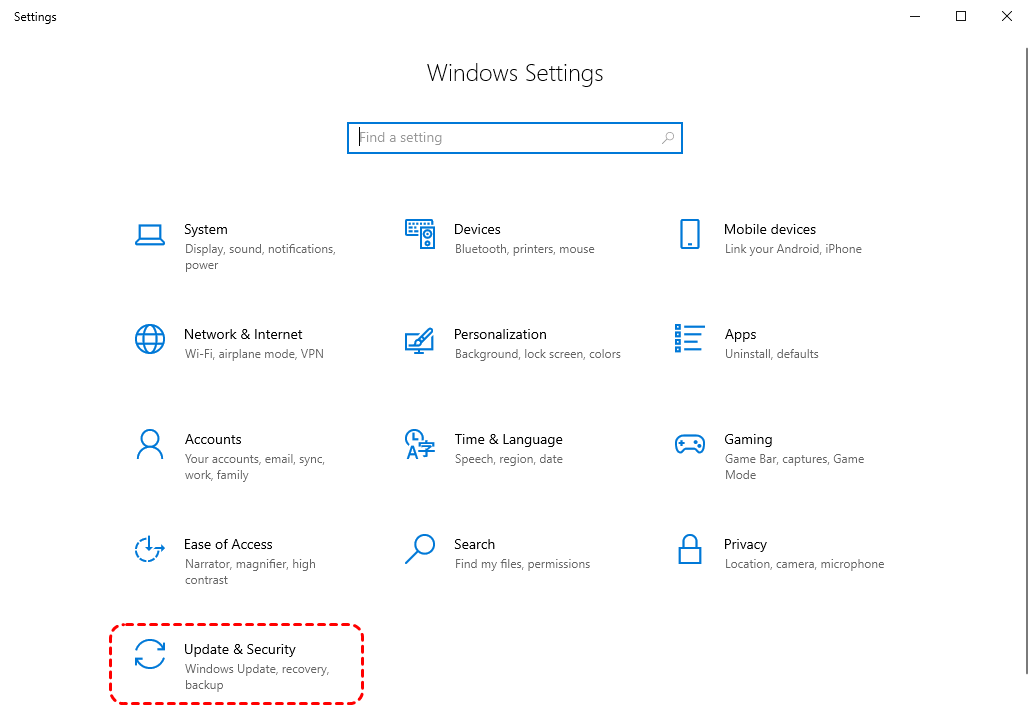
Step 1. Open "Settings" > "Update & Security" > "Windows security".
Step 2. Select "Virus & threat protection" and click "Scan options" to choose a scan mode.
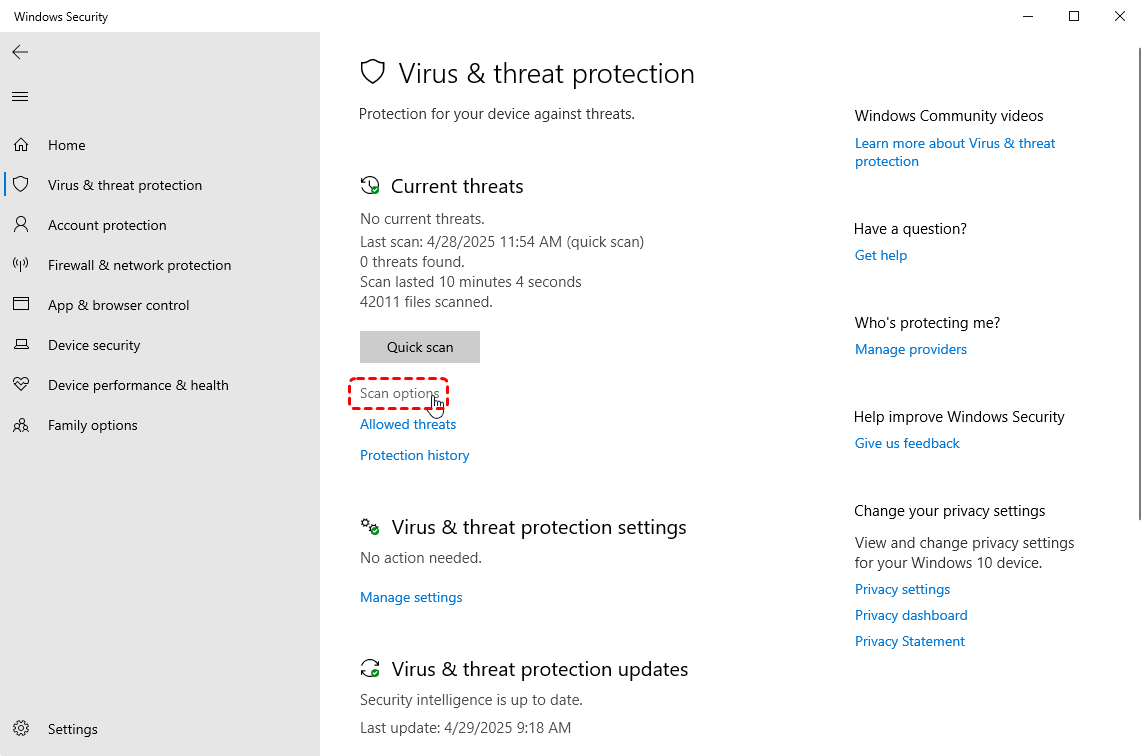
Step 3. If you want to perform a comprehensive scan, you can select "Full Scan" to start the process. This may take some time.

Conclusion
Whether it’s accidental deletion, corruption, or a drive that won’t boot, understanding how to recover data from an internal hard drive gives you a better chance of successful recovery. If you don’t have a backup or your system won’t start, try MyRecover—a professional yet user-friendly tool designed for all skill levels. Its read-only scanning process ensures no data is overwritten during recovery.
For both home users and business users, you can upgrade to the Technician version to bring data security to your family and friends with one license.
FAQs
Q1: Can I recover data from a hard disk which is not detecting?
Yes, data recovery may still be possible if the drive is not detected in Windows but appears in BIOS, Disk Management, or makes normal sounds. Recovery methods include reconnecting the drive, using another computer, creating a disk image, or running professional recovery software like MyRecover. Physical damage usually requires specialized recovery services.
Q2: Is data permanently stored in hard disk?
Data remains on a hard drive until it is overwritten, securely erased, or the storage media physically fails. Even deleted files often stay recoverable because only their references are removed. However, formatting, SSD TRIM operations, or repeated writes can significantly reduce recovery chances.
Q3: Why did my files suddenly disappear from my external hard drive?
Missing files can result from accidental deletion, hidden attributes, file system corruption, malware, improper ejection, or partition damage. In some cases, the drive becomes RAW or inaccessible. Stop using the drive immediately to avoid overwriting and improve recovery success.
Q4: Will removing the hard drive delete everything?
No. Physically removing a hard drive from a computer does not erase stored data. Files remain intact unless the drive is formatted, overwritten, or damaged during handling. In fact, connecting the drive to another PC is a common method for recovering inaccessible data.
Q5: How to recover data from a hard drive which is not detecting?
First, check cables, ports, and BIOS recognition. Then connect the drive to another computer or use a USB-to-SATA adapter. If the drive becomes visible, recover files immediately with backup tools or recovery software like MyRecover. Avoid formatting or initializing the disk before recovery.
Q6: Should I run CHKDSK before data recovery?
Usually, no. Running CHKDSK on a corrupted drive may modify file structures and potentially overwrite recoverable data. Prioritize recovering important files first, especially on RAW or damaged drives. CHKDSK is safer after recovery or when no critical data remains to preserve.


Stay Updated With Our
Latest Tips
Add us as a preferred source on Google to never miss helpful guides.