
Best Word Recovery Tool: Retrieve Lost/Deleted Word Files
This article explores the best Word recovery tools and methods available for Windows users. Whether your files were deleted or lost after formatting, this comprehensive guide helps you retrieve your Word documents safely and efficiently.
By Aria / Updated on March 12, 2026
The Common Reasons for Word File Loss
Microsoft Word documents are among the most essential file types for both professionals and students. From business proposals and academic reports to personal notes and creative writing, Word files are everywhere. But when a ".doc" or ".docx" file suddenly disappears, whether due to accidental deletion, system crash, or formatting, it can feel devastating.

Word file loss can occur for many reasons both user-related and technical. Below are the most frequent causes:
- Accidental deletion: You might have pressed "Shift" + "Delete" or emptied the Recycle Bin too soon.
- Formatting errors: Formatting a drive or partition mistakenly that contained Word files can wipe everything.
- Unexpected system shutdown: Power loss or crashes while editing may result in unsaved documents.
- Virus or malware attacks: Some malware deletes or encrypts Word files without warning.
- Storage issues: Bad sectors or hardware failures on your HDD/SSD can lead to partial or full data loss.
No matter what caused your Word file to be lost, the reassuring fact is Word file recovery is possible in most cases. This guide will introduce some of the best Word recovery tools to help you get your data back efficiently.
How to Recover Word File on Windows
Before turning to third-party software, try the native recovery options available in Microsoft Word and Windows. If your Word file was lost due to a sudden power outage, Microsoft Word’s built-in recovery feature can help you retrieve the lost Word document. If the file is lost due to deletion, formatting, or similar issues, a professional data recovery tool will be able to assist you. Let’s explore the recovery options step-by-step.
Built-in Microsoft & Windows Word Recovery Features
Microsoft Word includes several built-in tools to help users retrieve unsaved or lost documents. When you lose a Word file, you can give these Word’s built-in tools a try.
👉AutoRecover and AutoSave
If you closed Word without saving your file, Word automatically creates backup copies of your file in specific locations. Follow these steps to recover unsaved Word files:
Step 1. Launch Word and go to "File" > "Info" > "Manage Document", then click "Recover Unsaved Documents".
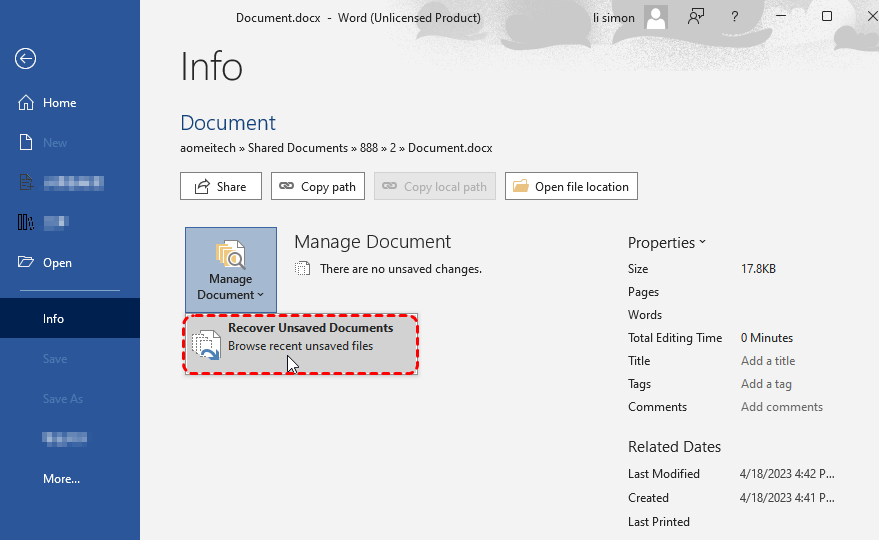
Step 2. If available, the unsaved files usually have a ".asd" extension. Look for the file with ".asd" extension and open it to check if it’s the one you want.
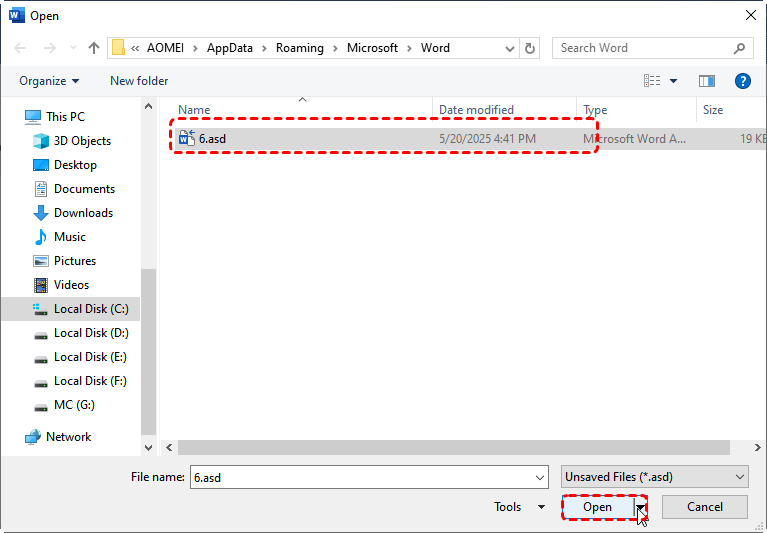
Step 3. Save it immediately to a safe location as ".doc" or ".docx" with a new name.
👉Check for Temporary Files
Sometimes, Temporary folder may create temporary copies while you edit a Word document, especially if Word didn't close properly or the system crashed.
Step 1. Press "Win" + "R" and type "%temp%", then hit "Enter" key to open temporary folder.
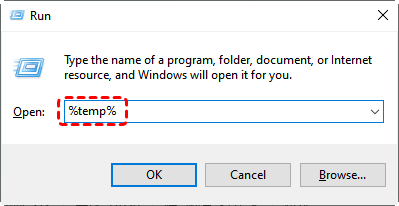
Step 2. Search for ".tmp" files in the folder. If you find a file that matches your Word document in both name and modification time, open it in Word.
Step 3. Save it to a secure folder.
👉Check the Recycle Bin
If you only accidentally deleted the file from your desktop or a local folder, your Word document might still be in the Recycle Bin. You can restore the lost Word document before emptying the Recycle Bin.
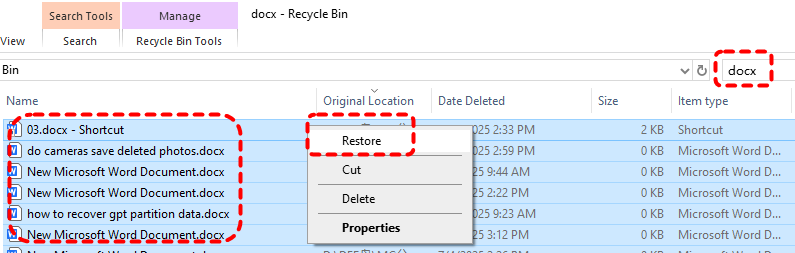
Step 1. Double click on the Recycle Bin icon to open it.
Step 2. Browse through the deleted items and locate the Word document you want to recover.
Step 3. Right click on it and choose "Restore" to recover it.
If the deleted file isn’t in the Recycle Bin, it means the file may have been permanently deleted. Turning to professional data recovery software can help you retrieve the permanently deleted file.
Windows File Recovery (Command-line Tool)
Microsoft offers a free command-line data recovery utility—Windows File Recovery. It can recover permanently deleted files from local storage devices like SD cards, USB drives, HDDs and more. But it requires basic familiarity with Windows File Recovery command.
Step 1. Download and install Windows File Recovery on your computer from Microsoft official channel.

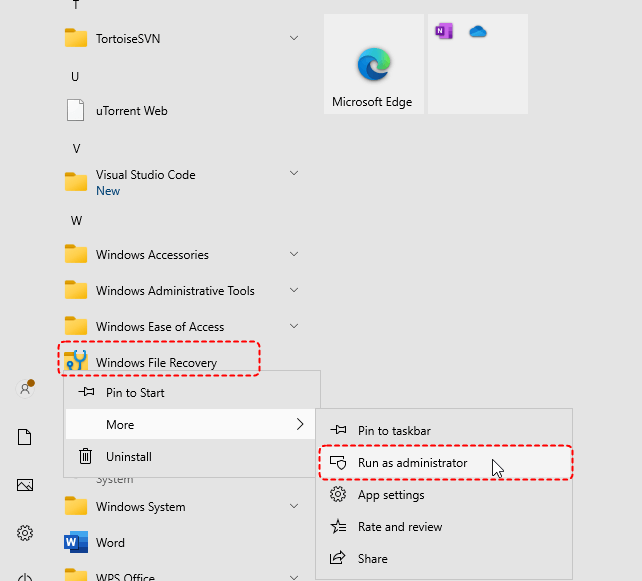
Step 2. Open Windows File Recovery and run it as administrator.
Step 3. Type the following command "winfr F: E: /regular /n translationtask.docx" and hit "Enter" key. This command will perform a quick scan for F: drive and locate a Word file named "translationtask", then restore it to the E: drive.

Wait for the process to complete, you can press "y" to check the recovered files in the destination folder.
- ★Tips:
- F: The source drive (The location where the deleted file originally existed).
- E: The destination drive (where recovered files will be saved).
- /regular: The recovery mode. It works best for recently deleted files on drives formatted with NTFS.
- /n translationtask.docx: The filter parameter that look specifically for a file named “translationtask.docx”.
The Best Word Recovery Tool for 2025: MyRecover
While Windows File Recovery is powerful, obviously, it’s not very user-friendly especially for non-technical users. That’s where professional word recovery tools like MyRecover come in. It is an excellent choice for Word file recovery. It features a simple and intuitive interface for a streamlined recovery process. Even computer novices don’t need to spend time learning how to operate it. You can easily complete data recovery with just a few clicks.
MyRecover's most impressive strengths include:
✅Support 1,000+ file types, including documents, images, videos, emails, and more.
✅Dual scan modes: Quick Scan for speed, Deep Scan for thorough recovery
✅Support NTFS, FAT32, exFAT, ReFS in Windows 11/10/8/7 & Windows Server.
✅Handle with more complex data loss cases like OS crash, RAW partition, formatted, corrupted or deleted drive.
✅Compatible with all storage devices: USB drives, HDDs, SSDs, SD cards, etc.
✅Reliable, efficient, and flexible—it’s the all-in-one toolkit for Toshiba hard drive data recovery.
Step 1. Download and install MyRecover on your computer from Microsoft Store, avoid installing it on the drive with lost files.
Step 2. Launch MyRecover and select a drive to scan for lost files, then click "Scan".

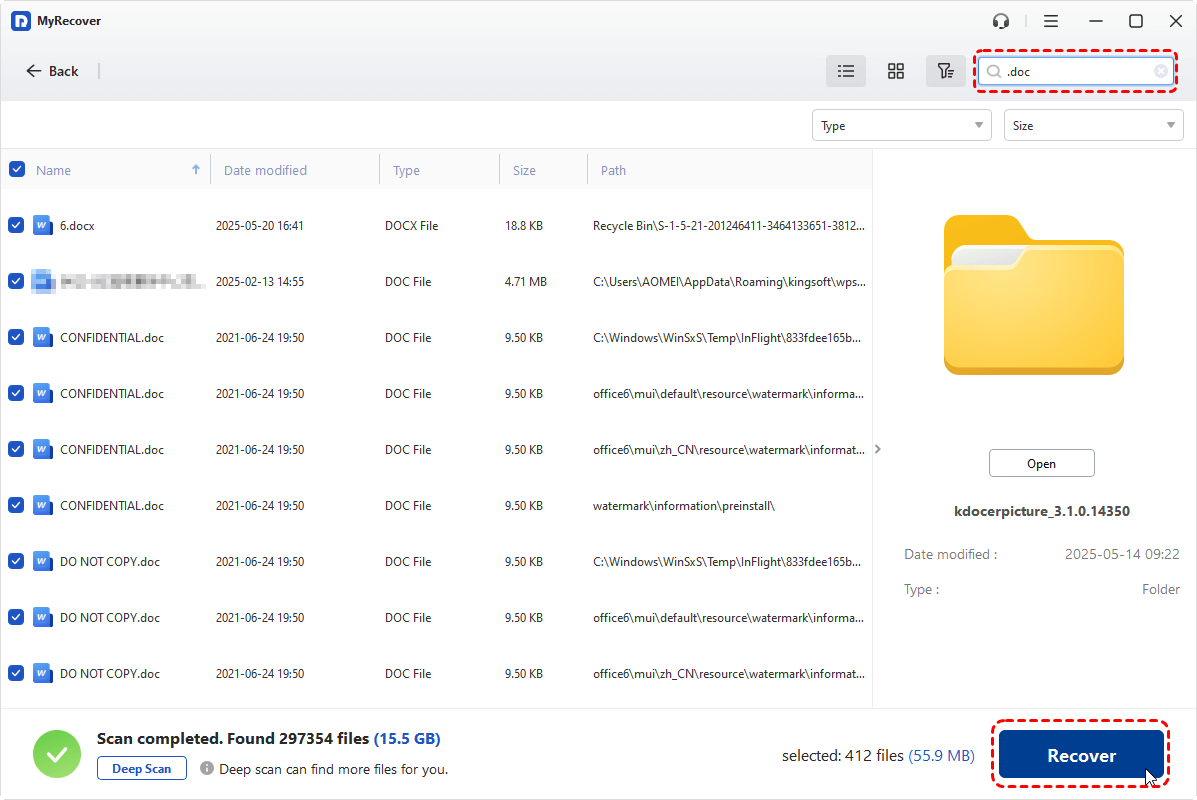
Step 3. In the filter function at the top right corner, enter "doc" or "docx" to find all the deleted Word files, select the files you want to recover, and click "Recover".
Upgrade to MyRecover Professional Edition for unlimited file recovery and real-time previews, so you can see exactly what you’re restoring before you hit “Recover.”
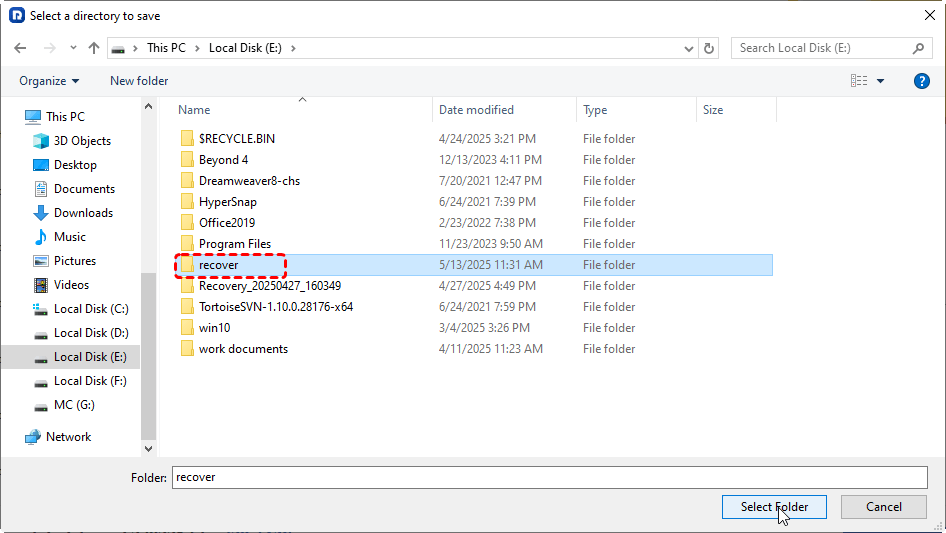
Step 4. Select a safe destination folder (not the original one) to save the recovered files.
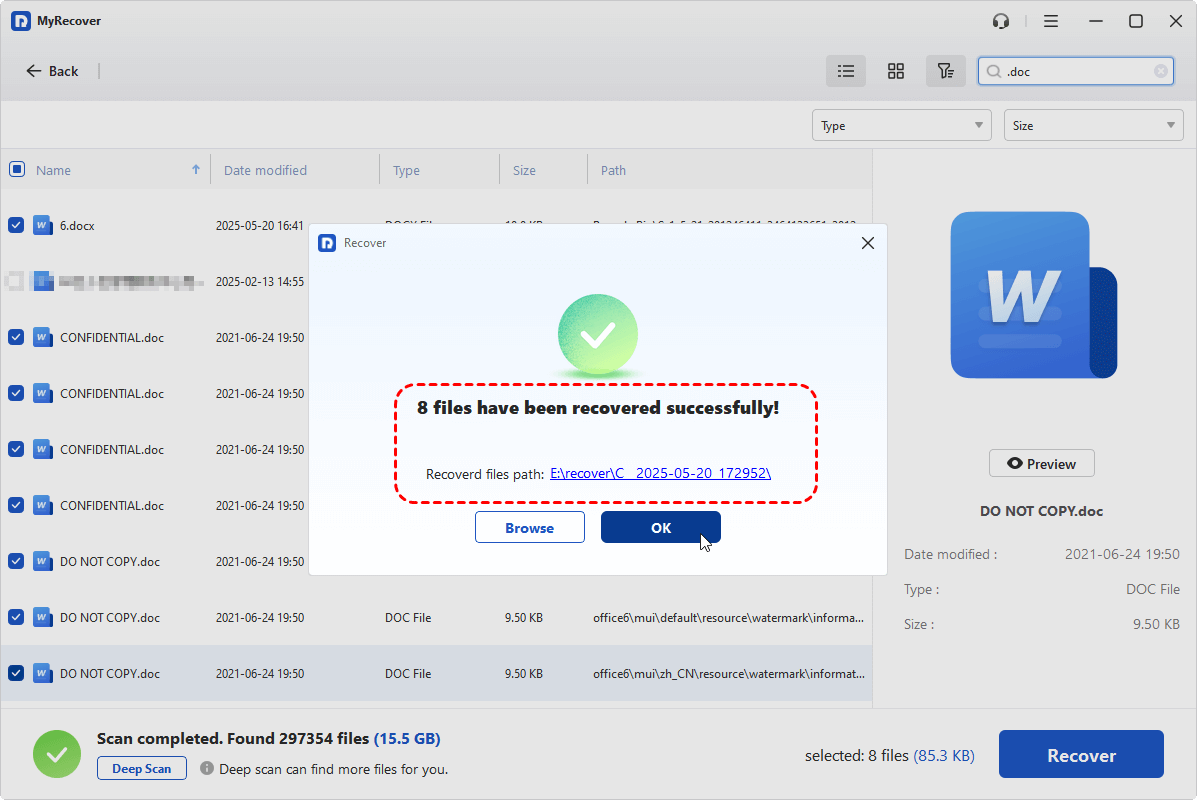
When the process is finished, you'll see the message "Files have been recovered successfully". Then you can check the recovered files by clicking on the destination folder path or "Browse" button.
Conclusion
Losing an important Word document can feel disastrous, but recovery is often possible with the right approach. From built-in features like AutoRecover to advanced tools like MyRecover, there are plenty of reliable options to get your files back.
If you frequently handle critical work or large volumes of documents, the MyRecover Professional Edition offers a robust solution. It even supports recovering data from unbootable Windows.


Stay Updated With Our
Latest Tips
Add us as a preferred source on Google to never miss helpful guides.