
Can I Delete Debug Dump Files in Disk Cleanup? Safe or Not
Debug dump files are snapshots of system memory captured when Windows encounters a critical error. While invaluable for developers and advanced troubleshooting, they serve little purpose for most users once the underlying issue is resolved. This article provides a clear framework for deciding whether keeping or removing debug dump files is the right choice for your system.
By Aria / Updated on February 10, 2026
What is Debug Dump Files in Windows?
Debug dump files, also known as memory dump files, are diagnostic files automatically created by Windows when the system encounters a critical error, such as a Blue Screen of Death (BSOD), application crash, or kernel failure. These files record the contents of system memory at the time of the crash, allowing developers or advanced users to analyze what went wrong.

This is why Disk Cleanup often lists them as system error memory dump files. Windows assumes that once the crash is resolved or no longer relevant, these files are no longer essential for everyday use. Disk Cleanup thus lists these files for you to delete them and free up more disk space. However, many users naturally ask: can I delete debug dump files in Disk Cleanup, and more importantly, is it safe?
Can You Delete Debug Dump Files in Disk Cleanup?
In most cases, the answer is "yes", and it is generally safe for regular users. Disk Cleanup categorizes debug dump files as optional system files because:
- They are mainly used for troubleshooting past crashes.
- They are not required for Windows to function normally.
- They can take up significant disk space (sometimes several GB).
For everyday users who do not actively analyze crash logs or work with Microsoft support, deleting these files does not affect system stability. This is why Windows explicitly offers them as removable items in Disk Cleanup.
What Happens After You Delete Debug Dump Files?
Once debug dump files are deleted:
- Windows frees up disk space immediately.
- Old crash data becomes permanently unavailable.
- Future crashes will still generate new dump files (unless disabled).
In other words, deleting them does not prevent Windows from recording future errors. It simply removes historical crash data. This is why system error memory dump files can be deleted safely after the issue has been resolved. That said, if you are actively diagnosing recurring BSODs or working with a support engineer, keeping these files temporarily may be useful. Otherwise, for most users, deletion is a reasonable maintenance step.
Additional Methods to Delete Debug Dump Files
If you’re just a non-technical user looking to free up more disk space, besides using Disk Cleanup, you can also manually delete these files via other methods. All the methods below are effective.
Delete Debug Dump Files via Windows Settings
Windows Storage settings provide a more modern interface for managing temporary and system files. This method achieves the same result as Disk Cleanup but is often more intuitive for Windows 10 and 11 users.
Step 1. Go to "Settings" > "System" > "Storage" > "Temporary files".
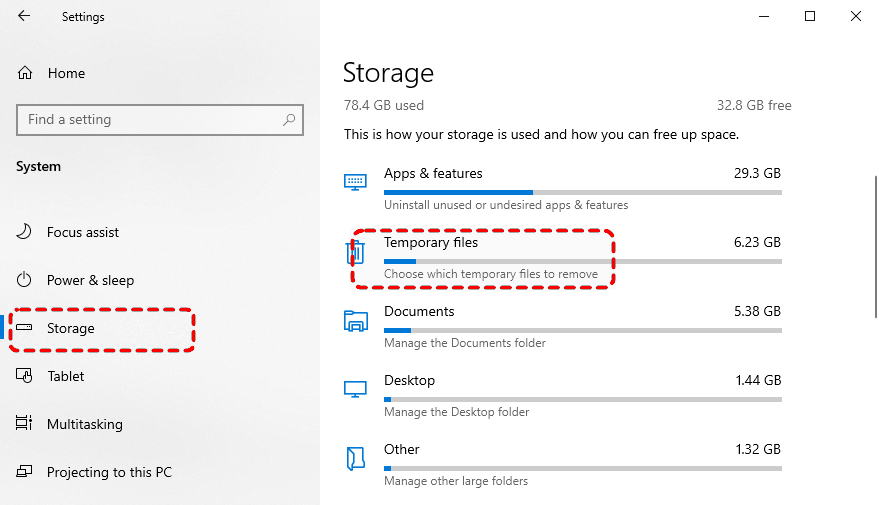
Step 2. Check "System error memory dump files" and click "Remove files" to delete them.

Delete Debug Dump Files Using Command Prompt
If you prefer using command-line tools, deleting the debug dump files becomes even simpler. This method force-deletes the main system memory dump file if it exists. Follow these steps:
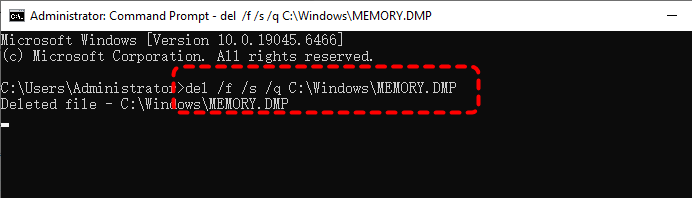
Step 1. Locate Command Prompt in the Start menu and right click on it, then select "Run as administrator".

Step 2. Enter the following command "del /f /s /q C:\Windows\MEMORY.DMP" to delete debug dump files and hit the "Enter" key.
Step 3 (Optional). Enter the command "del /f /s /q %systemroot%\Minidump\*.*" to delete the system error minidump files and press "Enter".
Once the commands complete, all the error dump files will be deleted in the system folder.
Manually Delete Debug Dump Files from File Location
You can also remove dump files manually if you know where they are stored. Here's how:
Step 1. Locate C:\Windows and find the "MEMORY.DMP" file.
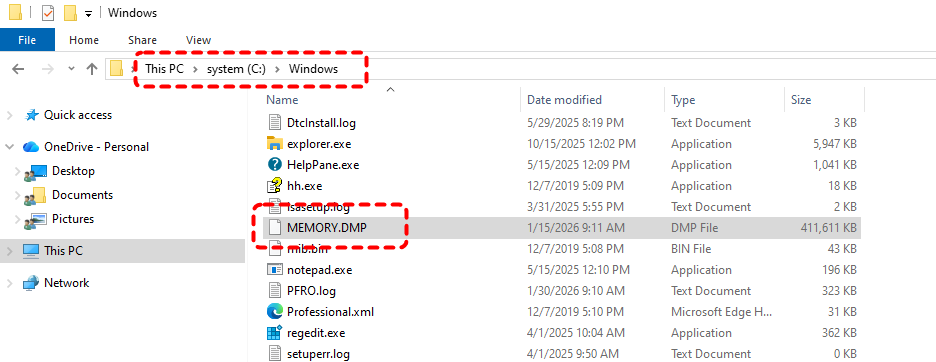
Step 2. Right click on it and choose "Delete" to remove it or press "Shift" + "Delete" to permanently delete.
How to Turn off Crash Dumps in Windows
If you don’t want Windows to create debug dump files at all, you can disable crash dumps entirely. This is useful for systems with limited storage.
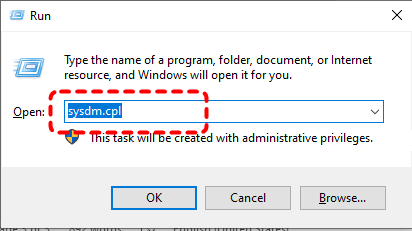
Step 1. Press "Win" + "R" and type "sysdm.cpl" in the Run dialog, then click "OK" to open System Properties window.
Step 2. Go to the "Advanced" tab, click "Settings" under the "Startup and Recovery" section.
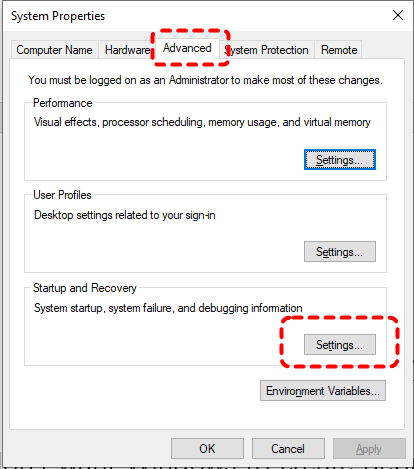
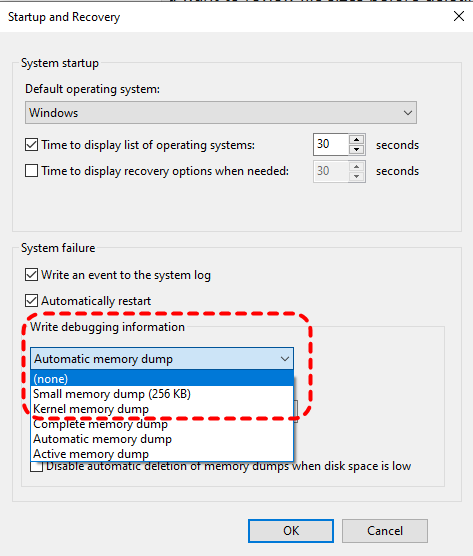
Step 3. In the drop menu of "Write debugging information", choose "none" and click "OK" to save the changes.
After this, Windows will stop generating dump files during crashes.
How to Recover Deleted Files After Disk Cleanup
Sometimes users accidentally delete more than intended during Disk Cleanup, especially when removing Recycle Bin or temporary files. If ever need to recover important documents from these deleted files, recovery may still be possible. This is where MyRecover becomes valuable. It can scan system drives deeply to locate recoverable files deleted during Disk Cleanup, even when they no longer appear in the Recycle Bin.

- No Tech Skills Needed: User-friendly interface designed for beginners and non-tech-savvy users.
- Supports Over 1000 File Types: Recover photos, videos, documents, emails, ZIP files, and more.
- Supports Multiple Storage Devices: Works seamlessly with internal and external HDD, SSD drives, USB flash drives, SD/memory cards, digital cameras, and more.
- Safe & Read-Only Process: Your original data remains untouched during the scan and recovery process.
Step 1. Download and install MyRecover on your computer from Microsoft Store or its official site, avoid installing it on the drive with lost files.
Step 2. Run the app and select your system drive to scan, then click "Scan" to search for recoverable files.

Step 3. After the scan completes, choose the files you wish to recover from the recoverable lists and click "Recover".

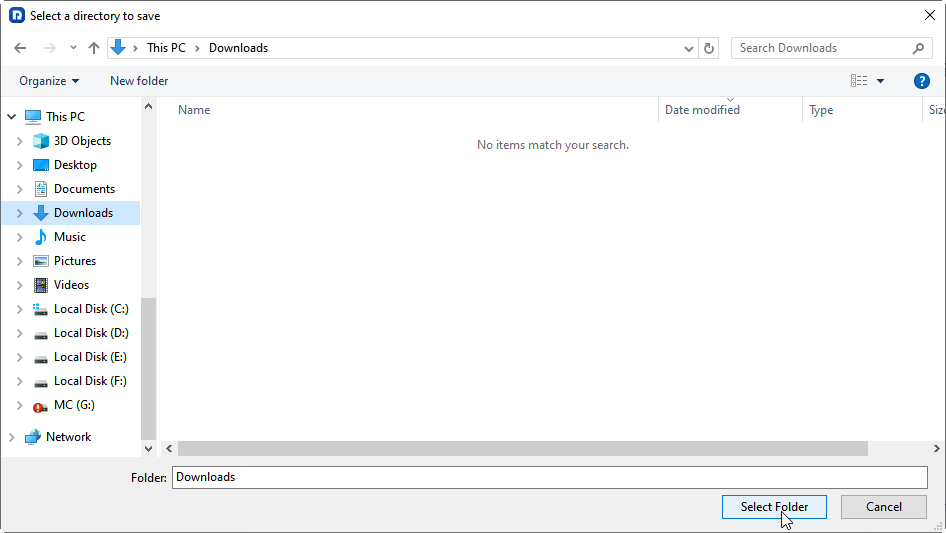
Step 4. Select a safe location to save the recovered files.
Once the process is done, the message "Files have been recovered successfully" will pop up. Then, you can access the recovered files in the destination folder by clicking on the "Browse" button.
Conclusion
Debug dump files are Windows-generated diagnostic logs designed to help analyze system crashes, not files required for everyday operation. Deleting them can reclaim valuable disk space without harming system performance. If this is of no concern to you, you can even disable the feature entirely.
Most importantly, if Disk Cleanup ever results in unintended data loss, having a reliable recovery solution like MyRecover ensures that cleaning up your system doesn’t come at the cost of your files. With its Professional edition, you can enjoy unlimited data recovery capacity and file content preview before restoration.


Stay Updated With Our
Latest Tips
Add us as a preferred source on Google to never miss helpful guides.