
Drive Shows Up in Disk Management but Not Explorer: Here’s the Fix
When a drive appears in Disk Management but not in File Explorer, it indicates an underlying issue with the drive’s configuration or visibility settings. This article explores the common causes of this issue and provide a step-by-step guide to resolve the problem. Follow these solutions to make your drive accessible again in File Explorer.
By Aria / Updated on March 13, 2026
A Drive Shows in Disk Management, but not File Explorer
I've been using an external WD 5TB HDD for extra game storage and decided to remove it from the external enclosure and put it inside my PC case. After doing so, the drive does not show up in File Explorer. It does show up in Disk Management as Disk 0 with two partitions: 2048.00 GB Healthy (GPT Protective Partition) and 2609.49 GB Unallocated.
How do I get this drive to show up in File Explorer?
- Question from Eriki
It's a common problem for Windows users to encounter: a drive that shows up in Disk Management but doesn't appear in File Explorer. The absence of a drive in File Explorer can prevent you from accessing or managing your data, creating a significant inconvenience. This issue can arise for a variety of reasons. In this guide, we'll explore the common causes behind this problem and walk you through the steps to resolve it effectively.
The Common Reasons Why the Drive Shows Up in Disk Management but Not Explorer
There are various reasons why a drive might appear in Disk Management but not in File Explorer. Some of the most common causes include:
🔔No Drive Letter Assigned: Sometimes, a drive shows up in Disk Management but doesn't have a drive letter assigned to it, preventing it from appearing in File Explorer.
📂File System Issues: If the drive is corrupted or the file system is unsupported by Windows (e.g., RAW format), it might be detected in Disk Management but remain inaccessible in File Explorer.
💾Partition Problems: If the drive is unallocated or has no partition, it will show in Disk Management but won't be available in File Explorer.
💽Driver Problems: Outdated or corrupted drivers can also cause the drive to appear in Disk Management but not show in File Explorer.
📀External Drive Not Initialized: If you're using an external drive, it may need to be initialized before it becomes fully accessible.
How to Fix the "Drive Shows up in Disk Management but Not Explorer" Issue
If you’re experiencing the same issue, don’t worry. This section will provide several effective methods to help you resolve the problem where a drive shows up in Disk Management but not in File Explorer. Let's dive into the detailed steps.
1. Check Connection
Before making any changes, ensure that the drive is properly connected to your computer. If it's an external hard drive or USB drive, try using a different USB port or cable. Also, check if the drive works on another computer. If it does, the issue may be specific to your current system.
2. Assign a New Drive Letter
One of the most common reasons for a drive showing up in Disk Management but not in File Explorer is that the drive doesn't have an assigned letter or there is a drive letter conflict. Assigning a new drive letter for the drive can fix the issue.
Step 1. Press "Win" + "X" and choose "Disk Management" to open it.
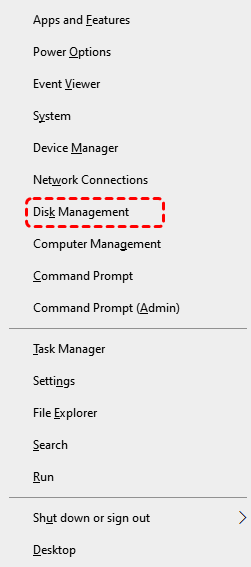
Step 2. Locate the drive not showing up in File Explorer and right click on it, then choose "Change Drive Letter and Paths".
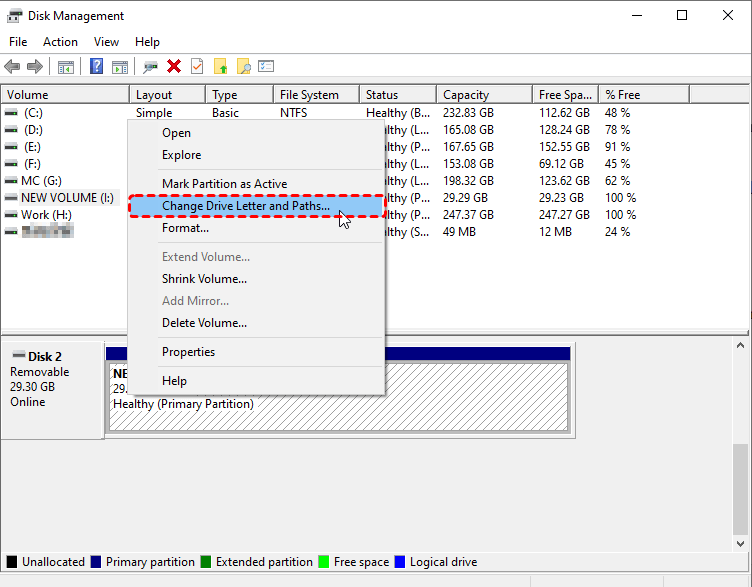
Step 3. Assign a new drive letter and click "OK" to save the change. After this, the drive should appear in File Explorer with the assigned letter.
3. Bring the Drive Online
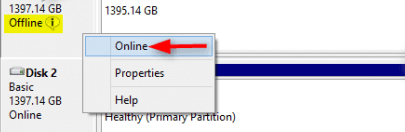
If the drive shows as "Offline" in Disk Management, it will also not appear in File Explorer. Setting it back to "Online" will make it show up again.
Step 1. Press "Win"+ "X" and select "Disk Management" to open it.
Step 2. Right click on the disk and select "Online". This should make the drive accessible in File Explorer.
4. Run CHKDSK Command
If the partition on your drive becomes corrupted or develops file system errors, Windows may be unable to read the partition and display it in File Explorer. The CHKDSK command can scan for and repair file system errors on the drive. Here's how:
Step 1. Locate Command Prompt in the Start menu and run it as administrator.

Step 2. Type the following command "chkdsk G: /f /r" and hit the "Enter" key. Replace the drive letter "G" with your actual drive letter.

Step 3. Wait for the process to complete. Open File Explorer to check if the drive is visible.
5. Initialize and Create a New Partition
If your drive is uninitialized or shows up as unallocated space, it means there are no partitions on the disk. You need to initialize the drive and create a new partition to make it recognizable by Windows. Follow these steps:
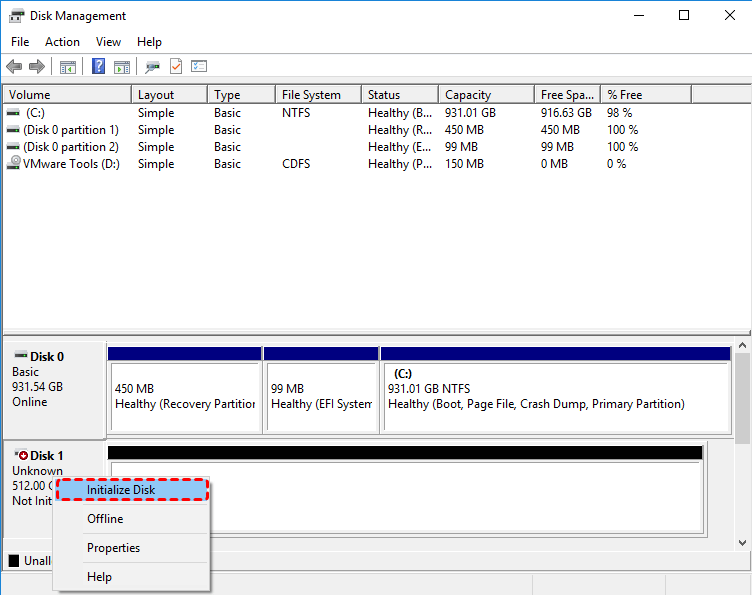
Step 1. Open Disk Management as described earlier.
Step 2. Find the not initialized disk and right click on it, then choose "Initialize Disk".
Step 3. Choose a partition table for the selected disk (GPT or MBR).
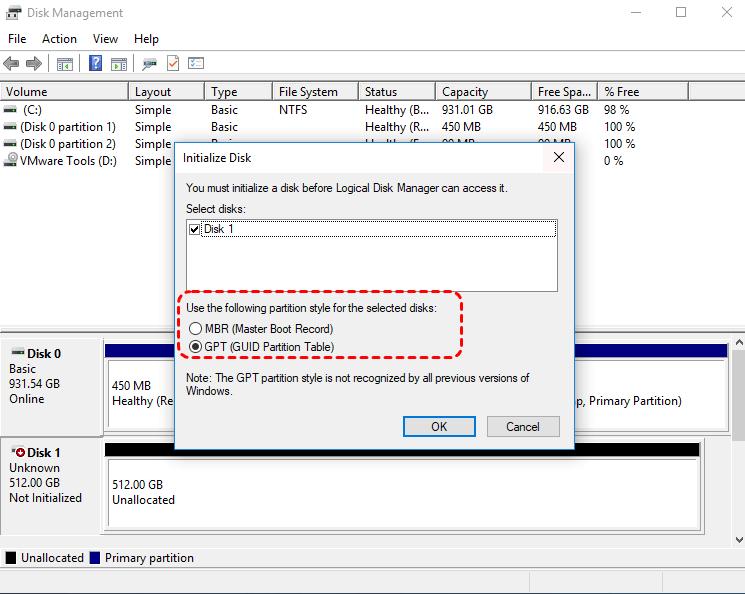
Then you will find that the drive is marked as "Unallocated". Creating a new partition will make it show up in File Explorer.
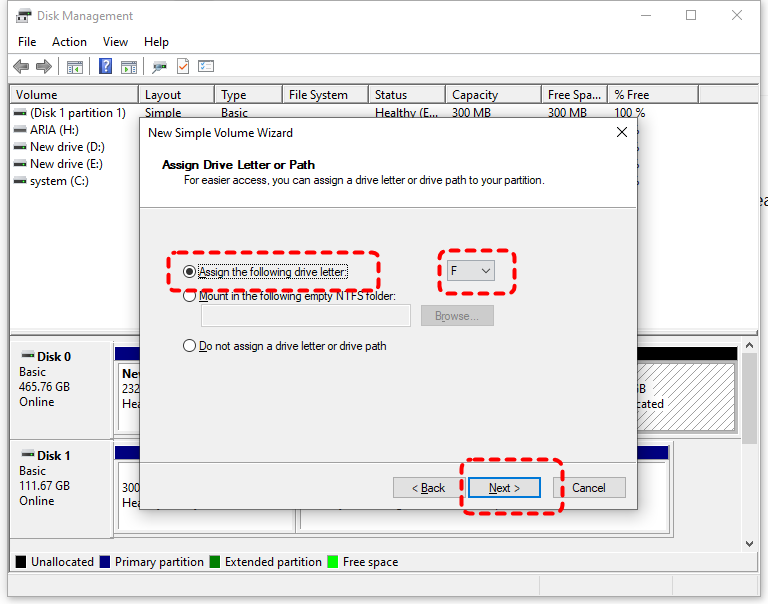
Step 1. Right click on the unallocated space and choose "New Simple Volume".

Step 2. Assign a drive letter and format the partition following the prompts. The drive will be usable again in File Explorer.

6. Format the Drive
If your drive shows up as RAW or uses a file system incompatible with Windows like Ext3, Ext4, windows will not recognize the drive even if it is properly connected. Reformat it to a file system that Windows can recognize, such as FAT32 or exFAT, and it will then appear in File Explorer.
-
This method will format and delete all the data on the hard drive. It basically resets the hard drive for use on windows. So, if you don't care for data on the drive, go ahead. However, this does not mean the data on the drive is lost forever. You can easily recover it with professional data recovery software such as MyRecover.
Step 1. Open Disk Management and right click on the drive, then select "Format".
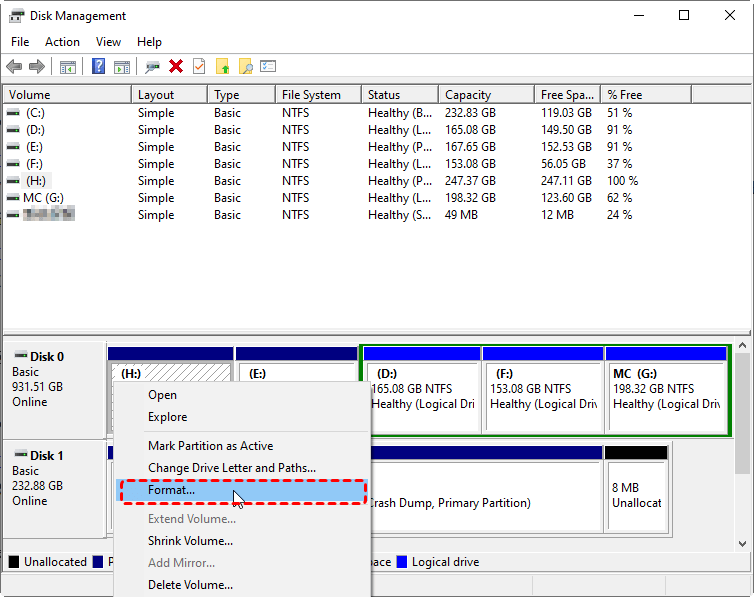
Step 2. Choose a Windows supported file system like NTFS and check the "Perform a quick format".
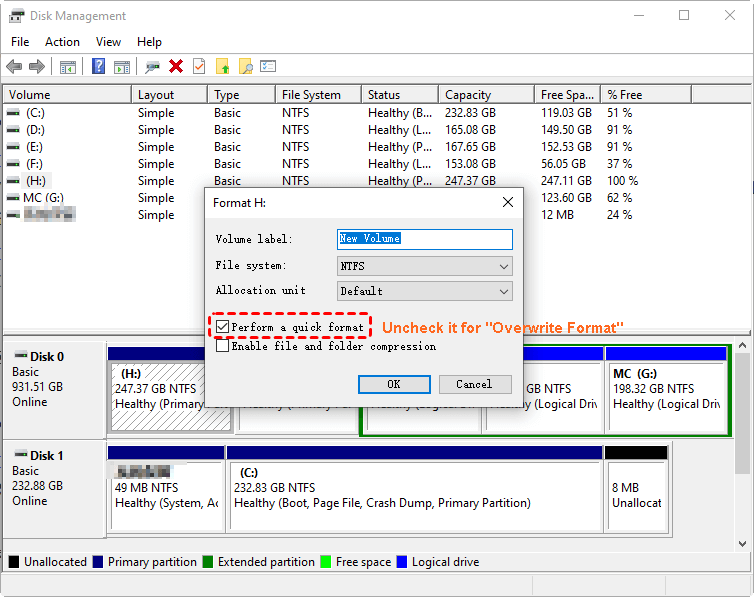
Step 3. Click "OK" to start the process.
7. Update or Reinstall Disk Driver
Outdated or corrupted drivers also may cause drive shows up in Disk Management but not in File Explorer. Updating or reinstalling your disk driver will help Windows detect and mount your hard drive correctly.
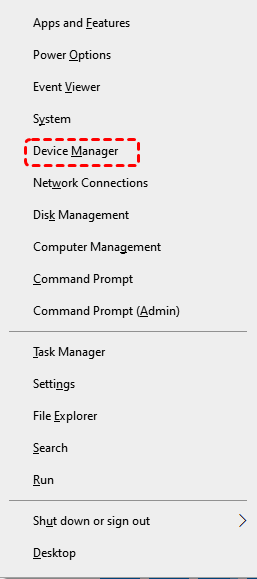
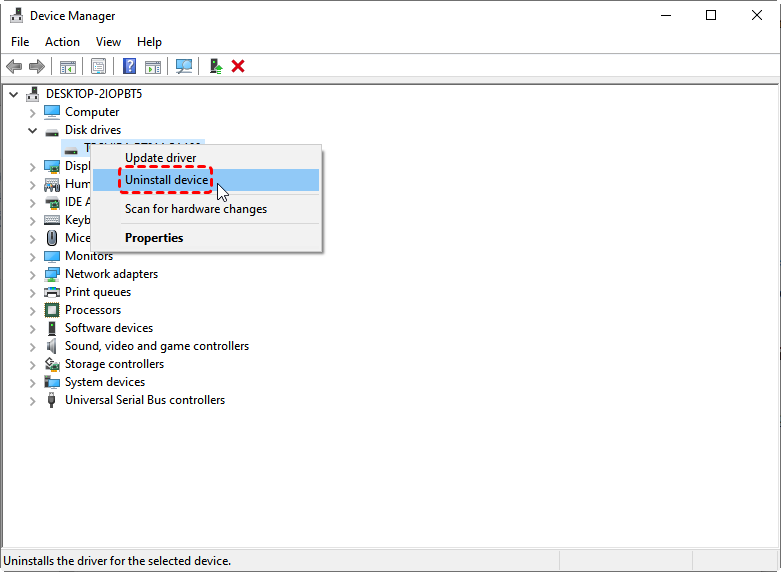
Step 1. Press "Win" + "X" and choose "Device Manager" to open it.
Step 2. Expand "Disk drives" and right click on your hard drive, then select "Update driver".
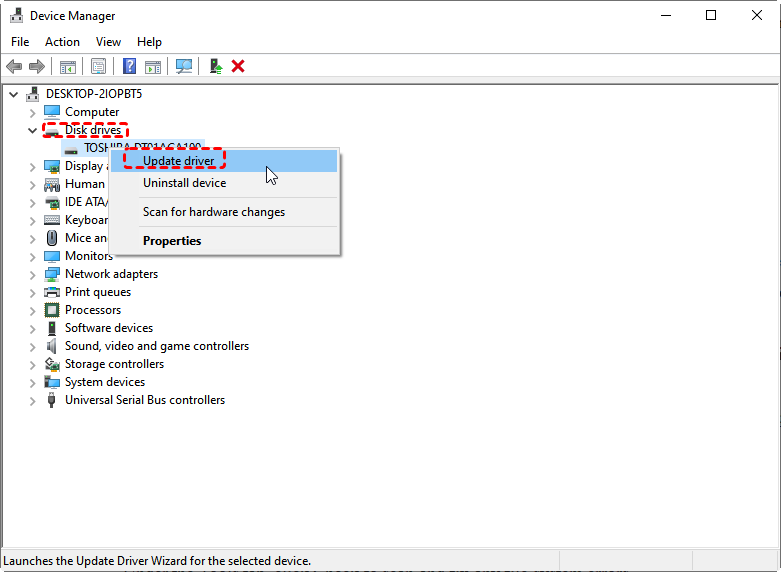
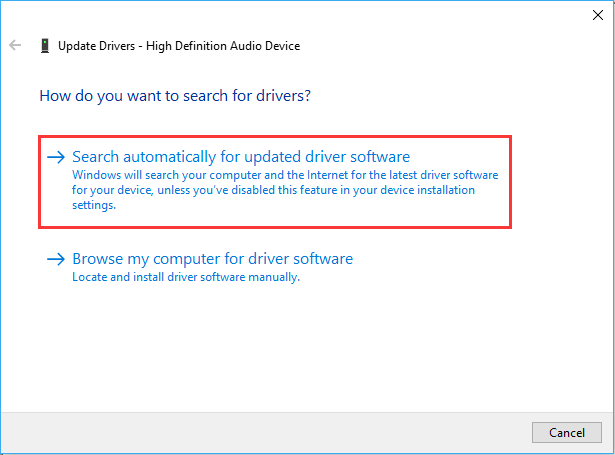
Step 3. Click "Search automatically for updated driver software" to continue the process.
Step 4. If no updates are found, choose "uninstall device" to uninstall the drive.
Restart your computer, and Windows will automatically reinstall the drive. Open File Explorer to check if the drive is visible and accessible.
How to Recover Data from Drive Not Showing in File Explorer
If you have lost important files during repairing and are unable to access the drive via File Explorer, MyRecover is an excellent data recovery option. MyRecover offers powerful data recovery features, allowing you to recover lost, deleted, or formatted files from hard drives, SSDs, USB drives, and more storage devices. You can recover a wide range of file types, including documents, photos, videos, and more.

- Recovering data from formatted HDD/SSD, emptied trash bin, after a virus attack, etc.
- Support HDD, SSD, External Hard Drive, USB Drive, SD Card, etc.
- Scan the missing files from quick scan or deep scan mode.
- Quickly Find Files Using File Types, Name, Size, etc.
Step 1. Download and install MyRecover on your computer from Microsoft Store.
Step 2. Open the app and select the drive to scan for lost files, then click "Scan".
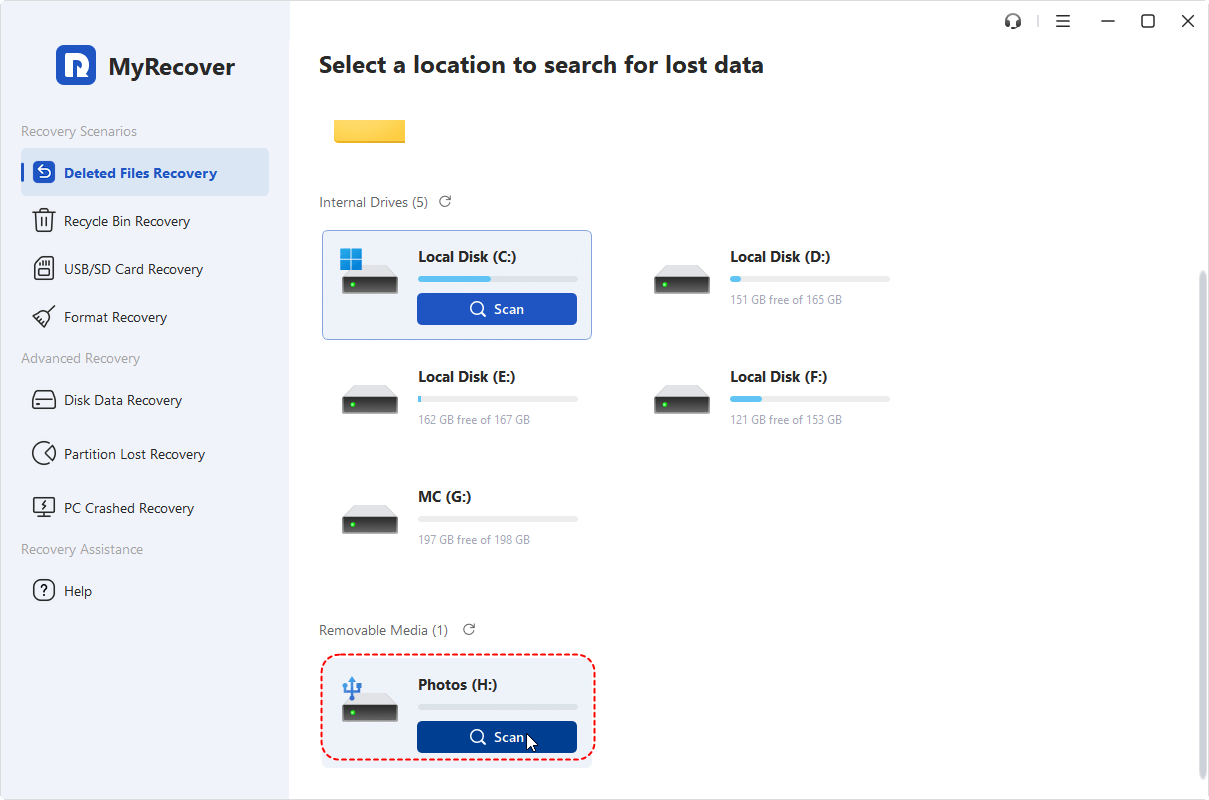
- Notes:✎...
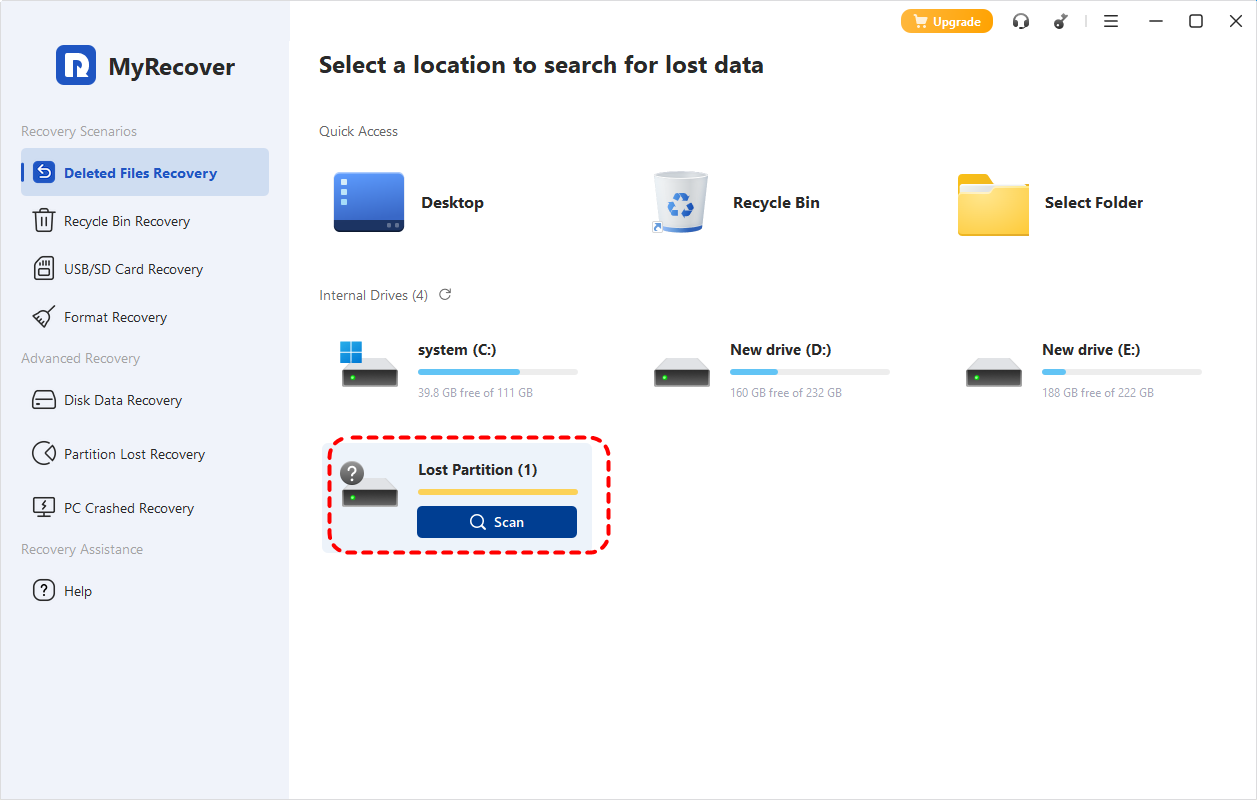
- If you cannot find your drive in the drive list, this may be because it is marked as a "Lost Partition".
-

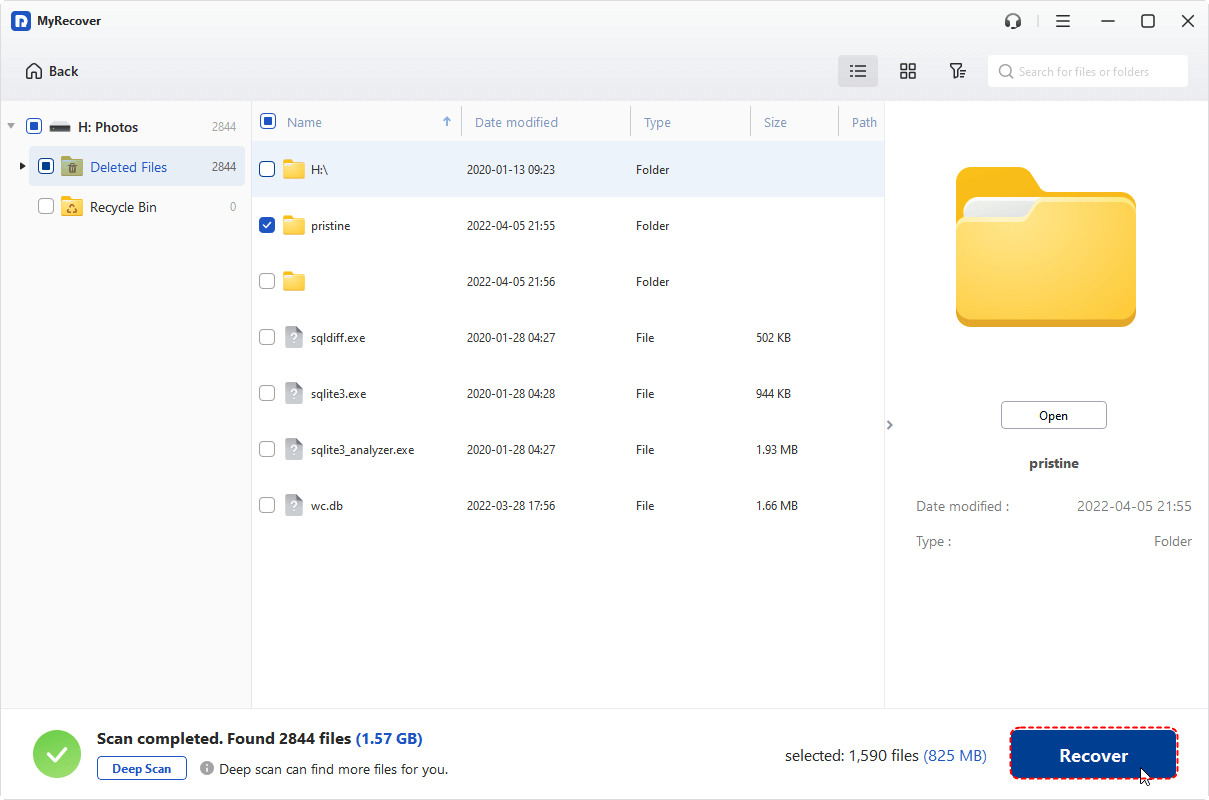
Step 3. After the scan finishes, choose the files you attempt to recover from the recoverable lists and click "Recover" under the "Type" or "Path" tab.
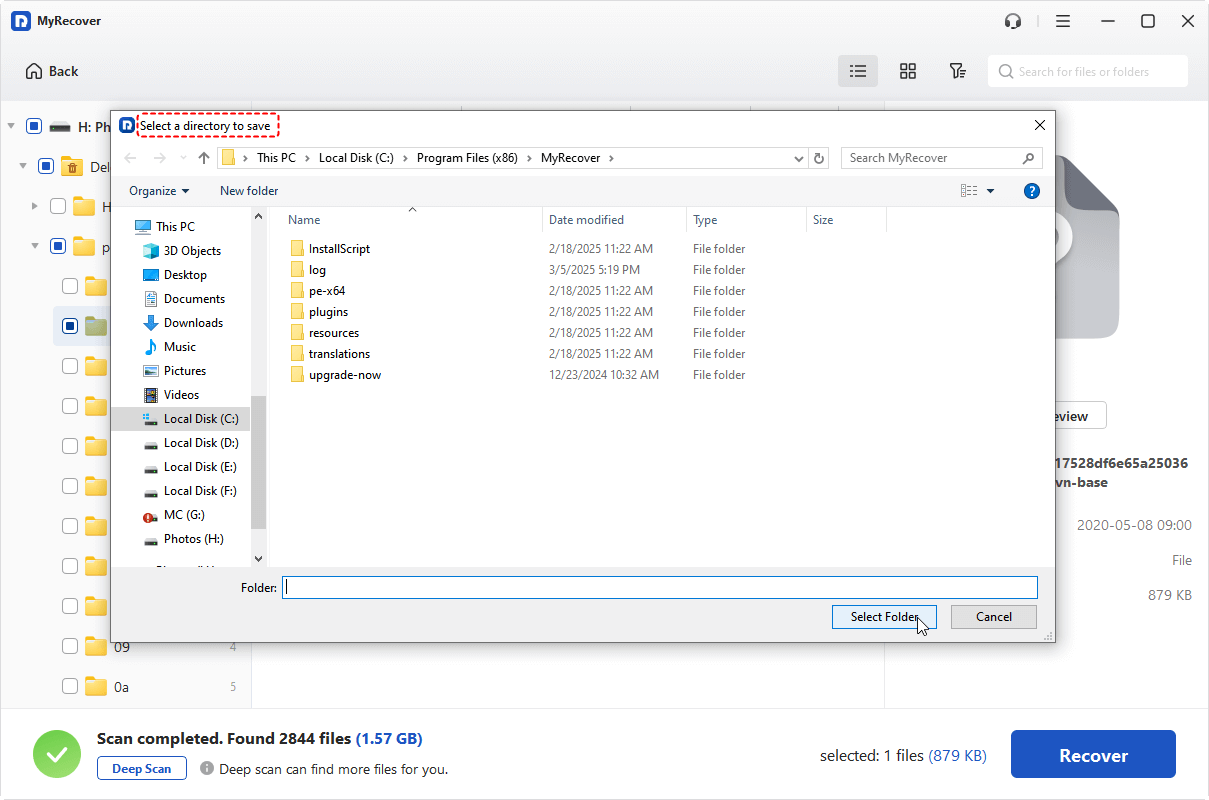
Step 4. Select a safe location to save the recovered files.
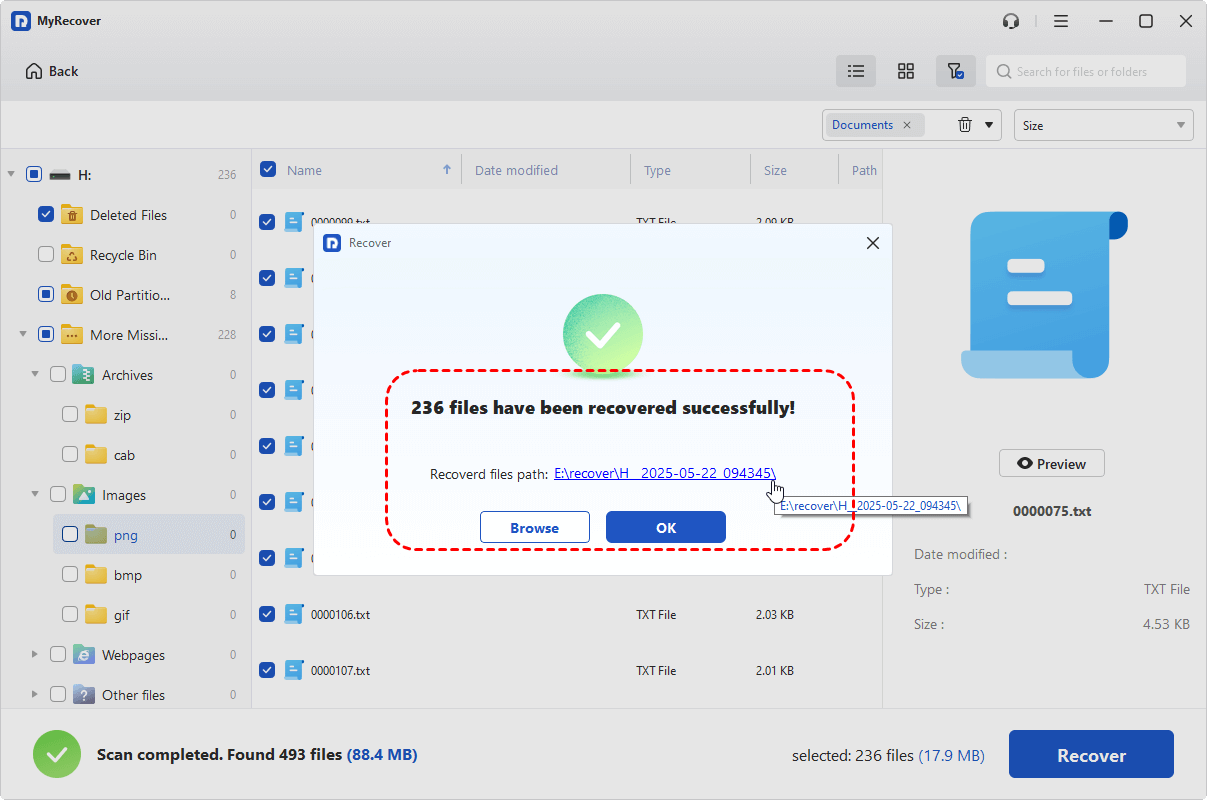
Once the process is done, the message "Files have been recovered successfully" will pop up. Then, you can access the recovered files by clicking on the destination folder path or the "Browse" button.
Conclusion
If your drive shows up in Disk Management but not in File Explorer, don’t worry. This issue is typically fixable. By following the steps above, you can troubleshoot the problem and restore access to your drive. Remember to ensure that you have a backup of your important files to avoid data loss.
If you need help recovering lost or inaccessible data after these fixes, MyRecover is an excellent data recovery tool for various storage devices. For users who need more like unlimited recovery, file content previewing before restoration, and powerful recovery from unbootable systems, MyRecover Professional edition is the ideal choice, offering a complete recovery solution.


Stay Updated With Our
Latest Tips
Add us as a preferred source on Google to never miss helpful guides.