
9 Proven Fixes: File History Does Not Recognize This Drive on Windows 11 & 10
If you meet the error “File history doesn’t recognize this drive” when backing up Windows files, read this article. It will explain why this happens and how to fix the issue on both Windows 10 and 11. Quickly resolve the “ file history drive not recognized” problem with our step-by-step guide.
By Emma / Updated on May 19, 2026
Preface- A Brief to "File History"
File History is a built-in backup feature in Windows that automatically saves copies of your personal files, such as documents, photos, and videos, to an external drive or network location. Unlike traditional backup solutions, File History continuously tracks changes to your files and retains multiple versions of them. This makes it easy to recover files to any earlier versions, such as recovering previous excels, powerpoint, documents, etc.

It runs in the background, ensuring that your files are regularly backed up without requiring manual intervention. It provides a simple and efficient way to safeguard your important data from accidental loss or corruption, offering peace of mind with minimal effort. Whether you’re recovering a single file or restoring an entire folder from a previous date, File History is a valuable tool for maintaining file security.
Why "File History Drive not Recognized" Occurs?
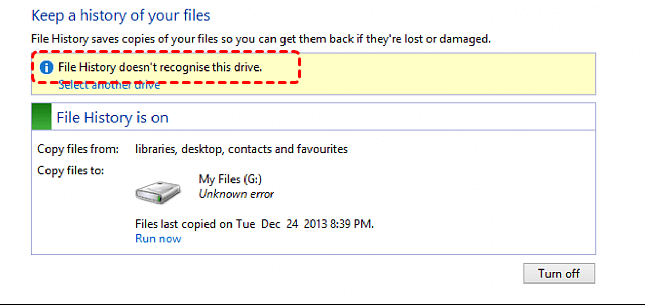
I've been using File History on my Win10 laptop for a couple of years with no problems, saving to an external drive. For the last couple of weeks, when I go to run it, I get the message: "File History doesn't recognize this drive." How can I fix this?
- Question from answers.microsoft.com
Although File History can be an effective way to protect Windows files from accident loss, sometimes it might not work as expected. For example, it might not recognize any connected external hard drive or network drive as described in the above user case.
When you encounter the "File History Drive Not Recognized" error, it typically means that Windows is having trouble detecting or accessing the external drive you have selected for backup. Why this happen? Any one of the following reasons might explain that:
- ⭕File History Disabled: Accidently disabled File History prevents the system from finding the target drive.
- ⭕Drive Connection Issues: The external drive may not be properly connected, or there may be a loose USB cable.
- ⭕Corrupted Drive: The drive may be damaged or contain corrupt data, preventing Windows from recognizing it.
- ⭕File System Errors: If the drive is formatted with an unsupported file system (e.g., Ext4), Windows won’t be able to read it.
- ⭕Drive Letter Conflicts: If the drive letter is conflicting with other devices or is missing, File History might fail to recognize it.
- ⭕Driver Problems: The required drivers for the external drive may not be installed correctly, causing compatibility issues.
How to Fix “File History Doesn't Recognize This Drive”?
After understanding the reasons behind "File History doesn't recognize this drive Windows 11 or Windows 10" issue, we can begin exploring how to fix the problem, ensuring that your files can be successfully backed up to the designated drive. Next, we will walk through some common solutions to help you restore the File History feature.
Method 1:Check Physical Connection
When File History cannot recognize a drive, the first and most basic step is to check the physical connection between your computer and the storage device. In many cases, the issue is not related to Windows settings but simply because the external drive is not properly connected or is temporarily disconnected.
- Re-plug the drive: Unplug the external drive and plug it back into a different USB port to ensure a solid connection. Make sure the cable is firmly plugged into both the computer and the drive.

- Try a differen USB port: You can also try unplugging it and reconnecting it to a different USB port, preferably a direct port on the computer instead of a USB hub.
- Try a different cable: Sometimes, faulty cables can prevent the drive from being detected. So just try another different cable.
Method 2:Turn File History Off and On Again (User-level reset)
In some cases, the File History service itself may be disabled or stuck in an error state. Simply turning File History off and then enabling it again can refresh the backup configuration and allow Windows to re-detect the backup drive.
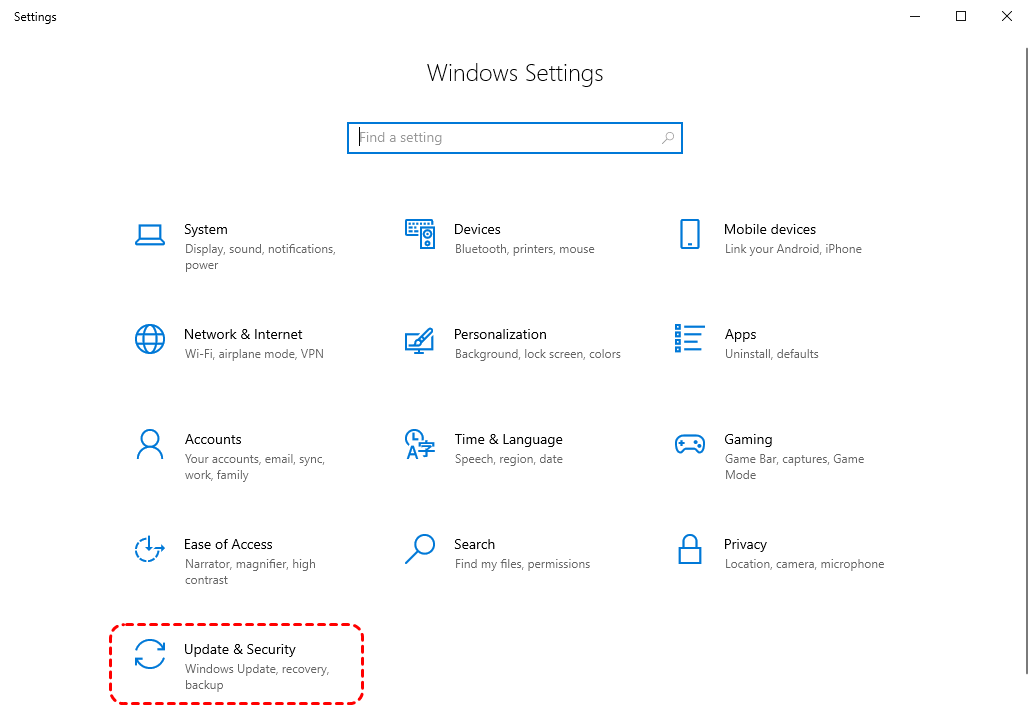
Step 1. Access to "Windows Setting", locate and click on "Update & Security".
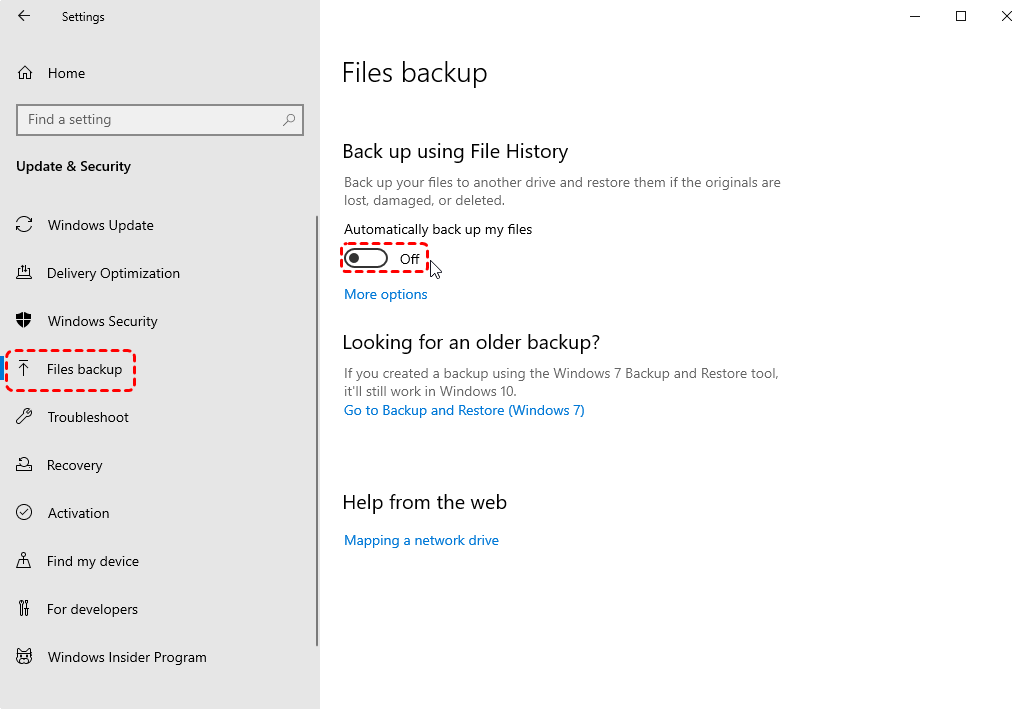
Step 2. In the "Windows Update" window, click on "Files Backup" in the left pane. Check whether the "Back up using File History" feature is enabled. If not, simply toggle it to "On.".
Method 3:Check Disk Drive Error
If the drive contains some errors, the Windows might not recognize it as usual. To check disk error, you can turn to CHKDSK command line tool.
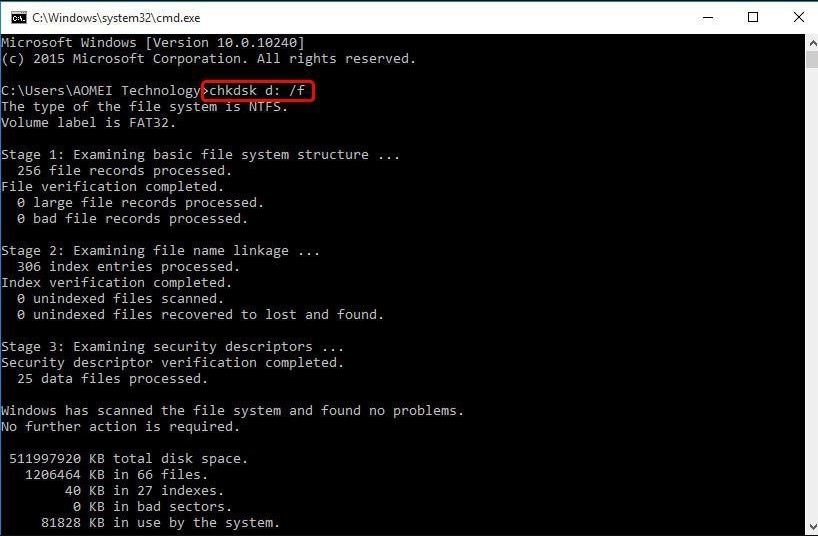
Step 1: Press "Win+R" to bring out "Run" dialogue, input "cmd", and hit Enter. Be sure to run it as administrator.
Step 2. Input "chkdsk d: /f" in the window. This command will check and fix errors that it found on D: volume. You can replace d with the target drive letter.
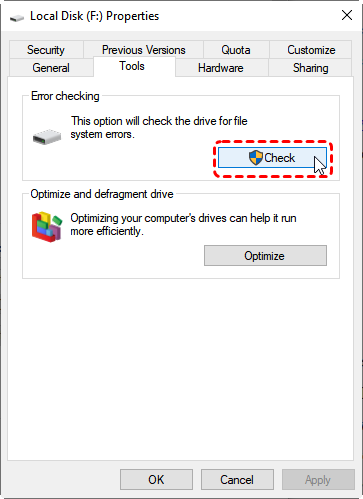
Or you can open File Explorer, right-click the external drive, and select "Properties". Under the "Tools" tab, click "Check" to scan and fix any file system errors.
Method 4:Check the Drive File System or Letter
A drive that lacks a drive letter or is formatted with an unsupported file system (such as Ext, typically used on Linux) may also fail to be recognized by the operating system. In such cases, you can open Disk Management to make a check.
Step 1. Press "Windows + X" and select "Disk Management".
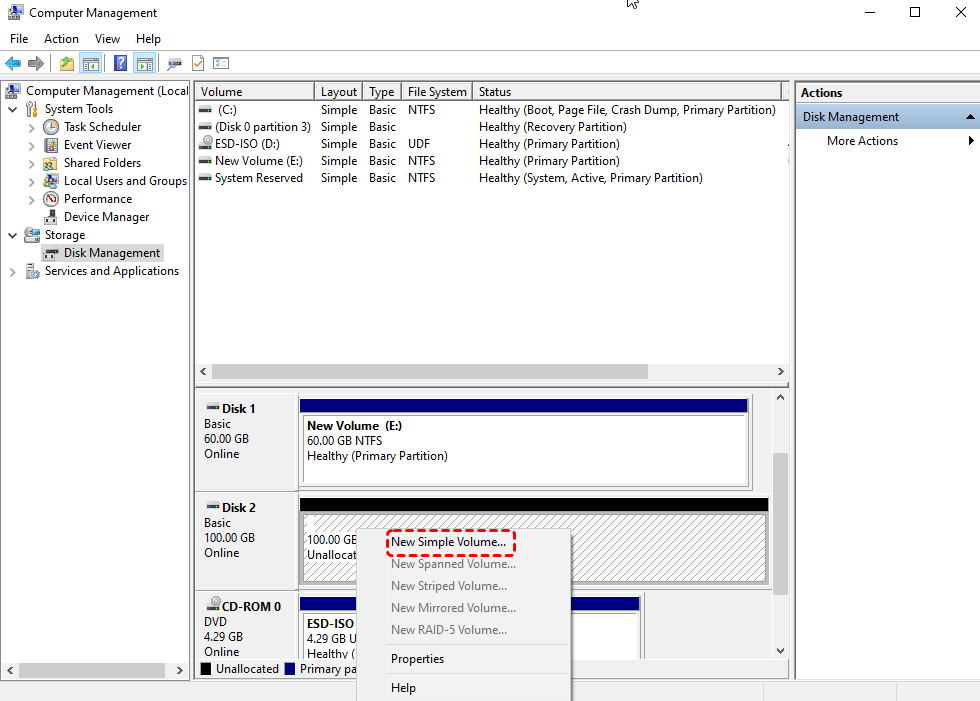
Step 2. In the Disk Management Windows, locat your external drive in the list.
- If it’s not listed or shows as "Unallocated," the drive may need formatting. Right click the drive and select "New Simple Volume". During the new volume creation process, choose NTFS, FAT32 or other compatible file system as you need.
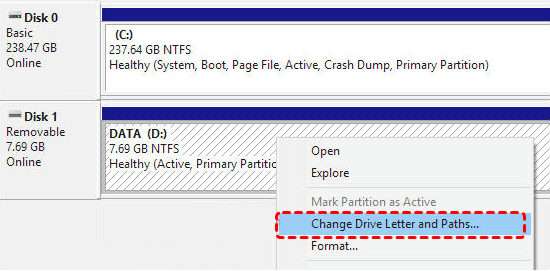
- If it is shown as a partition, but not with any drive letter, just right-click the drive and select "Change Drive Letter and Paths…" to assign a unique drive letter.
Method 5:Update or Reinstall Drivers
If there's an issue with the external drive's driver, such as it not being installed correctly or being outdated, Windows may fail to detect or recognize the drive. In such cases, you may need to update or reinstall the driver.
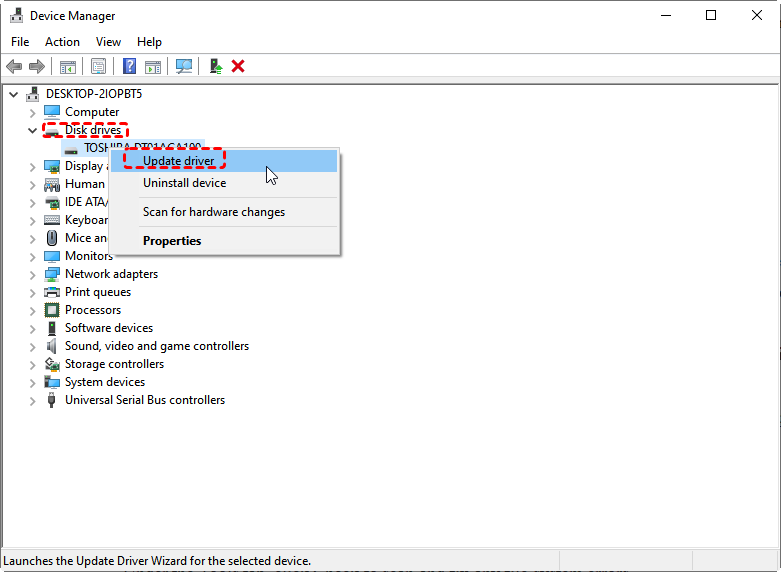
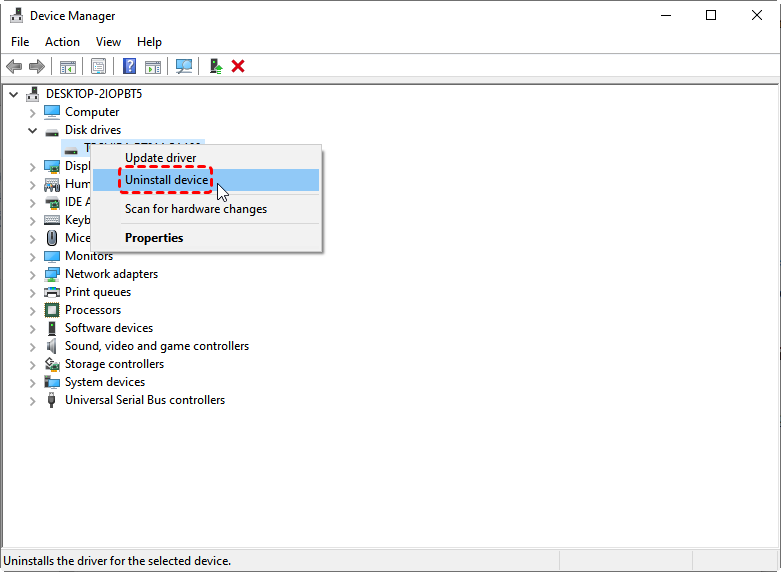
Step 1. Go to Device Manager by pressing "Windows + X" and selecting it.
Step 2. Find your external drive under Disk Drives, right-click, and choose "Update driver". If no updates are available, try uninstalling and reinstalling the driver.
Choose "Uninstall device", then unplug and replug the external drive. Windows will attempt to reinstall the correct drivers automatically.
Method 6:Delete Old Settings
If File History still fails to recognize the drive, the issue may be caused by corrupted or conflicting configuration data stored locally on your system. Over time, File History can accumulate old backup settings that interfere with new backup configurations, preventing Windows from properly detecting or assigning the backup drive.
To fix this:
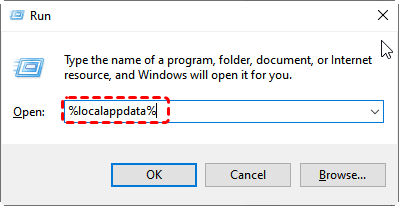
Step 1. Press "Win + R", type "%localappdata%", and press Enter.
Step 2. In the folder that opens, navigate to "Microsoft > Windows > File History > Configuration".
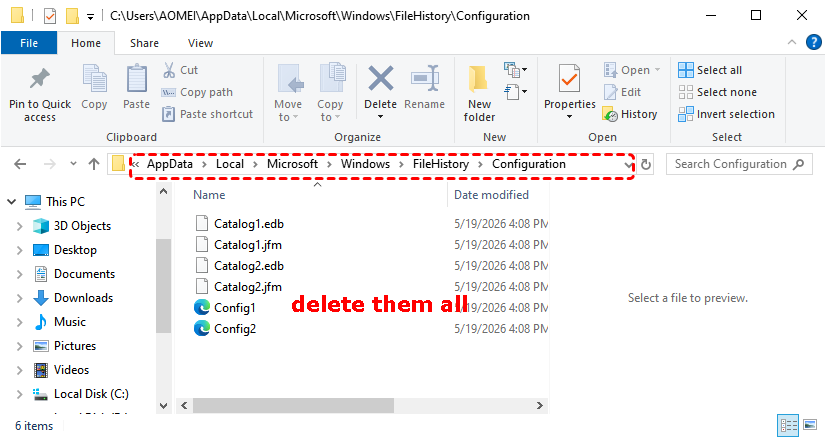
Step 3. Inside this folder, delete all the files you find.
This action removes the existing File History configuration and forces Windows to rebuild fresh settings from scratch the next time you set up the feature.
Method 7:Refresh File History Service (Service restart)
If deleting old settings does not resolve the issue, the next step is to refresh the Windows service responsible for File History. In some cases, this service may be stuck, stopped, or incorrectly running, which prevents Windows from detecting the backup drive properly.
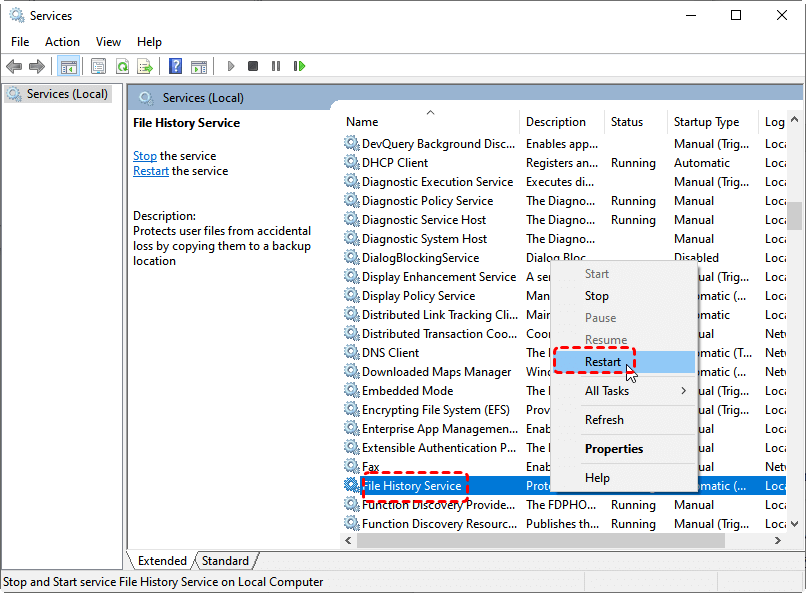
Step 1. Press "Win + R", type "services.msc", and press Enter.

Step 2. In the Services window, scroll down and locate File History Service. Right-click on it, then you will see different options depending on its current state. If the service is running, choose "Restart" to refresh it. If it is disabled, select Enable, and then click Start to activate it.
After that, reconnect your backup drive and open File History again to check whether the system can recognize the drive correctly. Refreshing or re-enabling the service forces Windows to rebuild its backup service state, which often fixes temporary system-level issues.
Method 8:Disable Completely and Re-enable File History (Service reset)
If File History is still not working properly, you can try fully restarting the service by disabling and then re-enabling it. This method helps clear stuck background processes and forces Windows to reload the File History service from a clean state.
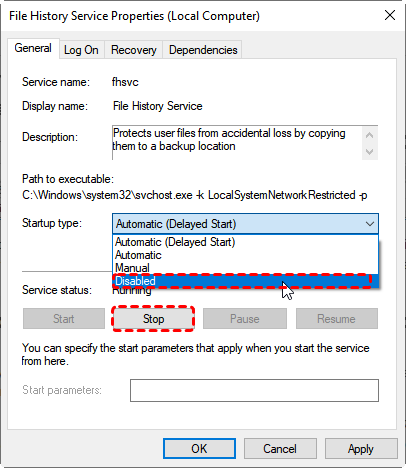
Press "Win + R", type "services.msc", and press "Enter". In the Services window, locate "File History Service". Right-click it and select "Properties". First click "Stop" to turn off the service, then change the Startup type to "Disabled", and click "OK" to confirm.
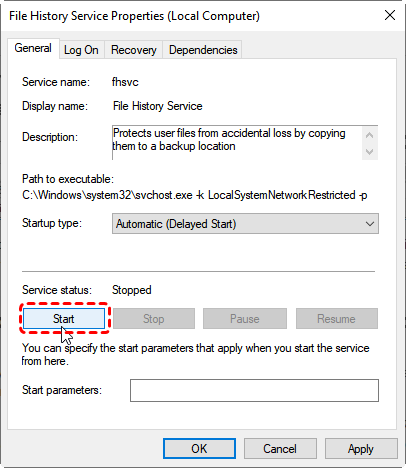
After that, restart your computer to ensure the service is completely shut down. Once the system boots up again, go back to services.msc, open File History Service, change the Startup type back to "Automatic" or "Manual", and then click "Start" to re-enable it.
This full disable-and-restart process helps reset the service state and often resolves issues where File History cannot recognize or connect to the backup drive due to internal service glitches.
🔎Method 2 vs Method 7 vs Method 8 (Simple Comparison)
Although these three methods may look similar, they actually fix the problem at different levels. Think of them as three "reset strengths" for File History.
| Method | What It Does | Technical Level | When to Use |
|---|---|---|---|
| 2: Turn File History Off and On Again | Restarts the File History feature from Windows settings and refreshes basic configuration | Basic (User-level) | When File History has minor glitches or temporarily fails to recognize the drive |
| 7: Restart File History Service | Restarts the Windows background service that controls File History operations | Medium (Service-level) | When File History is stuck, frozen, or not detecting the drive even though it is turned on |
| 8: Disable and Re-enable Service | Fully disables the service, reboots the system state, then re-enables it to rebuild from scratch | Advanced (Deep reset) | When File History is completely broken or restarting the service does not work |
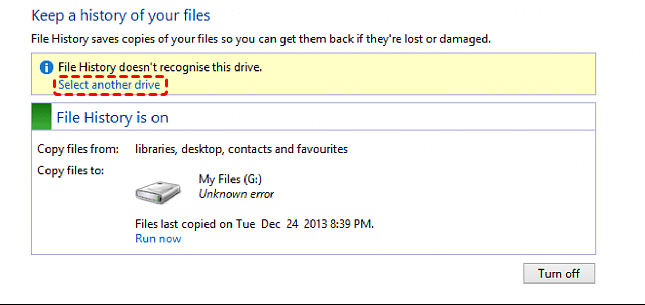
Method 9:Select Another Drive to Back Up
If you've tried all the above methods and the "File History doesn't recognize this drive" issue persists, you can try selecting a different drive for the backup.
Bonus Tip: Easily Restore Files Without Using File History Backup
If you don't have File History backup available or it's not functioning properly like the above issue "File Historydoesn't recognize this drive", there are still ways to restore your files. Among all alternatives, best option should be using professional data recovery software.
With many data recovery tools available on the market, choosing the right one can be challenging. Today, we’ll focus on MyRecover as a reliable solution. This tool allows you to easily recover lost or deleted data from Windows with simple steps. Specifically, it offers fast recovery speeds and a high success rate across various scenarios, including:
🌟Deleted Data Recovery: Get back data removed by "Shift+DEL" key or "Delete" button.
🌟Recycle Bin Recovery: Recover data that were deleted from Recycle Bin.
🌟Restore Data from Formatted Disks: Retrieve data from formatted hard drive before they are overwritten.
🌟Retrieve Data from Lost Partition: Restore data from partitions that are deleted/lost/corrupted.
🌟Windows Data Recovery After System Crash: Recover data from BSOD, frozen computer, inaccessible system.
🌟Windows Data Recovery After Virus Attack: Save your precious data from infected hard drives (Trojan, malware, worms, etc).
Now, you can check the following tutorial to learn how to recover data from hard drive even if you don’t have File History backup due to the “File History drive not recognized”problem.
Step 1. Download and install MyRecover.
Step 2. Open the data recovery softare. Choose the drive which contains the lost data and click on "Scan".

Step 3. After the software scan the drive and list all deleted data, choose what you want to recover and click on "Recover".

Step 4. Choose a local drive folder to save the recovered data.

Summary
This article not only explains why File History doesn't recognize this drive, but also lists 9 effective methods for your reference. What’s more, if the File History cannot help back up Windows data any longer, you can download MyRecover to recover lost or deleted data effortlessly even without any backup created before. To recover unlimited data and preview all before final recovery, please upgrade to the advanced version.


Stay Updated With Our
Latest Tips
Add us as a preferred source on Google to never miss helpful guides.