
File History vs Backup and Restore: Which Windows Tool Should You Use
"File History" and "Backup and Restore" are both effective file recovery tools built into Windows. However, they also have significant differences. So, how should you choose between these two tools in various situations? This article will analyze the pros and cons of each tool and provide guidance on making the right choice.
By Aria / Updated on December 17, 2025
Preface
When data loss occurs, “File History” and “Backup and Restore (Windows 7)” are likely the first data recovery tools that come to mind. However, what is the difference between “Backup and Restore” and “File History”? What are their individual pros and cons? And which tool should you use when you encounter data loss? If you've been puzzled by these questions, read on as we delve deeper into them.
File History: Continuous Protection
File History in Windows is a feature that creates regular backups of files stored in user’s libraries (such as Documents, Pictures, and Music, etc.) on the desktop automatically once configured. It keeps multiple versions of your files, allowing you to go back to a previous version if needed. You can choose how long to retain the saved versions.
👍Pros
- The restoration process is convenient and easy to operate. Automatically restoring personal files without manual intervention frees up users' hands.
- When a file is accidentally lost, deleted or damaged, you can easily restore it from File History backup.
- You can browse different versions of a file or folder and restore the one corresponding to a specific point in time.
- When backing up personal files, the backup takes up little space and is suitable for daily use.
- If there are files or folders you don't want to back up, you can choose to exclude them. Similarly, you can add the folders you want to back up.
👎Cons
- It has a limited backup scope and cannot back up the entire system, partitions, or disks, or installed programs.
- It may not be able to restore the files that have been deleted for a long time.
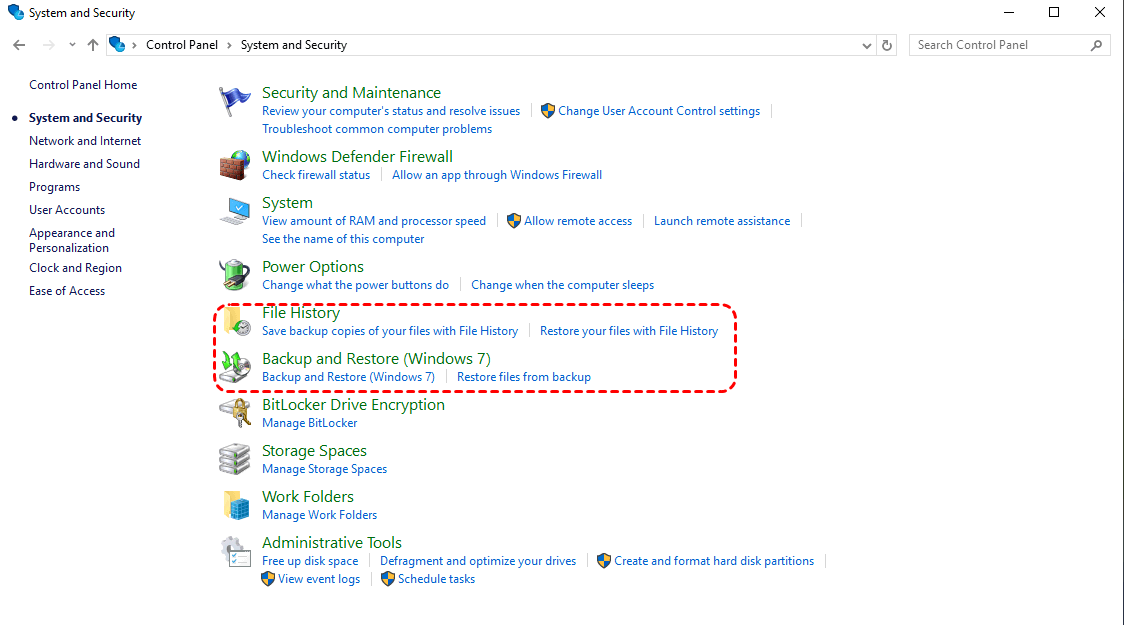
✅How to Use File History to Restore
File History is very simple to operate, but before you use it, you should enable File History feature. Otherwise, it will send the error message “no previous version”. Once the file history has been enabled, you can follow these steps to restore your files.
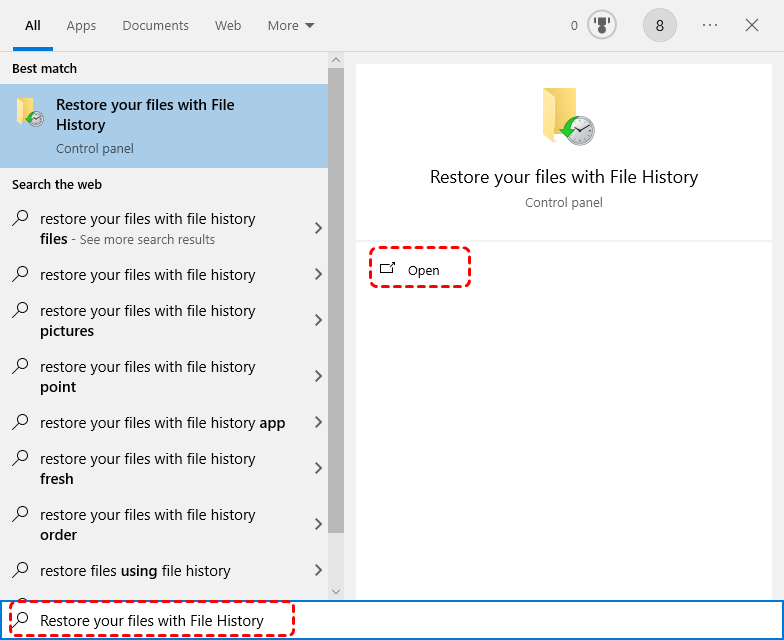
Step 1.Type “Restore your files with File History” and open it.
Step 2. Then you can choose the file or folder you want to recover from the backup drive to restore and click the green restore button.

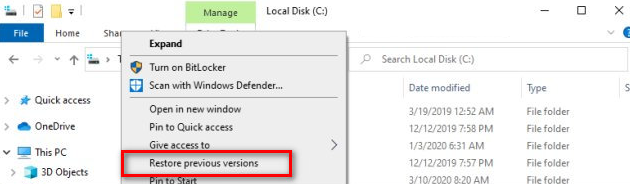
Moreover, there exists an alternative method for file restoration.
Step 1. Open “file explorer” on your computer (by double clicking This PC or pressing the Windows key and E simultaneously).
Step 2. Choose the folder where the lost file was previously saved, and right click to select “Restore previous version”.
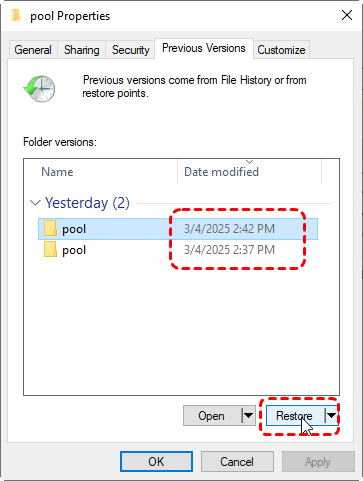
Step 3. Choose the version of the lost file that you want to restore and click "Restore".
Backup and Restore: Disaster Recovery
Backup and Restore is the process of copying data and applications to a secondary device or location, and then using those copies to recover data in case of loss or damage. It's a crucial practice for protecting data in the event of unexpected events such as hardware failures, human errors, system corruption.
👍Pros
- This feature effectively safeguards data against loss or damage resulting from various events.
- It can create a comprehensive system image, backing up your entire computer system, including software, settings, etc., and can recover data from a crashed computer even when in complex scenarios such as system crashes.
- Backup and Restore offers more detailed scheduled backup options, such as daily, weekly, and monthly intervals, enabling users to specify particular days and time points.
- It allows users to create system repair disks, which can be utilized to boot up the computer and restore the system during emergencies.
👎Cons
- Backup files are too comprehensive and take up more disk space.
- Backing up the entire system takes a long time and is not suitable for frequent operations.
✅How to Use Backup and Restore to Restore
As Windows turns off this feature by default, it is crucial for you to set it up prior to your need for it. Once done, you can retore your files with these steps:
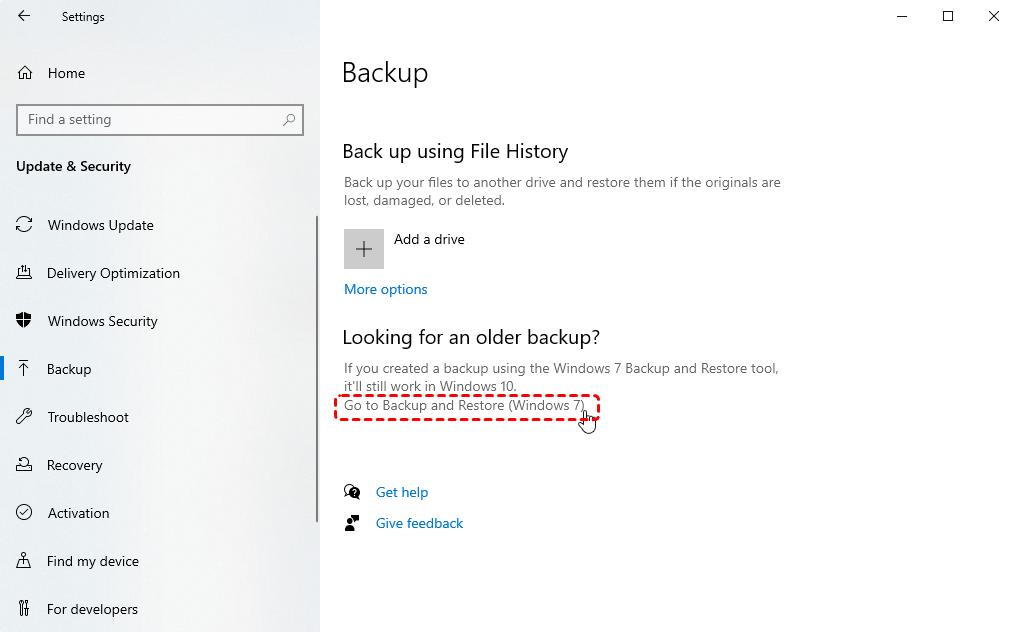
Step 1. Type “backup and settings” in the start menu and open it, then click on “Go to Backup and Restore (Windows 7)”.
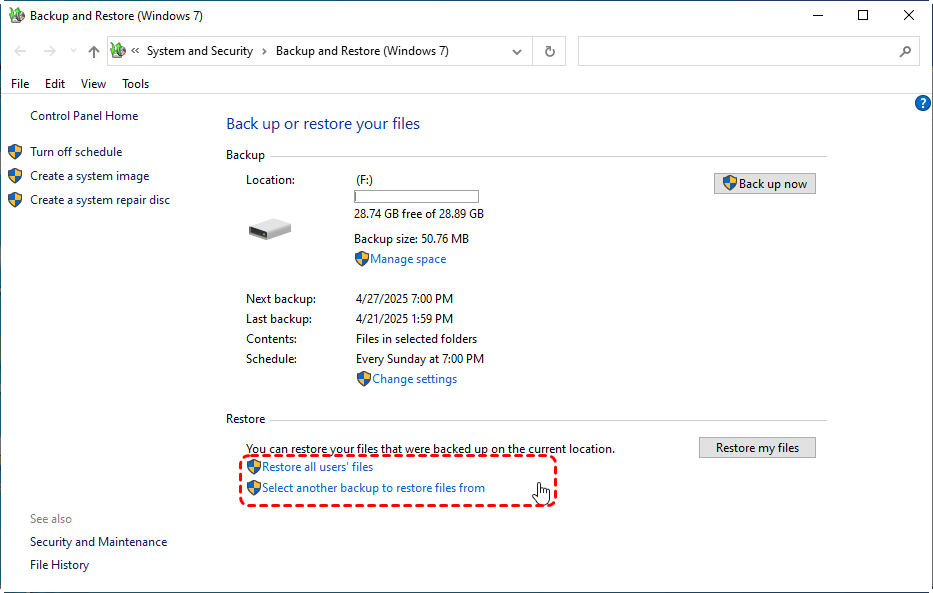
Step 2. Click "Select another backup to restore files from".
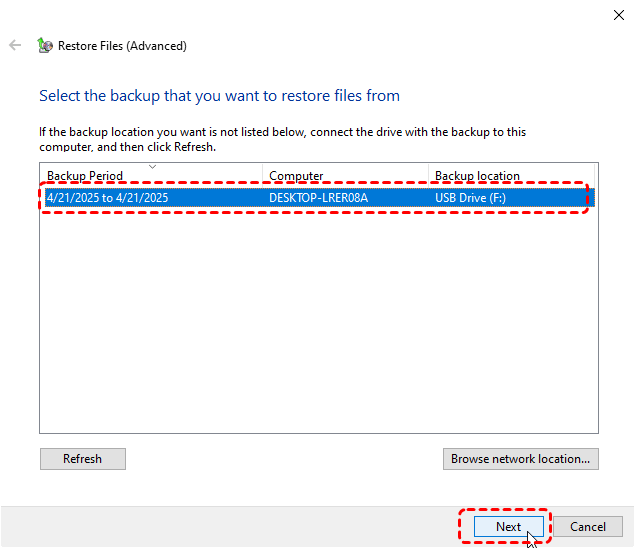
Step 3. Select the backup created on your computer and click “Next”.
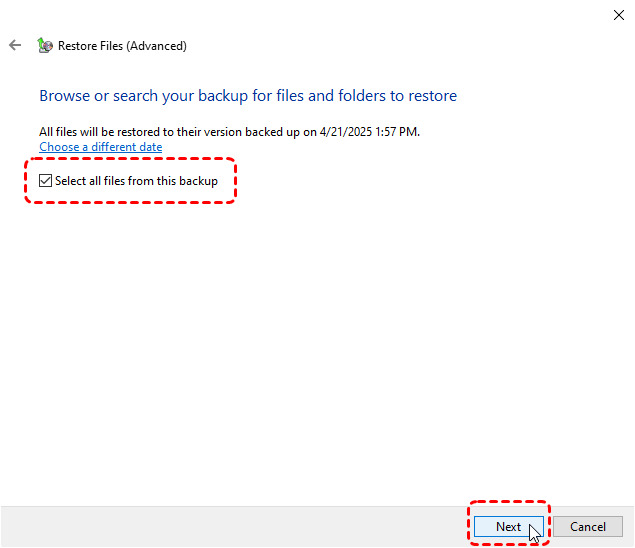
Step 4. Select "Select all files from this backup" checkbox, and then select “Next”.
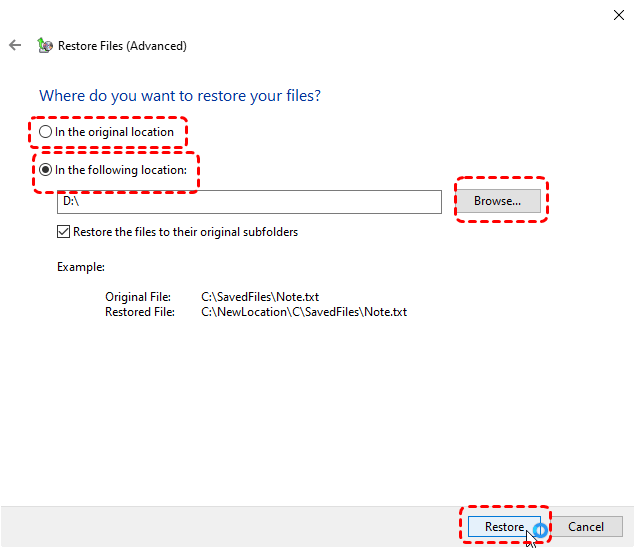
Step 5. Select a location to restore your files and click “Restore”.
Step 6. Wait several minutes until the message “Your files have been restored” appears on the screen.
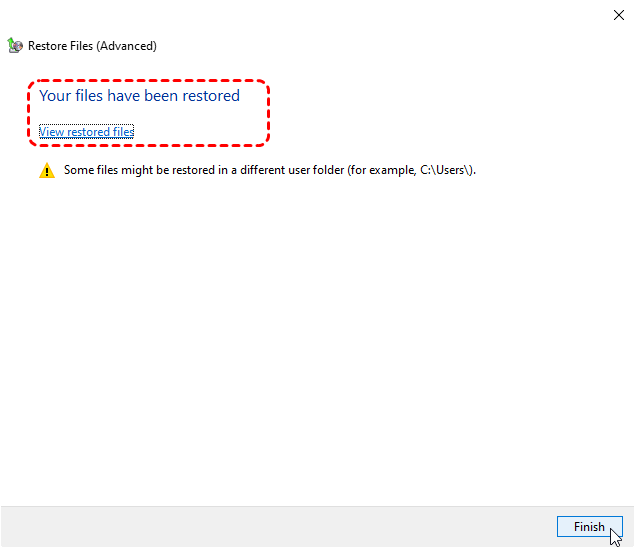
At this stage, you are then able to access the backup files stored within the designated destination folder.
How to Choose File History vs Backup and Restore
After understanding the advantages, disadvantages and usage of "File History" and "Backup and Restore", it is clear that File History is more suitable for restoring personal files, while Backup and Restore is more suitable for restoring a whole operating system, which is especially effective when you are faced with an incident in the system.
|
Feature |
File history |
Backup and Restore (Windows 7) |
|
Primary purpose |
Backup personal files (documents, pictures, videos, etc.) |
Creates full system backups or file backups |
|
Setup complexity |
Simple (automatic file backups) |
More options (customizable but complex) |
|
Backup type |
Incremental (saves versions overtime) |
Full backup or scheduled file backups |
|
Storage space |
Small |
Large |
|
Storage efficiency |
Saves only changed files (space-saving) |
Larger backups (can include system image) |
|
File system |
NTFS |
NTFS/FAT32 |
|
Restore flexibility |
Restore previous file versions |
Restore individual files or entire system |
|
System image |
No (only files/folders) |
Yes (create a full system image) |
|
Default location |
External drive or network location |
External drive, DVD or network |
|
Best for |
Regular file versioning, quick recovery |
Full system backup or legacy compatibility |
Both "Backup and Restore (Windows 7)" and "File History" have their own merits and demerits. Only by using them correctly in different data loss scenarios can you protect your data better. In daily use, a combination of file history to protect daily file versions and Backup and Restore to create system images will maximize your data security.
Alternative File Recovery Tool: MyRecover (Does Not Require Prior Backup)
While File History and Backup and Restore cover basic Windows backup needs, they have clear limitations—require pre-configuration and consistent backups to safeguard your files. But what if data loss occurs without a backup in place? This is where MyRecover offers a critical advantage—a specialized data recovery solution that retrieves lost files even without prior backups.
Step 1. Download and install MyRecover on your computer.
Step 2. Select a location to search lost files and click “Scan”.

Step 3. From the list of recoverable files, select the ones you wish to retrieve and click "Recover".

Step 4. Select a different destination to save the recovered files.

When the message “files have recovered successfully” appears on the screen, you can check the recovered files in the designed destination folder.
Unlike traditional backup tools, MyRecover eliminates dependency on pre-existing backups. It scans storage devices directly to recover deleted or corrupted files—ideal for unexpected data loss scenarios. MyRecover supports NTFS, FAT32, exFAT, and ReFS file systems. Its user graphical interface makes data recovery user-friendly.
What’s more, it also doesn't occupy much space and supports recovery of data loss in various scenarios, such as when you’ve accidentally formatted a drive, faced system crashes, or forgotten to back up critical files. The Professional and Technician version provides a useful feature that supports previewing files before recovery, allowing users to confirm whether they are the correct files they want to retrieve.
Summary
"File History" and "Backup and Restore" are two very powerful built-in tools for Windows data recovery. Choosing the right tool in different situations can effectively increase the probability of successful data recovery. If you have more advanced recovery needs, you can also consider the third-party tool MyRecover, which is much simpler to use and allows users to complete data recovery by simply clicking on the icon.


Stay Updated With Our
Latest Tips
Add us as a preferred source on Google to never miss helpful guides.