
File is Too Large For the Destination File System | Cause and Fix
Encountering the ‘file is too large for the destination file system’ error can be frustrating, particularly when transferring large media files or backups to USB drives or external hard drives. Here comes several effective solutions to help you move large files without encountering file system restrictions.
By Emma / Updated on December 24, 2025
User Query: Why Can't I Put a 5GB file on a USB Stick?
Just returned from a two-week vacation and gota 5GB video file of my trip. I plannedto copy it to my 32GB USB stick to share with my friends. When I triedto copy the file, I gotthe error:"This file is too large for the destination file system."What does that mean and can I bypass the limitation?
Overview: File is Too Large For the Destination File System
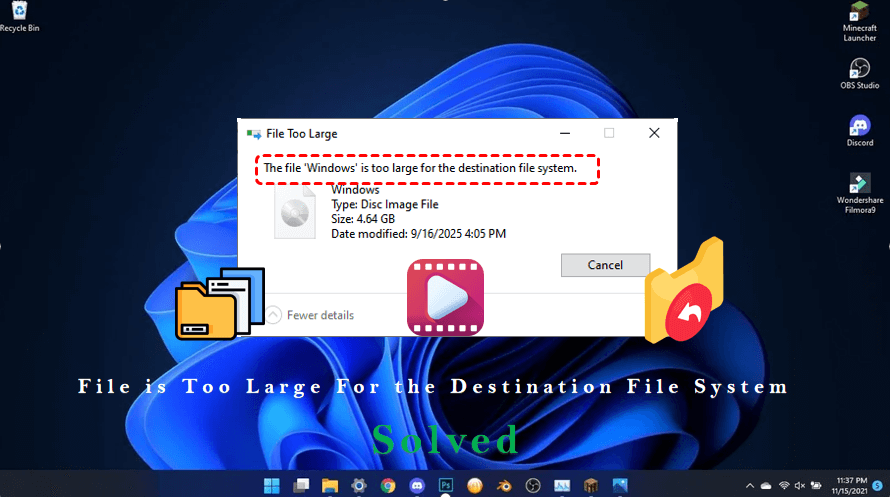
The error "File is too large for the destination file system" occurs when you try to copy or move a file that exceeds the maximum size supported by the file system of the destination drive. This is most common with FAT32-formatted drives, which cannot handle files larger than 4GB.
For example, trying to transfer a 5GB video to a FAT32 USB stick will trigger this error, even if there is enough free space on the drive. The issue is not related to the file itself but to the limitations of the file system.
How to Resolve "The File Is Too Large for the Destination File System"?
If you encounter the error "This file is too large for the destination file system" when copying a large file to a USB drive, you can resolve it by either changing the drive’s file system to one that supports files larger than 4GB, such as exFAT or NTFS, or by splitting the large file into smaller parts that are compatible with the FAT32 file system. Keep reading to get details for each method.
1. Change the Destination Drive File System to exFAT or NTFS
To bypass the 4GB file size limit of FAT32, you can change your USB drive’s file system to "exFAT"or "NTFS", both of which support single files larger than 4GB. Choosing the right file system depends on your usage scenario:
- ✎Difference between exFAT and NTFS
- exFAT: Compatible with both Windows and macOS, making it ideal if you plan to use the USB drive across multiple operating systems. However, converting to exFAT requires "reformatting", which will erase all existing data on the drive.
- NTFS: Offers advanced features like file permissions and better error recovery. If you primarily use Windows, NTFS is a good choice. The advantage is that you can "convert a FAT32 drive to NTFS without losing data" using the "convert" command, avoiding the need to reformat.
Convert FAT32 to NTFS [without Losing Data]
This command can directly change FAT32 to NTFS without erasing everything on the destination drive.
Step 1. Press "Win+X", select Command Prompt (Admin) to open Command Prompt as administrator.

Step 2. Then type the following command and press Enter:
convert X: /fs:ntfs (Replace `X:` with your USB drive letter.)
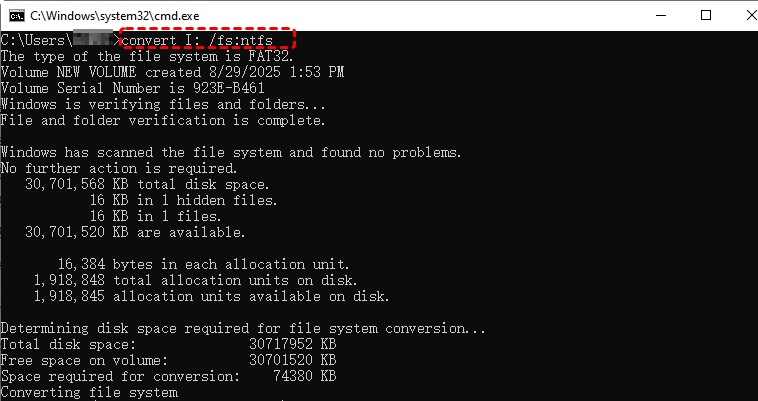
Wait for the process to complete. Your drive is now NTFS, and the 4GB file limit is removed.
Format FAT32 to exFAT [Data Loss, Unless Backup]
Converting a FAT32 USB drive to exFAT requires reformatting, which will erase all existing data on the drive. Therefore, it is essential to back up your files before proceeding.
Step 1. Open File Explorer, right-click the USB drive, and select "Format".
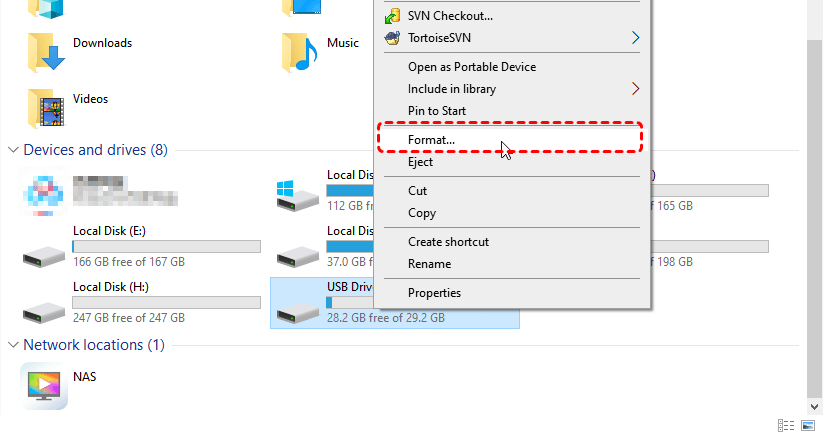
Step 2. Choose "exFAT" as the file system and click "Start".
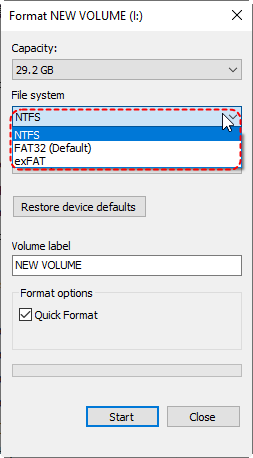
Step 3. Wait for the format to complete, then copy your large files to the drive.
This way, you can easily bypass the FAT32 4GB limitation depending on your compatibility and data retention needs.
2. Split the File into Smaller Parts
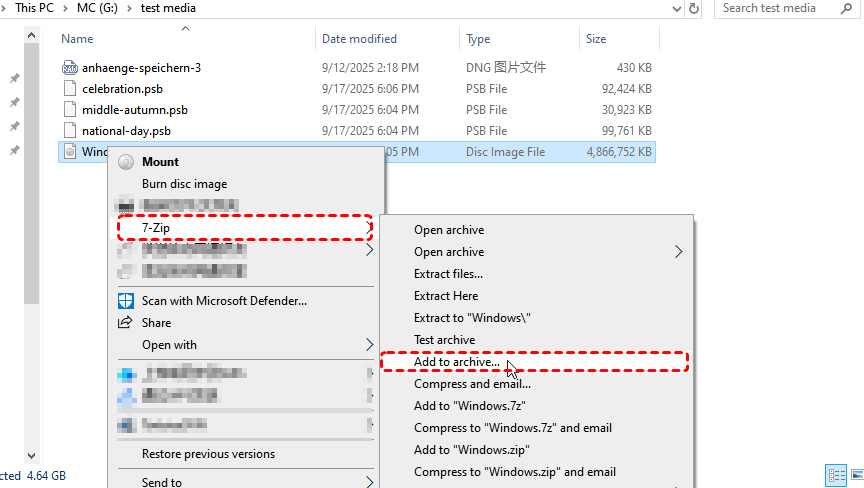
If you don’t want to format the drivebecause of its data loss risk, you can split the large file into smaller chunks using compression software like WinRAR or 7-Zip. Following steps are for 7-Zip.
Step 1. Right-click the file → "7-Zip" and choose "Add to archive".
Step 2. In the new window, choose archive format as you need.

Step 3. Then specify the split size (e.g., 1000M) and click "OK".
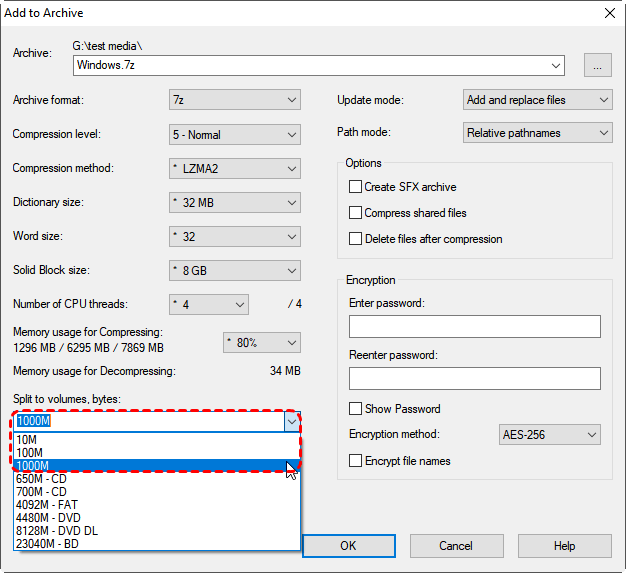
The software will create multiple smaller files that can be copied to a FAT32 drive.
Data Lost After Converting File System or Splitting Files? Recover Now
Data loss can happen during file system conversion or file splitting if proper precautions aren’t taken, including:
- Change FAT32 to exFAT or NTFS file system using the "Format" option without backing it up first.
- Splitting a file into multiple parts does not delete the original file, but errors during the split, copy, or transfer process can corrupt one or more parts.
If data is lost, try MyRecover, a free yet powerful data recovery solution to help retrieve lost files from FAT32, NTFS, exFAT, or other storage devices safely. It supports recovery from internal and external SSD, HDD, USB flash drives, SD cards, and more.

- ✨Easy-to-use interface: No command-line navigation or keyboard-based selection required.
- ✨AI-Powered Recovery: Uses AI recognition and deep scanning technology.
- ✨Wide file support (1000+): Photos, videos, documents, audio files, archives, and more.
- ✨Supports all common devices (500+): HDDs, SSDs, USB flash drives, SD cards, external drives, etc.
- ✨Cover 500+ Scenarios: deletion, formatted disk, emptied Recycle Bin, system crashes and more.
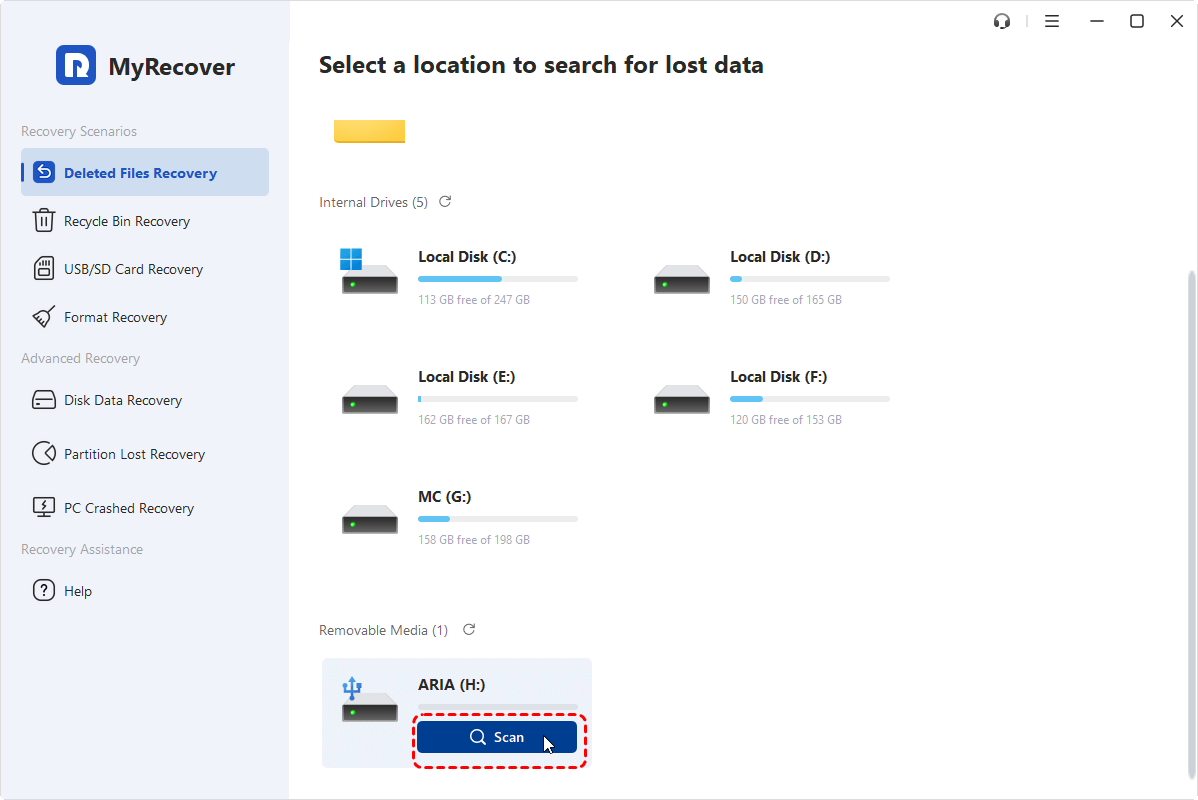
Step 1. Download and install MyRecover on a different drive than the one where data was lost.
Step 2. Launch the software and select the affected FAT32, NTFS, or exFAT partition. Click "Scan" to automatically perform a scan .
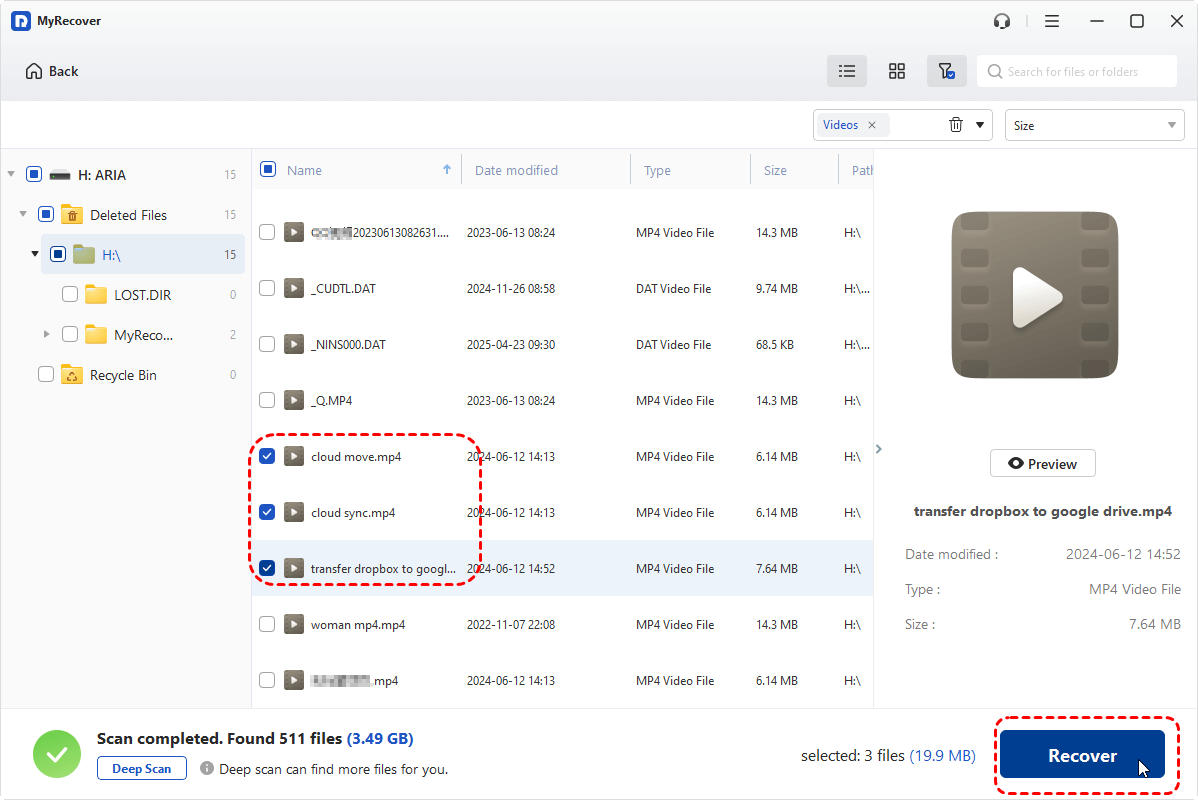
Step 3. Filter or search the files by type, size, or name.
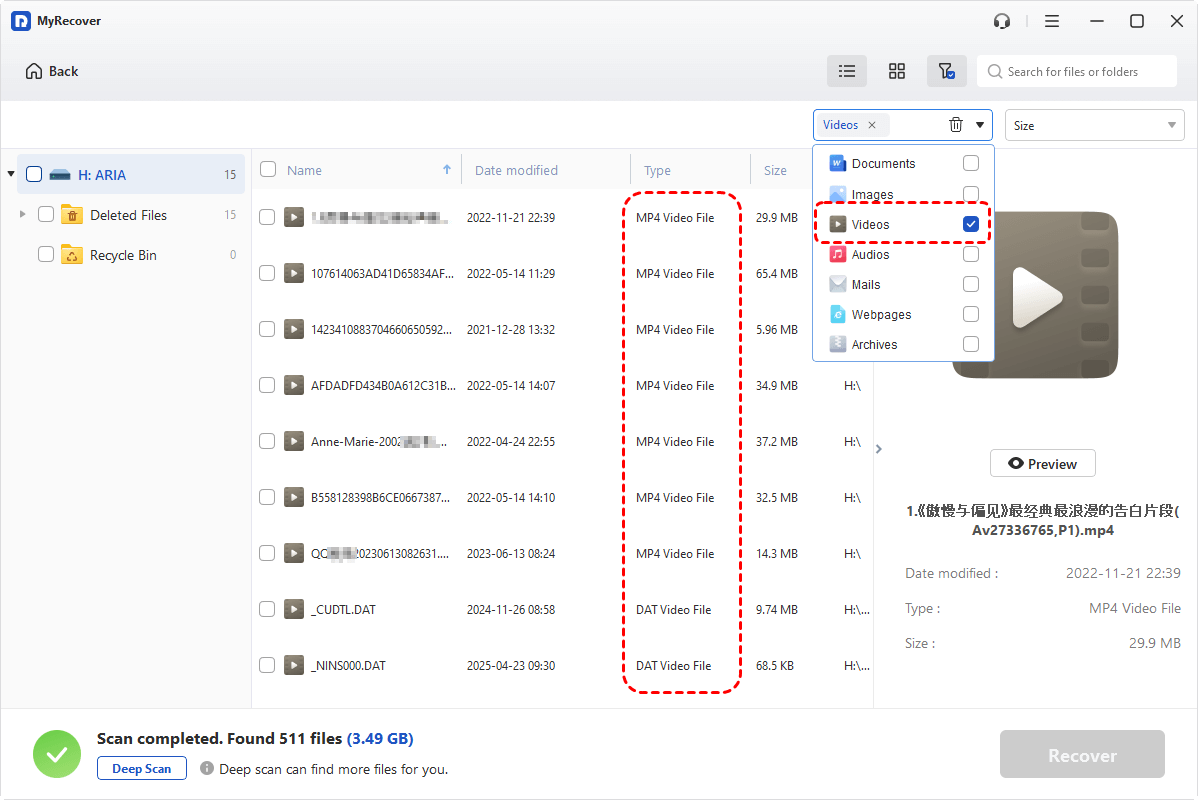
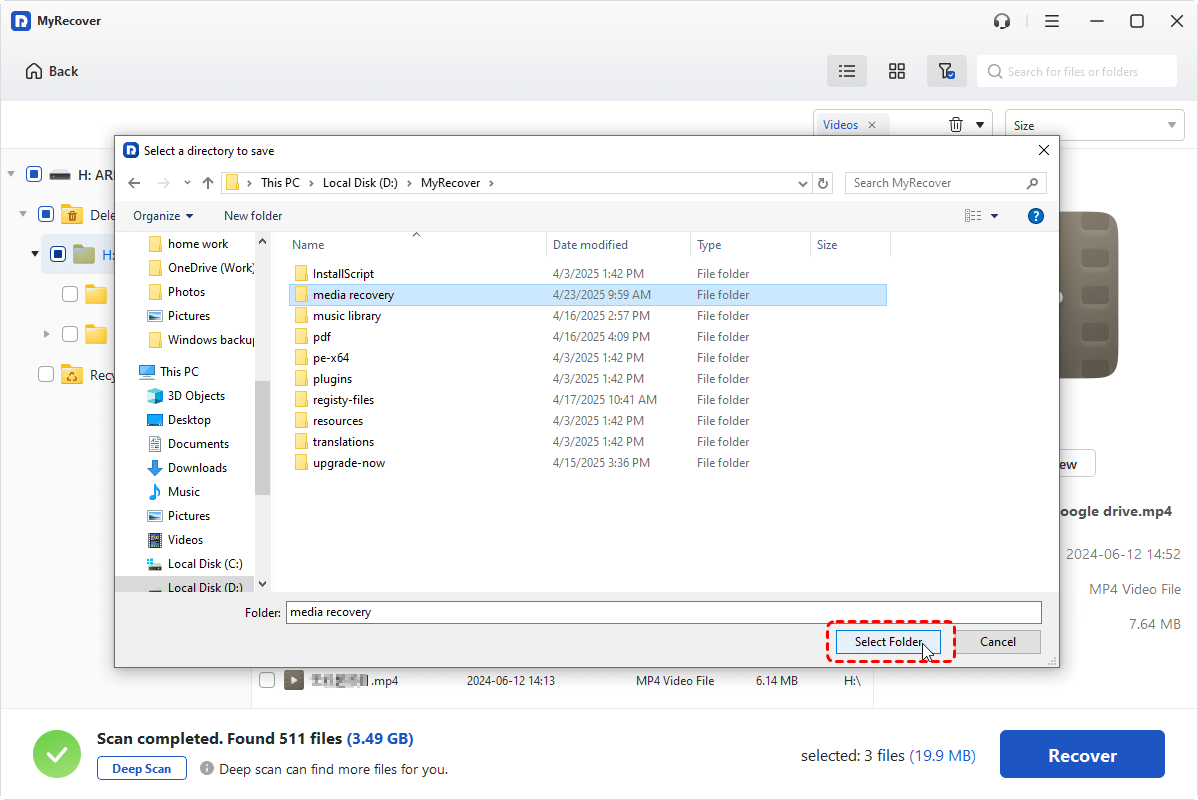
Step 4. Select the files you want and click "Recover" to save them to a safe location.
Step 5. Recover files to another partition to prevent data overwriting.
To enable "file preview before recovery" or break the "data recovery limit (500MB)", you can upgrade to the Professional edition.
Summary
So, the error "File is too large for the destination file system" is not caused by insufficient storage space, but by the file size limitation of the destination drive’s file system, most commonly FAT32. Once you understand this core reason, the solution becomes clear and manageable.
However, both solutions come with potential risks. Formatting can erase existing data, and file splitting or transfer interruptions may lead to file corruption or unexpected data loss. This is where MyRecover becomes essential. Whether data is lost due to file system conversion, accidental formatting, corruption, or transfer errors, it provides a safe and effective way to scan storage devices and recover lost files from FAT32, NTFS, exFAT, ReFS, Ext and more.


Stay Updated With Our
Latest Tips
Add us as a preferred source on Google to never miss helpful guides.