
[Free] How to Recover Files Too Large For Recycle Bin?
When files are too large for the Recycle Bin, Windows permanently deletes them instead of sending them to the bin, making recovery seem difficult. This tutorial explains step-by-step methods to recover these large deleted files safely. You’ll learn how to use Windows features like File History and Windows File Recovery, as well as professional tools like MyRecover, to restore deleted files that were too big for Recycle Bin efficiently.
By Emma / Updated on August 28, 2025
This File is Too Large for Recycle Bin?
“We just completed a recording session that produced a 90GB video file. Unfortunately, my friend accidentally deleted the file while clearing up space. Since the file was too large for the Recycle Bin, it was permanently removed, rather than going to Recycle Bin.
We haven’t saved or recorded anything new on the drive yet, so no data has been overwritten. What tools or methods can we use to recover this large video file, and how should we proceed to ensure a safe recovery?”
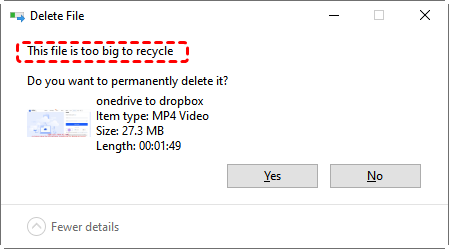
What Will Happen When File is Too Large to Recycle?
When you delete a file or folder that is larger than the Recycle Bin’s size limit, Windows cannot move it to the Recycle Bin. Instead, the file is permanently deleted immediately.
- Key Points to Remember:✎...
- No Recycle Bin Backup: The file will not be stored in the Recycle Bin, so you cannot restore deleted files from Recycle Bin.
- Immediate Deletion: Once deleted, the space on your drive is marked as available for new data.
How to Recover a File Too Big for the Recycle Bin?
Although the file or folder will be permanently deleted immediately when it is too big to Recycle, the recovery is still possible as long as you do not save new files to the drive. Generally, you can try the following recovery tools or methods, depending whether you have a prior backup or not.
Windows File History (Backup Required)
As one of the common Windows inbuilt backup & recovery solutions, File History can help recover files too big for Recycle Bin, as long as you had already enabled it before the large file deletion. To recover files from File History backup:
Step 1. Press "Windows + S", type "Restore your files with File History", and open it.
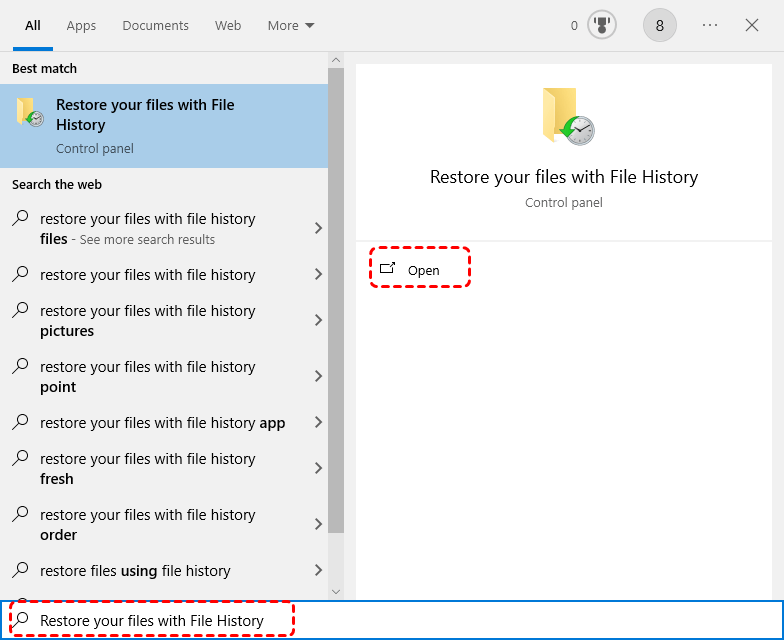
Step 2. Browse through the available backups or use the search bar to find the deleted file.
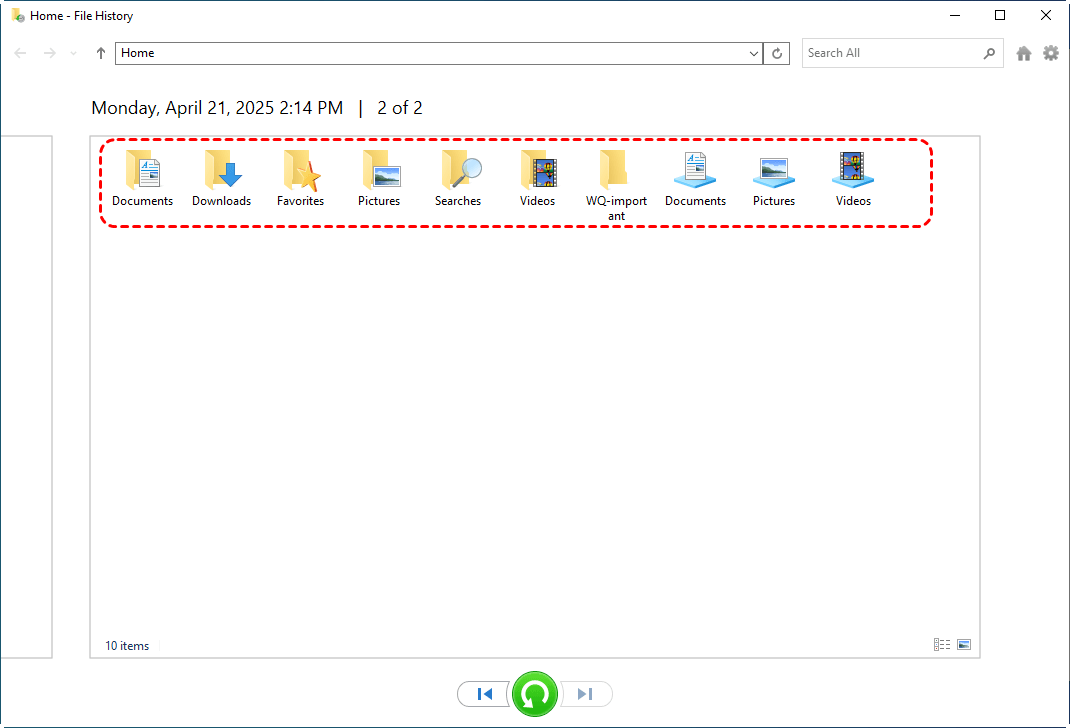
Step 3. Select the file or folder and click "Restore" to recover it to its original location. Optionally, right-click it, select "Restore to" and choose a different location if you prefer.

Windows Backup and Restore (Backup Required)
Apart from Windows File History, another amazing feature to recover files in Windows is the "Backup and Restore (Windows 7) " tool, which aims to restore deleted or lost files from previously created backups, helping you recover important documents, photos, videos, and other data even if they were permanently deleted from your computer.
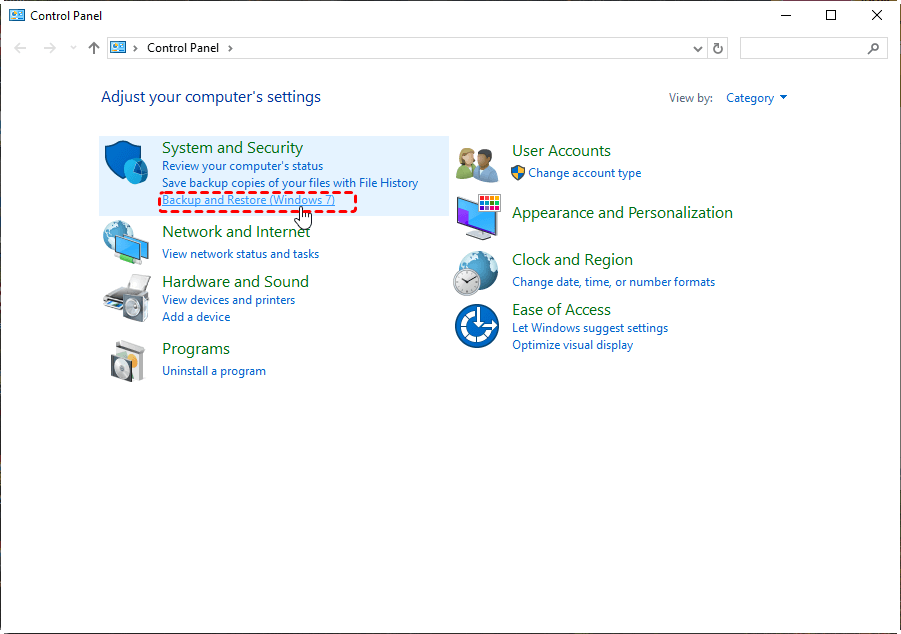
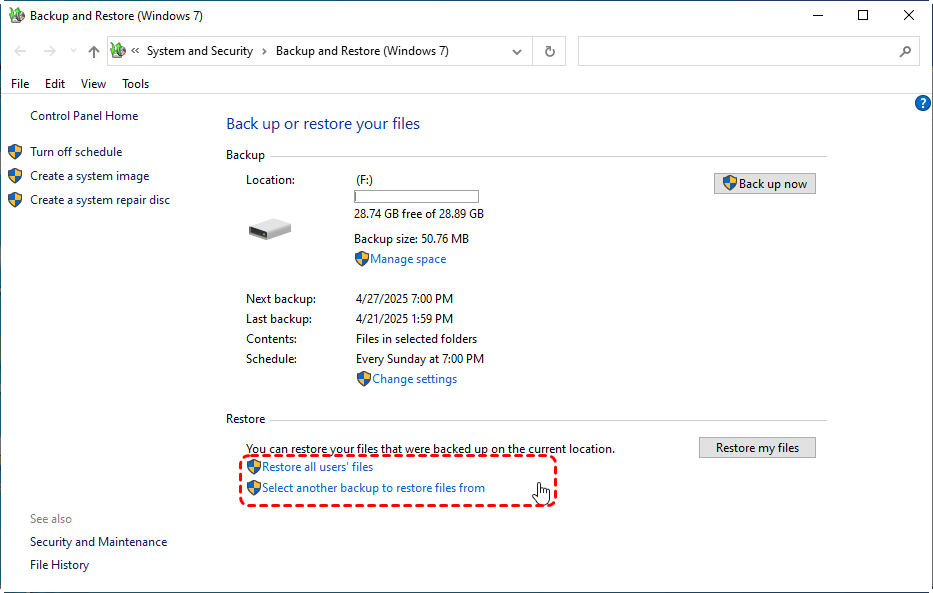
Step 1. Open "Control Panel → System and Security → Backup and Restore (Windows 7) ".
Step 2. Click "Select another backup to restore files from" or "Restore all users’ files ".
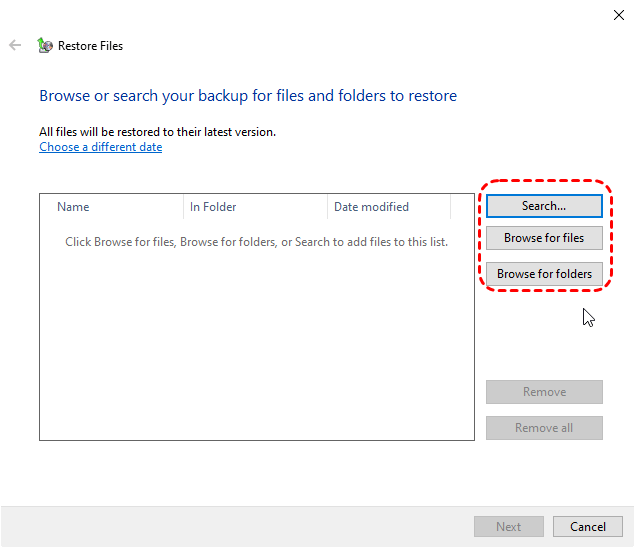
Step 3. Browse for the deleted file or folder in the backup.
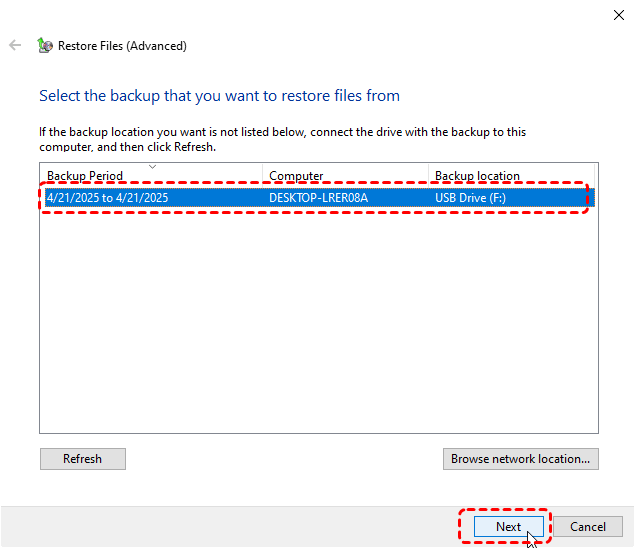
Step 4. Select target backup and click "Next".
Step 5. Choose a location to restore the file if you do not want it in the original folder.Once everything is confirmed, click "Restore".
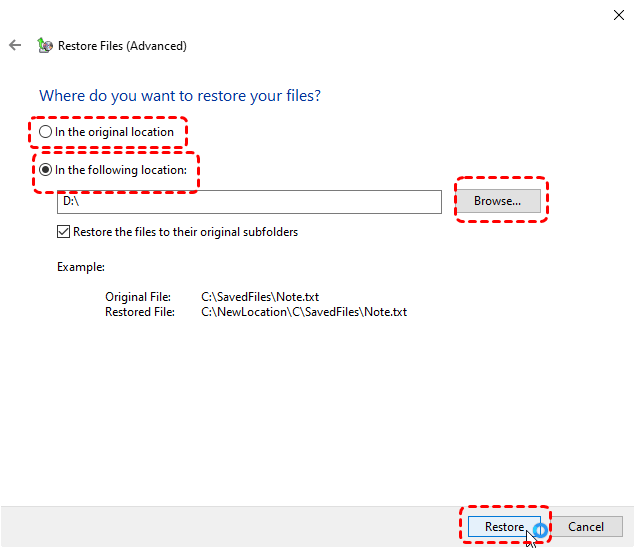
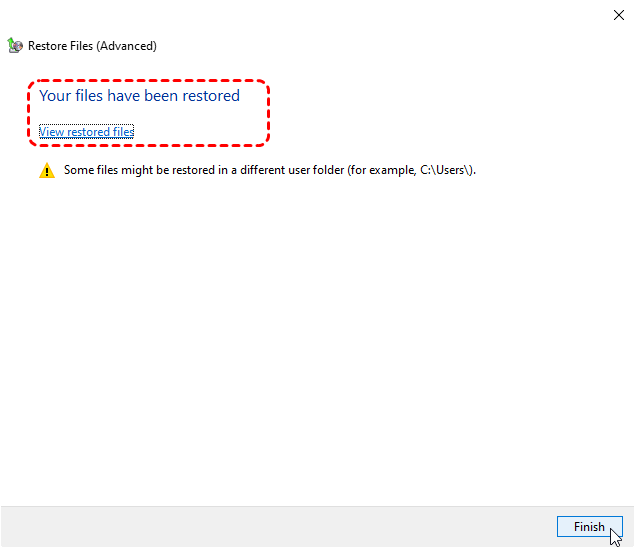
When the restoration process is complete, Windows will display a confirmation message indicating that your files have been successfully restored.
Windows File Recovery (Not Require Prior Backup)
If you did not create a backup using File History or Backup and Restore, don’t worry! Microsoft still provides a built-in professional data recovery tool called Windows File Recovery. This tool can help you recover deleted files, including those too large for the Recycle Bin, without requiring any prior backup.
- Notes:✎...
- It only works through the Command Prompt, so some basic familiarity with command-line operations is needed.
- It only works on Windows 10 and Windows 11. If you are trying to recover files on Windows Server or Windows 7, 8, proceed to the next method.
Next, we will go through the step-by-step instructions to recover files too large for Recycle Bin using Windows File Recovery commands (winfr).
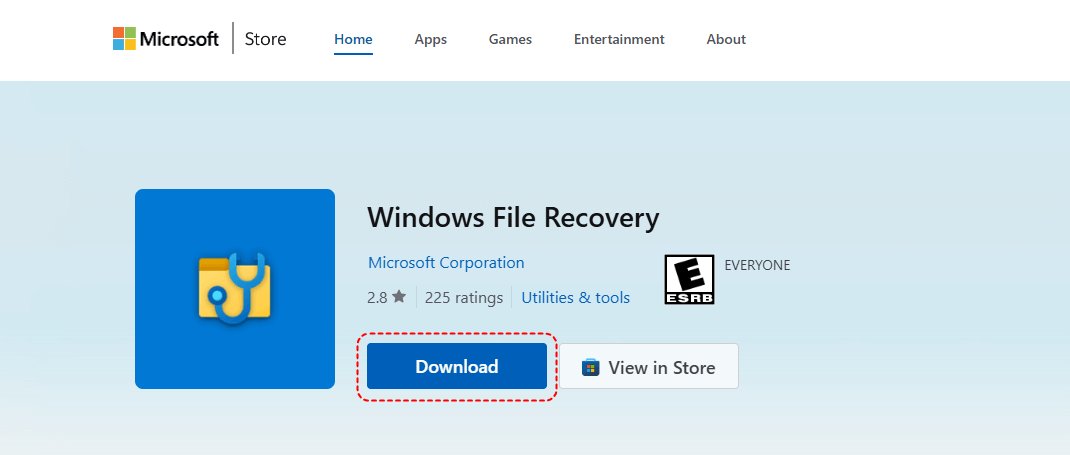
Step 1. Open the Microsoft Store on your Windows 10/11 computer. Search for Windows File Recovery and click Download. Click the installer and install it on your computer.
Step 2. Press "Windows + S", type "cmd", and right-click "Command Prompt". Choose "Run as administrator" to ensure you have the required permissions.

Step 3. Identify the source (the drive where the deleted large file was located) and destination drive (a different drive to save recovered files).
Example: Your deleted file was on drive C:, and you want to recover it to D:.
Step 4. Choose the recovery mode. Windows File Recovery has two common modes:
- Regular mode: For NTFS drives, recover ecently deleted files.
- Extensive mode: For NTFS, exFAT and FAT32 drives, recover files deleted a while ago, and recover data from formatted drive or corrupted disk.
Step 5. Enter the proper recovery command: winfr C: D: /regular /n *.zip
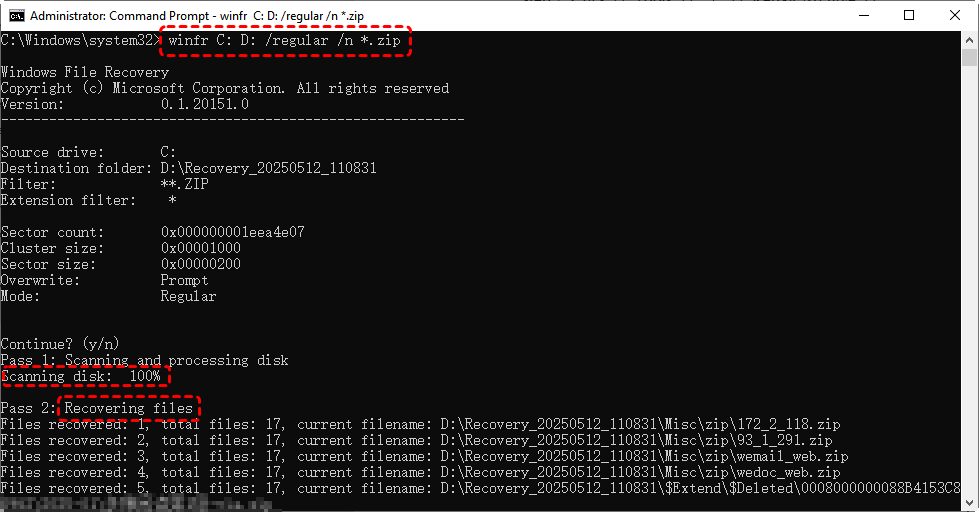
Replace C: with your source drive and D: with your destination drive. This example is to recover all deleted zips files in C: drive to D: drive:
Step 6. Press "Enter" to execute the command and start the recovery process.
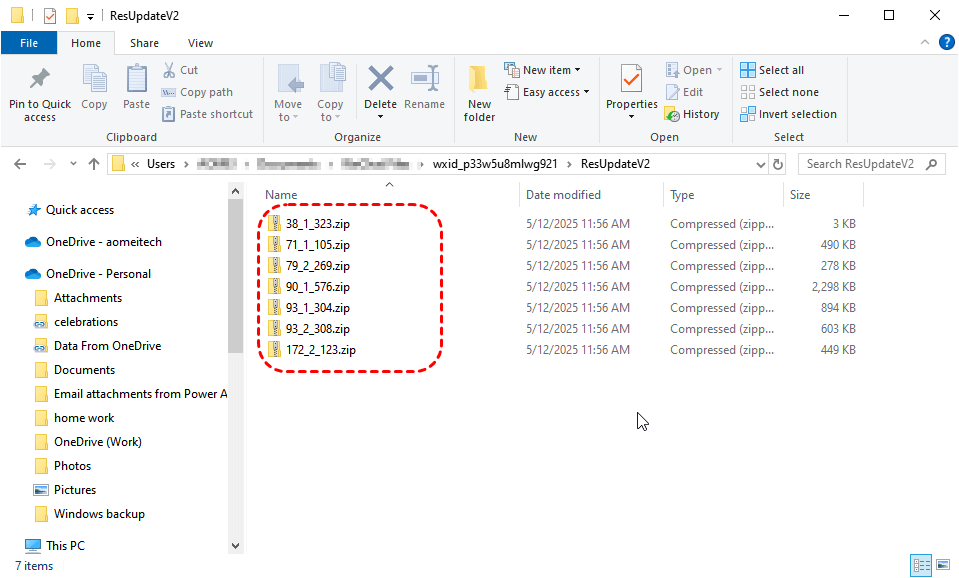
Wait while Windows File Recovery scans the drive. Recovery time depends on file size and drive capacity. Once complete, the recovered files will be saved to the destination drive you specified. You can directly hit on "Y" to open the destination drive and check your recovered files.
MyRecover (Not Require Prior Backup)
If using Windows File Recovery feels too technical, or you prefer a graphical interface, you can try MyRecover. Unlike WinFR, MyRecover is user-friendly, works without any prior backup, and supports recovering data too bing for Recycle Bin.
With MyRecover, you can scan the drive, preview recoverable files, and restore them to a safe location—all with just a few clicks. This makes it ideal for beginners or anyone who wants a simpler and more intuitive recovery experience.
- Deleted File Recovery: Restore data deleted normally, with Shift+Del, or after emptying the Recycle Bin.
- Formatted Disk Recovery: Retrieve files from formatted drivesbefore data is overwritten.
- Partition Recovery: Recover data from lost, deleted, or corrupted partitions.
- System Crash Recovery: Rescue files after system crash, system freeze, or BSOD.
- Virus Attack Recovery: Restore data from drives affected by malware or viruses.
Step 1. Download and install MyRecover. After installation, launch the program on your Windows computer.
Best Windows Data Recovery Software for personal use.
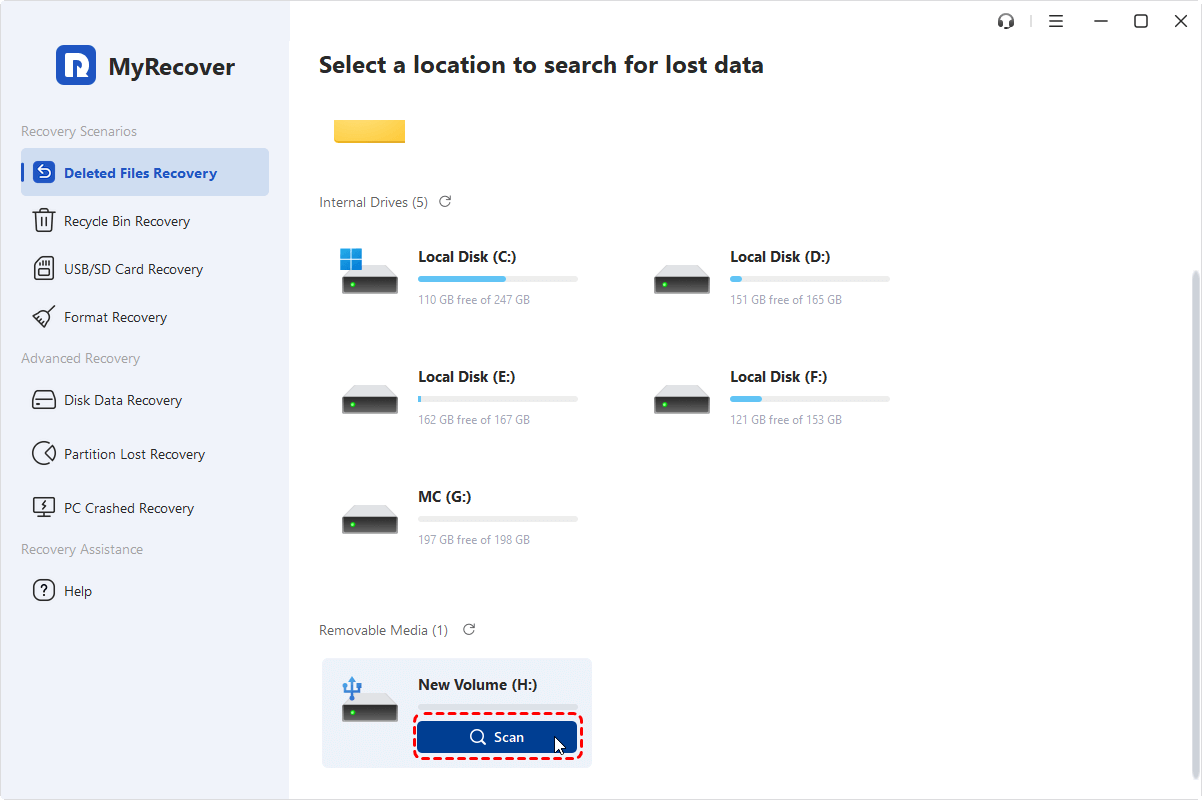
Step 2. On the main interface, select the drive where you delete large files, then click "Scan".
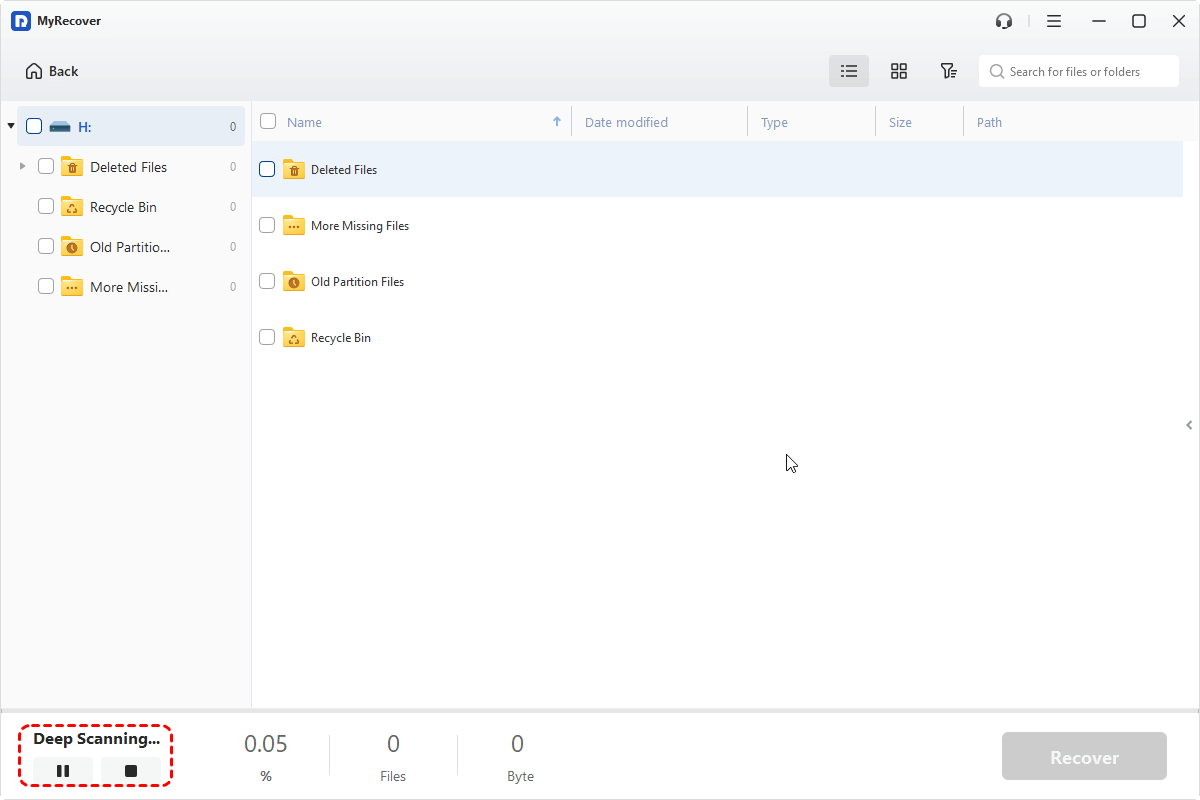
Step 3. In general, MyRecover will perform a "Quick Scan"to locate recently deleted files, orautomatically initiatea "Deep Scan"to find more lost data. You can browse or filter files by type, size, or keywords while scanning.

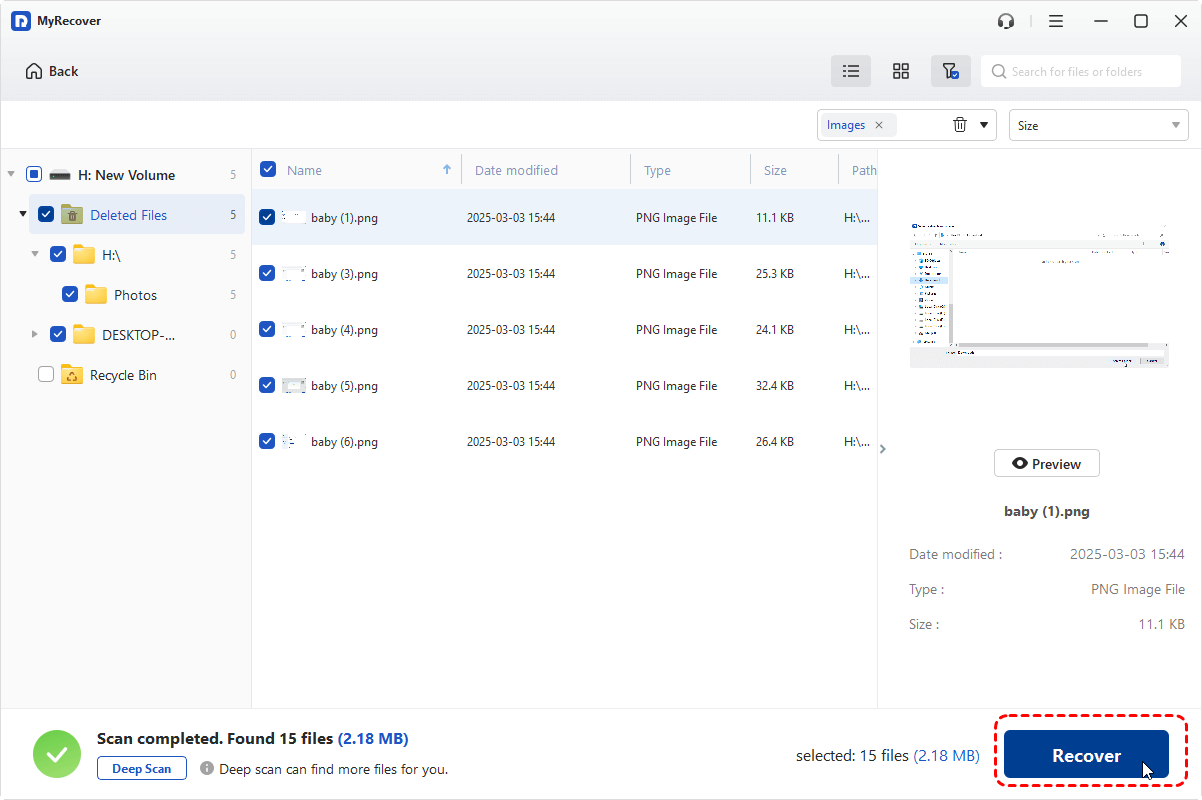
Step 4. Once the scan is complete, preview the recoverable files such as photos, documents, or videos to confirm they are intact.
Step 5. Select the files you want to restore, click the "Recover" button, and choose a safe location on another drive to save them, ensuring they are not overwritten.

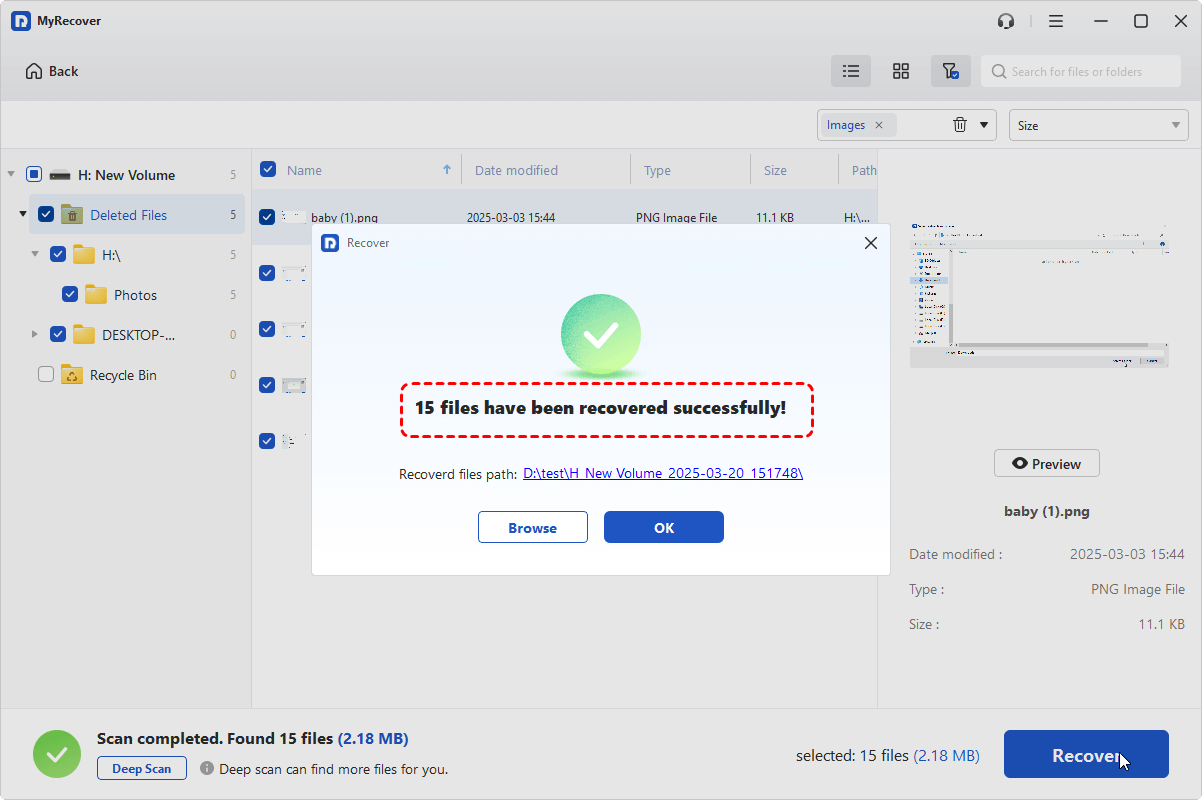
Once the recovery process finishes, the softwarewill display a summary notification indicating the total number of files successfully restored, and the specific directory you have chosen to save recovered files.
Conclusion
So, to recover files too large for Recycle Bin, you have more than 1 choice. Depending on whether you have a prior backup or not, choose one you prefer. If you already enabled Windows File History or Backup and Restore, restoring from backup is the fastest way. If no backup is available, you can try Windows File Recovery or use a more user-friendly tool like MyRecover to safely bring your data back.
FAQs
A: Is It Possible To Recover Files After Emptying The Recycle Bin?
Q: Yes, you can recover them with data recovery tools like MyRecover or Windows File Recovery, as long as the files are not overwritten.
A: How To Restore Deleted Huge Files?
Q: Use backup tools like File History or recovery software such as MyRecover to scan and restore large deleted files. Make sure not to save new data on the drive to avoid overwriting the deleted files.
A: What Happens When The Recycle Bin Exceeds Its Capacity?
Q: When the Recycle Bin exceeds its capacity, Windows automatically deletes the oldest files in the Bin to make room for new ones. Files larger than the Recycle Bin’s limit bypass it entirely and are permanently deleted.
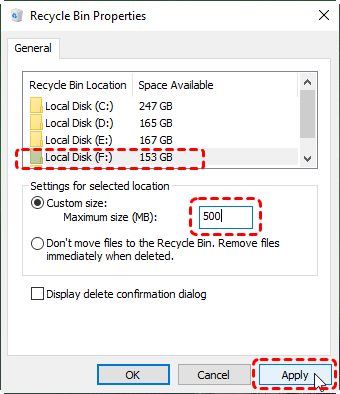
A: How to Increase Recycle Bin Size?
Q: To prevent large files from being permanently deleted without going to Recycle Bin, you can increase the Recycle Bin size by right-clicking it, choosing "Properties", selecting the drive, setting a larger "Custom size", and clicking "Apply"and then "OK".


Stay Updated With Our
Latest Tips
Add us as a preferred source on Google to never miss helpful guides.