
3 Free Methods: GPT Protective Partition Recover Data in Windows
Is your drive showing as a "GPT Protective Partition" with no access to data? Don’t panic! This guide covers 3 free tools to recover lost data from a GPT protective partition. Besides, methods of removing GPT protection safely are also included.
By Emma / Updated on May 19, 2026
User Query: GPT Protective Partition Error
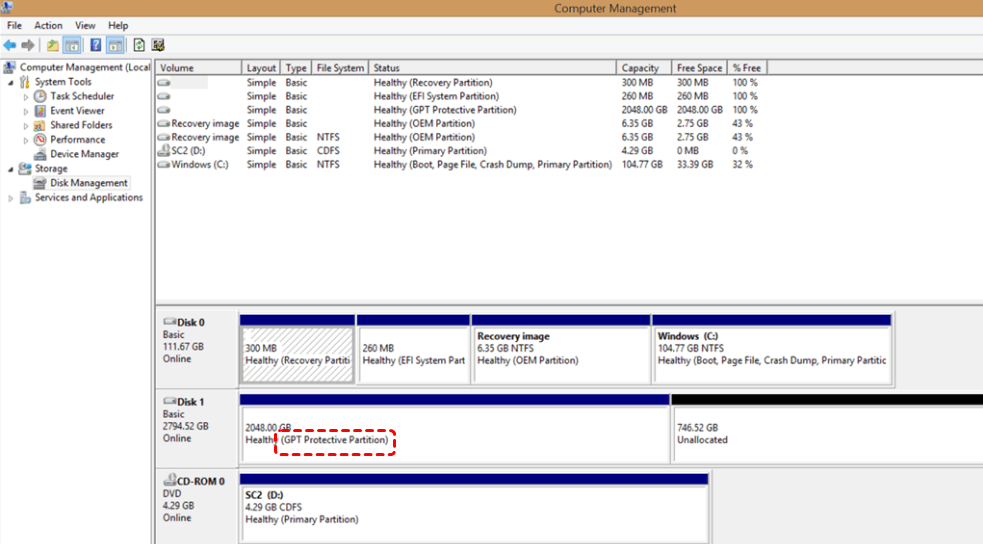
"Today I noticed I tried to open one of my applications (installed on said SSD) and it just wouldn't open, so I decided to restart my computer and now my (e:) drive isn't even showing up in file explore, upon investigating I noticed my drive now says "GPT protective partition" with a size up to 2tb (the drive is only 1tb). I'm completely lost on how this could happen and the only solution I'm finding is to format the drive. Can I fix this problem without formatting? How does this happen to begin with? Is there any free recovery software that allows you to recover files?"
What is the GPT Protective Partition?
A GPT Protective Partition is a type of partition structure found on GUID Partition Table (GPT) disks in Windows. It is not a real usable partition you normally work with. It is a special marker used on disks that follow the GUID Partition Table (GPT) standard.
Its main purpose is compatibility protection. When a disk uses GPT, it places a "protective MBR" at the beginning of the drive. This creates a single entry that marks the entire disk as used, even if Windows (or another system) cannot fully understand the GPT structure. This can help:
- Prevent older systems (that only understand MBR) from mistakenly thinking the disk is empty
- Avoid accidental overwriting of GPT data
- Protect the disk’s partition structure
When you right-click on the "GPT Protective Partition," all options except for "Help" are disabled or greyed out, so you are not allowed to format or delete it as usual.
Briefly, the GPT Protective Partition serves as a safeguard for GPT disks, preventing accidental modification by legacy systems that only support Master Boot Record (MBR) partitioning.
What is the Cause of GPT Protective Partition?
So, what could be triggering this particular error? Generally speaking, this usually happens when:
1. Failed MBR-to-GPT Conversion: Incomplete conversion leaves residual metadata, confusing Windows.
2. Corrupted Partition Table: Power failures, crashes, or malware can damage critical GPT structures.
3. Improper Disk Cloning: Sector-by-sector copies may preserve incorrect GPT headers or mismatched sizes.
4.Buggy Partition Tools: Third-party software or Disk Management may misapply changes during resizing/conversion.
5. File System Damage: Bad sectors or unsafe removal can corrupt data, triggering protection mode.
6. UEFI/BIOS Mismatch: Booting a GPT disk in Legacy BIOS mode without CSM support often causes issues.
7. Faulty Drivers/Controllers: Outdated RAID/USB adapter drivers may misread the disk's partition scheme.
In some cases, the GPT protective partition is intentional (e.g., when using dynamic disks or RAID configurations), but if it appears unexpectedly, it can block access to your data.
3 Free Tools: Recover Data from a GPT Protective Partition
To reuse the GPT protective partition or disk, you typically need to force clean the disk using DiskPart command and reinitialize it with either GPT or MBR format. However, cleaning or initializing the disk will permanently erase all partition and data, so data recovery should be completed before proceeding.
How to recover data from GPT protective partition? There are 3 different free options you have, and check them one by one to choose what best suit your requirements.
Option 1.TestDisk
TestDisk is a powerful free and open-source tool designed to recover lost partitions and repair damaged partition tables, including GPT disks. It is able to recover lost or deleted partitions and repair corrupted GPT/MBR partition tables.
👉Steps to Use TestDisk to Recover Data from a GPT Protective Partition
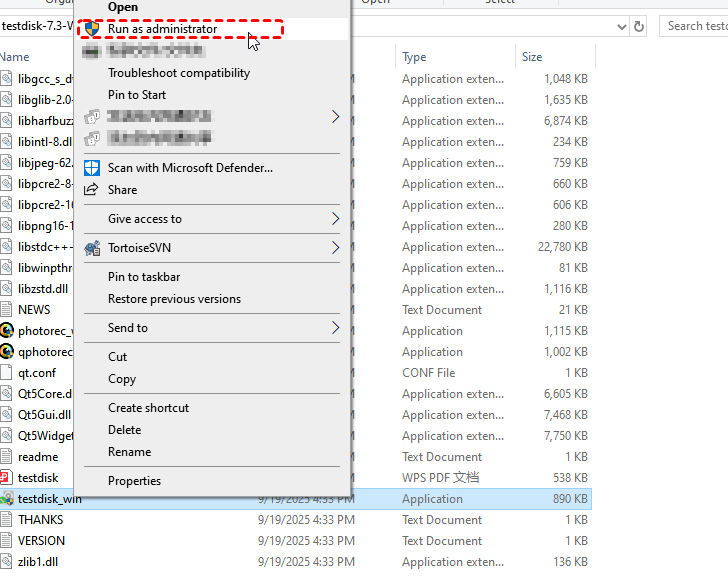
Step 1. Download and launch TestDisk as administrator (it will be a zip folder, extract it, right-click the testdisk and choose "Run as administrator").
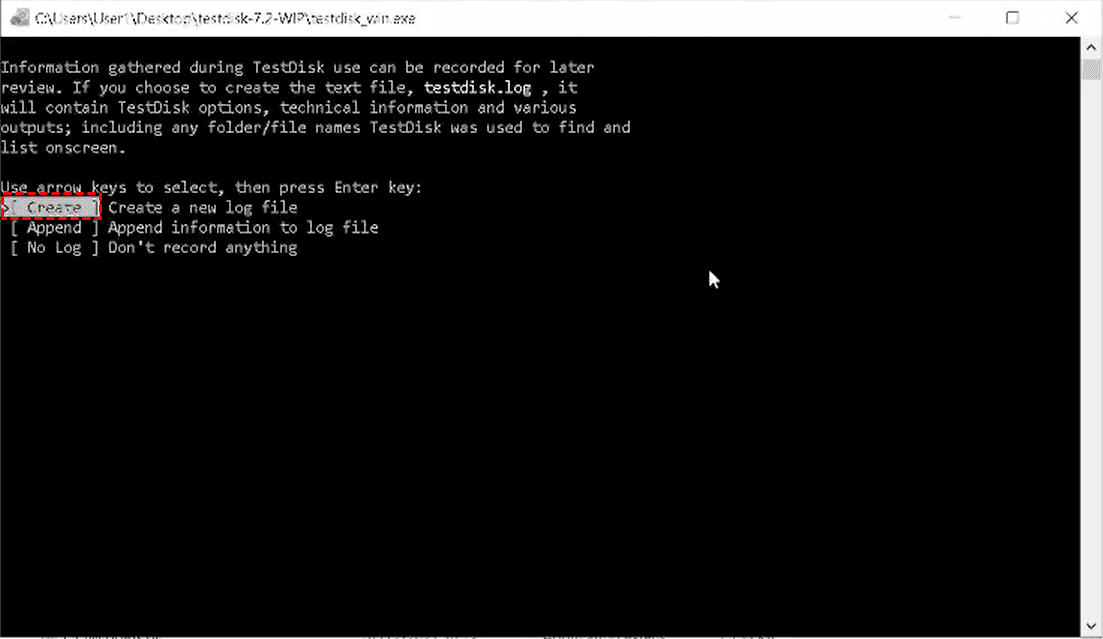
Step 2. Select “Create” to generate a new log file.
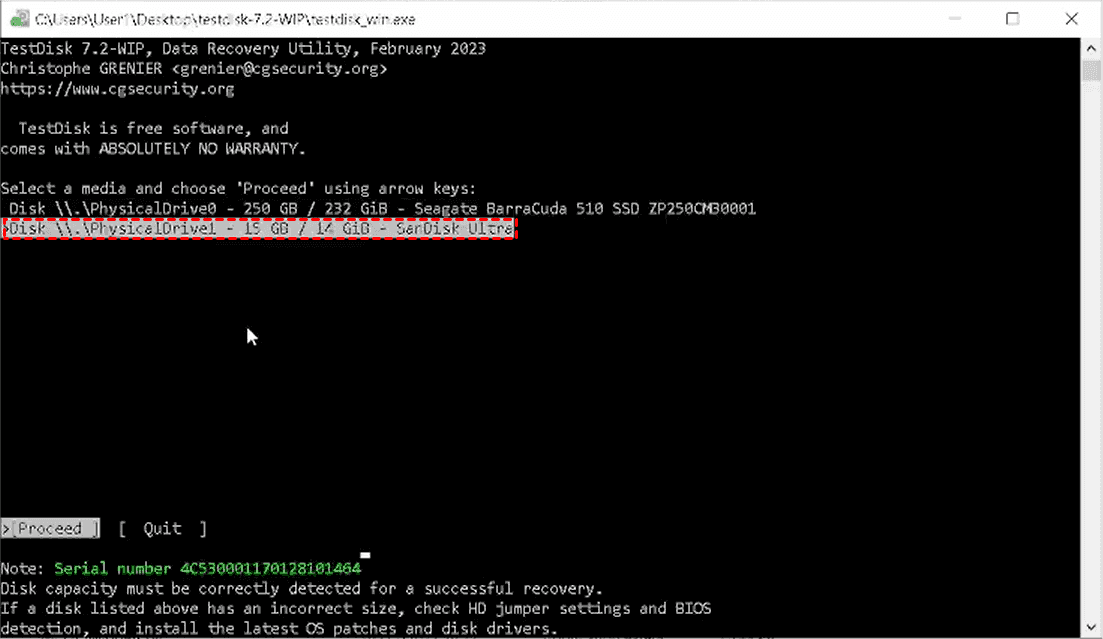
Step 3. Choose the affected disk (the one showing as GPT Protective Partition).
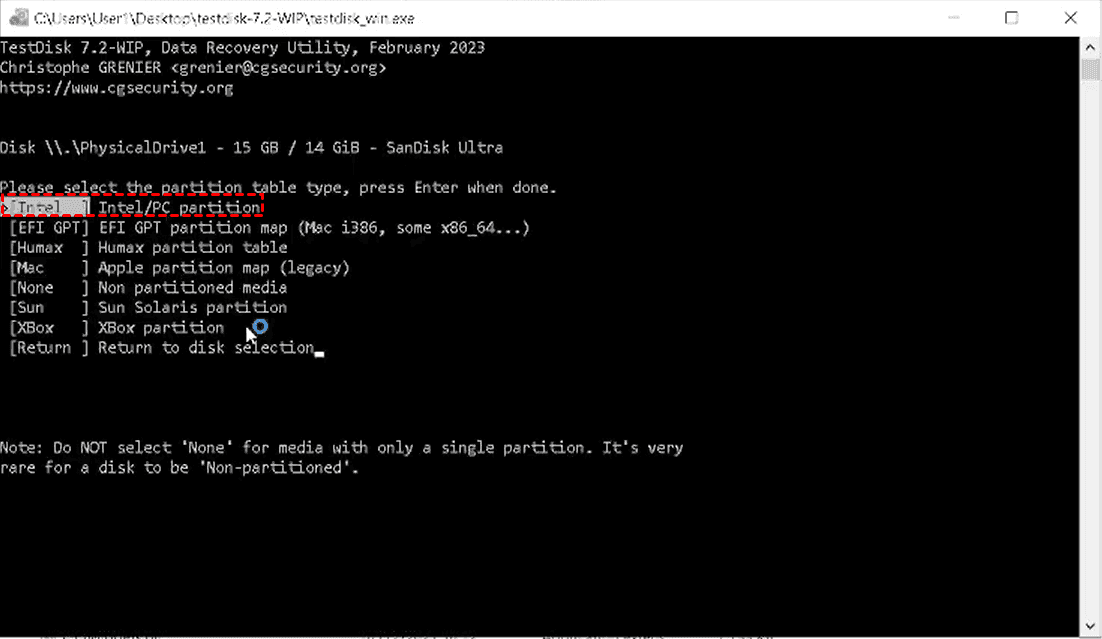
Step 4. Select "EFI GPT" as the partition table type.
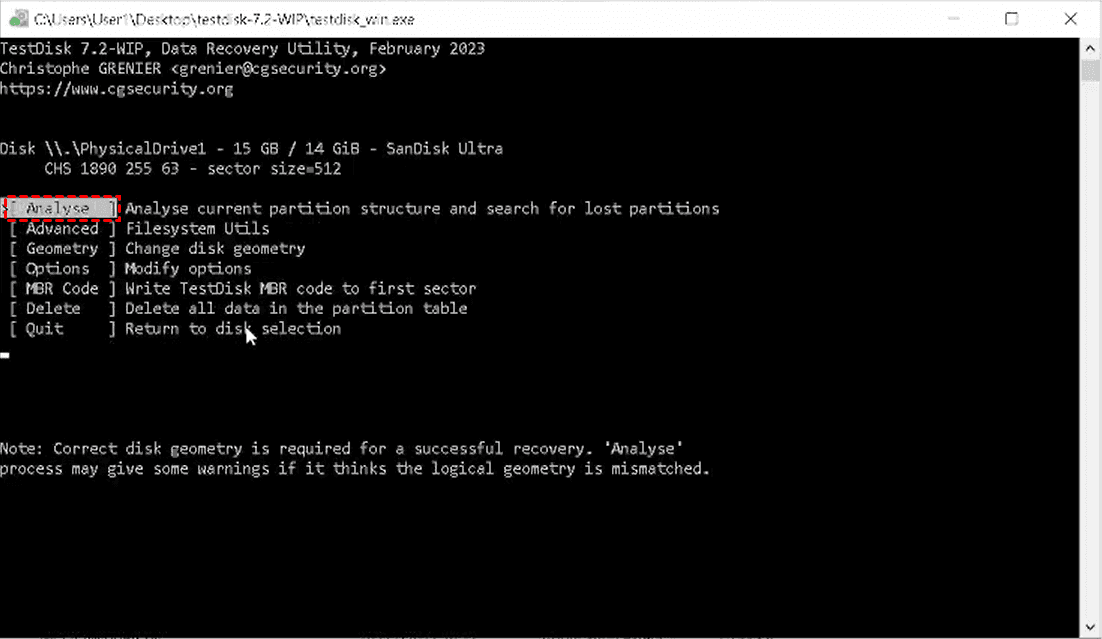
Step 5. Click "Analyze" to scan for lost partitions.
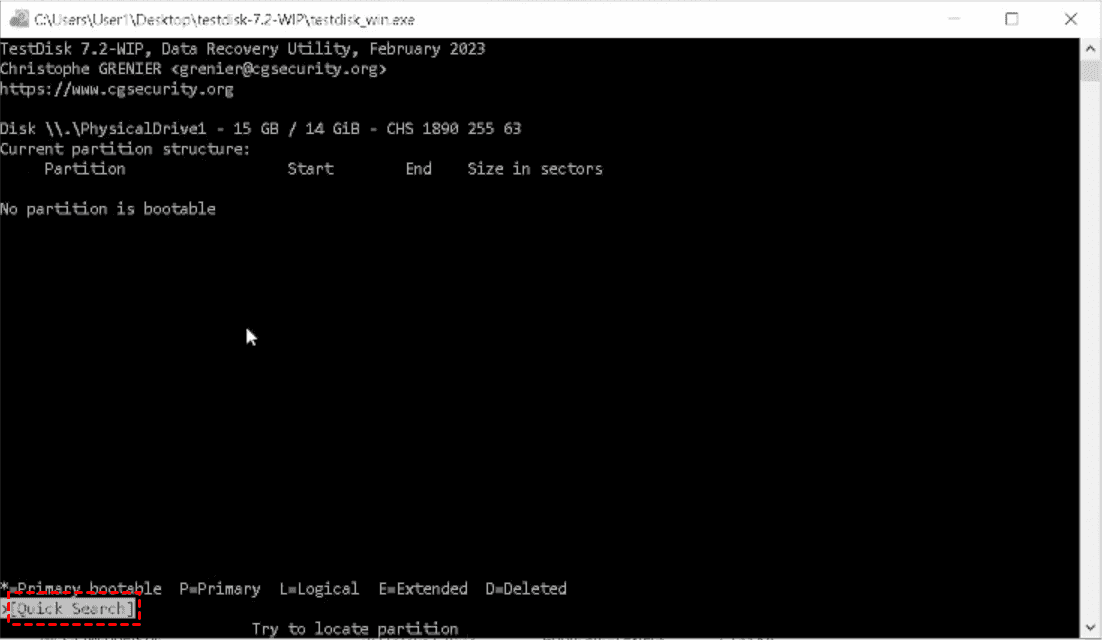
Step 6. Choose "Quick Search" (and "Deeper Search" if needed).
Step 7. Once partitions are found, preview files to confirm integrity.
Step 8. Select the correct partition and choose "Write" to restore it.
| Pros |
|
| Cons |
|
Option 2.Windows File Recovery Command
If you prefer an official Microsoft tool with a simpler recovery workflow, you can use Windows File Recovery. This is a command-line utility developed by Microsoft that helps recover deleted files from local drives, including NTFS, FAT, and exFAT-formatted disks.
Compared to TestDisk, it does not rebuild partition tables, but it is very effective when your goal is to recover files from a damaged or inaccessible drive.
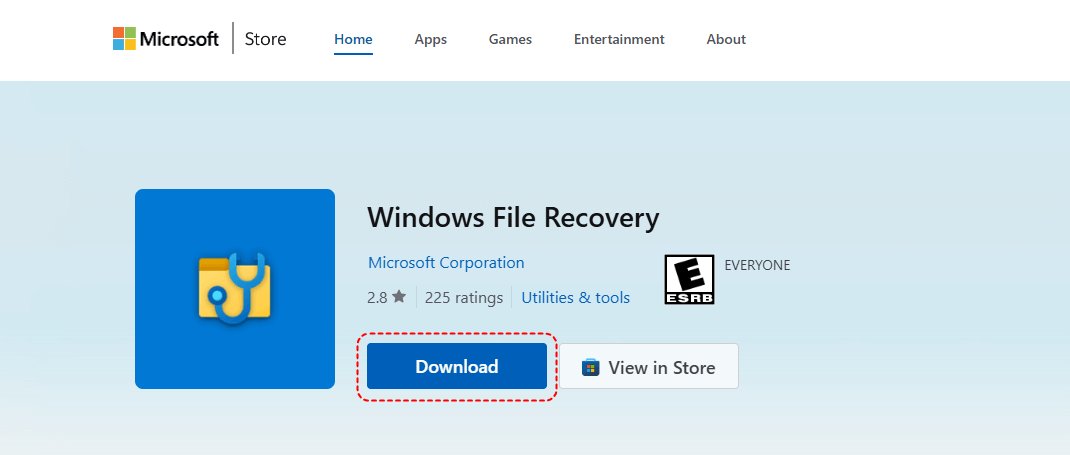
Step 1. Open Microsoft Store, search for Windows File Recovery, download and install it as instructed.
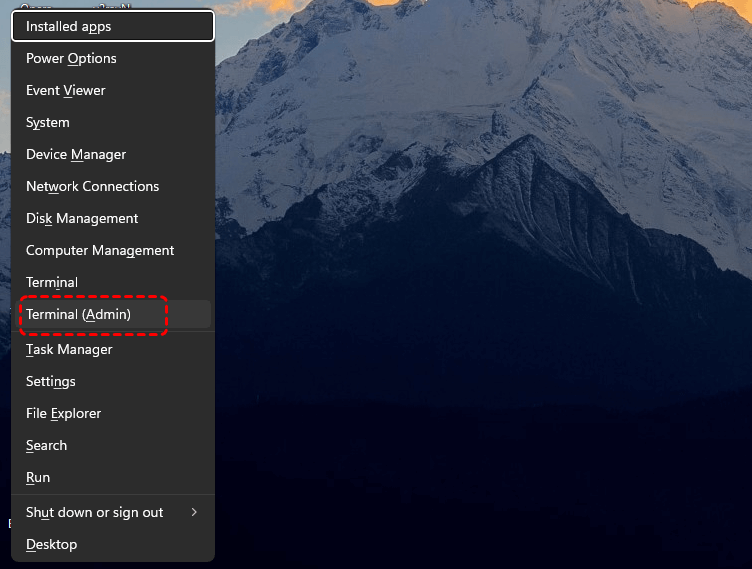
Step 2. Press Win + X → select Windows Terminal (Admin) or Command Prompt (Admin).
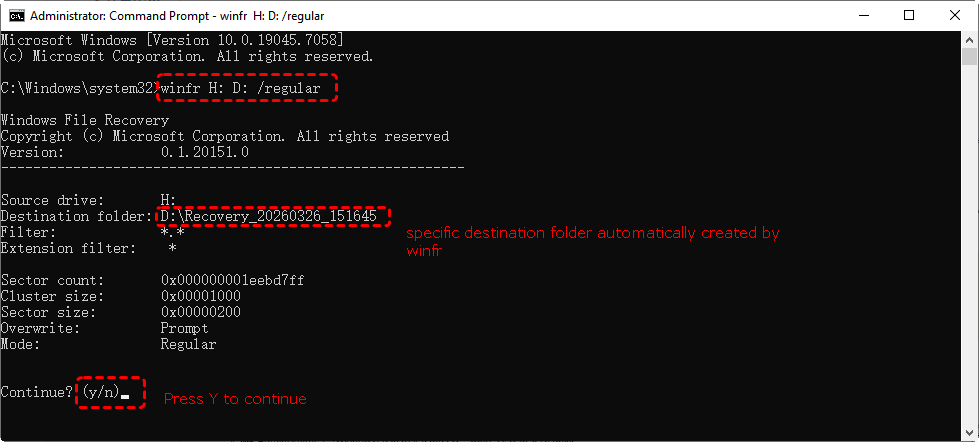
Step 3. Run the proper command: winfr source-drive: destination-drive: /mode /switches
For example: winfr H: D: /regular
If the /regular mode failed to recover files from the GPT protective partition, try /extensive mode, which is for formatted, corrupted, or partition-damaged drives: winfr H: D: /extensive
Replace:
- H: = affected drive
- D: = recovery destination drive (must be different)
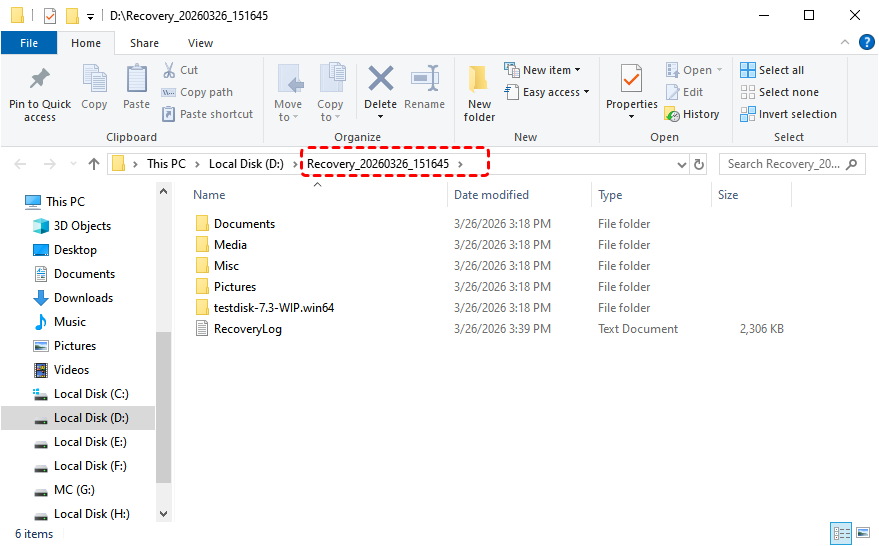
After completion, Windows File Recovery will create a recovery folder on the destination drive.
| Pros |
|
| Cons |
|
Option 3.MyRecover
If you prefer a more user-friendly graphical interface (GUI) instead of command-line tools like Windows File Recovery, you can use MyRecover. It is a professional data recovery tool designed for Windows users to recover lost files from formatted, deleted, corrupted, or inaccessible partitions—including cases where a disk previously showed as a GPT Protective Partition.
Compared to TestDisk and Windows File Recovery, MyRecover focuses on simplicity + visual recovery workflow, making it more suitable for beginners.

- ✅ User-Friendly Interface – No technical skills needed; just follow simple steps.
- ✅ Wide Format Support – Retrieves documents, photos, videos, archives, and 1000+ file types.
- ✅ Broad Device Compatibility – Works with HDDs, SSDs, USB drives, SD cards, and other storage media.
- ✅ Multi-OS Support – Compatible with Windows 11/10/8.1/7 and Server 2025/2022/2019/2016/2012.
- ✅ Deep Scan Technology – Recovers files even from corrupted or inaccessible GPT partitions.
Step 1. Download & Install MyRecover on your Windows computer.
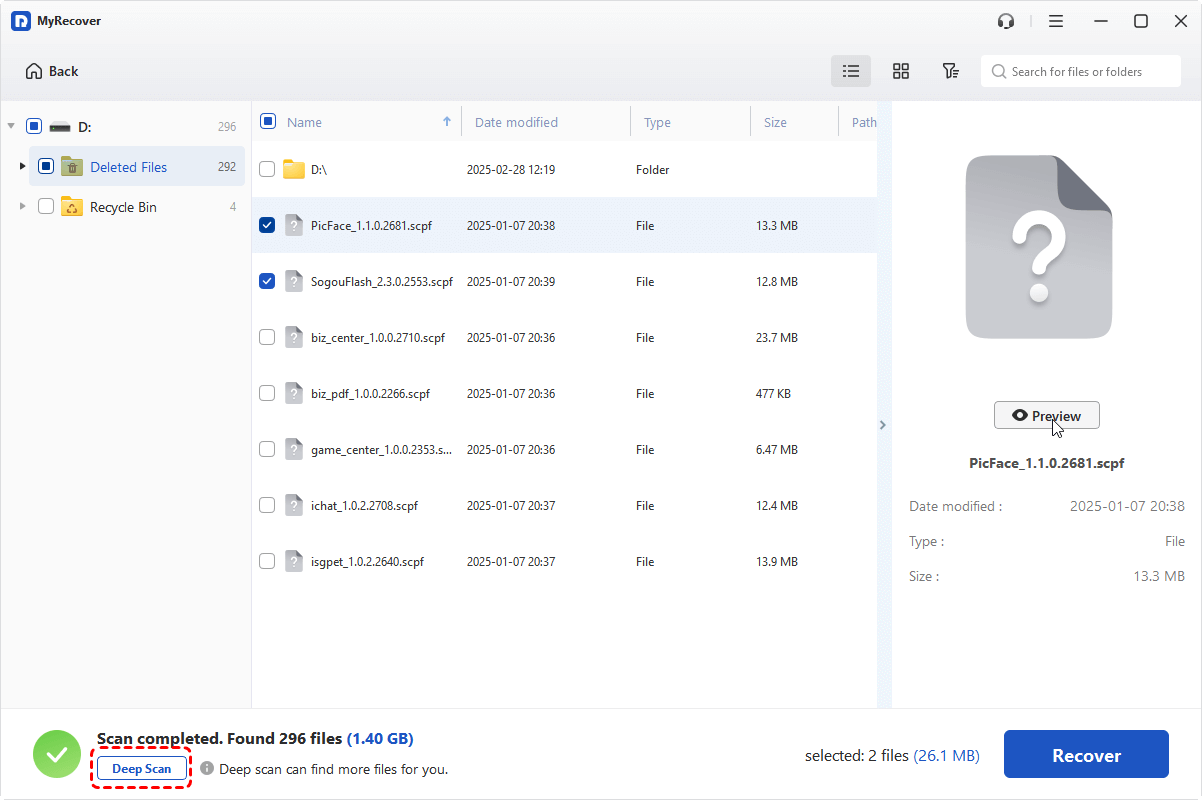
Step 2. Select your GPT-protected drive and start scanning.

Step 3. When all recoverable files list, you can click the target one, preview & recover files to a secure location.

Step 4. Choose another different drive to store the recovered files.

If the default “Quick Scan” does not find your lost files, you can turn to the “Deep Scan”.
No matter you lose important data due to accidental deletion, emptied Recycle Bins, formatting, virus attacks, corrupted partitions, RAW partitions, and power failures, you can successfully retrieve them via the above steps.
| Pros |
|
| Cons |
|
How to Clear GPT Protective Partition?
Once you've successfully recovered your data from the GPT protective partition using the above methods, you can proceed to remove the GPT protective mark using one of these reliable methods:
Method 1. Clean and Initialize It
As mentioned above, you can clean and re-initialize the disk to remove the GPT protective partition. However, the Disk Management disables all options and you are not allowed to initialize it using the tool. Don’t panic, and you can turn to the DiskPart command.
Step 1. Click the Search icon, input Command Prompt. Select and run it as Administrator.

Step 2. In the Command Prompt, input “diskpart”and press on Enter.
Step 3. Type “list disk” and hit on Enter: This shows all connected disks (identify your target disk by size).
Step 4. Type “select disk x” and press on Enter: Replace X with your disk number
Step 5. Type “clean” and press on Enter: This erases all data on the disk.
Step 6. Type “convert gpt” and press on Enter: Convert the disk to GPT or MBR.
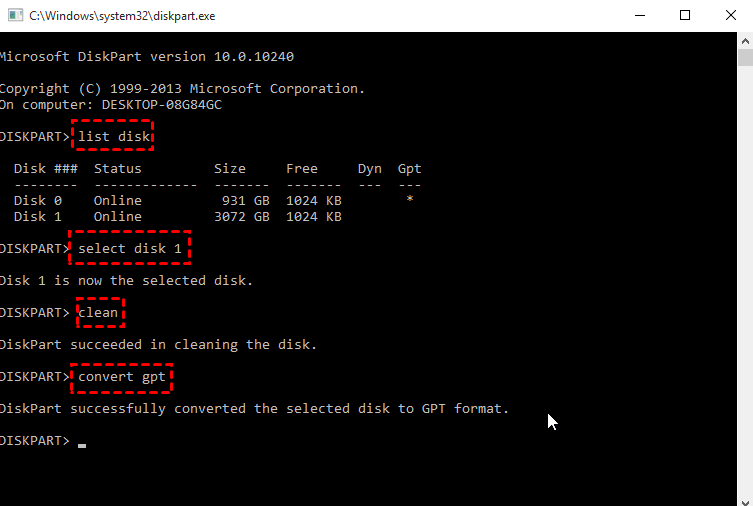
At last, execute “exit” command to close the command prompt. Then the disk partition will become normal and accessible again on your system.
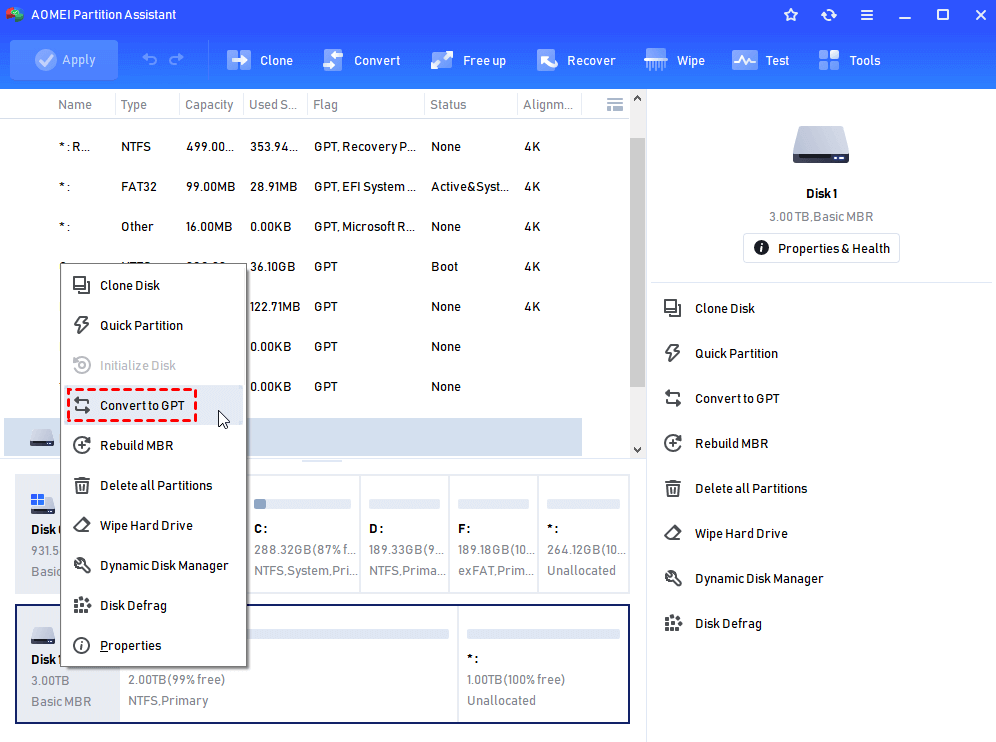
Method 2. Convert GPT to MBR
Although you cannot do anything in Windows built-in Disk Management when encountering the GPT protective partition, some third-party partition manager can help like AOMEI Partition Assistant.This free toolcan convert disk to GPT or MBR without deleting partitions on the target disk. Only 3 steps can convert the GPT disk to MBR.
Summary
When you encounter a GPT protective partition that prevents access to your important data, the solutions provided here can help you effectively recover your files from the protected drive while also offering reliable methods to remove the GPT protective attribute.
Whether the issue stems from partition corruption, failed conversions, or system incompatibilities, these approaches provide a comprehensive way to resolve GPT protection problems while emphasizing the importance of data safety before making any modifications to the disk structure.
Quick Answers
Q: What is GPT partition recovery in BIOS?
A: GPT partition recovery in BIOS refers to the process of restoring access to a disk using GPT (GUID Partition Table) when the system fails to recognize it correctly. In most cases, BIOS itself does not actually perform recovery. Instead, the issue appears when Windows or the system firmware cannot properly read the partition structure, and the disk may show as “GPT Protective Partition,” “Unknown,” or “Unallocated.”
Recovery usually happens through software tools that rebuild the partition table, repair corrupted GPT metadata, or restore lost partitions so that the operating system can access the data again.
Q: Is GPT more reliable than MBR?
A: GPT is generally considered more reliable and modern than MBR. It offers stronger data protection because it stores multiple copies of partitioning information and uses checksum verification to detect corruption. GPT also supports larger disk sizes beyond 2TB and allows many more partitions than MBR, which is limited to four primary partitions.
In comparison, MBR is an older standard with fewer safety mechanisms and more structural limitations, which is why GPT is now the default for most UEFI-based systems.
Q: How do I convert a GPT partition to normal?
A: Converting a GPT partition to what is often referred to as "normal" usually means converting it to MBR. This process can be done using Windows built-in tools such as Disk Management or DiskPart, or with third-party partition software.
However, this conversion typically requires deleting existing partitions, which leads to data loss unless a specialized non-destructive tool is used. In DiskPart, for example, the process involves selecting the disk, cleaning it, and then converting it to MBR, which effectively resets the drive structure before it can be reused.
Q: How to convert GPT protective partition to NTFS?
A: A GPT protective partition cannot be directly converted to NTFS because it is not a real file system. Instead, it is a protective state that appears when Windows cannot interpret the GPT structure correctly. To make the drive usable again, the correct approach is to first attempt partition recovery using recovery tools to restore the original structure.
If recovery is not possible, the disk must be reinitialized by deleting the existing structure, creating a new partition, and then formatting it as NTFS. This process will usually erase existing data unless recovery is performed beforehand.
Q: Is it safe to delete GPT reserved partition?
A: Whether it is safe to delete a GPT reserved partition depends on what type of partition it is. System-related partitions such as the EFI System Partition or Microsoft Reserved Partition are essential for booting and system stability, so deleting them can make the operating system unbootable.
Recovery partitions are used for system restoration and should also generally be kept unless there is a specific reason to remove them. Only unknown or corrupted entries that appear during disk errors might be safely removed, and even then it should be done cautiously after confirming that no important system data is stored there.


Stay Updated With Our
Latest Tips
Add us as a preferred source on Google to never miss helpful guides.