
How to Set Up & Configure File History in Windows 10/11 (Step-by-Step Guide)
This guide explains how to enable and configure File History in Windows 10 and Windows 11 for automatic file backups. Steps include how to connect a backup drive, turn on File History, customize backup settings, restore files from backups and troubleshoot common issues.
By Emma / Updated on December 12, 2025
What is File History in Windows?
File History is a built-in backup feature in Windows 10 and 11 that automatically saves versions of your personal files (documents, photos, videos, etc.) to an external drive or network location. It works like a time machine for your files, allowing you to restore previous versions if files are lost, corrupted, or accidentally deleted.
File History is not a full system backup (like System Image Backup or Backup and Restore Windows 7 tool) but focuses on protecting your personal data. To use it, you need an external drive or network storage.
How to Configure File History on Windows 10 or Windows 11?
Whether you're using Windows 10 or the newer Windows 11, this comprehensive guide will walk you through the complete setup process with detailed instructions and common troubleshooting tips.
Step 1. Connect a backup drive (external/USB/network)
File History requires an external storage device (USB drive, external HDD/SSD) or a network location (NAS or shared folder).
1. Connect an external drive to your PC via USB.Ensure it has enough space (at least double your important files).

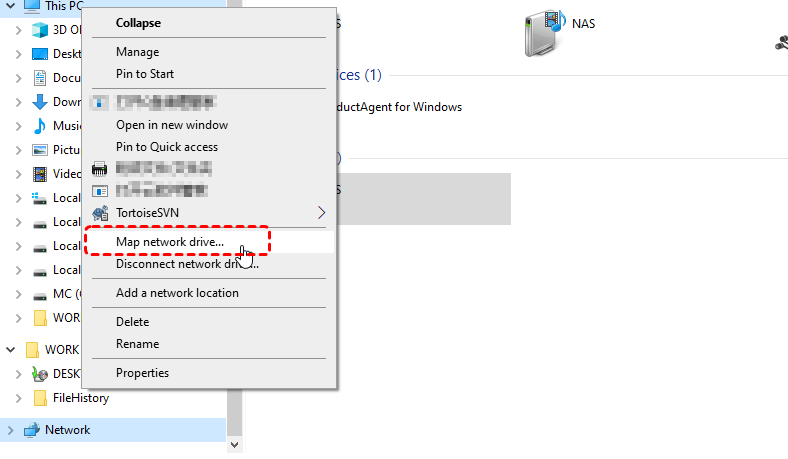
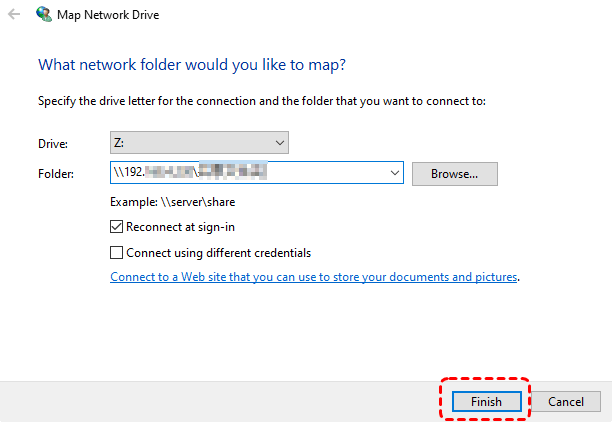
2. For network backups (Windows 10/11 Pro recommended): Open File Explorer ->Right-click This PC->Map network drive.Enter the network path and assign a drive letter.
If Windows doesn’t recognize your external drive, try reformatting it to NTFS or exFAT format. Avoid using FAT32, as it has a 4GB file size limit which could prevent backing up larger personal files like videos.
For network backups, ensure permissions are set correctly (read/write access).
Step 2. Turn on File History
Once the drive is connected, turn on File Historyfeature as following:
For Windows 10 users:
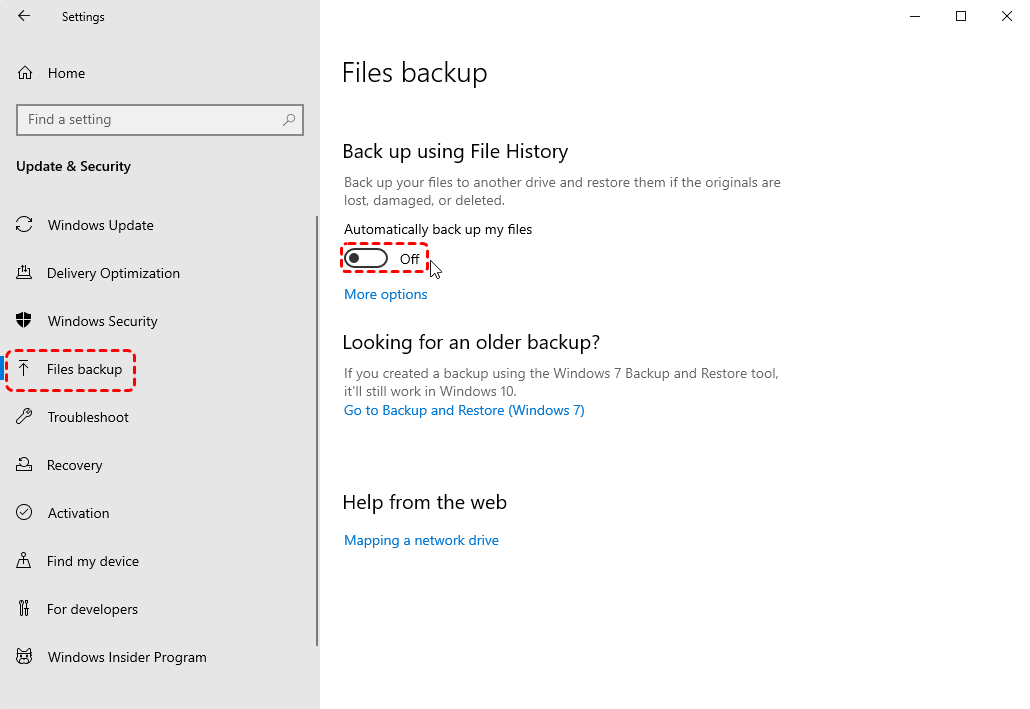
- Go to Settings (Win + I) → Update & Security → Backup.
- Toggle "Automatically back up my files" to ON.
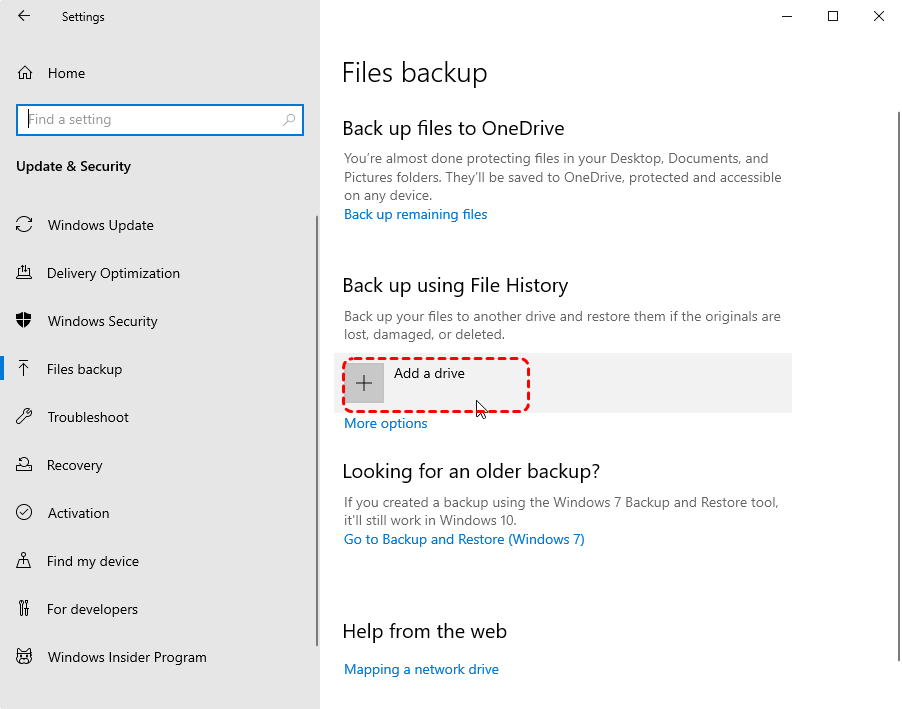
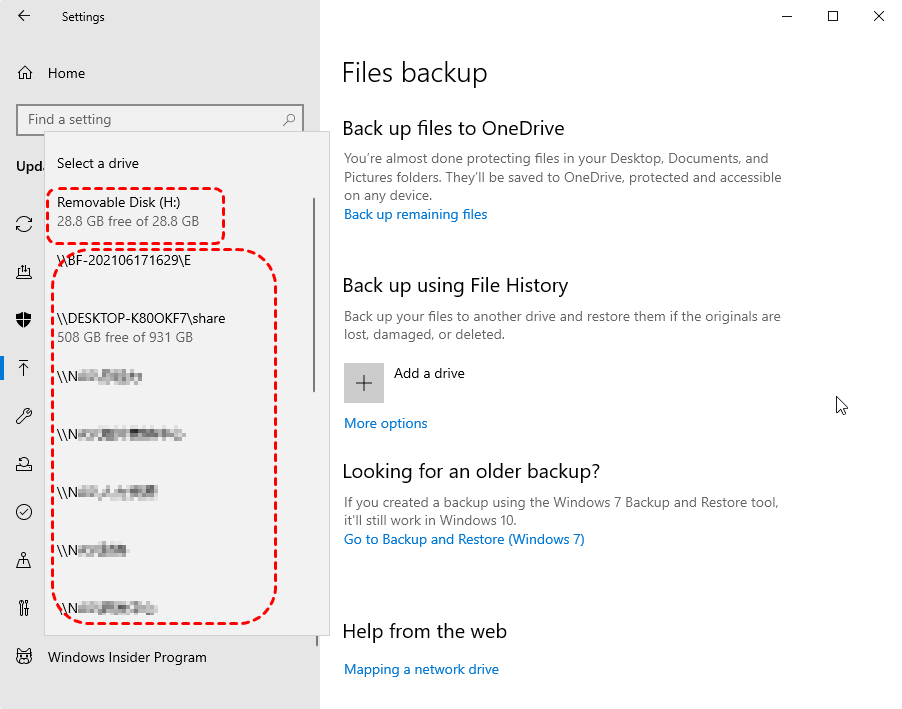
- Under "Back up using File History", click "Add a drive" and select your connected drive.
For Windows 11 users:
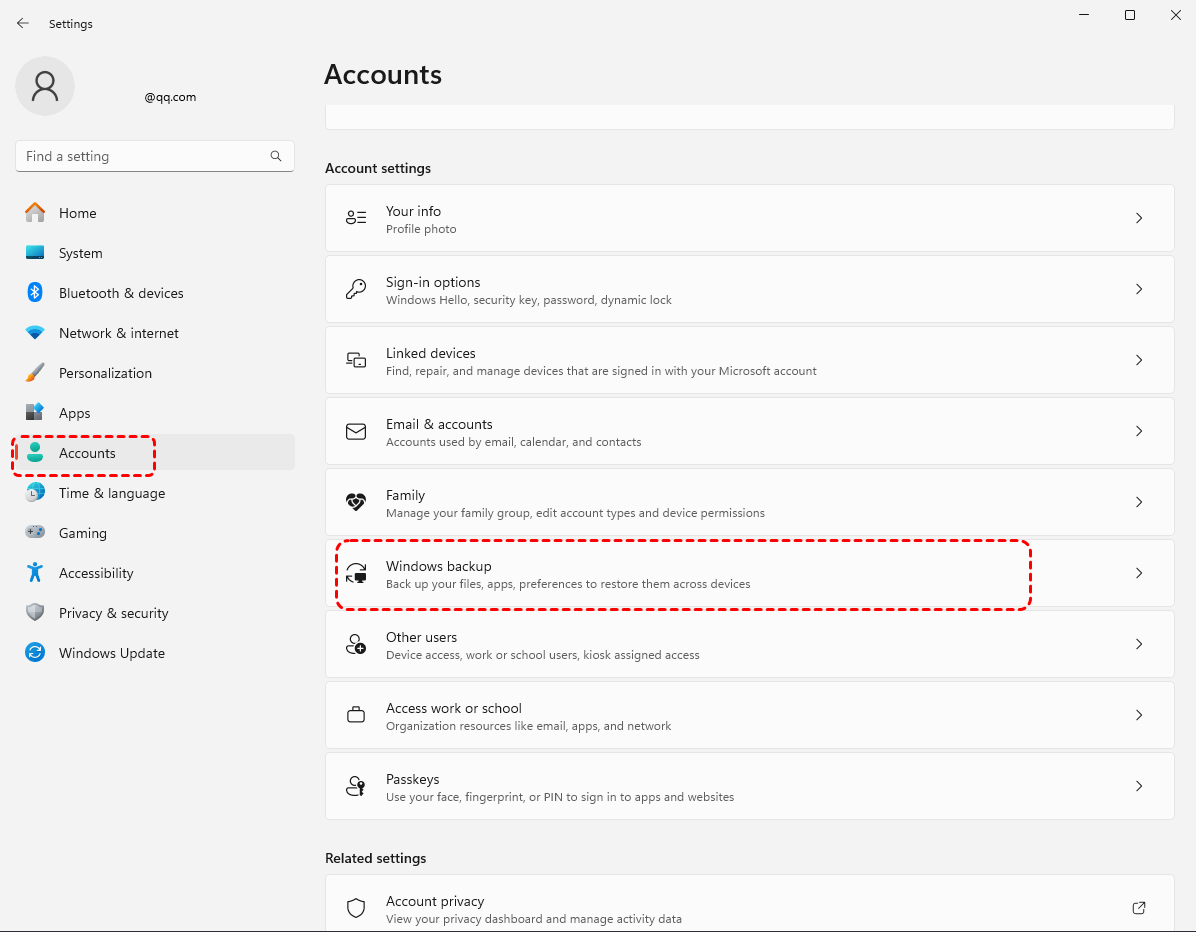
- Open Settings (Win + I) → Accounts → Windows Backup.
- Enable "Automatically back up my files".
- Under "Backup options", click "Add a drive" and choose your backup location.
Work on Both Windows
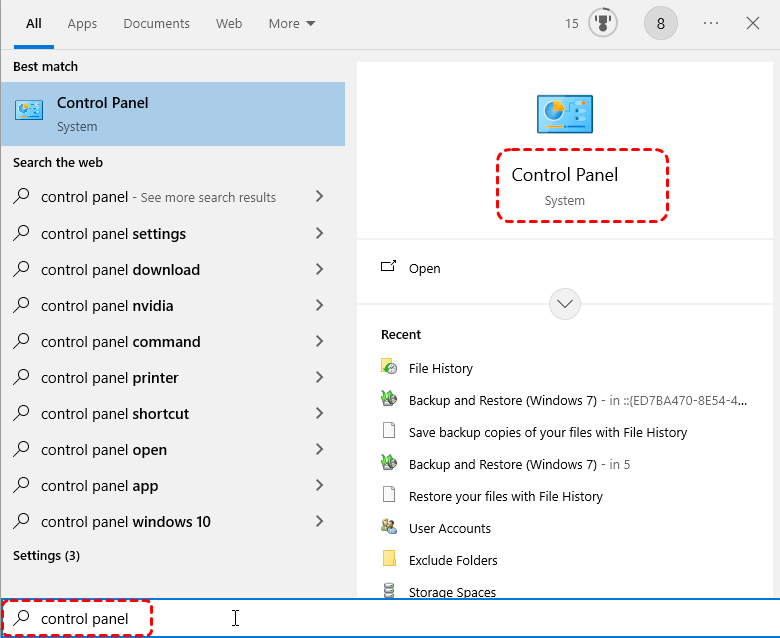
- Open Control Panel by searching "Control Panel"in Windows search box and click the matching result.
- In the Control Panel interface, click "Save backup copies of your files with File History" in the "System and Security"section.

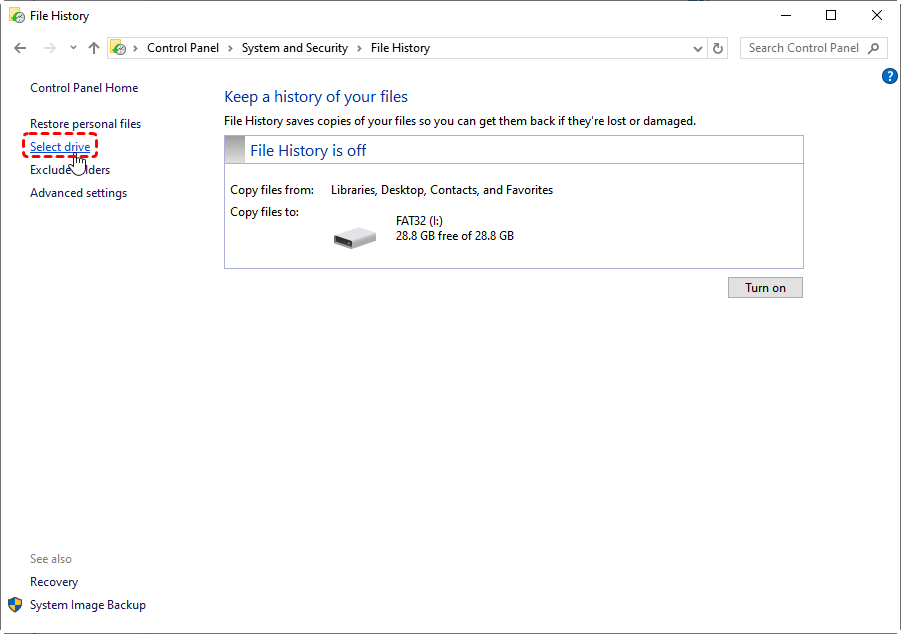
- In the pop out window, click on the "Tun on" button and add a drive through "Select Drive".
If the drive disconnects, File History will pause until reconnected.
Windows may prompt you to recommend a drive if none is selected.
Step 3. Customize backup frequency & retention
By default, File History backs up files hourly and keeps versions indefinitely. However, you can optimize these settings to better suit your storage capacity and data protection needs.
Through Windows Backup Setting:
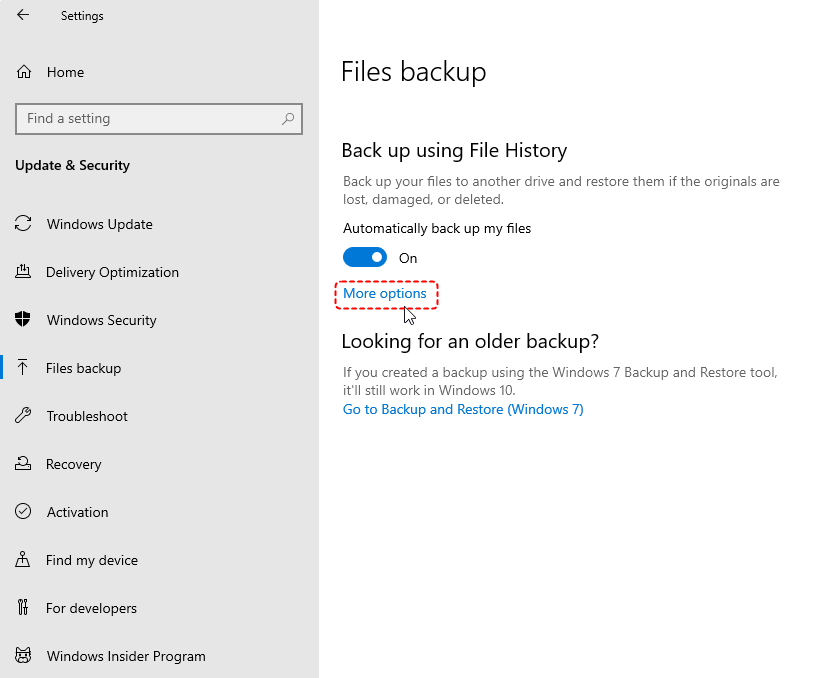
Windows 10: Settings > Update & Security > Files Backup > More options.
Windows 11: Settings > Accounts > Windows Backup > Advanced options
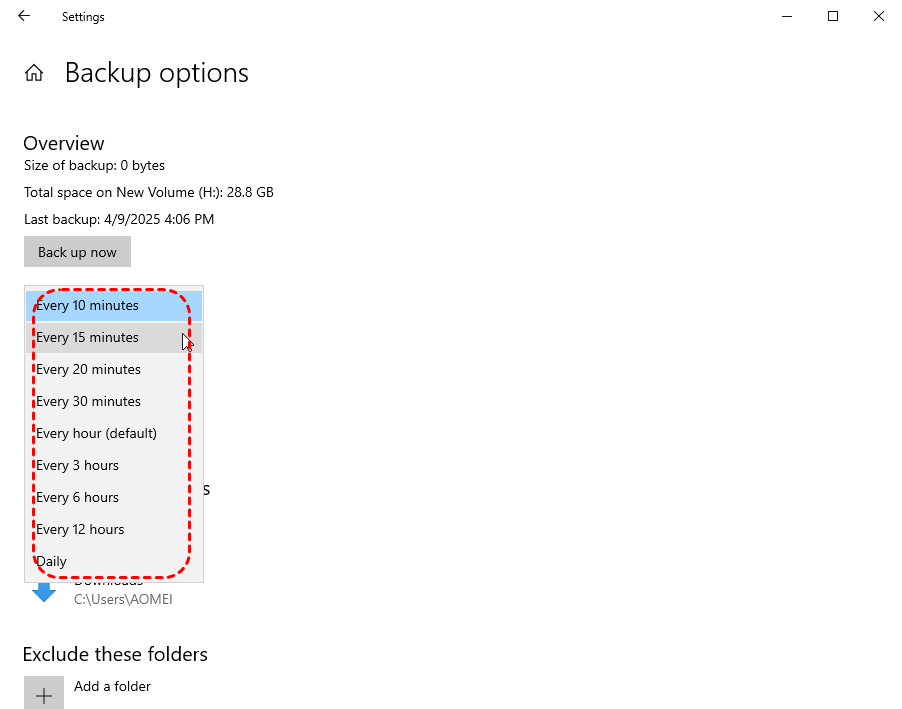
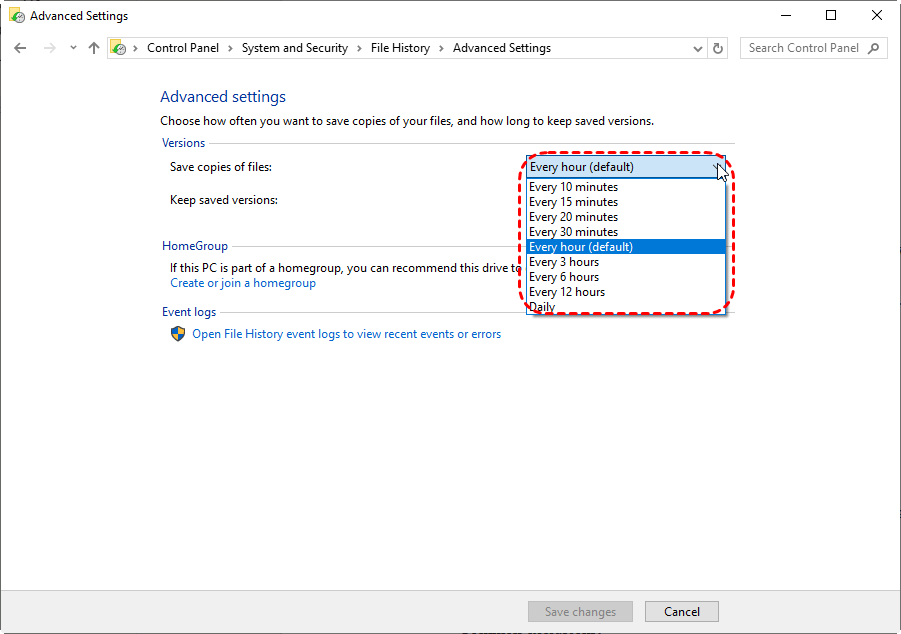
Available Intervals:
- Every 10 minutes (ideal for critical files with frequent changes)
- Every 15minutes
- Every 20 minutes
- Every 30minutes
- Every hour (default recommended setting)
- 3 Hours
- 6 Hours
- 12 Hours
- Daily (suitable for casual users)
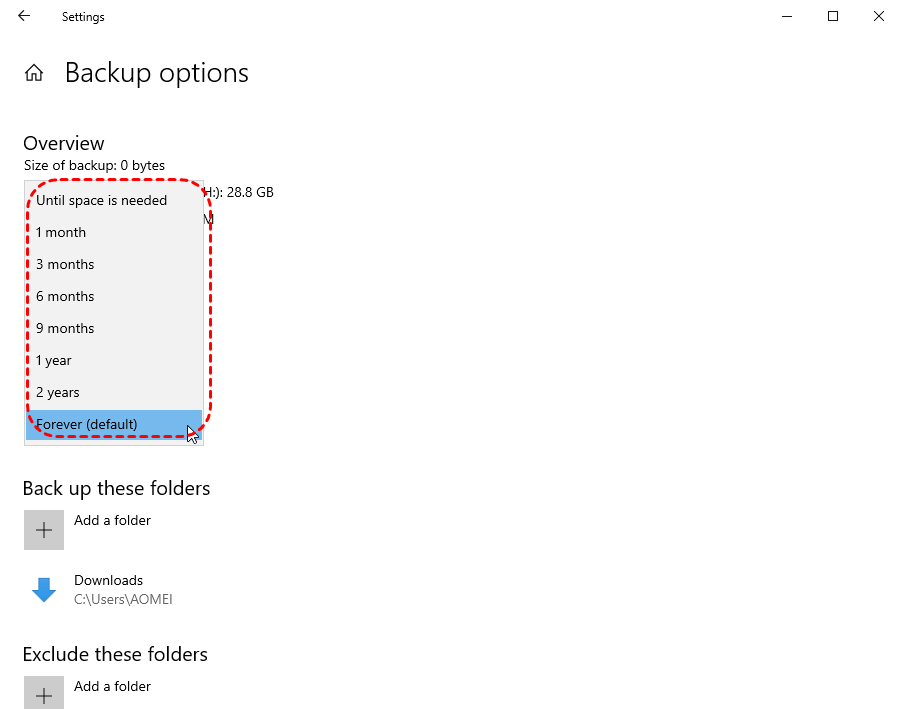
Available Backup Retention Period
- 1 month
- 3 months
- 6 months
- 9 months
- 1 year
- 2 years
- Forever (default, consumes increasing storage)
- Until space is needed (auto-clears old versions)
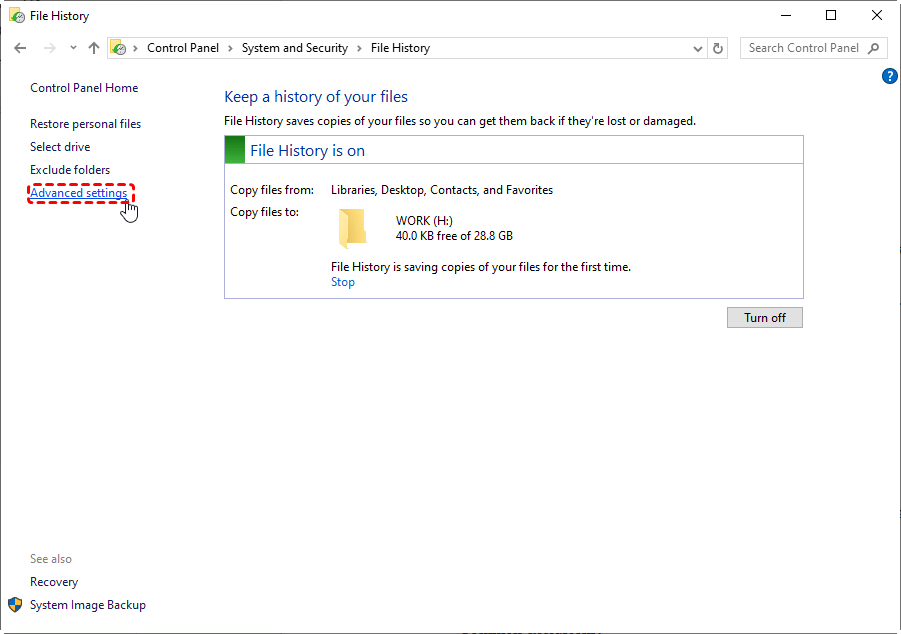
Through Control Panel
Open Control Panel, click "Save backup copies of your files with File History". Click "Advanced Setting", then set the proper backup frequency and retention period.
🌟Optimal Settings Combinations:
Office documents: Hourly backup + 3-month retention
Personal media: Daily backup + keep until space needed
🌟Storage Monitoring:
Regularly check backup drive capacity - consider expanding storage or adjusting retention when space drops below 20%.
Step 4. Include or Exclude Specific Folders
File History automatically backs up files in your User folders (Documents, Pictures, Desktop, etc.), but you may want to customize which folders get included or excluded. This helps optimize storage usage and backup efficiency.
Add Folders to File History (Inclusion)
- By default, File History backs up standard user folders. If you want to add additional folders:
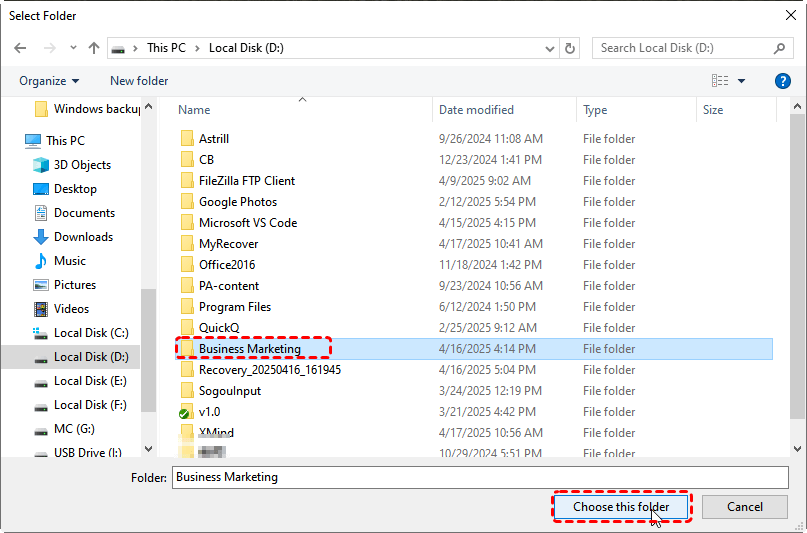
- Click "More options" (Win 10) or "Advanced options" (Win 11). Under "Back up these folders", click "Add a folder" .
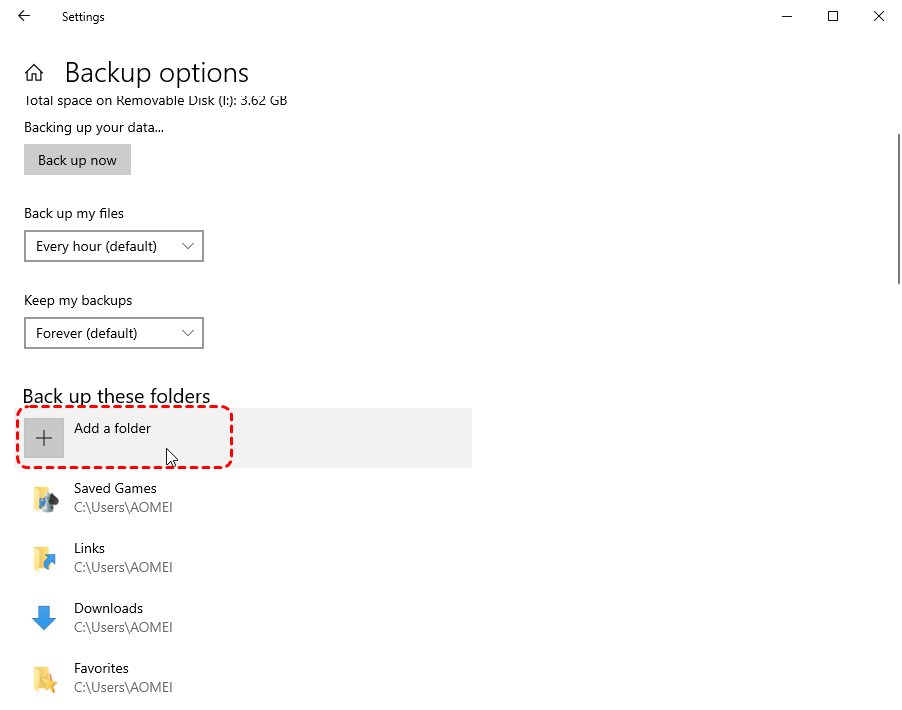
- Browse and select the folder you want to include.
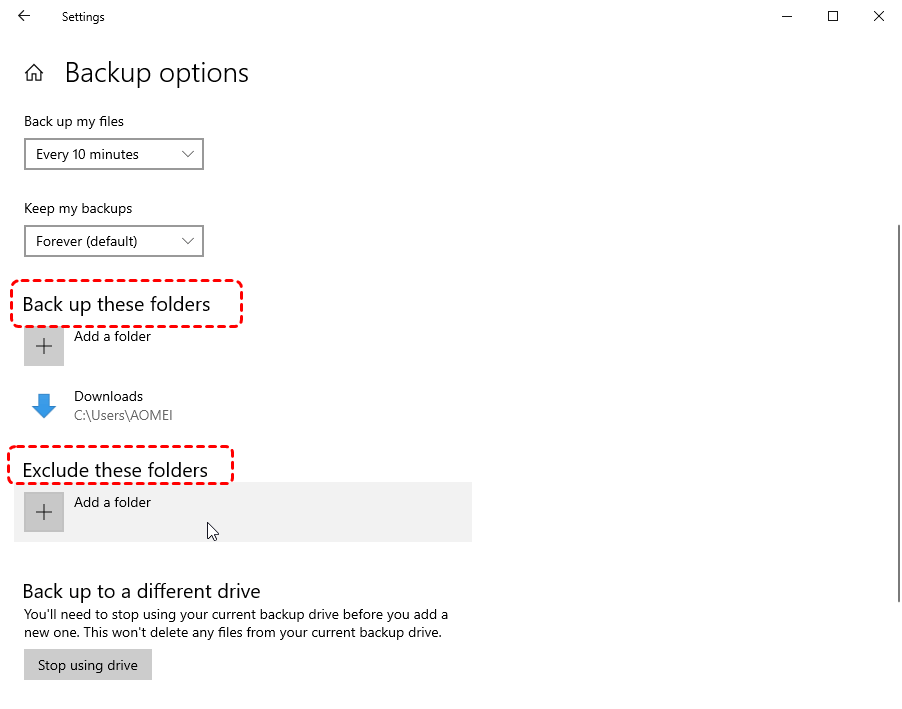
Exclude Folders from Backups
- To prevent certain folders from being backed up (e.g., temporary files, cache folders):
- In the same "Backup options menu", scroll to "Exclude these folders". Select folders you want to exclude.
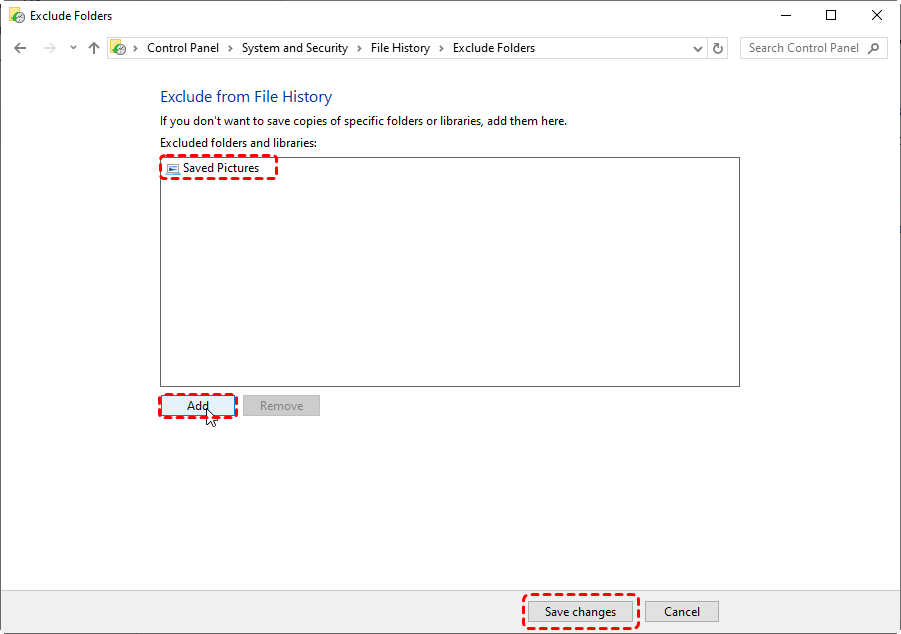
Besides, you can also exclude folders from File History backup from Control Panel. Click "Exclude Folders" in the File History from control panel. In the next screen, add a specific folder to the "exclude from File History"list and click on "Save Changes".
What to Exclude: "Temporary files"(%Temp%, browser cache) , "Large media folders"(if already backed up elsewhere) and "System folders"(Windows, Program Files).
What to Include: "Important work documents", "Personal photos & videos"and"Custom project folders".
Step 5. Restore files from backups
File History not only backs up your files but also allows you to restore previous versions when needed—whether you accidentally deleted a filepermanently, overwrote important data, or encountered system corruption.
1: Restore via File Explorer (Quick Access)
- Open File Explorer (Win + E) and navigate to the folder where your lost file was stored.
- Click the "History" button in the top ribbon (or right-click → "Restore previous versions").
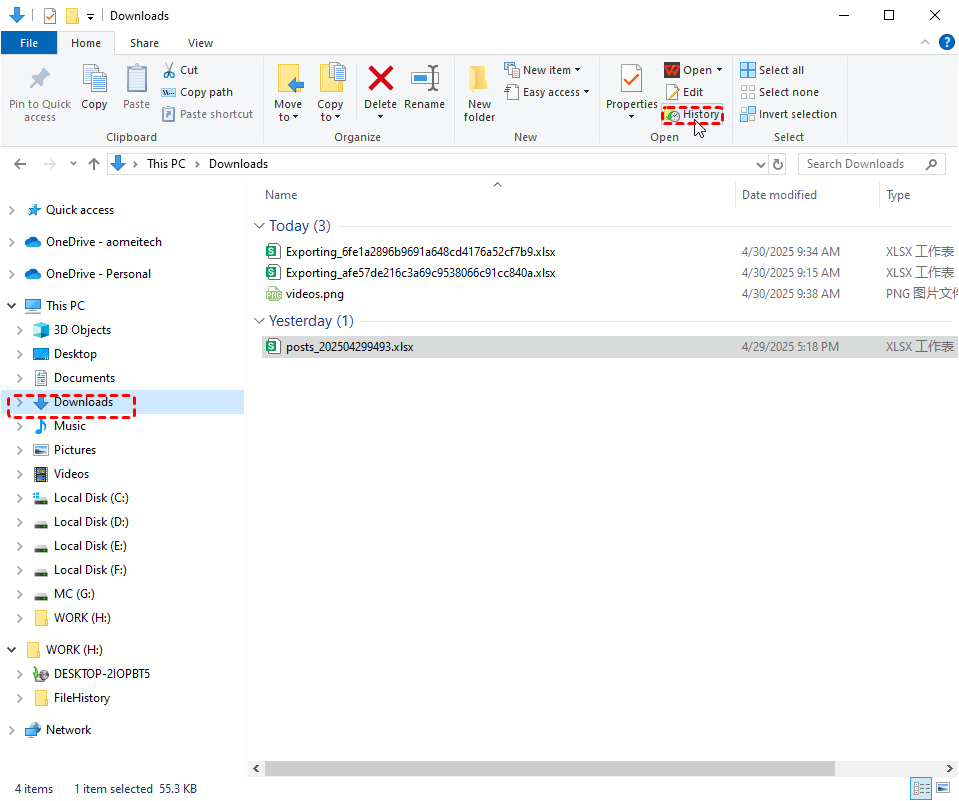
- A timeline view of backups will appear—browse through different versions using the arrows.
- Select the file/folder you want to restore and click:"Restore " (to original location, overwriting existing files) or "Restore to... "(to choose a different folder).

2: Restore via File History Control Panel
- Go to Settings → Update & Security (Win10) / Accounts (Win11) → Backup.
- Click "More options" → "Restore files from a current backup".
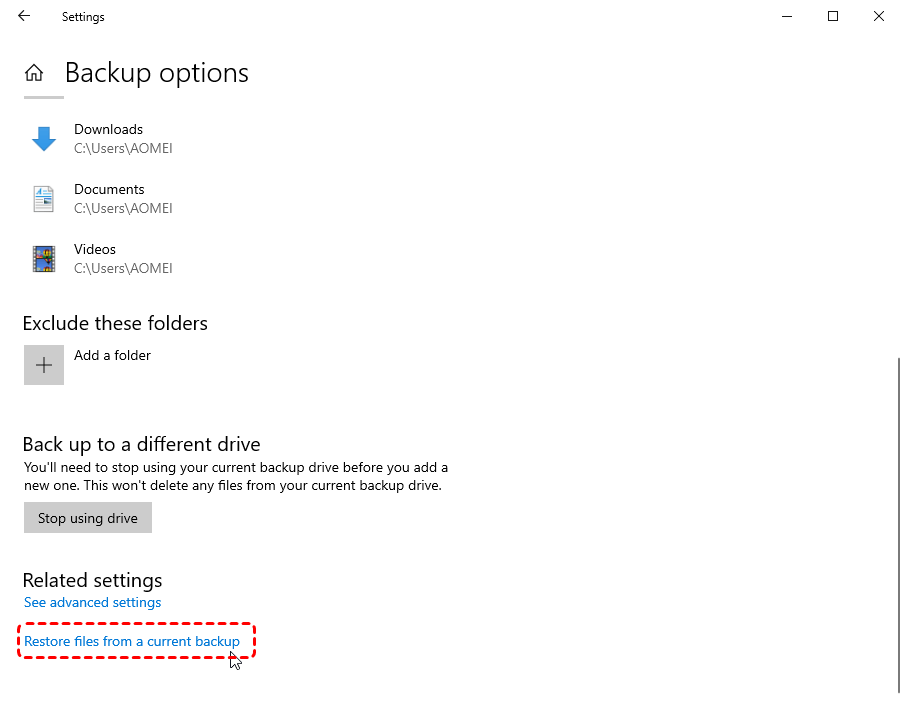
- Browse the backup drive’s File History folder.
- Copy the needed files manually or use "Restore all" for a complete recovery.
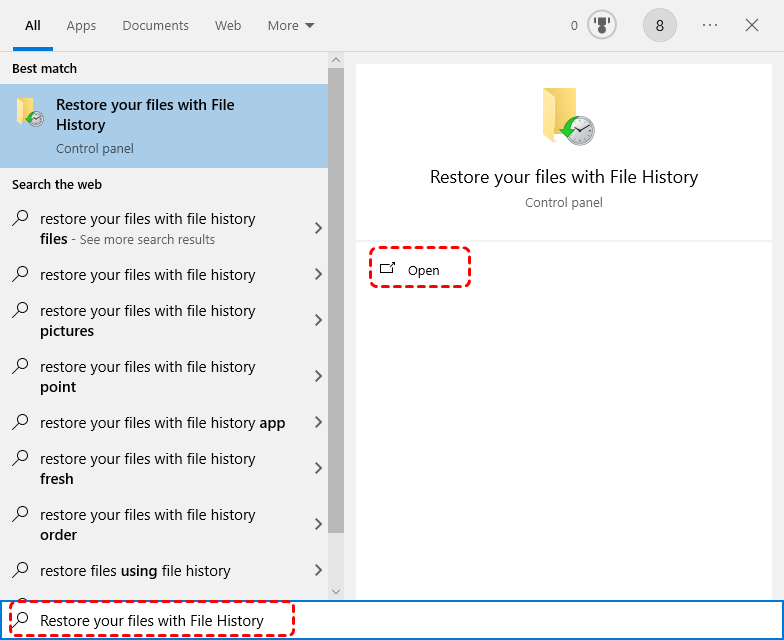
Alternatively, you can directly search "Restore your files with File History" and access the backup history.
Bonus Tips: Troubleshoot common issues
Even though File History is a reliable backup tool, you might encounter some issues. Here’s how to fix the most common problems:
1. File History Not Recognizing External Drive
Check connection & power – Ensure the drive is properly connected and powered (if applicable).
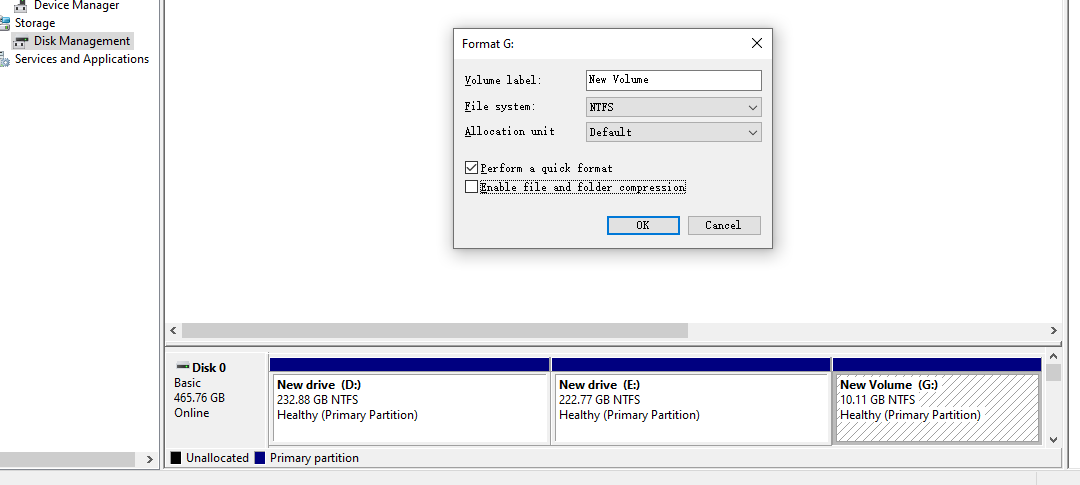
Reformat the drive – Open "Disk Management"("Win + X"> "Disk Management"), right-click the drive, and format it as "NTFS"or "exFAT".
Try a different USB port – Some USB ports may not provide enough power.
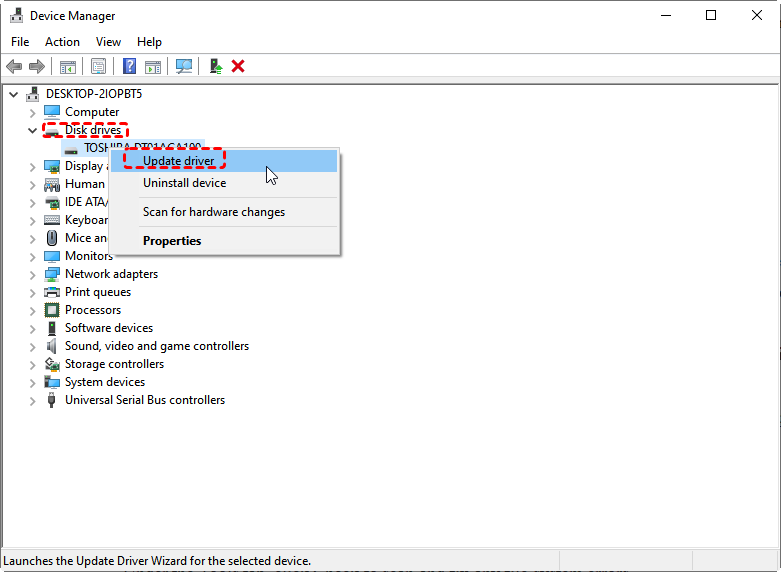
Update drivers – Right-click "Start"> "Device Manager", expand "Disk drives", right-click your drive, and select "Update driver".
2. File History Backup Fails or Stops Working
Check drive space – Ensure the backup drive has enough free space (at least "twice the size"of your files).
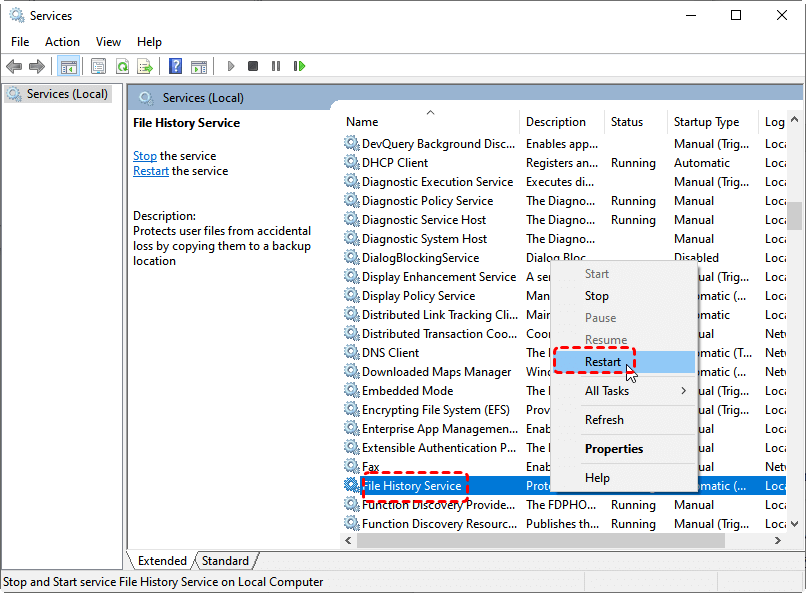
Restart File History service – Press "Win + R", type "services.msc", find "File History Service", right-click it, and select "Restart".
3. File History Drive Not Found After Reboot
Reconnect the drive manually– Sometimes Windows doesn’t auto-mount the drive.
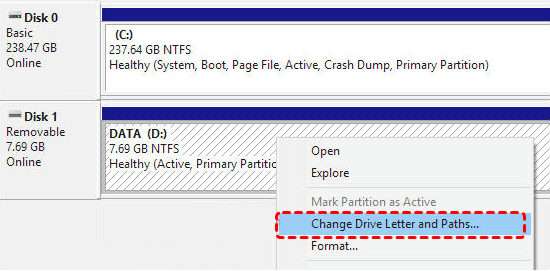
Assign a permanent drive letter (for external drives): Open "Disk Management"("Win + X"> "Disk Management"). Right-click your backup drive > "Change Drive Letter and Paths". Assign a fixed letter (e.g., "Z:") to prevent drive letter conflicts.
4. Slow Backups on Network Drives
Use a wired connection– Wi-Fi can slow down large backups.
Check network permissions – Ensure you have "read/write access"to the shared folder.
Exclude large files (e.g., videos, ISO files) if they’re not critical.
5. Restored Files Are Corrupted or Won’t Open
Try an older version – File History keeps multiple versions; restore an earlier backup.
Check file integrity – Run "sfc /scannow"in Command Prompt (Admin) to fix system file issues.
Use Professional Data Recovery-If File History fails, try MyRecover, a powerful Windows data recovery tool that supports over 1000 file types and recovers data from HDDs, SSDs, USB drives, and formatted disks with higher success rate.

- Wide Recovery Scenarios– Restores data from accidental deletion, formatting, system crashes, and more.
- Broad File Type Support– Recovers photos, videos, documents, emails, and 1000+ file formats.
- Multi-Device Compatibility– Works on HDDs, SSDs, USB drives, SD cards, and 500+ storage media.
- Preview Before Recovery– Lets you check recoverable files before restoring them.
- Dual Scan Modes– Quick Scan for fast retrieval & Deep Scan for thorough recovery.
- Seamless Windows Integration– Fully compatible with Windows 11/10/8/7 and NTFS/FAT/exFAT/ReFS file systems.
To Conclude
File History provides a straightforward way to protect your important files in Windows 10 and 11. By following this guide, you've learned how to configure File History in Windows 10, fromautomatingbackups, customizingsettings, restoringfiles, and troubleshootingcommon issues.
Remember that while File History is excellent for personal files, you should consider additional backup solutions for complete system protection. For cases where backups fail or files become corrupted, professional recovery tools like MyRecover offer reliable solutions.


Stay Updated With Our
Latest Tips
Add us as a preferred source on Google to never miss helpful guides.