
How to Get Data Off an Old Hard Drive Easily for Beginners
Wondering how to get data off an old hard drive without damaging your files? This step-by-step beginner’s guide explains the safest and most effective ways to access and recover data from aging or unused drives. Whether the disk is still readable or showing errors, you’ll learn proven techniques to retrieve your important files with minimal risk.
By Aria / Updated on March 4, 2026
Introduction
Old hard drives often hold valuable photos, documents, or project files, but accessing them can feel intimidating, especially for beginners. Whether the drive is no longer recognized, uses an outdated interface, or simply hasn’t been powered on in years, many users aren’t sure where to start or worry about making the situation worse.

If you’re wondering how to get data off an old hard drive, the good news is that most drives can still be accessed with the right approach. In many cases, you don’t need advanced technical skills, just the proper connection method, a few built-in Windows tools, or reliable recovery software. The key is to choose a safe method that matches your drive type and condition to avoid permanent data loss.
What to do Before the Process
Before attempting to retrieve files, take a few precautionary steps to improve your success rate and avoid accidental data loss. Proper preparation helps you choose the correct connection method and prevents unnecessary damage to an aging drive.
🔔Identify the drive type and interface: Check whether it is an internal or external drive and note the connector (SATA, IDE, USB, etc.). This determines the adapter or enclosure you will need.
🔉Inspect the physical condition: Look for unusual noises, burnt smells, or visible damage. If the drive is clicking or not spinning, avoid repeated power-on attempts, as this may worsen the damage.
💽Prepare a safe destination drive: Make sure you have enough free space on another healthy disk to store recovered data. Never save recovered files back to the old drive.
💾Use a stable power source and connection: Connect through a reliable USB port or power adapter to prevent disconnections during access or recovery.
💻Avoid writing to the old drive: Do not format, initialize, or run unnecessary repair tools before securing your data, as these actions can overwrite recoverable files.
How to Get Data off an Old Hard Drive on Windows
After completing the preparation checks, you can begin retrieving your files using the method that best matches the drive’s condition. Start with the least invasive approach and move to more advanced solutions only if necessary. The following methods progress logically from basic connection to professional recovery, helping beginners recover data safely and efficiently.
Method 1. Connect the Old Hard Drive to Your Computer
In many cases, the drive itself is still healthy. It simply needs the correct adapter or enclosure to be recognized by your system. Properly connecting the drive allows Windows to mount it so you can directly copy files without specialized tools. This is always the first method to try because it is fast, safe, and requires minimal technical skill.
Step 1. Identify the drive interface (SATA, IDE, or USB) and obtain a compatible USB adapter, docking station, or enclosure.
Step 2. Connect the old hard drive to your computer using the adapter and power it on if required.
Step 3. Open File Explorer and check whether the drive appears under "This PC".
Step 4. If accessible, open the drive and copy important files to another healthy storage device.
Sometimes the drive is detected but you cannot open folders due to ownership or permission conflicts and the error "Access is Denied" will prompt, especially when the disk came from another computer. Taking ownership in Windows can restore access without modifying the actual data.
Method 2. Recover Data with MyRecover
If the drive shows up but files are missing, corrupted, or inaccessible, professional recovery software like MyRecover provides a safer and more powerful solution. Its dual-mode scanning algorithm automatically combines quick and deep analysis for maximum recovery coverage. Moreover, it supports the recovery of over 1,000 file types, including documents, photos, design files, videos, audio, and more.
Why choose MyRecover?
✅500+ Devices Support: Recover files from all types of devices like SSD, HDD, USB flash drive, SD card, cameras, game console drives and more.
✅Handle 500+ Data Loss Scenarios: Recover from deleted partition, formatted hard drive, emptied Recycle Bin, system crash, virus attack, etc.
✅Read-Only Scan Mode: Ensures 0 damage or overwriting to source drive during recovery.
✅Real-time file preview: See recoverable files before restoring to ensure accuracy.
✅OS Compatibility: Work not only on Windows 11 /10, but also on Windows 8.1/ 8/ 7 and all Servers.
Step 1. Download and install MyRecover on a different healthy drive from Microsoft Store or its official website.
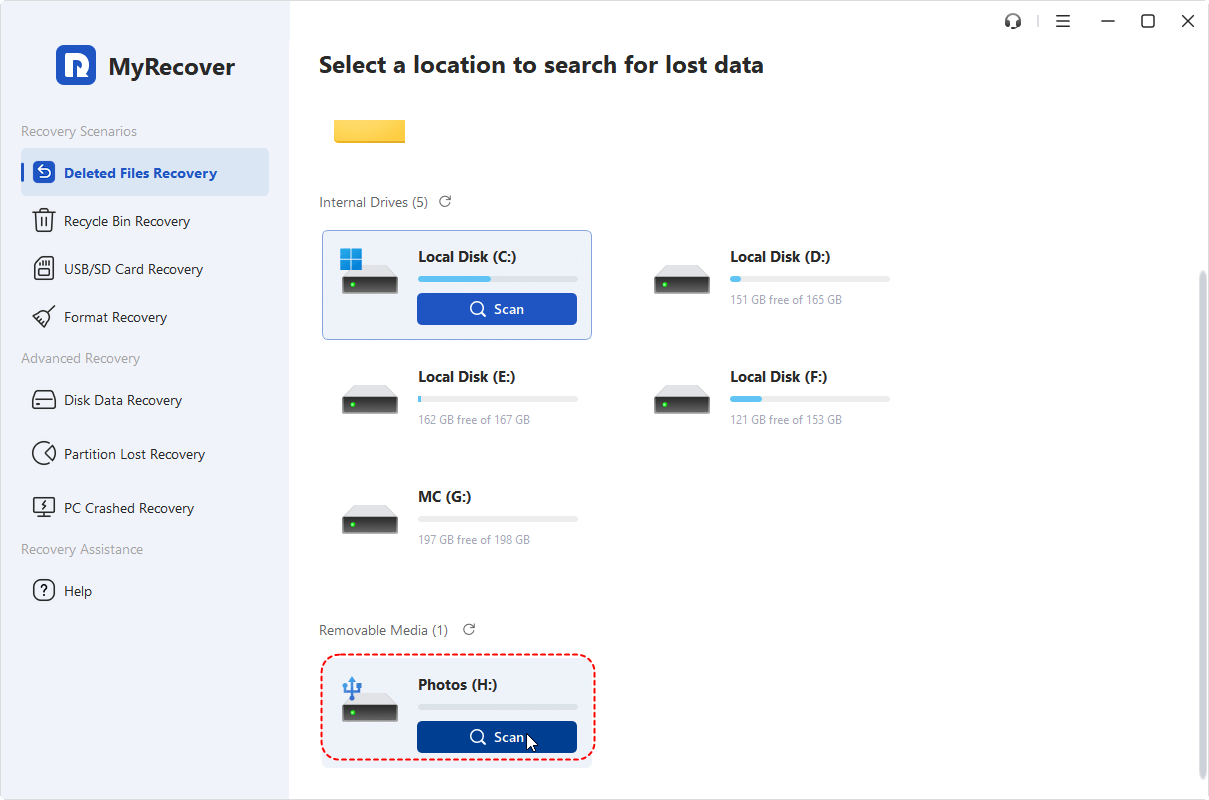
Step 2. Launch the program and select the old hard drive, then click "Scan" to search for the recoverable files.
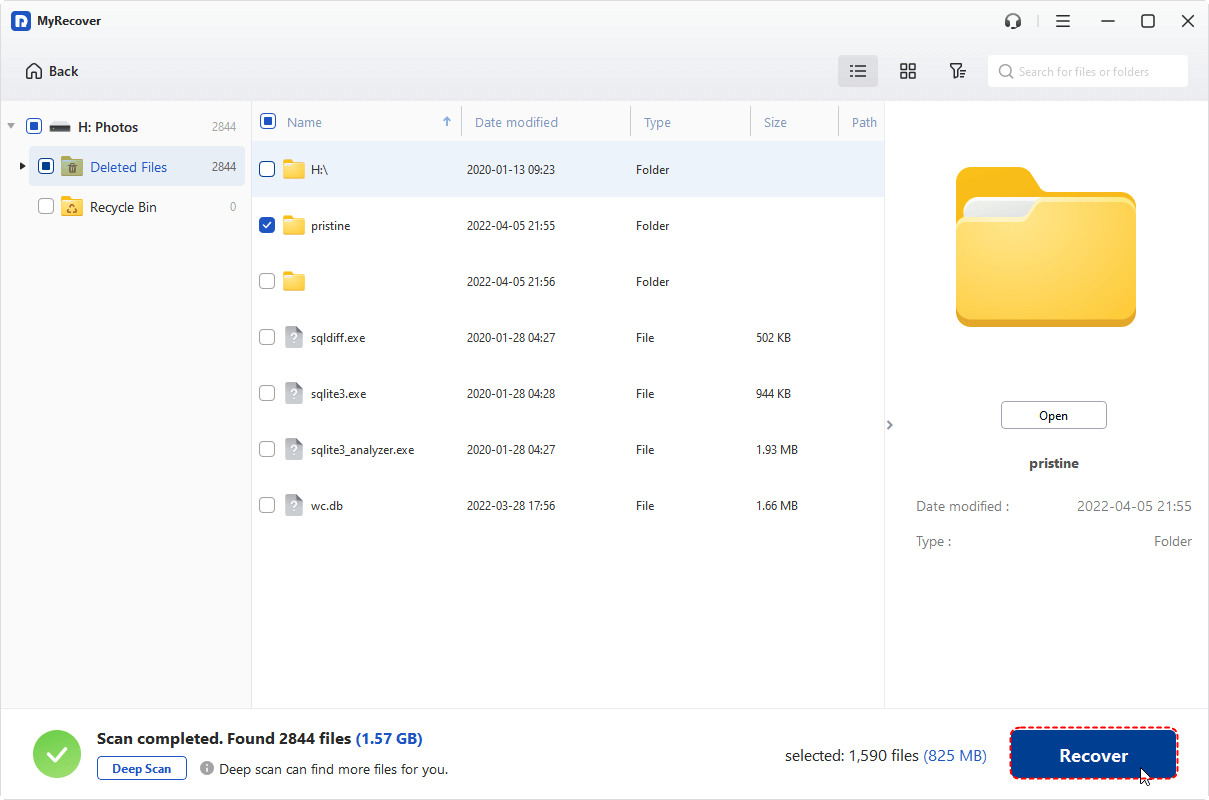
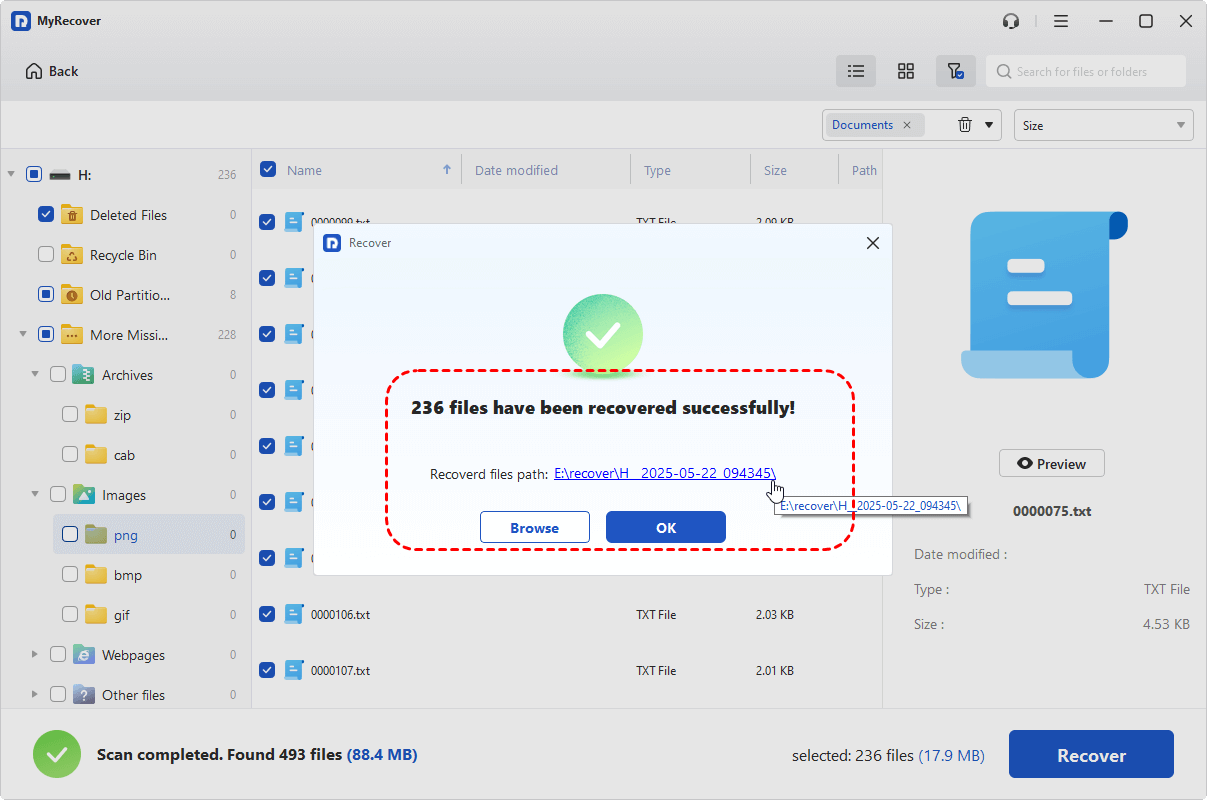
Step 3. Wait for the Quick Scan (and Deep Scan if needed) to finish and preview recoverable files. Select the files you wish to recover from the recoverable lists and click "Recover".
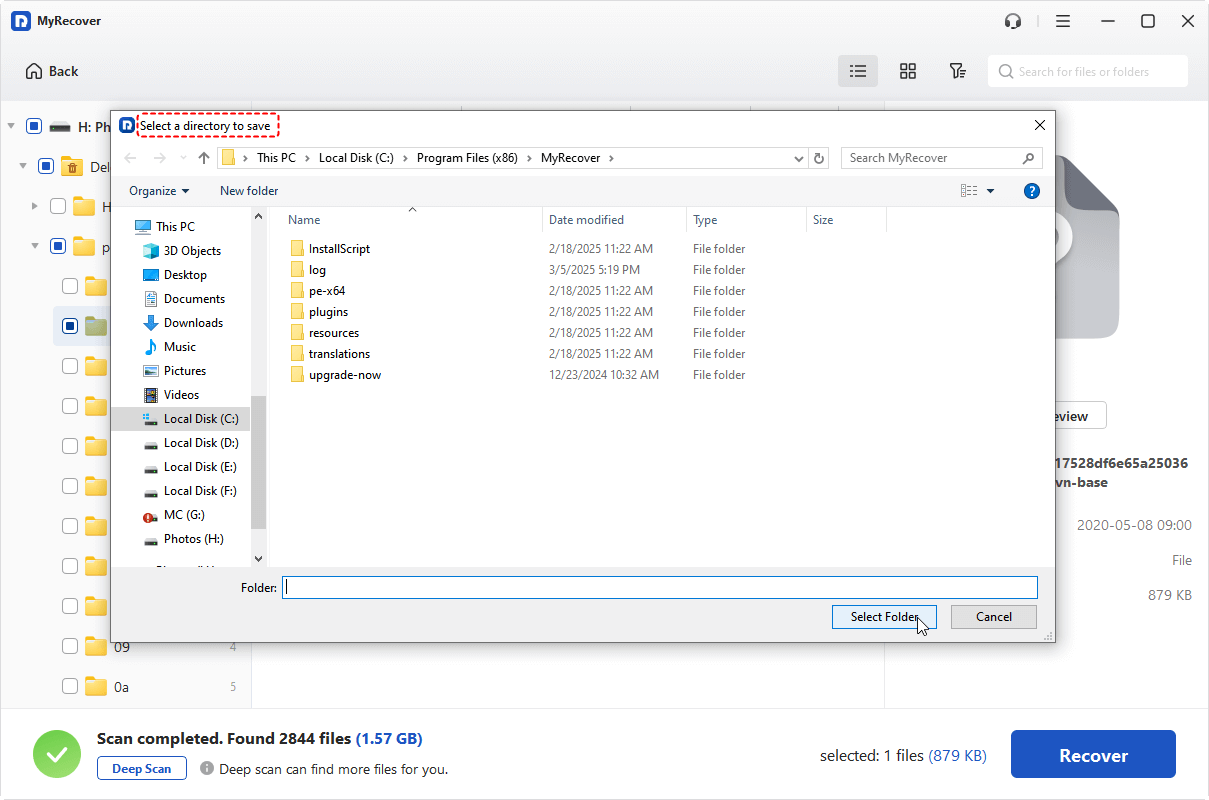
Step 4. Select a new safe location to save the recovered files.
Once the recovery process is finished, the message "Files have been recovered successfully" will pop up. Then, you can verify the recovered files by clicking on the destination folder path or the "Browse" button.
If your hard drive is inside an old computer and can no longer boot it up, you can still use MyRecover to retrieve important data from that computer. Follow these steps:
Step 1. Download and install MyRecover on a working computer. Prepare a blank USB drive and connect to the computer.
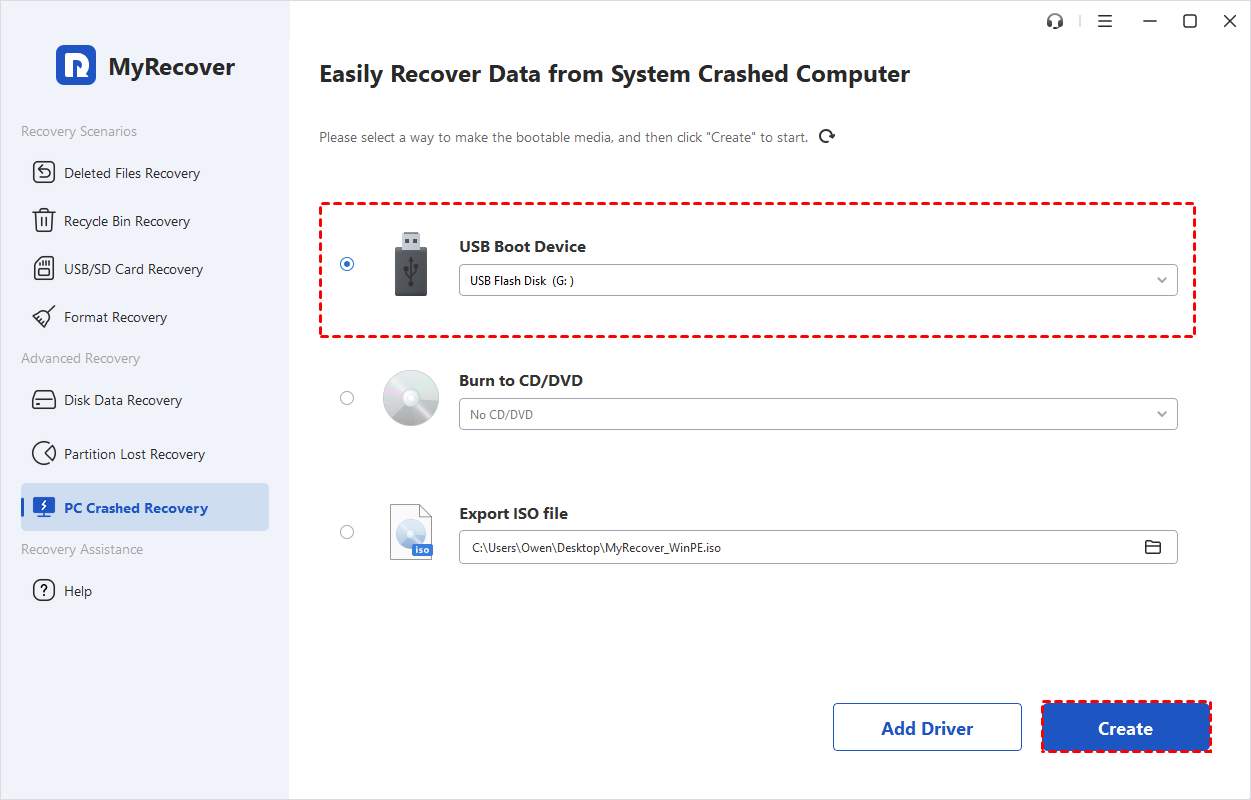
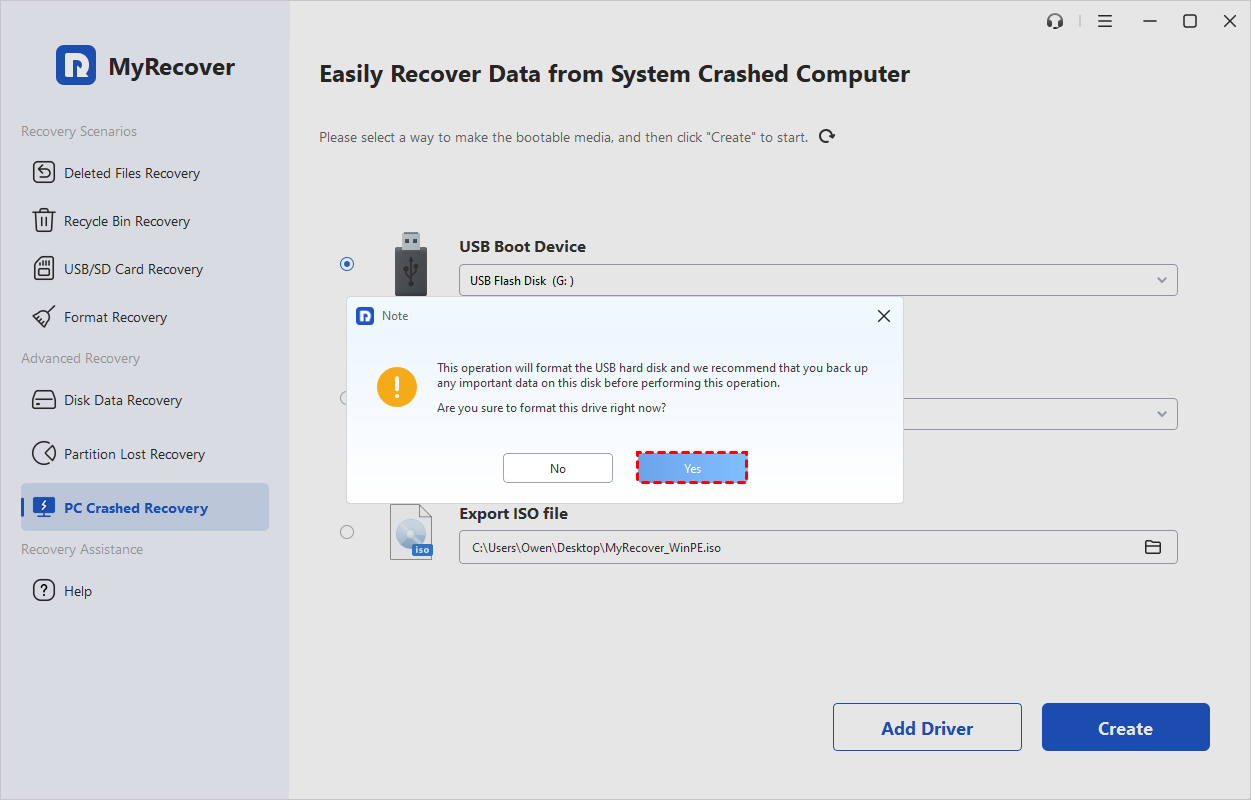
Step 2. Select "PC Crashed Recovery" and choose "USB Boot Device", then click "Create". This will format the USB drive. If there is important data on it, you’d better back it up first.
Step 3. Confirm to create the USB bootable media. Wait for the process to completed.
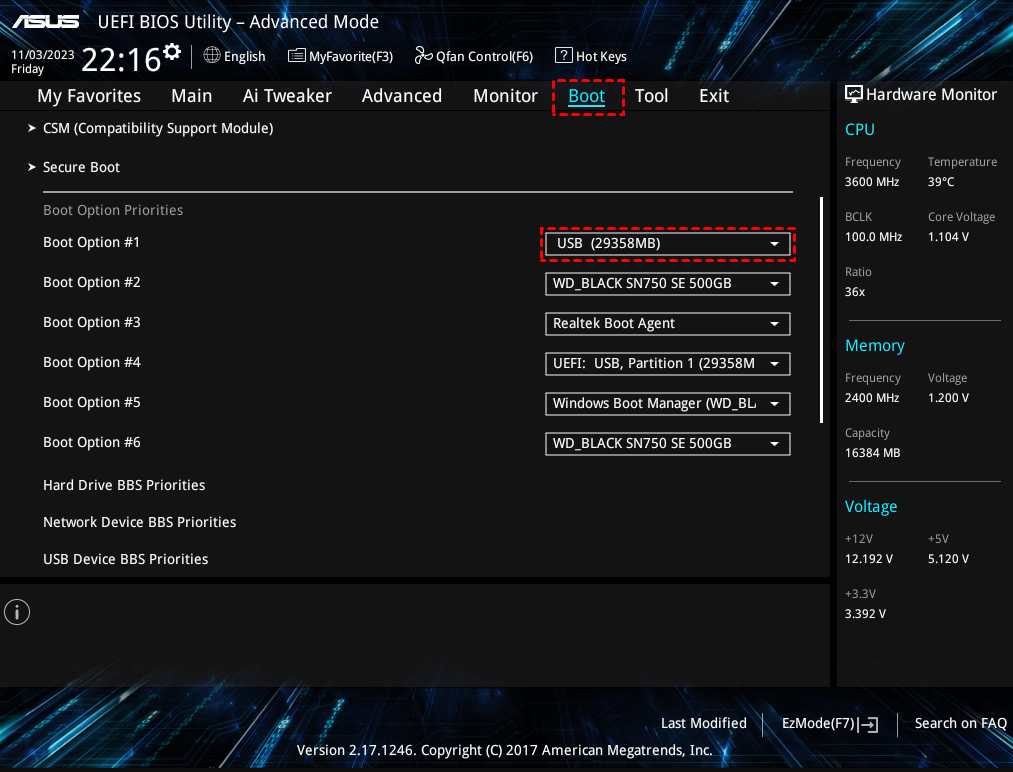
Step 4. Insert the USB into the unbootable computer and power on the PC to enter BIOS/UEFI.
Step 5. Change the boot menu to boot from the USB drive. Then, you will automatically enter the interface of MyRecover. You can recover files from the computer with the steps above.
Method 3. Use a Professional Data Recovery Service (For Physically Damaged Drives)
If the drive is not spinning, makes clicking noises, or fails to appear in Disk Management, the issue is likely hardware-level damage. In such cases, software solutions will not help, and continued DIY attempts may worsen data loss. The professional data recovery service like Seagate rescue data recovery service can be the best option. The certified recovery lab has cleanroom equipment and specialized tools to extract data safely from failing drives.
Step 1. Stop powering on the problematic drive to prevent further damage.
Step 2. Research reputable data recovery service providers with cleanroom capabilities.
Step 3. Contact the provider for evaluation and confirm pricing and success policies.
Step 4. Ship or deliver the drive following the provider’s packaging instructions.
Conclusion
In short, getting data off an old hard drive is not a difficult task. You can choose the appropriate method according to the actual condition of your hard drive. If any data is lost or deleted, a dedicated tool like MyRecover can perform read-only scans to locate and restore files without risking overwrite. For drives that show physical failure symptoms, professional recovery services remain the safest path.


Stay Updated With Our
Latest Tips
Add us as a preferred source on Google to never miss helpful guides.