
This Device Is Disabled (Code 22): A Complete, Step-by-Step Fix Guide
This guide explains how to troubleshoot error code 22 in Windows, covering what causes disabled devices, how Device Manager works, and step-by-step methods to safely re-enable hardware without data loss or system instability.
By Vera / Updated on January 15, 2026
What Does "This Device Is Disabled (Code 22)" Mean?
Error Code 22 appears when Windows detects a hardware device but has disabled it intentionally. This can happen due to user action, system configuration, driver problems, or BIOS settings.
In simple terms:
- Windows recognizes the device.
- The device is not currently active.
- Windows will not use it until enabled.
This is very different from errors that indicate missing or damaged hardware.
Where Code 22 Usually Appears
You’ll find Code 22 inside Device Manager, commonly affecting:
- Network adapters (Wi-Fi or Ethernet).
- Graphics cards (especially on laptops).
- Sound devices.
- USB controllers.
- Bluetooth adapters.
- Internal components like webcams or card readers.
Common Causes of Device Manager Code 22
Device Disabled Manually
The most common cause is also the simplest. The device was disabled manually—sometimes accidentally. A single right-click in Device Manager is all it takes.
BIOS or UEFI Configuration Issues
Some devices can be disabled at the firmware level. If a device is turned off in BIOS or UEFI, Windows cannot enable it—even if the driver is installed correctly.
Driver Problems
Drivers act as translators between Windows and your hardware. If they’re outdated, corrupted, or incompatible, Windows may disable the device to avoid system instability.
Driver Conflicts After Updates
Major Windows updates can sometimes replace or override existing drivers, leading to conflicts that result in Code 22.
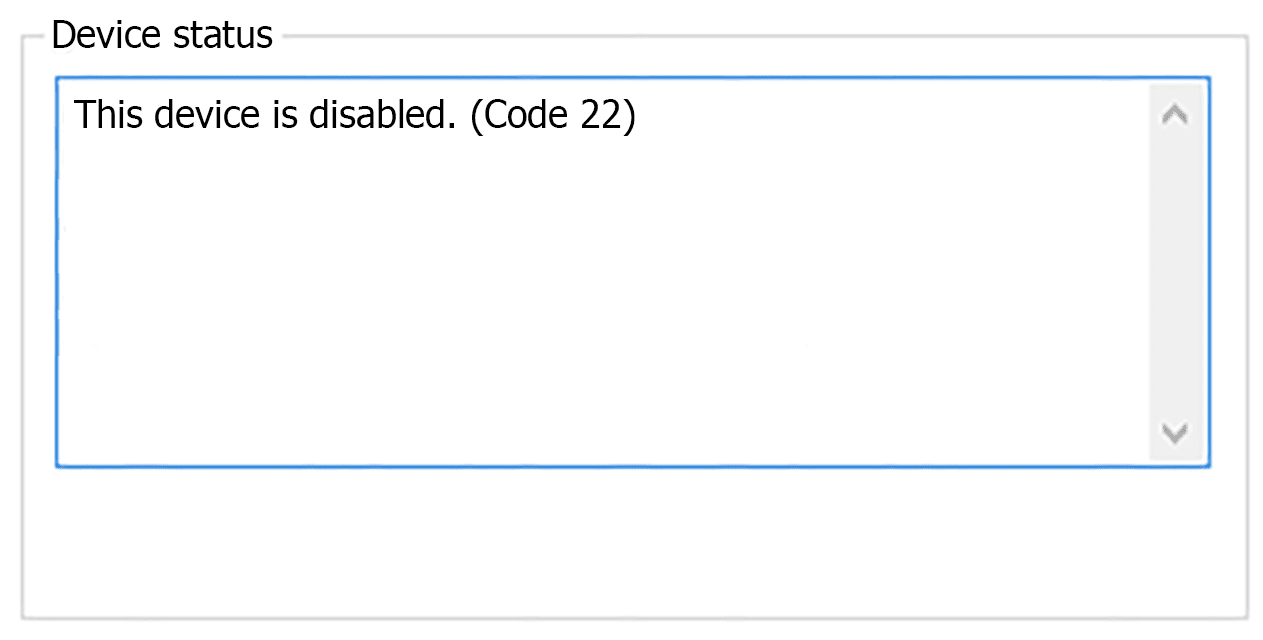
How to Confirm Code 22 in Device Manager
There are standardized diagnostic steps.
1. Press Windows + X.
2. Select Device Manager.
3. Locate the device with a yellow warning icon.
4. Right-click the device and choose Properties.

5. Check the Device status section.
If you see the message "This device is disabled (Code 22)", you’ve confirmed the issue.
👉Important Note: Data Access and Potential Data Loss
While Code 22 itself does not delete data, it can prevent Windows from accessing storage devices such as hard drives, SSDs, or USB drives. If the disabled device contains important files, avoid repeated uninstallations or unnecessary formatting.
Using MyRecover to Protect and Recover Data
If you suspect that a disabled storage device may contain important or irreplaceable data, using a reliable data recovery tool can be a smart precaution. MyRecover is a data recovery solution designed to scan and retrieve files from inaccessible, disabled, or unrecognized storage devices.
MyRecover can be especially helpful if:
- A drive shows Code 22 and cannot be accessed normally.
- Files became unavailable after driver or system changes.
- You want to recover data before attempting advanced fixes.
Using a data recovery tool early reduces the risk of permanent data loss while troubleshooting hardware issues.
How to Fix "This Device Is Disabled (Code 22)"
Follow these solutions in order, starting with the simplest.
Method 1: Enable the Device Manually (First and Fastest Fix)
1. Open Device Manager.
2. Right-click the disabled device.
3. Select Enable device.
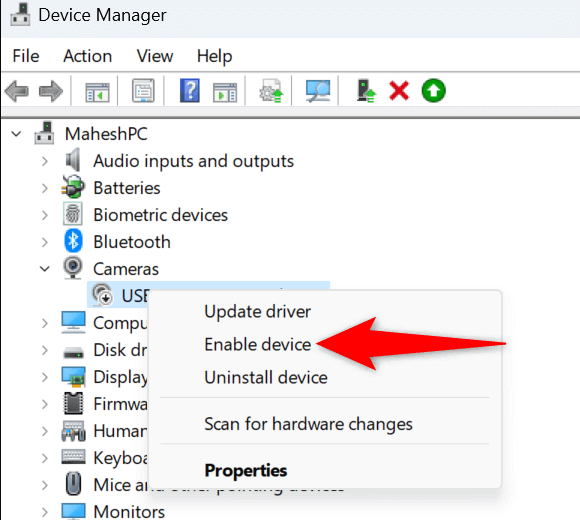
4. Restart your computer.
If the device works after reboot, the issue is resolved. No further action is required.
Method 2: Restart the Computer
Restarting reloads system services, drivers, and hardware configurations. Temporary glitches often disappear after a clean boot.
1. Save all open work.
2. Restart Windows normally.
3. Check Device Manager again.
This simple step fixes more issues than most people expect.
Method 3: Update the Device Driver
Option A: Update Driver Using Windows
1. Open Device Manager.
2. Right-click the disabled device.
3. Select Update driver.
4. Choose Search automatically for drivers.
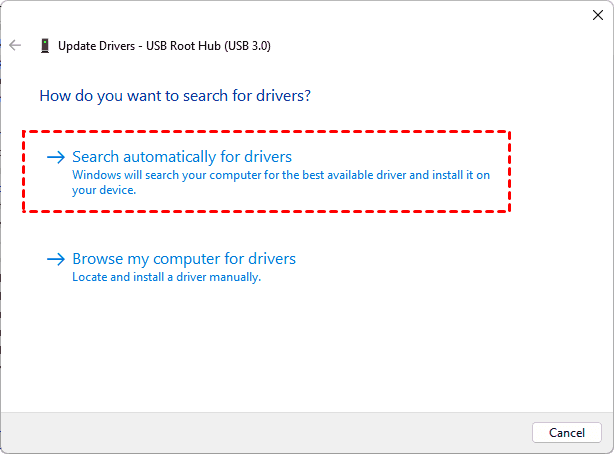
5. Follow on-screen instructions.
6. Restart the system.
Option B: Update Driver from Manufacturer Website
This method is more reliable for graphics cards, network adapters, and audio devices.
1. Identify the device model.
2. Visit the manufacturer’s official website.
3. Download the latest Windows-compatible driver.
4. Install the driver manually.
5. Restart the system.
Method 4: Roll Back the Driver (If the Issue Appeared Recently)
If Code 22 started after a driver update, rolling back restores the previous stable version.
1. Open Device Manager.
2. Right-click the affected device. Select Properties.
3. Open the Driver tab. Click Roll Back Driver.
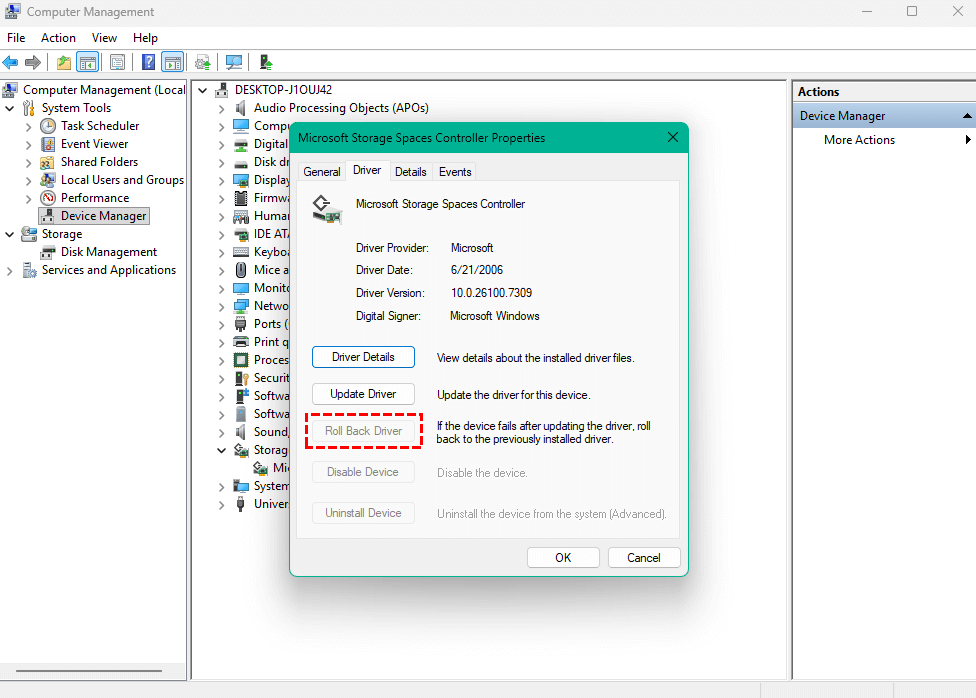
4. Restart your PC.
Method 5: Uninstall and Reinstall the Device
This clears corrupted driver data and forces Windows to rebuild the device configuration from scratch.
1. Open Device Manager.
2. Right-click the device.
3. Select Uninstall device.
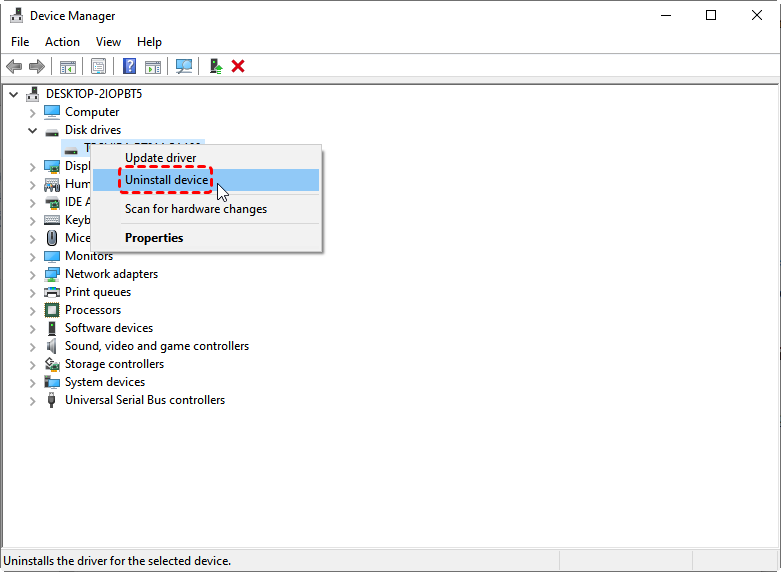
4. Confirm the action.
5. Restart your computer.
6. Allow Windows to reinstall the driver automatically.
Fixing Code 22 Using BIOS or UEFI Settings
When BIOS Is the Root Cause
Integrated components such as:
- Network cards
- USB controllers
- Audio devices
- Onboard graphics
may be disabled directly in BIOS or UEFI.
Standard BIOS Procedure
1. Restart your computer.
2. Press Del, F2, F10, or Esc during startup (varies by manufacturer).
3. Enter BIOS/UEFI Setup.
4. Navigate to Advanced, Integrated Peripherals, or Onboard Devices.
5. Locate the disabled hardware. Set it to Enabled.
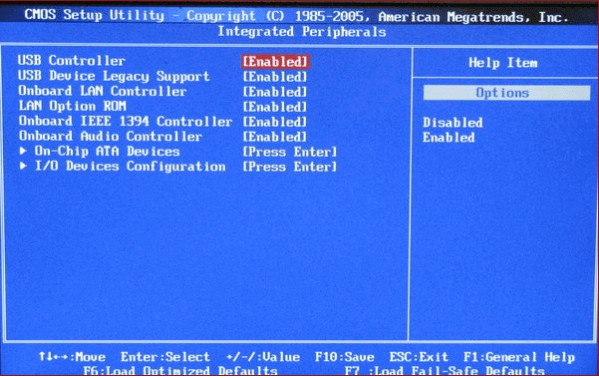
6. Save changes and exit. Boot into Windows and recheck Device Manager.
Advanced Solutions for Persistent Code 22 Errors
1. Use System Restore
System Restore reverts Windows system files and drivers to a previous working state.
1. Press Windows + R.
2. Type rstrui and press Enter.
3. Choose a restore point before the issue started.
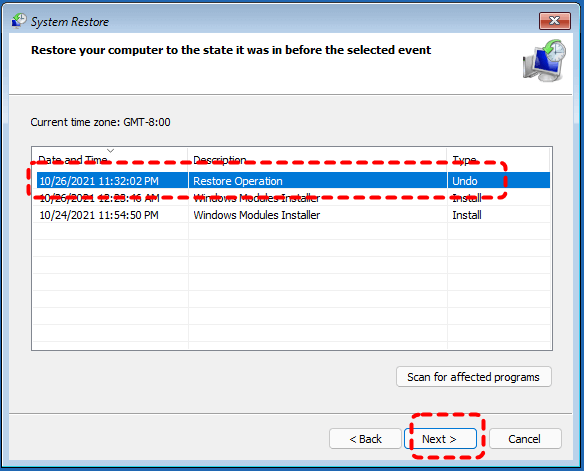
4. Follow the prompts. Restart the system.
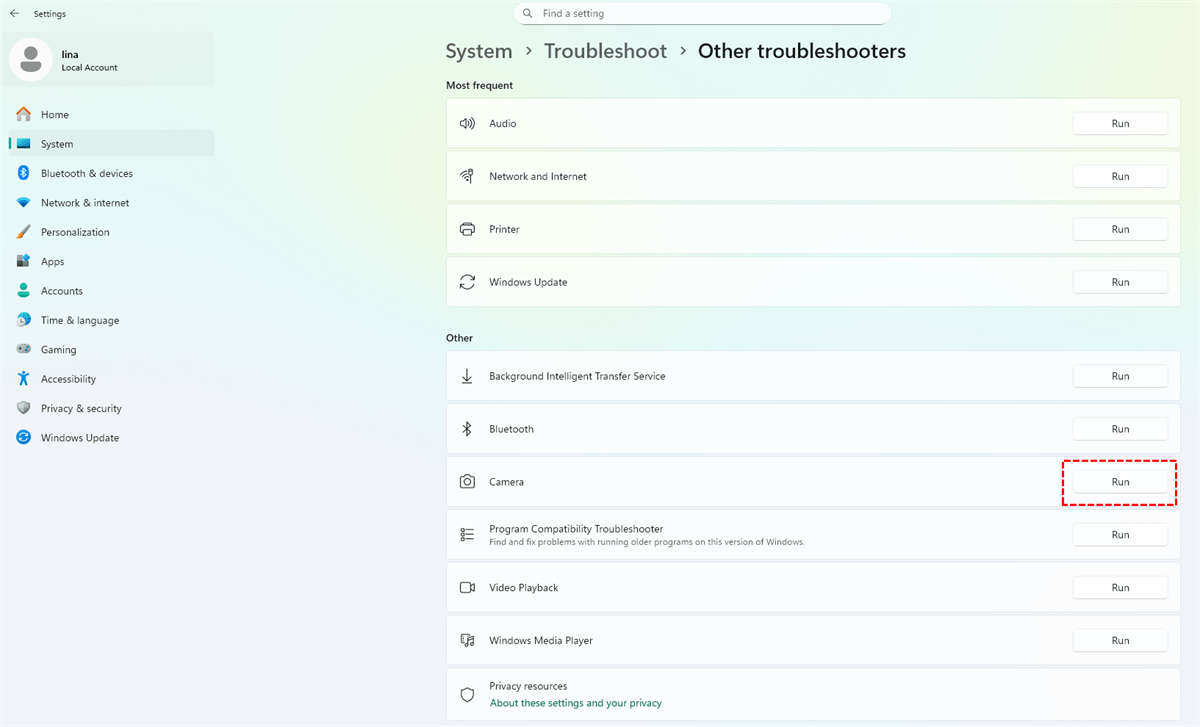
2. Run Windows Hardware Troubleshooter
Windows includes built-in troubleshooters that can automatically detect and fix hardware issues.
1. Open Settings.
2. Go to System → Troubleshoot.
3. Select Other troubleshooters.
4. Run the relevant hardware troubleshooter.
❓FAQ: Can Code 22 Damage Your Hardware?
No. Code 22 does not physically damage hardware, and it does not delete files. However, improper troubleshooting steps can increase the risk of data loss, which is why tools like MyRecover are useful when storage devices are involved.
How to Prevent Code 22 in the Future
- Keep device drivers updated.
- Avoid disabling devices unless necessary.
- Use official manufacturer drivers.
- Create restore points before major updates.
- Update BIOS only when required.
Prevention saves time, frustration, and unnecessary troubleshooting.
Conclusion
The message "This device is disabled (Code 22)" may look intimidating, but it’s usually a manageable configuration issue rather than a serious hardware failure. By following standardized troubleshooting steps and protecting your data—especially with tools like MyRecover when storage devices are affected—you can resolve the issue safely and efficiently.


Stay Updated With Our
Latest Tips
Add us as a preferred source on Google to never miss helpful guides.