
WMDK File Recovery: Recover Deleted or Corrupted VMDK Files
VMDK files store the contents of virtual machine disks and are essential for running virtual environments. Accidental deletion, corruption, or system errors can put these files at risk. This article explains how to recover deleted or corrupted VMDK files. Follow the step-by-step methods to restore your VMDK files and get your virtual machines running again.
By Emma / Updated on September 12, 2025
Overview of VMDK Files
VMDK stands for Virtual Machine Disk, a file format used to store the contents of a virtual machine’s hard drive. Developed by VMware, VMDK files can contain the operating system, applications, and data of a virtual machine, making them essential for running virtualized environments.
Unlike physical hard drives, a VMDK file allows a virtual machine to operate independently of the host system. It supports features such as snapshots, cloning, and dynamic resizing, giving users flexibility to manage virtual disks efficiently.They can be split into multiple smaller files or kept as a single large file, depending on storage and performance needs.
How to Recover Deleted VMDK Files?
VMDK files can be lost or deleted in a variety of scenarios—accidental deletion, disk formatting, system crashes, virus attacks, or software errors. Losing these files can disrupt virtual machine operations and impact critical data.
If your VMDK files were deleted recently, the first place to check is the Recycle Bin. Just like recovering other types of files from Recycle Bin, select it and click on "Restore".
If you have previously set up backups like "Windows File History or Backup and Restore (Windows 7)", restoring from a backup is another simple and reliable solution.
However, if the files are no longer in the Recycle Bin and no backup exists, you’ll need to use more advanced recovery methods. Tools like Microsoft Windows File Recovery (WinFR) and professional software such as MyRecover can help scan your drives and recover lost VMDK files safely.
Method 1. Windows File Recovery
Windows File Recovery is a free command-line tool from Microsoft that allows you to recover deleted files from NTFS, FAT, or exFAT drives. You can use it to scan for and restore deleted VMDK files without a backup.
- Requires knowledge of command-line syntax; a small mistake or typo can result in failed recovery.
- Supports different modes: Regular for recently deleted files, Extensive for older or corrupted files.
- Only works on Windows 10 and Windows 11.
Steps to Recover Deleted VMDK Files via Winfr command
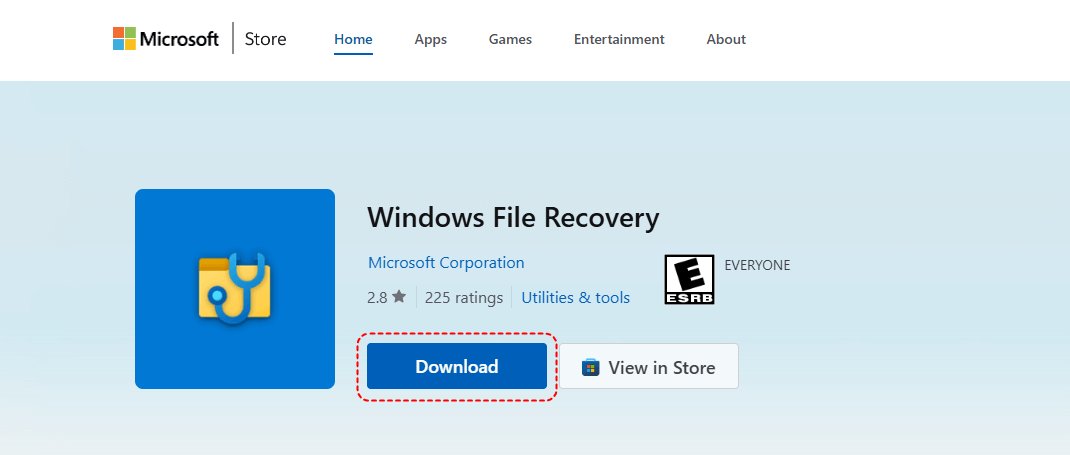
1. Download the tool from Microsoft Store.
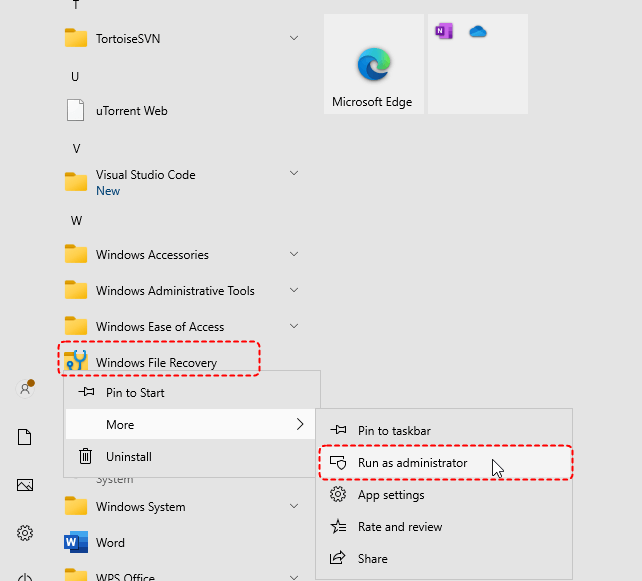
2. After successful installation, search it from your Start menu and run it as administrator.
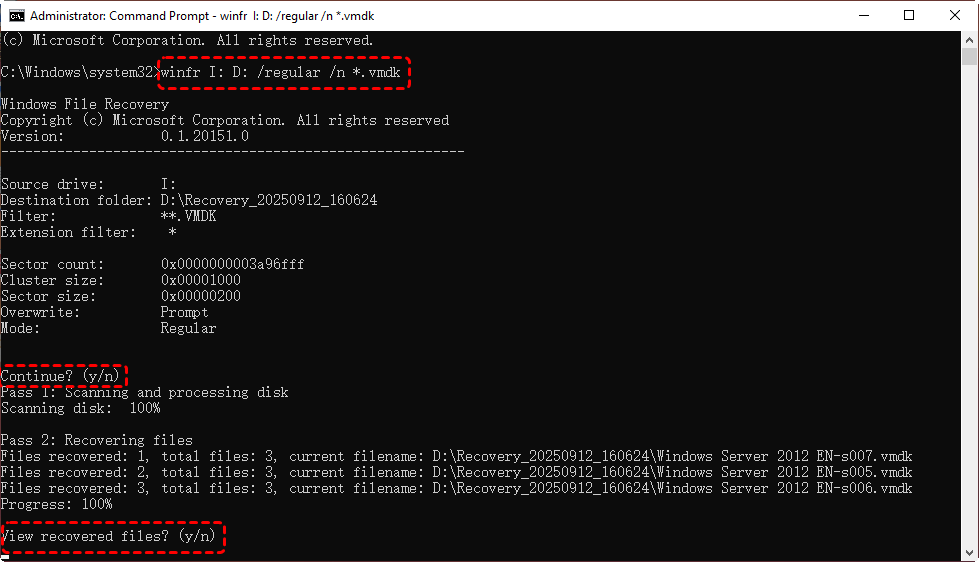
3. In the elevated Command Prompt window, input the following command (for example) and press on "Enter".
winfr I: D: /regular /n *.vmdk
- Explanation:✎...
- winfr – This launches Windows File Recovery, Microsoft’s command-line tool for recovering deleted files.
- I: – This is the source drive where the deleted VMDK files were originally located. Replace it with the correct drive letter on your system.
- D: – This is the destination drive where recovered files will be saved. It cannot be the same as the source drive to avoid overwriting.
- /regular – Recovery mode suitable for recently deleted files on an NTFS-formatted drive. For older files or non-NTFS drives (FAT32/exFAT), you would use /extensive mode.
- /n *.vmdk – File filter that tells the tool to search specifically for all files with the .vmdk extension, ignoring other file types.
This command scans the I: drive for deleted VMDK files that were recently removed and saves any recoverable files to the D: drive.
4. When prompted, just hin on "Y" key to confirm and continue the operation. Finally, check the recovered VMDK files in the destination folder.
Limitations:
⭕The interface is text-based and may be confusing for beginners.
⭕It does not provide file previews or an easy way to search for specific file types like VMDK.
⭕Errors such as "No recovery files were found with this mode", " There was an error parsing your command" can occur if commands are not entered correctly.
Method 2. MyRecover
MyRecover is professional data recovery software with a user-friendly interface and powerful scanning technology. It simplifies the process of recovering deleted or corrupted VMDK files, even if they are not in the Recycle Bin or a backup.
- ★Advantages over WinFR::
- Graphical Interface: No command-line knowledge required; just select the drive and scan.
- Advanced Scanning: Combines Quick Scan and Deep Scan to locate all recoverable files, including partially corrupted VMDK files.
- File Preview & Filter: Easily search for .vmdk files before recovery.
- High Success Rate: Designed to recover complex files safely and reliably, reducing the chance of errors.
- Supports Multiple Devices: Can recover from HDDs, SSDs, USB drives, and virtual disk partitions.
- Covers More Data Loss Scenarios: Accidental deletion, formatting, system crash, file transfer failure,virus attackand more.
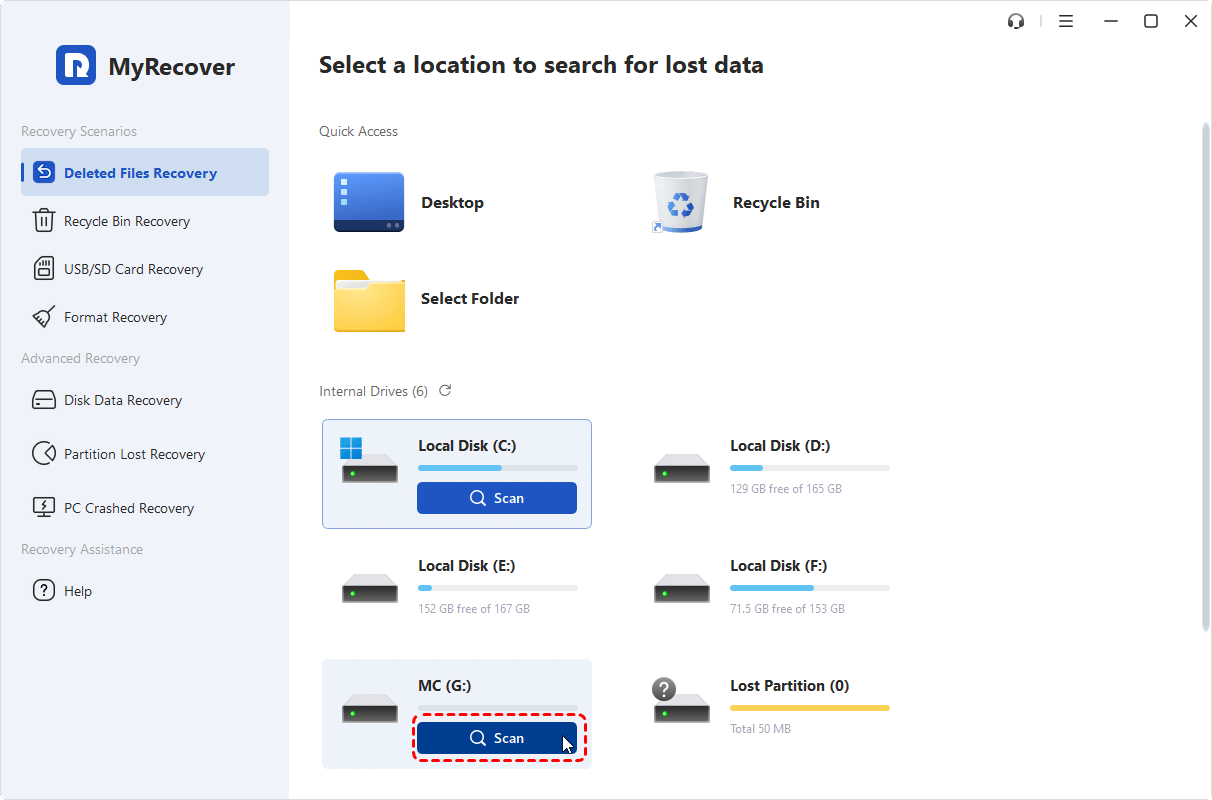
1. Download and install MyRecover.
2. Launch the software and select the drive containing your lost VMDK files. Click "Scan" and wait for the results.
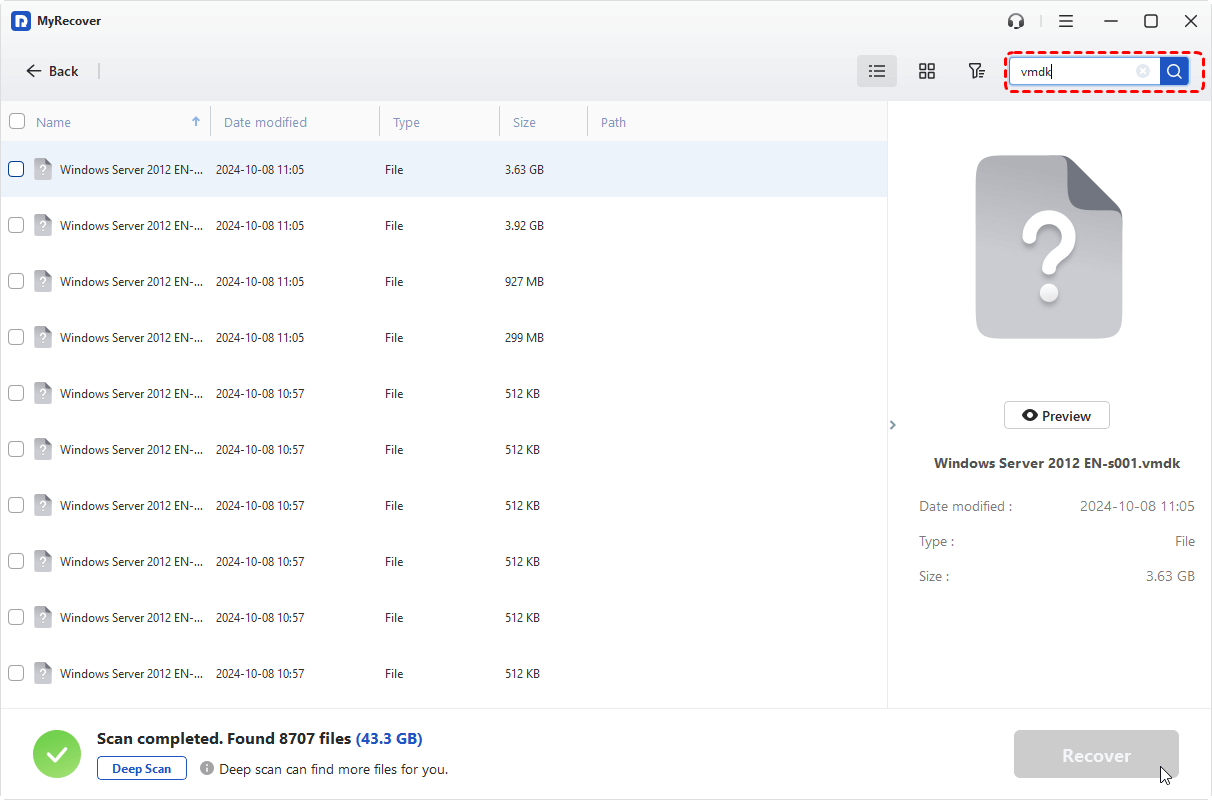
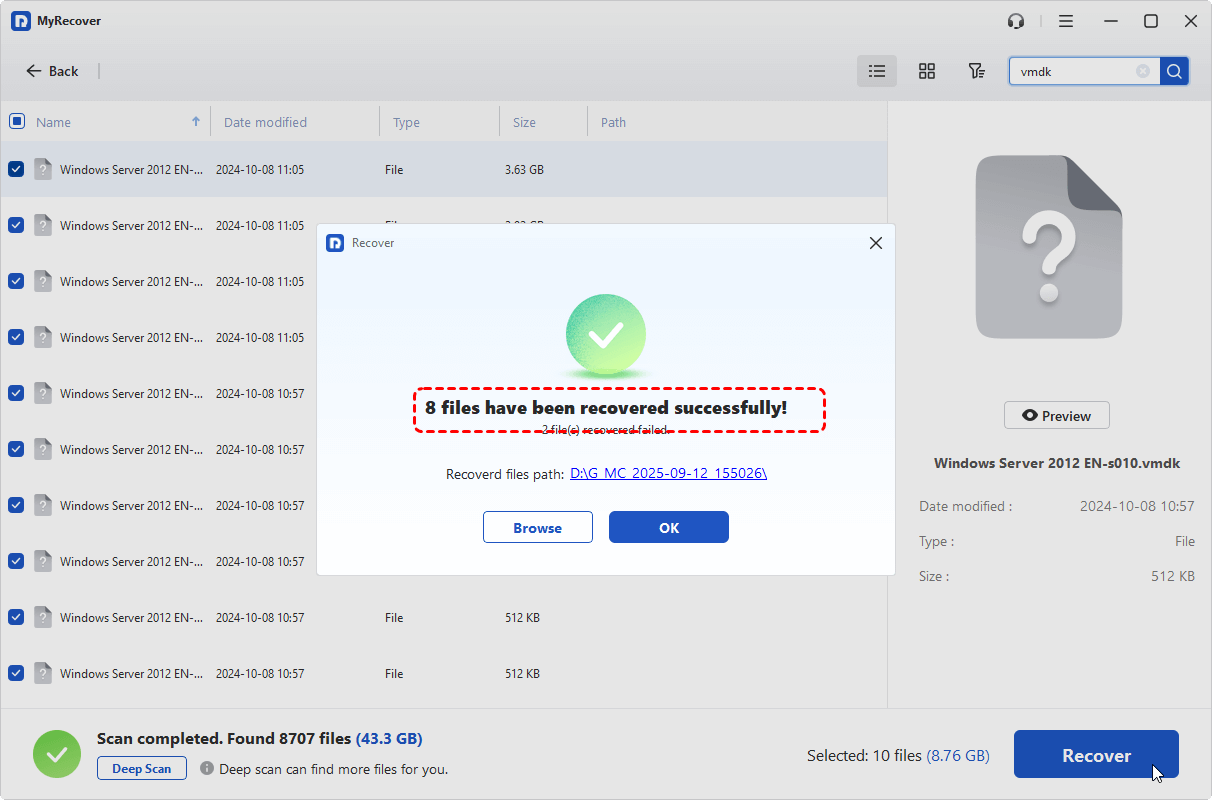
3. Search or filter for .vmdk files, select them, and click "Recover".
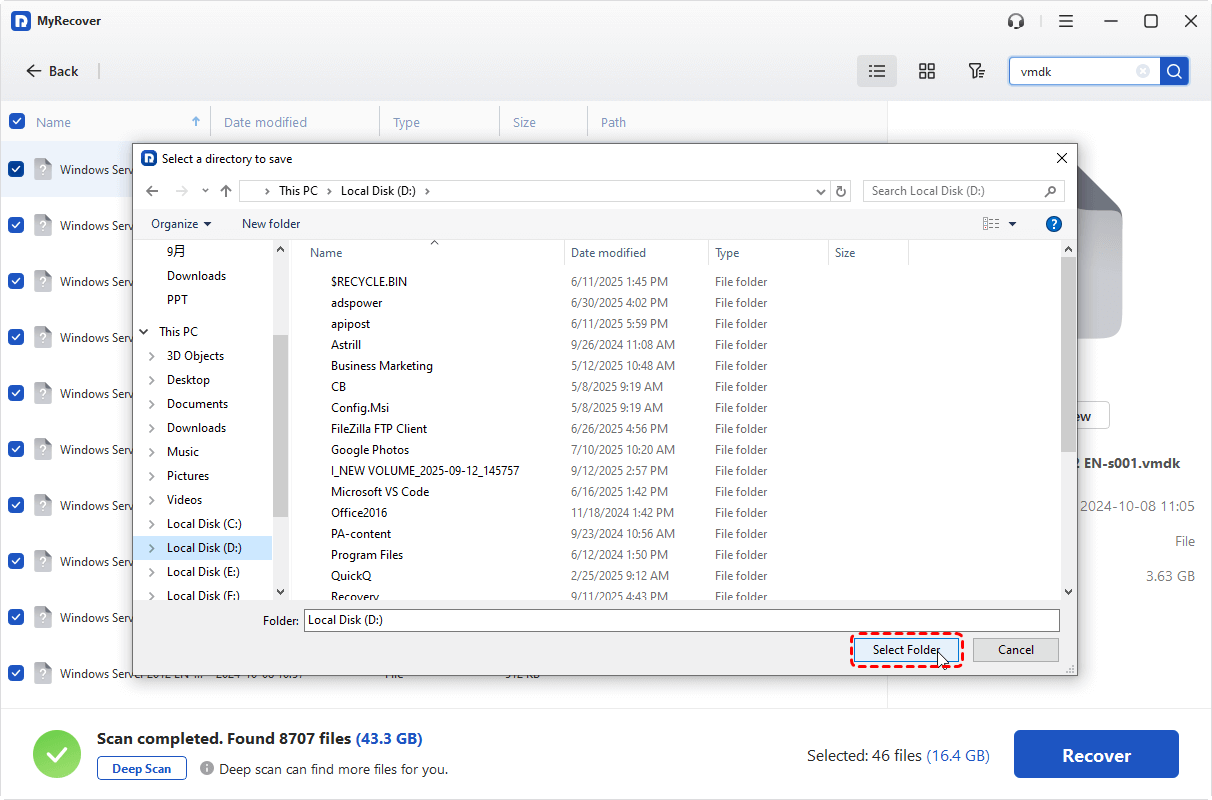
4. Save the recovered files to a different drive to avoid overwriting.
5. After the VMDK file recovery is completed, you can see a mini summary windows, indicating how many files have been recovered successfully and where you can access them now.
How to Repair or Recover Corrupted VMDK Files?
VMDK files can become corrupted due to sudden system crashes, improper shutdowns, software errors, virus attacks, or disk issues. When a VMDK file is corrupted, the virtual machine may fail to start, or certain data inside the virtual disk may be inaccessible.
Quick Tricks Before Repair or Recovery
Check for backups: If you have a recent backup of the virtual machine, restoring it is the safest and fastest option.
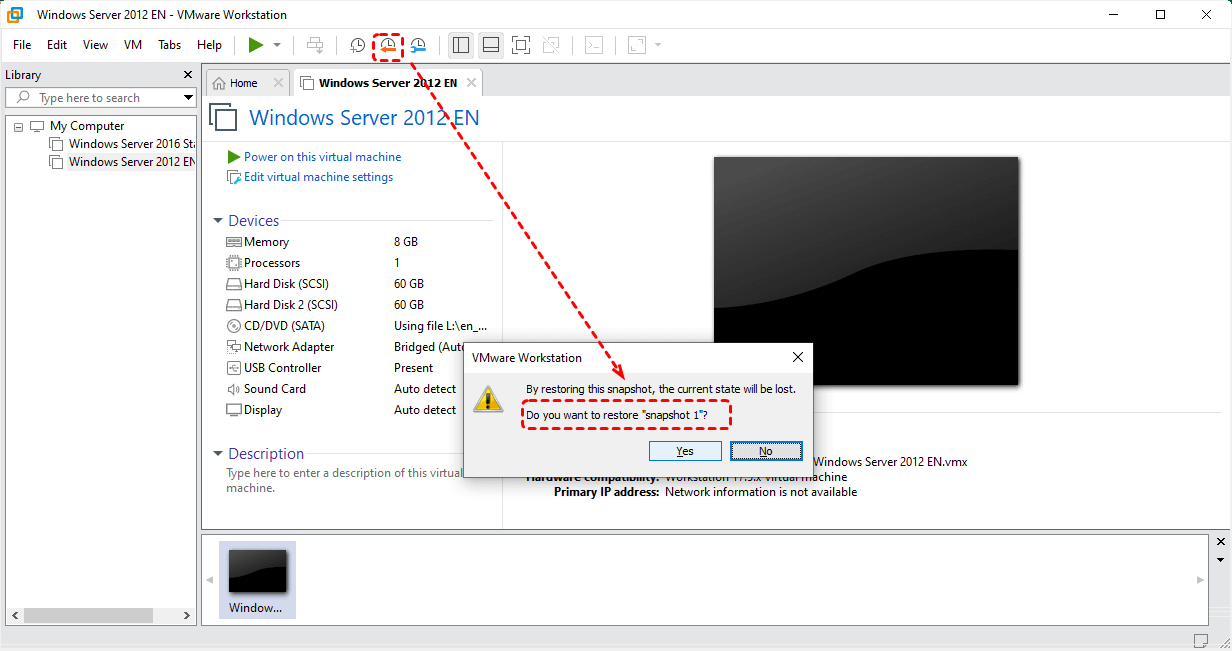
Snapshot recovery: VMware snapshots can sometimes allow you to revert the virtual disk to a previous state if the corruption happened after a snapshot was taken.
Use VMware Built-in Repair Tools
If you don’t have backups or snapshots, VMware provides a utility called "vmware-vdiskmanager" to check and repair minor errors in VMDK files. Follow these steps:
Step 1: Find the folder where your virtual machine is stored. Identify the corrupted ".vmdk" file. It is usually named like "YourVM.vmdk".
Step 2: Press "Win + S", type "cmd", and select "Run as administrator".

Step 3: Navigate to VMware Installation Folder (if needed). By default, "vmware-vdiskmanager" is installed in the VMware program folder. Example Windows path: C:\Program Files (x86)\VMware\VMware Workstation\
Step 4: Use the "cd" command to navigate to this folder:
cd "C:\Program Files (x86)\VMware\VMware Workstation\" (some parameters might vary based on your specific installation path)

Step 5: Run the Repair Command: vmware-vdiskmanager -R "full\path\to\disk.vmdk"
For example: vmware-vdiskmanager -R "D:\VMs\MyVirtualMachine\MyDisk.vmdk"
Step 6. Press Enter to start the repair process. Wait for the Process to Complete.
The tool will scan the virtual disk and attempt to fix minor corruption. After completion, open your virtual machine in VMware Workstation or Player.
In the End
Recovering or repairing VMDK files is essential to ensure the smooth operation of your virtual machines and protect critical data. Depending on the situation, you can start with simple solutions like checking the Recycle Bin or restoring from backups and snapshots. For more complex cases, tools like Windows File Recovery and professional software such as MyRecover (it also has the Technician edition, 1 license can be used on unlimited devices) make the recovery process safer and more efficient.
Additionally, minor corruption issues can often be repaired using VMware’s built-in vmware-vdiskmanager, allowing your virtual machine to function normally again. By following these methods, you can effectively restore deleted or corrupted VMDK files, minimizing data loss and keeping your virtual environments running smoothly.


Stay Updated With Our
Latest Tips
Add us as a preferred source on Google to never miss helpful guides.