
What Exactly Does Windows File History Backup? Step-by-Step Explanation
Windows File History is a useful tool for backing up your files, but many users aren’t sure exactly what it protects. In this detailed guide, we break down exactly what File History backs up. We also walk you through the step-by-step process to ensure that your important data is always secure. Learn how to back up documents, photos, and videos, etc. with this powerful Windows tool.
By Aria / Updated on November 21, 2025
Overview of File History
In Windows 10 and Windows 11, File History is a built-in backup tool that automatically backs up your personal files, ensuring that you can restore them in case of accidental deletion or modification. It is an easy-to-use feature that offers protection for documents, photos, and other important files stored on your PC. Unlike traditional system backups, which can back up the entire operating system and installed programs, File History is focused on safeguarding user-generated files and allowing you to restore previous versions of them.

By understanding how File History works and knowing how to configure it properly, you can ensure that your files are safe and recoverable, even after accidental deletion or file corruption. But what exactly does File History backup? Let’s dive into that.
What Exactly Does Windows File History Backup?
Many users immediately try to restore lost files using File History after discovering data loss. However, you may find that File History sometimes works, but sometimes fails to find the backup of the file you need. This is because File History does not back up everything.
Windows File History automatically backs up all specific files and folders contained in your User folder (C:\Users[Your Username]) and your Desktop. It doesn’t backup system files, applications, or settings.
✅What Does Windows File History Back Up?
File History targets the following types of files for backup:
- Documents: Files in your Documents folder, including text files, spreadsheets, and presentations.
- Pictures: Files in your Pictures folder, such as photos and artwork.
- Music: Files in your Music folder, including songs, albums, and soundtracks.
- Videos: Files in your Videos folder, including movies, clips, and home videos.
- Desktop Files: Anything saved on your Desktop will be backed up, allowing you to recover files that may have been accidentally deleted from there.
- Downloads: Anything you have downloaded on your computer in the Downloads folder.
❌What Windows File History Does Not Back Up?
By default, File History doesn’t back up system files, programs, or settings. It’s a file-level backup tool designed for recovering personal data, not for restoring an entire operating system. Here’s what it does not back up:
- System Files: Windows File History does not back up system files, applications, or operating system components. It won’t help you recover your Windows system or programs if they’re corrupted or lost.
- Program Settings: Any settings related to third-party applications (such as browser configurations or software preferences) are not included in the backup.
- Email or Cloud Data: Files saved directly to cloud storage services like OneDrive or Gmail are not backed up by File History, though these services typically have their own backup and recovery systems in place.
- Files Outside of Personal Folders: Files stored outside the User folder (C:\Users[Your Username]) will not be included unless you manually add them to File History’s backup locations.
How to Set Up and Configure Windows File History
Setting up File History is simple and doesn’t require any advanced technical skills. You can add or exclude any files from the backup plan according to your needs. Here’s how you can enable it and configure it for optimal file protection:
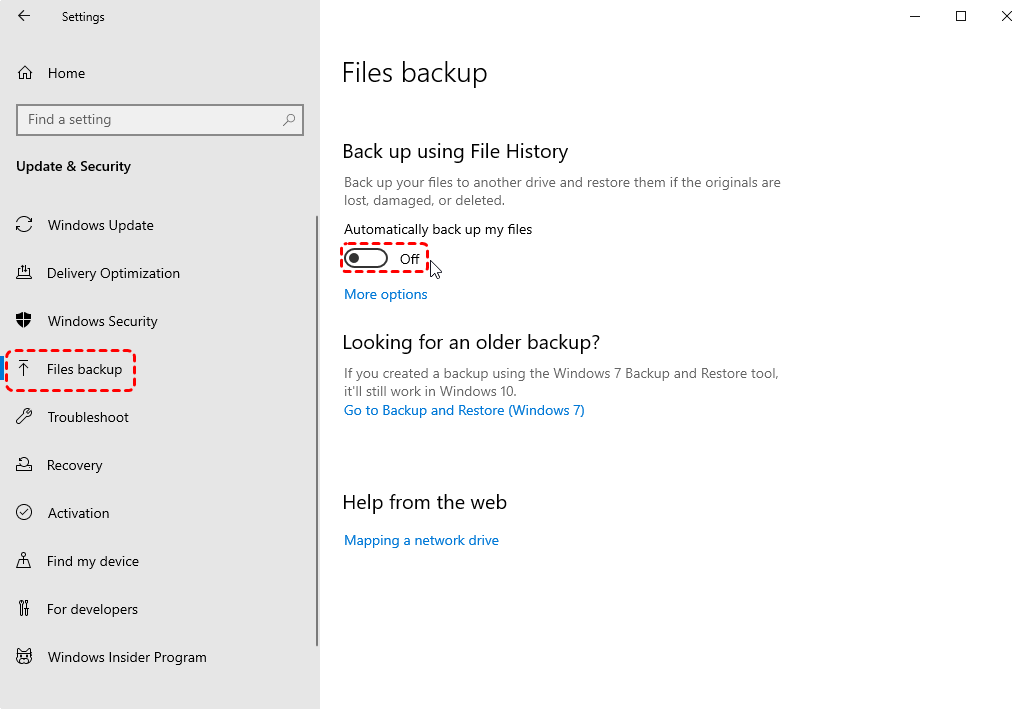
Step 1. Enable File History
Navigate to "Settings" > "Update & Security" > "Files backup", then switch the "Back up using File History" to "On".
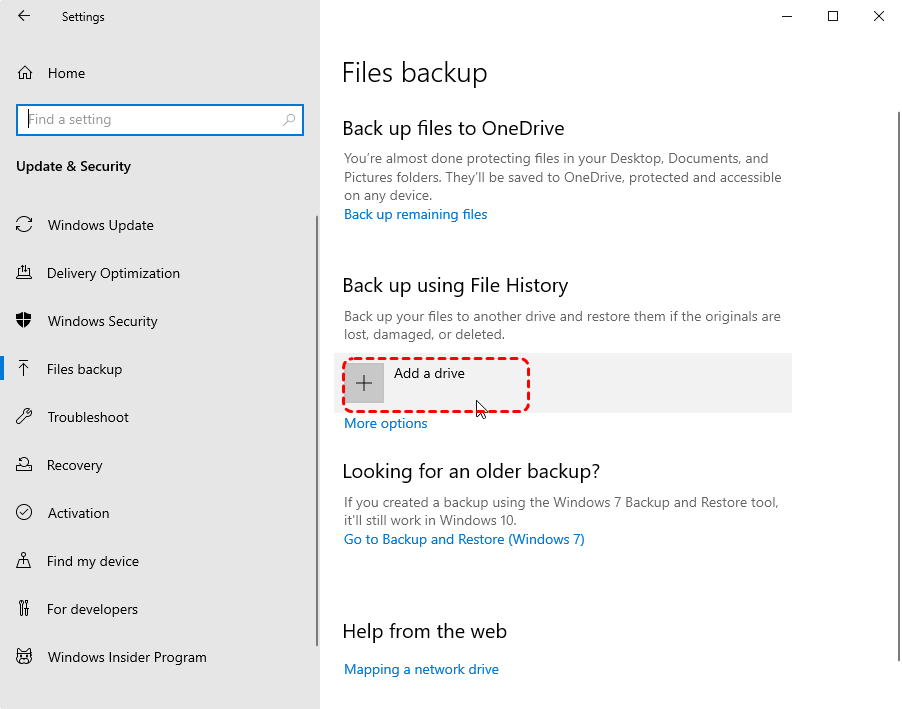
Step 2. Set a Backup Drive
If no drive is selected automatically, click "Add a drive" to choose an external hard drive or network location to save the backups. When the original drive fails, you can change the File History drive to continue the backup process.
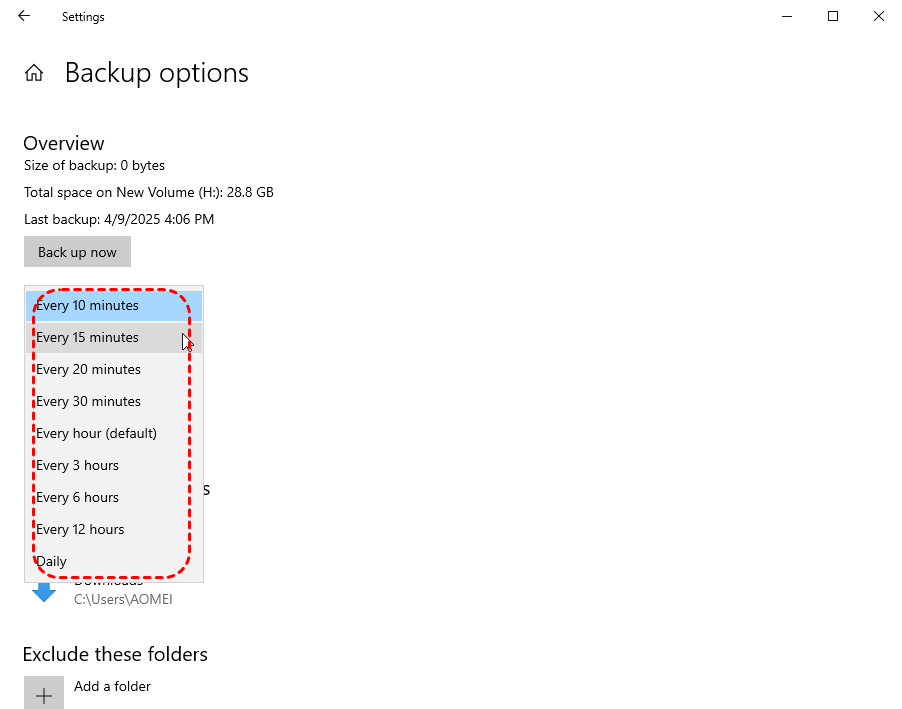
Step 3. Customize Backup Settings
You can choose how frequently to back up files (e.g., every hour, every day) and how long to keep the backups (e.g., forever, 1 month).
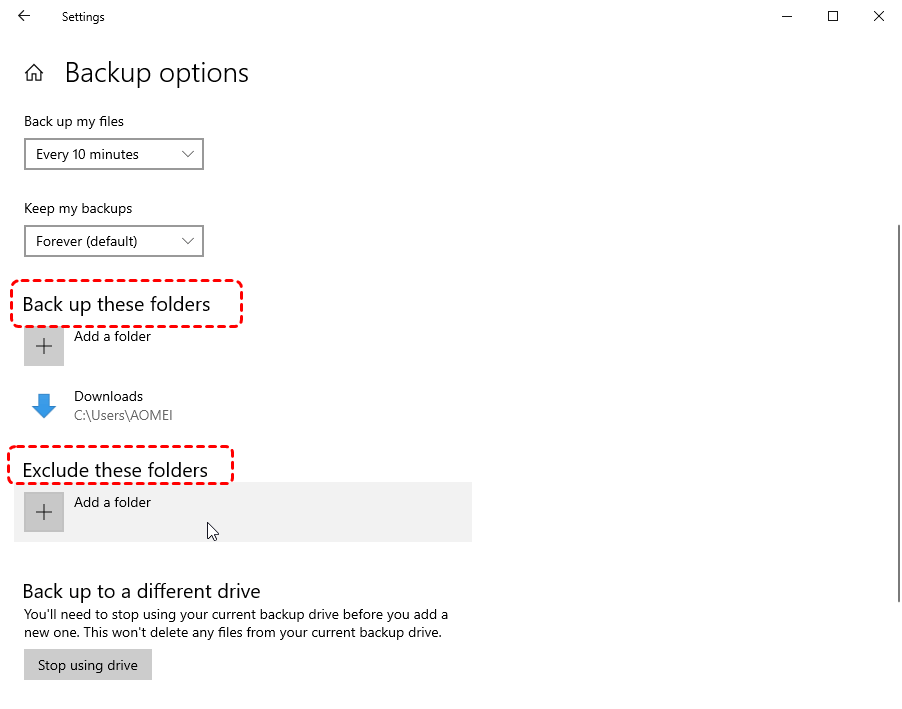
Step 4. Add or Exclude Specific Folder to the Backup Plan
After confirming the files that need to be backed up, you can also select which folders to include or exclude from the backup. Simply click on "Add a folder" under "Back up these folders" to include new locations, or under "Exclude these folders" to remove certain directories.
Alternative Data Recovery Options: Using MyRecover
As previously mentioned, Windows File History is unable to back up all files. When these unbacked-up files are lost, does it imply permanent loss? Fear not. In such cases, professional data recovery software like MyRecover proves effective. It supports more than 500 file loss scenarios, including emptied Recycle Bins, deleted partitions, permanently erased files, formatted drives, and inaccessible hard disks, enabling effortless retrieval of your desired files.

- Intuitive interface requiring no technical expertise.
- Faster scanning compared to command-line tools.
- Work on HDD, SSD, USB flash drive, memory card, etc.
- Compatible with all Windows operating systems and Server.
Step 1. Download and install MyRecover on your computer from Microsoft Store, avoid installing it on the drive with lost files.
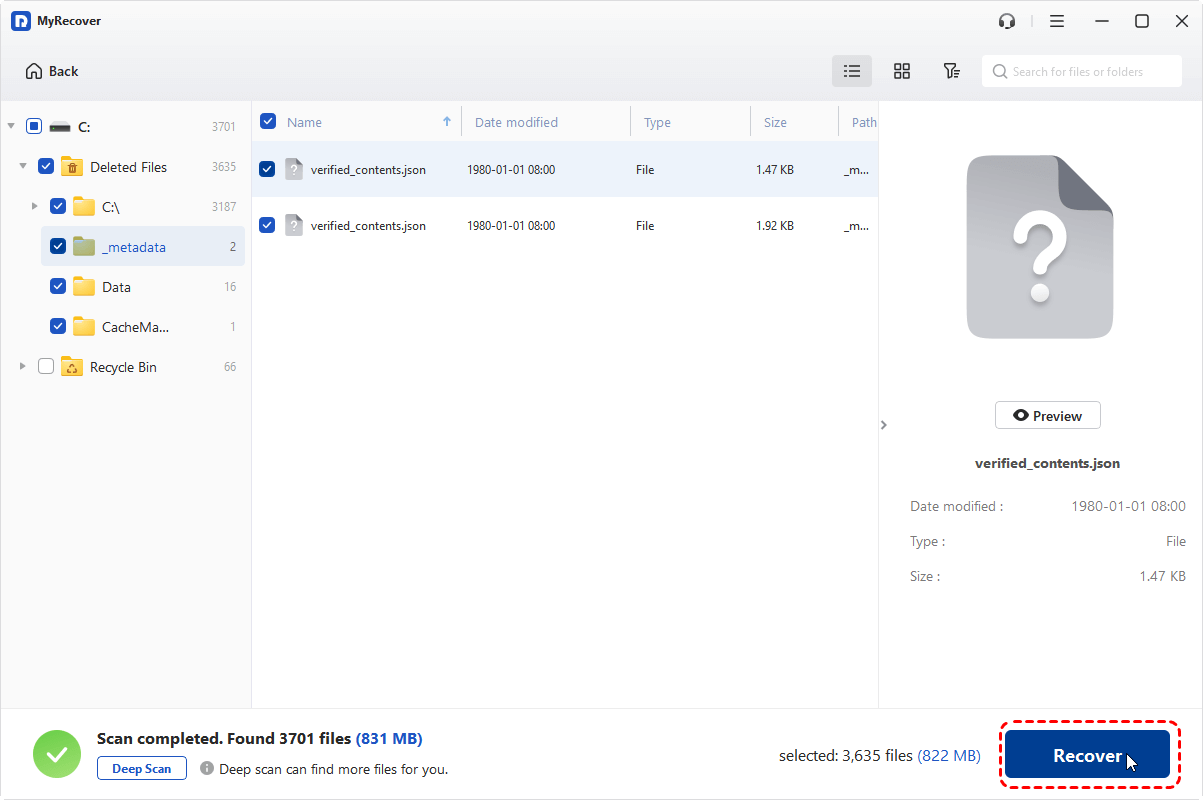
Step 2. Run the program and select a drive including the deleted files to scan, then click "Scan". After the quick scan is complete, you can perform a more comprehensive scan by clicking "Deep Scan" to find more lost file fragments.

Step 3. Choose the files you would like to recover from the recoverable lists and click "Recover".
If you're unable to locate the desired files promptly, you may utilize the filtering function located in the top-right corner.
Options in the Filter feature:
-
Type: Different file types, such as images, videos, documents, mails, webpage, compressed files, etc. are included.
-
Data Modified: Sort files by modification time—you can choose to list them from most recent to oldest or from oldest to most recent.
-
Size: It allows you to filter file size from less than 512KB to 512KB ~10MB to 10MB~100MB and above.
-
Keyword: Type the keywords of the file name you want to recover into the search box.
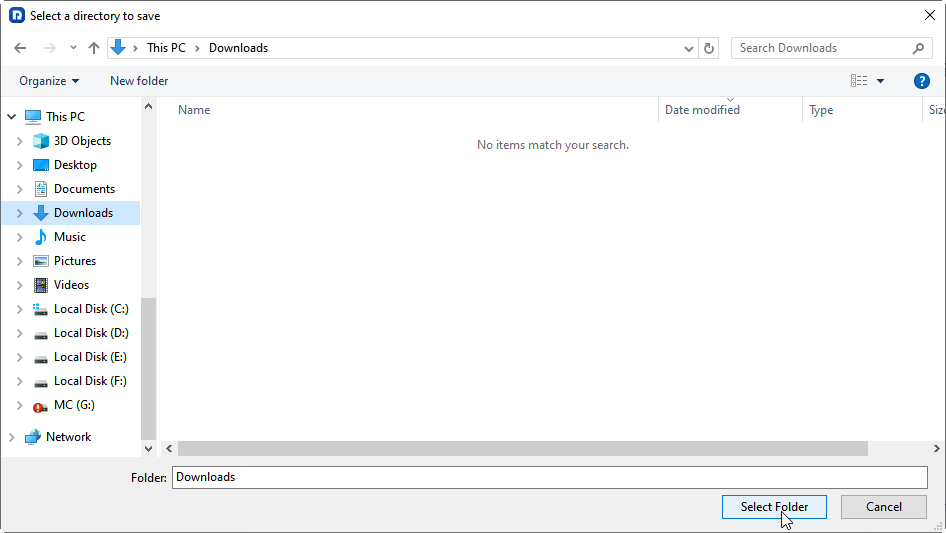
Step 4. Select a safe location to save the recovered files.
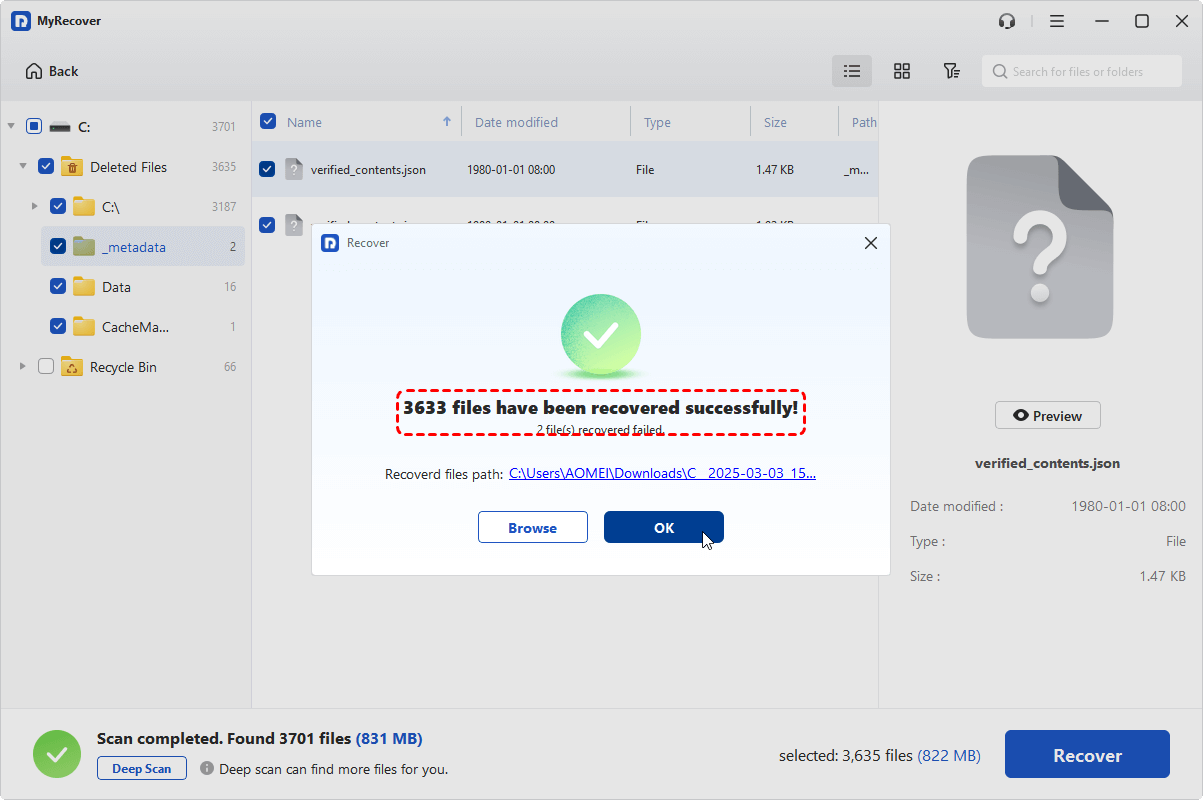
Once the process is done, the message "Files have been recovered successfully" will pop up. Then, you can check the recovered files by clicking on the "Browse" button.
Whether you're recovering from File History or dealing with more complex data loss with MyRecover, they're all good options to ensure you files security. In necessary circumstances, the integration of these two methods can achieve the maximum protection of data security.
Final Thoughts
In a short, File History is an excellent tool for regular file backups, offering easy recovery of documents, pictures, and other personal files. However, for more complex data loss situations, such as permanent deletions or corrupted files, MyRecover offers a more advanced and comprehensive recovery solution.
For users with more advanced needs, upgrading to MyRecover Professional edition, you can enjoy unlimited data recovery and the ability to preview files before restoring them. It even supports data recovery from unbootable laptop.


Stay Updated With Our
Latest Tips
Add us as a preferred source on Google to never miss helpful guides.