
What Happens If You Unplug a Hard Drive Without Ejecting?
This article explains what happens if you unplug a hard drive without ejecting, detailing risks like file corruption and directory damage. We also provide solutions for when you are unable to eject external hard drive windows 11, offering safe removal techniques and data recovery steps.
By Delores / Updated on December 5, 2025
Preface
You might be curious about what happens if you unplug a hard drive without ejecting. Is your precious data lost? Do you know that drive filled with family photos or critical work files? This comprehensive guide not only explains what happens but also shows why the "Safely Remove Hardware" notification appears, what’s really at stake when you ignore it, and most importantly, how to fix things if you've already taken the plunge. Let's find out more details.
About the Safe Removal Process
When you save a file to your external drive, your system might not write every single bit of data immediately. To keep things running smoothly, it often uses a trick called "write caching".
This means it tells you, "Yep, saved!" while it actually holds some of that data in its speedy temporary memory (RAM), planning to write it to the slower hard drive in the background when it has a free moment. Safely ejecting a drive is the critical final step that tells the operating system to complete and lock in all those pending changes to this master map.
Pulling the plug during the process interrupts this conversation mid-sentence, potentially leaving data half-written and file ledgers unbalanced.
Write caching is a classic double-edged sword. On one hand, it makes your computer feel incredibly responsive. On the other hand, it creates a dangerous illusion of completeness. That green progress bar finishes, but the final act might still be pending in the cache.
In Windows, you can change a drive's policy to "Quick removal", which essentially disables write caching for that device. This makes it safer to unplug, but it can slightly slow down write speeds. The default is usually "Better performance", which uses caching and makes safe ejection non-negotiable.
What Happens If You Unplug a Hard Drive Without Ejecting
What happens if you unplug a hard drive without ejecting? There are some potential risks:
⭕ Long-Term Damage to File Systems. This is the directory that tells the OS where every file begins and ends. An improper ejection can corrupt this index. Symptoms of this are far scarier: your drive might ask to be formatted when you plug it in next, entire folders could appear empty (even though the data is physically still there), or you might see error messages like "The file or directory is corrupted and unreadable".
⭕ Potential for Physical Drive Failure.Now, for the rarest but most severe outcome: physical damage. This is primarily a concern for traditional spinning Hard Disk Drives (HDDs), not Solid State Drives (SSDs). An HDD has a read/write head that floats nanometers above spinning platters. If the drive is actively reading or writing and loses power abruptly, that head can "crash" onto the platter surface. This can render sectors of the drive permanently unreadable.
What to Do After Unplugging a Hard Drive without Ejecting?
Alright, take a deep breath. And try the following steps:
Do not immediately plug it back in. If the file system was damaged, plugging it back in might trigger Windows to attempt an automatic repair, which can sometimes make things more complicated for dedicated recovery software later. Give yourself and the drive a moment.
The next step is the cautious reconnect. Plug the drive back into the same USB port if possible. Listen for unusual sounds—clicking or grinding from an HDD is a very bad sign pointing to physical damage.
If the drive is detected, don't open any files from it yet.
How to Repair a Corrupted Drive After Unplugging without Safely Ejecting?
After unplugging a hard drive without ejecting, the Windows system can diagnose and fix your hard drive errors. Or you can manually fix it.
Way 1. Run CHKDSK Command
1. Open Command Prompt as Administrator.
2. Type chkdsk G: /f /r (replace G with your drive letter).

This tool will scan the file system for inconsistencies and attempt logical repairs. It can fix directory errors and mark bad sectors.
Warning: While chkdsk can restore access to a drive, its repair method can sometimes lead to "lost" files being moved to a FOUND.000 folder with cryptic names, or in rare cases, it can exacerbate data loss if the corruption is severe. It's a good first-aid tool, but not a data recovery solution.
Way 2. Repair Disk Errors
Beyond chkdsk, Windows offers the "Error-checking" tool with a nicer interface.
1. In File Explorer, right-click the drive, select Properties.
2. Choose Tools, and hit Check in the Error checking section.
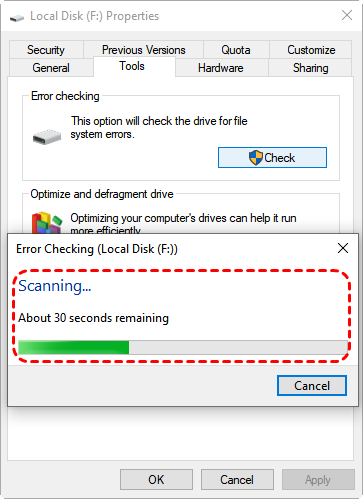
3. Hit Scan drive to fix errors.
This can sometimes resolve minor file system issues. If the drive is asking to be formatted, DO NOT FORMAT IT. Formatting wipes the file system index completely, making professional data recovery much harder.
At this point, if your data is valuable and these basic tools don't work or make things seem worse, it's time to stop DIY repairs and consider specialized software.
How to Eject an External Hard Drive in Windows 11, 10?
Prevention is always better than a cure. Knowing how to eject an external hard drive in Windows 11 correctly should become as habitual as putting on your seatbelt.
Way 1. Safely Eject in the System Tray
The standard and recommended method is via the system tray.
1. Look for the tiny upward arrow on the far right of your taskbar and click it.
2. You should see an icon that looks like a USB plug with a green checkmark, labeled "Safely Remove Hardware and Eject Media", click it.
3. A list of your removable devices will pop up. Click on the name of the drive you wish to remove.
4. Wait for the notification that says "Safe to Remove Hardware" or something similar. Only then should you physically unplug the cable. This process ensures all disk activity is stopped and caches are flushed.
Now your hard drive is safely removed. However, the icon might sometimes be hidden. You can manage this in Windows 11 settings by going to Start > Settings > Personalization > Taskbar > Other system tray icons, finding the Safely Remove Hardware and Eject Media option, and then turning it on.

Way 2. Safely Eject Your Hard Drive via File Explorer
If the system tray icon is being finicky, File Explorer offers a straightforward alternative.
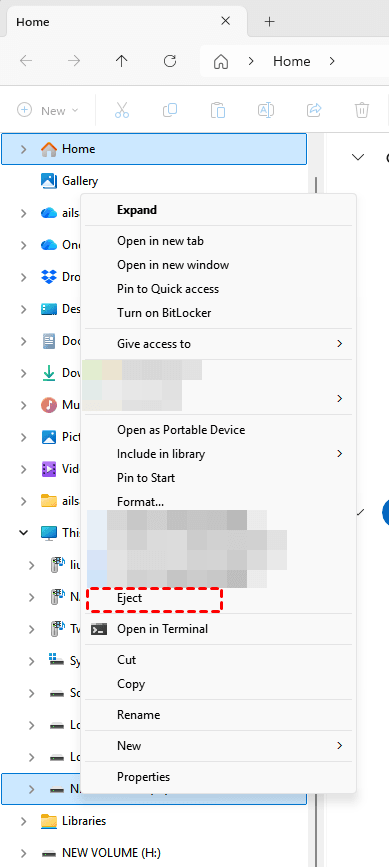
1. Open File Explorer (Win+E), and look at the navigation pane on the left.
2. Under "This PC", you should see your external drive listed.
3. Simply right-click on the drive icon and select "Eject" from the context menu. Again, wait for the confirmation before unplugging.
You can also click on the drive in the main pane and use the "Eject" button on the File Explorer ribbon under the "Drive Tools" tab.
Unable to Eject External Hard Drive in Windows 11
Sometimes, you're just unable to eject an external hard drive in Windows 11, and it displays the error message "Problem ejecting USB mass storage devices. This device is currently in use", but it's usually solvable.
This message typically means Windows believes a program or process is still actively using files on the drive. It's being protective, stopping you from unplugging it while it's "in use."
The most common culprits are:
- Having a file explorer window open to that drive,
- An application (like a photo editor or media player) that has a file from the drive open,
- Or even antivirus software that is scanning the drive in the background.
Way 1. Close All Related Programs
Start by closing any obvious programs and file explorer windows pointing to that drive.
Way 2. Close Related Process via Windows Resource Monitor
If the problem persists, you can use the built-in Windows Resource Monitor to find the sneaky process.
1. Press Ctrl+Shift+Esc to open Task Manager, go to the "Performance" tab, and click "Open Resource Monitor" at the bottom.
2. Go to the "CPU" tab, and in the "Associated Handles" search box on the right, type the drive letter of your external drive (e.g., E:). It will list every single process that has a "handle" (an open connection) to anything on that drive.
3. You can then right-click the offending process and "End Process" to close it, after which you should be able to eject safely.
Way 3. Force Eject Your Hard Drive
As a last resort, you can perform a "soft" force ejection by shutting down or putting your computer to sleep. Once the PC is fully off, it's generally safe to remove the external hard drive when the computer is off, as all processes are halted and caches are cleared. You can then unplug it.
Restarting the PC without the drive plugged in can also clear any lingering locks.
The nuclear option is to physically unplug it while the system is on, but this, of course, brings us right back to the risks we detailed at the start. Only consider this if the data on the drive is unimportant and you have no other option.
FAQs About Unplugging without Ejecting
Q: I unplugged during a file copy. Is the original file gone?
A: Likely not. The original file is probably still on the source drive. Don't save anything new there—use recovery software (like MyRecover) on the source drive immediately, saving recovered files to a different drive.
Q: Does unplugging damage the drive or just the data?
A: Usually just data, but spinning hard drives (HDDs) risk physical damage if power is cut while active. SSDs only risk data corruption.
Q: My drive now asks to be formatted. Is everything lost?
A: No—your files are likely still there. The prompt means the file system is damaged. Do not format. Use recovery software to scan the drive instead.
Q: Is "Safely Remove Hardware" still needed with modern USB-C/SSDs?
A: Yes—the risk of data corruption remains due to write caching, even with newer connections. Proper ejection is a good habit.
Q: What should I do right after accidentally unplugging?
A: Don't panic. Wait 10–20 seconds, then reconnect. If detected, back up any accessible data to another device. Run Windows Error Checking (chkdsk). If issues continue, use recovery software.
Q: Can I disable the eject notification and just unplug?
A: Yes, by setting the drive to "Quick removal" in Device Manager. However, ejecting is still recommended as an extra safety step for important data.
Q: Is It Safe to Remove an External Hard Drive When the Computer Is Off?
A: Yes, it is safe to remove an external hard drive when the computer is completely powered off. At that point, there is no activity, so you can unplug it without risk.
Recovering Files with MyRecover After an Unsafe Removal
If you find yourself facing corrupted files or a missing file system after an unsafe ejection, a tool like MyRecover can be your best option. It's designed to navigate around logical corruption and get your data back. Here's how to use it step-by-step:
1. Download and install the MyRecover software on a drive that is not the corrupted external drive you need to scan.
2. Launch MyRecover. Tap Disk Data Recovery or another feature that suits you, click Scan while pointing to the drive that was unplugged without ejecting.

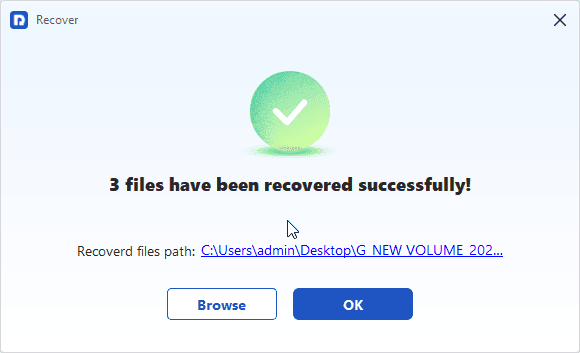
3. Wait for the scanning to complete, and hit OK.
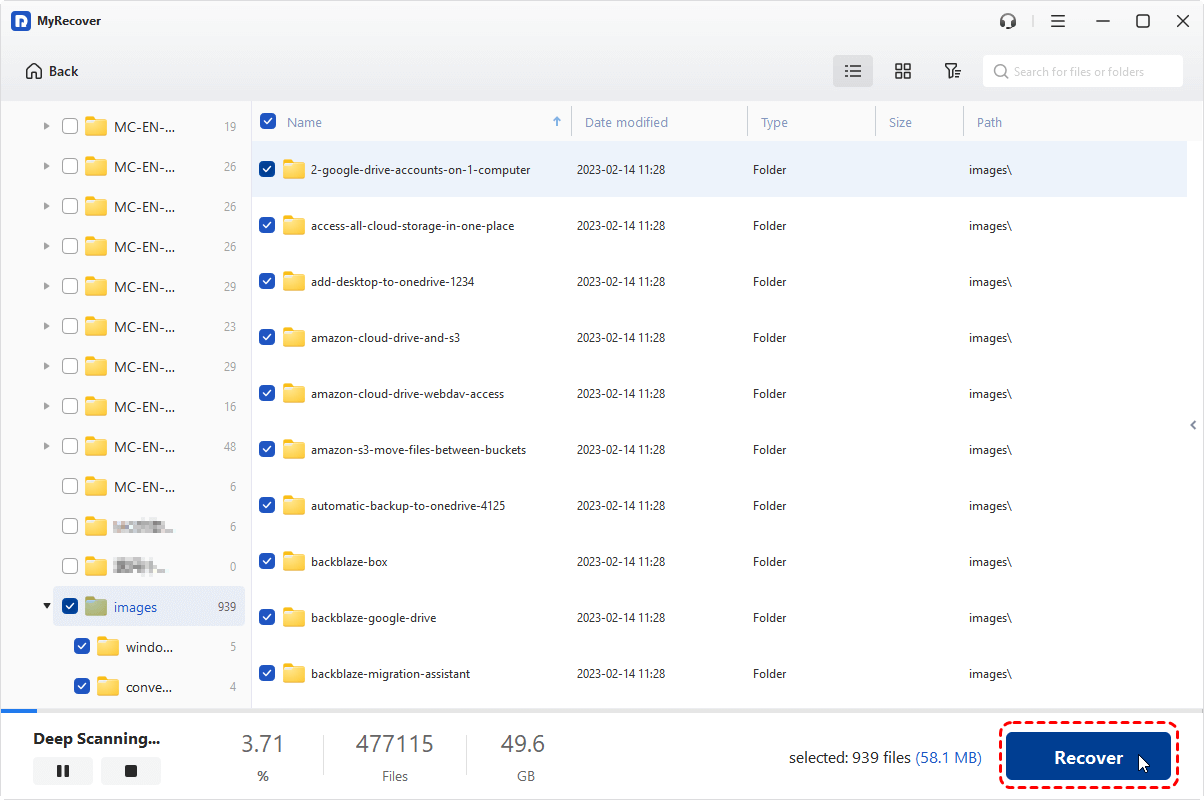
4. Preview and select the files you need, and hit Recover.
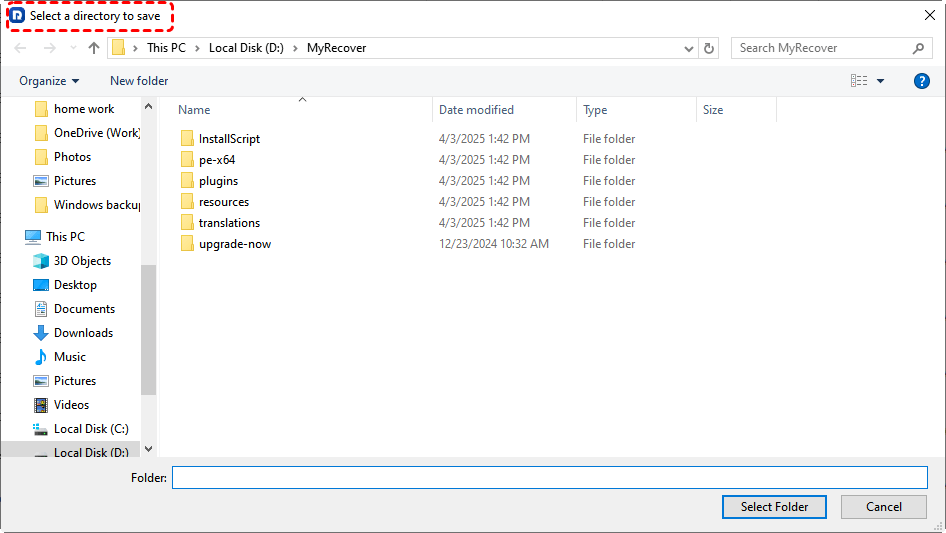
5. Choose another safe location to keep them, and check the integrity of the destination folder.
- Notes:✎...
- MyRecover will first perform a quick scan of existing file structures. If no files you need, you can run a deep scan, which searches the drive sector-by-sector for file signatures. This is essential for finding files when the directory is damaged.
- As files are found, you can browse them by original path, file type (photos, documents, videos), size, name, or date.
- Use the preview function to verify that critical files are intact before recovery.
- The time required depends on the amount of data. Once finished, navigate to the destination folder you selected. Your recovered files should be there.
- You can try MyRecover Technician to recover files from unlimited computers fast.

- Recover Deleted Files Easily with Simple Clicks
- 1000+ File Formats Supported
- Support HDD, SSD, External Hard Drive, USB Drive, SD Card, etc.
- Quickly Find Files Using File Types, Name, Size, etc.
- Preview Files Before Recovering
- Recover Unlimited Data


Stay Updated With Our
Latest Tips
Add us as a preferred source on Google to never miss helpful guides.