
Where Do Pictures Go When You Delete Them on Phone or PC?
When you delete pictures from your iPhone or PC, they don’t disappear right away. Instead, they move to folders like Recently Deleted or the Recycle Bin, where they stay for a limited time before being permanently erased. This guide explains the full photo deletion process, how to recover images before they’re lost for good, and the difference between deleting photos temporarily and permanently.
By Emma / Updated on February 5, 2026
Where Do Pictures Go When You Delete Them Off Your Phone?

When you delete pictures off your phone, they usually don’t disappear right away — they’re just moved to a temporary storage folder. Here’s what happens depending on your device:
On iPhone
- Deleted photos move to the "Recently Deleted" album in the Photos app.
- They stay there for 30 days before being permanently erased.
After 30 days (or if you manually delete them from that folder), the photos are permanently deleted and can only be recovered using iCloud backup or data recovery software.
On Android
- Deleted pictures usually go to a "Trash"or "Recently Deleted" folder in the Photos app (like Google Photos, Samsung Gallery, etc.).
- Most phones keep them for 30–60 days before auto-deleting.
- If synced with Google Photos, deleted pictures also go to its "Trash"and can be restored from there within 60 days.
Where Do Pictures Go When You Delete Them on Windows PC?
Similarly, when you delete pictures on a Windows PC, they aren’t erased right away. either. Instead, Windows temporarily keeps them in the Recycle Bin, giving you a chance to bring them back before they’re gone for good.
- ★Tip:
- if you delete files from USB flash drive or other types of removable media on computers, they won’t go to Recycle Bin, but permanently deleted.
1: Sent to the Recycle Bin
When you remove a photo by pressing Delete or dragging it to the Recycle Bin, Windows stores it there until you clear it manually or the bin reaches its storage limit.
2: Fully Erased
Pics deleted with Shift + Delete, or emptied from the Recycle Bin, skip that temporary stage and are marked for permanent removal.
Difference Between Deleting Photos Temporarily and Permanently?
🗑️When you delete a photo temporarily, it isn’t erased right away. Instead, it’s moved to a holding folder (like Recently Deleted on iPhone or Android, or the Recycle Bin on Windows).
- The photo still exists on your device — it’s just hidden from your main gallery or folder.
- You can restore it easily within a certain period (usually 30–60 days).
- Temporary deletion is meant to give you a chance to recover photos you deleted by mistake.
❌When photos are permanently deleted or emptied from the Recycle Bin, they’re completely removed from your visible storage — you can’t recover them from the Recently Deleted or Recycle Bin anymore.
- The file’s space is marked as “available” for new data.
- While the image may still exist in the background for a short time, it becomes inaccessible without recovery tools.
- Over time or after new data is saved, the deleted photo’s data is overwritten and gone forever.
How to Recover Deleted Pictures from Phone?
After understanding where pics go when you delete them permanently or temporarily, let’s move on to how you can get them back when necessary.
For iPhone Users
1. Check the Recently Deleted Album
- Open the Photos app.
- Go to Albums > Recently Deleted.
- Tap Select, choose the photos you want, and tap “Recover”.
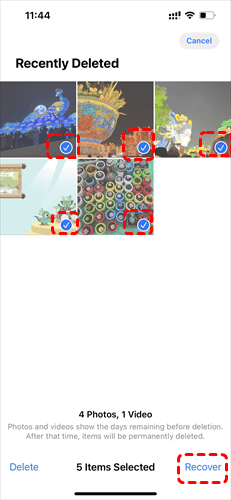
Photos remain there for 30 days before you delete them from Recently Deleted.
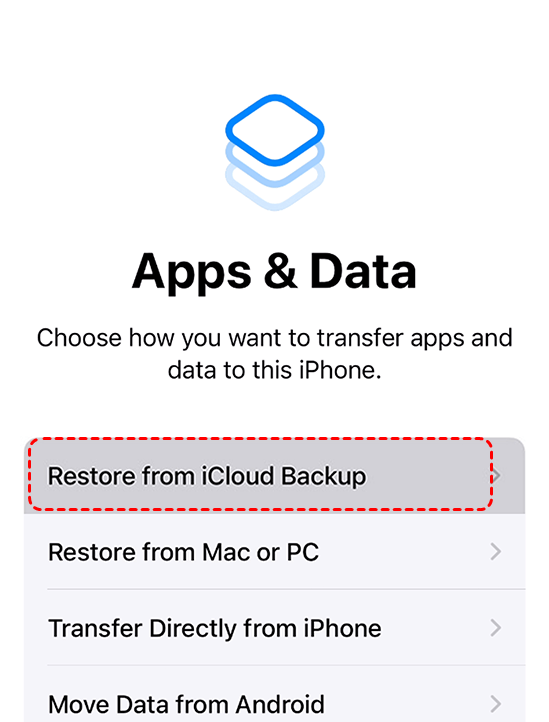
2. Restore from iCloud Backup
- Go to Settings > General > Transfer or Reset iPhone > Erase All Content and Settings.
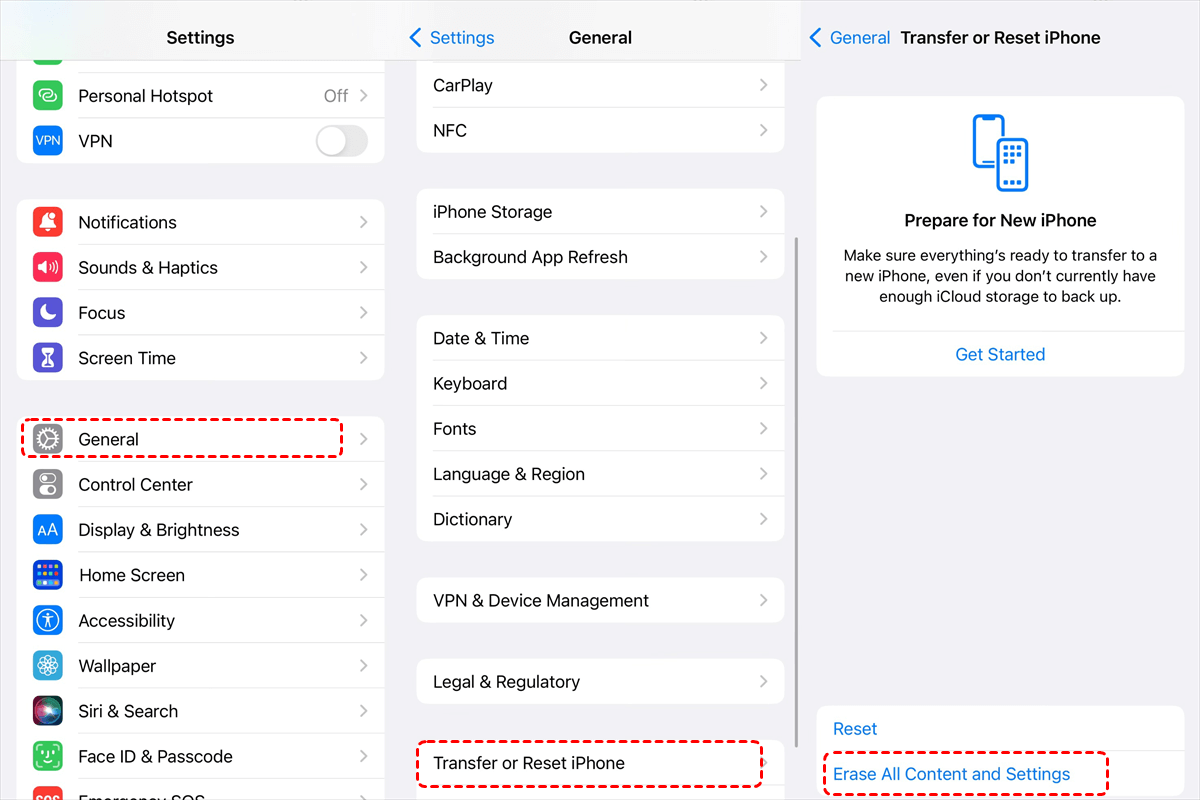
- During setup, choose Restore from “iCloud Backup” and select a backup made before the deletion.
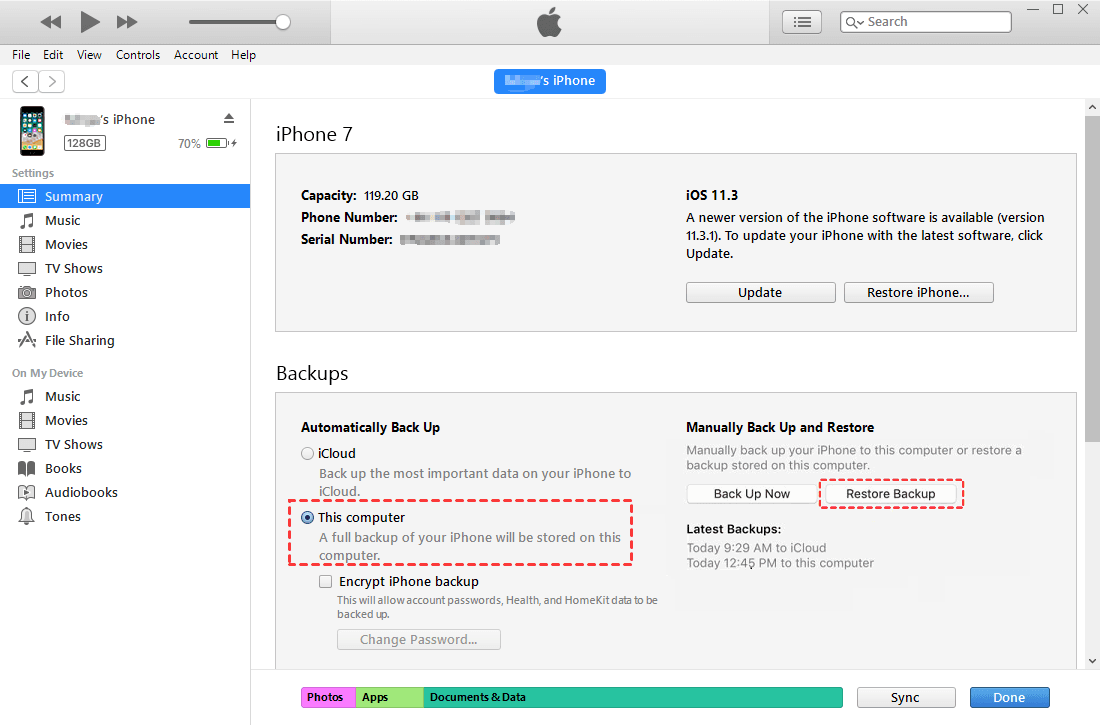
3. Use iTunes/Finder Backup
- Connect your iPhone to your computer.
- Open Finder (Mac) or iTunes (Windows).
- Select your device → “Restore Backup”, and pick one that includes your deleted photos.
For Android Users
1. Check the Trash Bin
- Open the Gallery or Photos app. Go to “Trash Bin”.

- Select the photos and tap “Restore”.
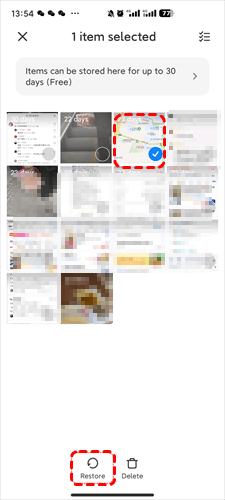
Most phones keep deleted items for 30–60 days.
2. Restore from Google Photos Backup
If your Android phone is synced with Google Photos, there’s a good chance your deleted pictures are still stored in the cloud and can be restored easily.
- Visit the Google Photos website or open the app.
- Go to Library > Trash.
- Select the deleted pictures and tap “Restore”.
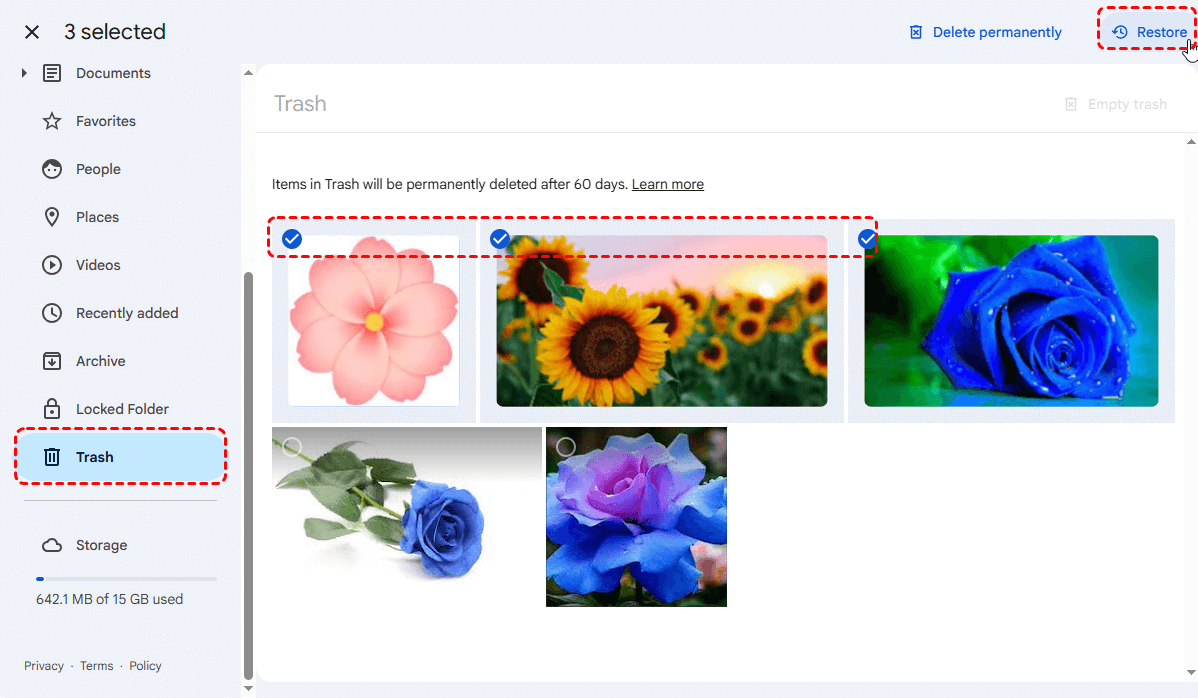
They’ll reappear in your main gallery if syncing was enabled.
How to Recover Deleted Pictures from PC?
When you delete pictures on a Windows PC, they usually go to the Recycle Bin first. If they’re permanently deleted, recovery is still possible using backups or data recovery software. Here’s how to do it step by step.
- If your photos were saved on a memory card and accidentally deleted from your phone, simply remove the card, connect it to a Windows PC, and recover the images using Microsoft Windows File Recovery (Method 3) or data recovery software (Method 4).
1. Restore from the Recycle Bin
Most deleted photos aren’t gone immediately — Windows temporarily stores them in the Recycle Bin. Open the Recycle Bin on your desktop. Browse or search for the deleted photos. Right-click the photo(s) and select “Restore”.
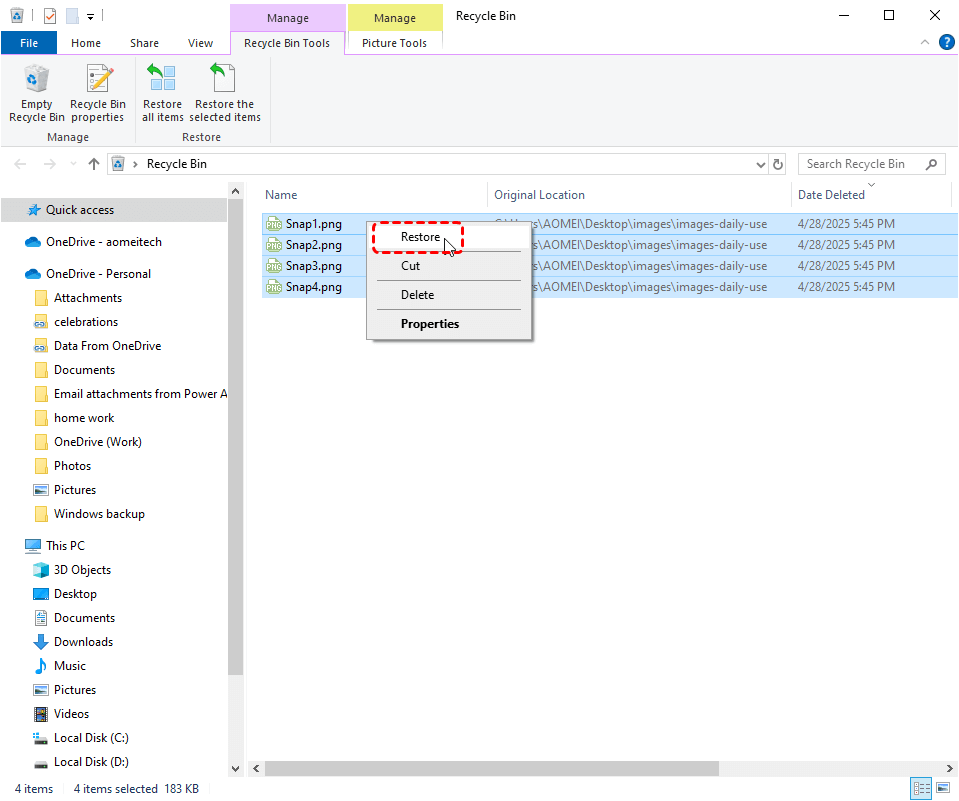
The files will return to their original location. This method works for photos deleted normally (without Shift + Delete) or before the Recycle Bin has been emptied.
2. Recover from a Backup
If the photos aren’t in the Recycle Bin, check if you have a backup:
Options:
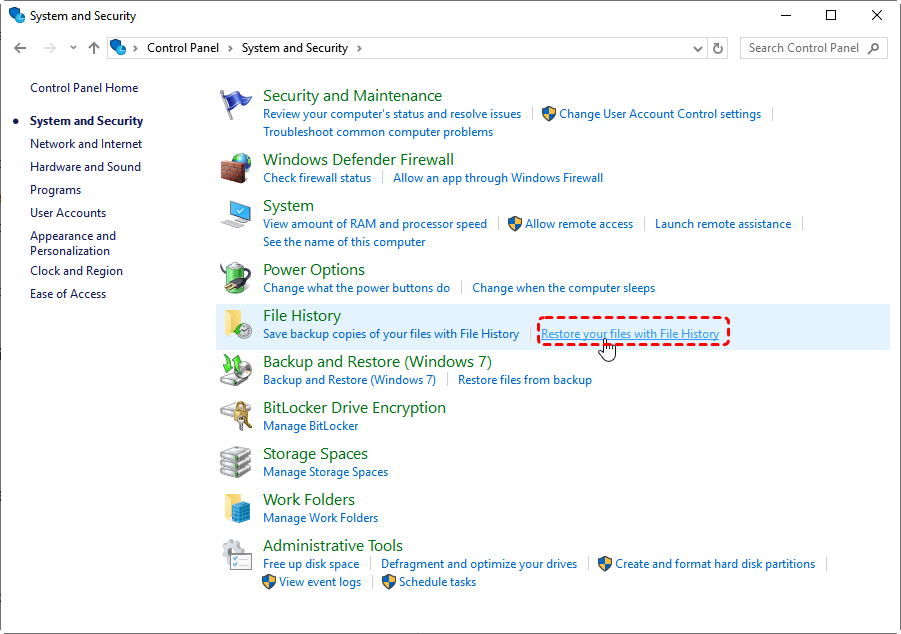
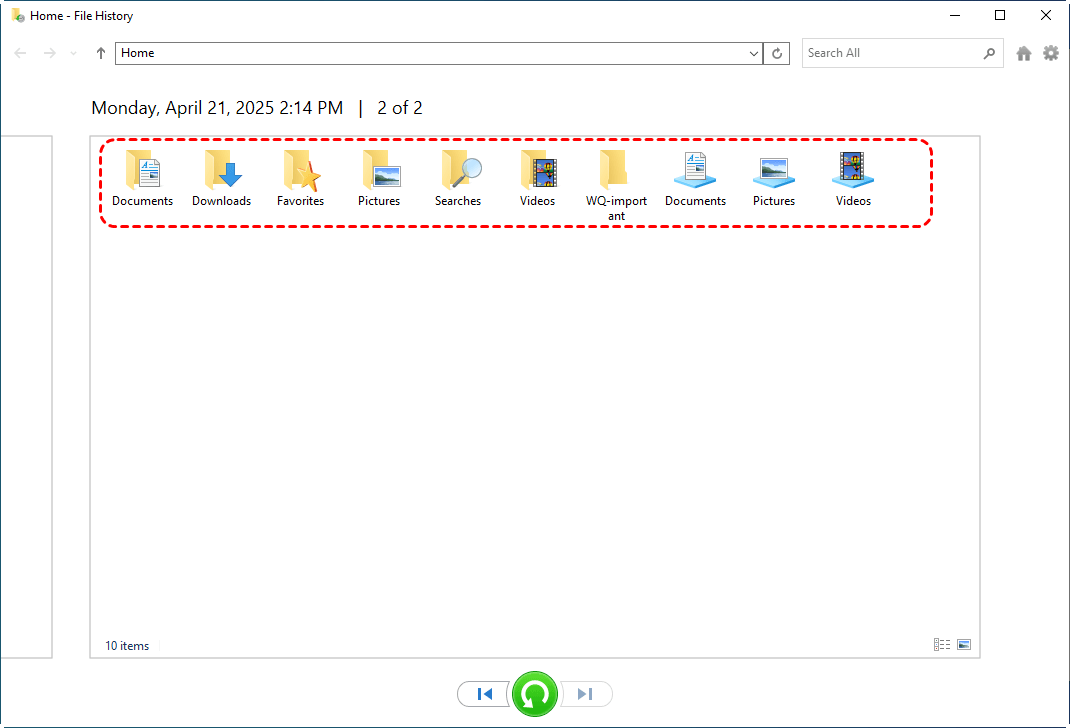
Recover from File History: Go to Control Panel > System and Security > Restore your files with File History and restore your pictures from previous versions.
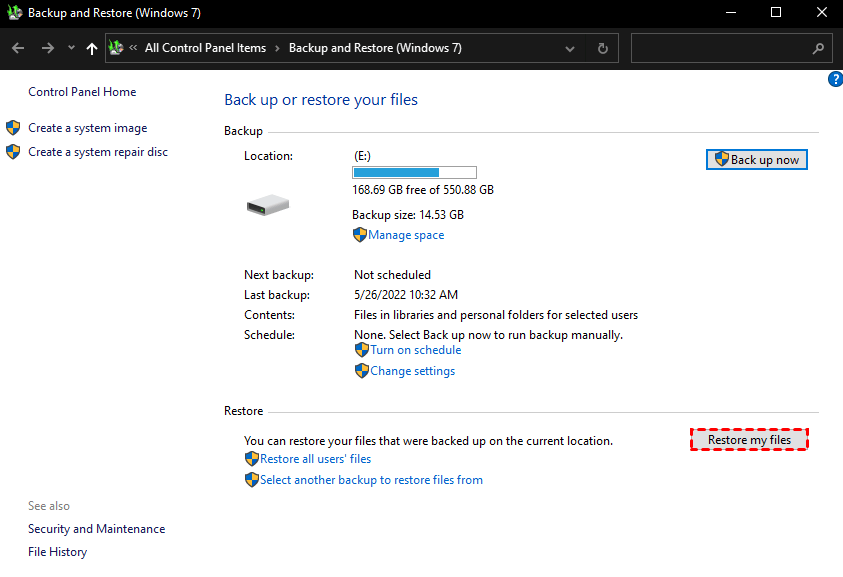
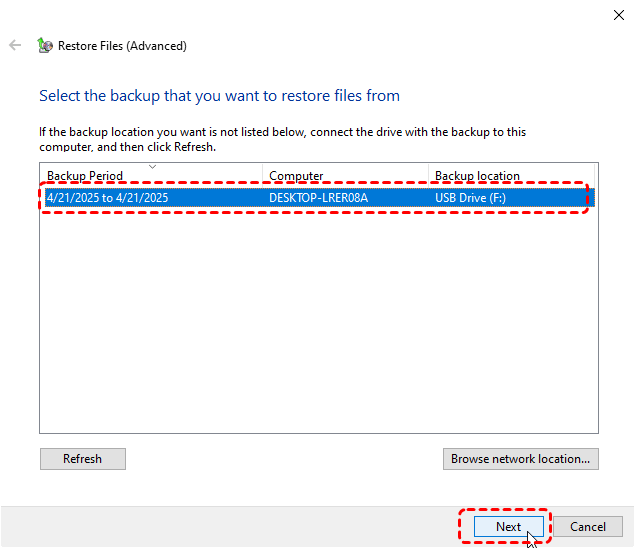
Backup and Restore Windows 7: Go to Control Panel > System and Security > Backup and Restore (Windows 7). Click “Restore my files”, select the photos from your backup, and restore them.
3. Use Microsoft Windows File Recovery Command
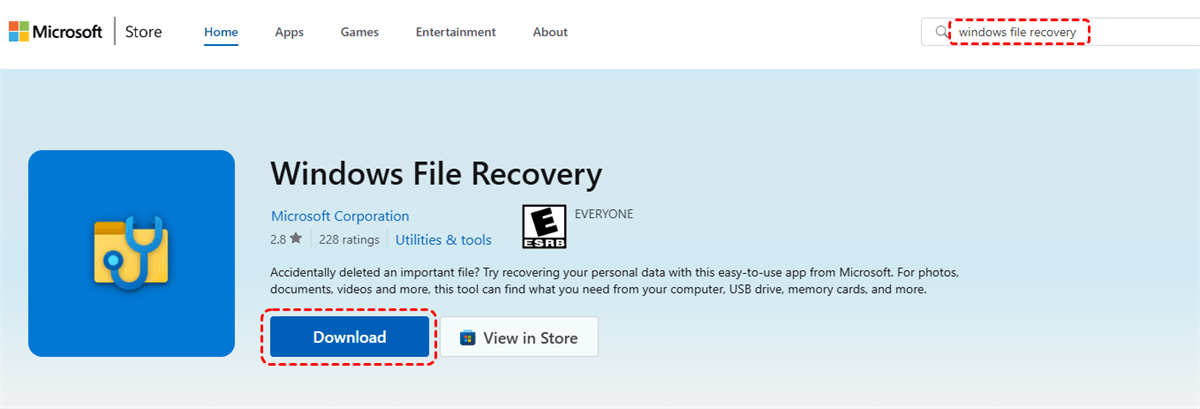
For photos that aren’t in the Recycle Bin or backups, Microsoft Windows File Recovery can scan your hard drive and recover permanently deleted files without any backup required.However, it only works on Windows 10 and Windows 11.
Step 1. Download and install Microsoft Windows File Recovery from the Microsoft Store.
Step 2. Open the Command Prompt with administrator privileges.

Use commands like: winfr H: D: /extensive /n *.png
- H: is the source drive, D: is the destination for recovered files.
- “exensive” is the deep scan mode, suitable for recovering files from a formatting partition or corrupted disk, if you are trying to recover data from healthy NTFS drive, "regular" mode is enough.
- *.png specifies the type of files to recover.
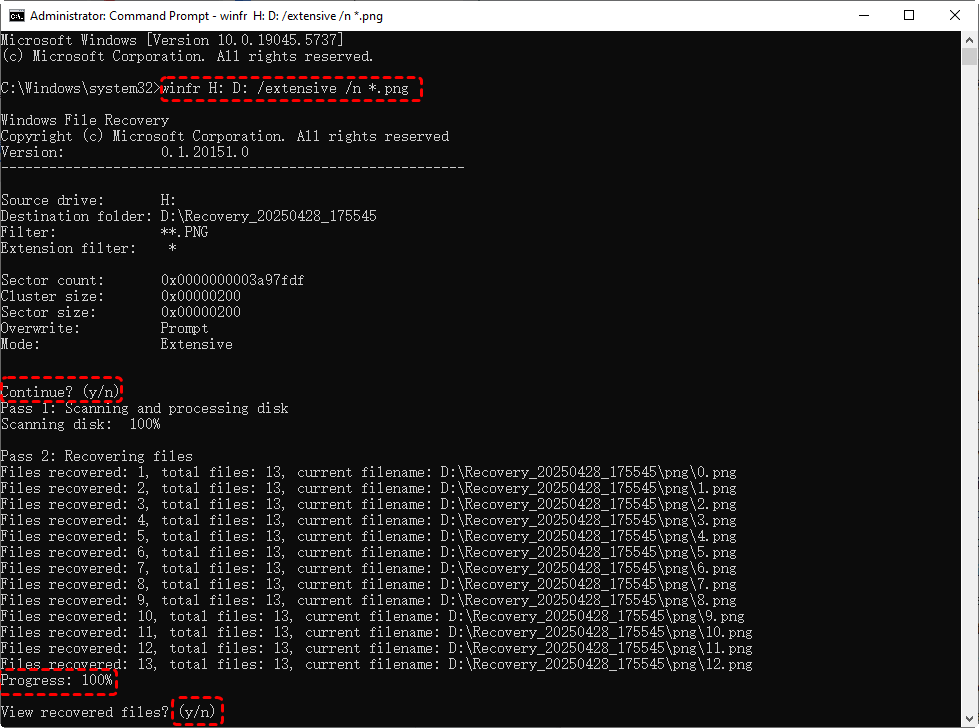
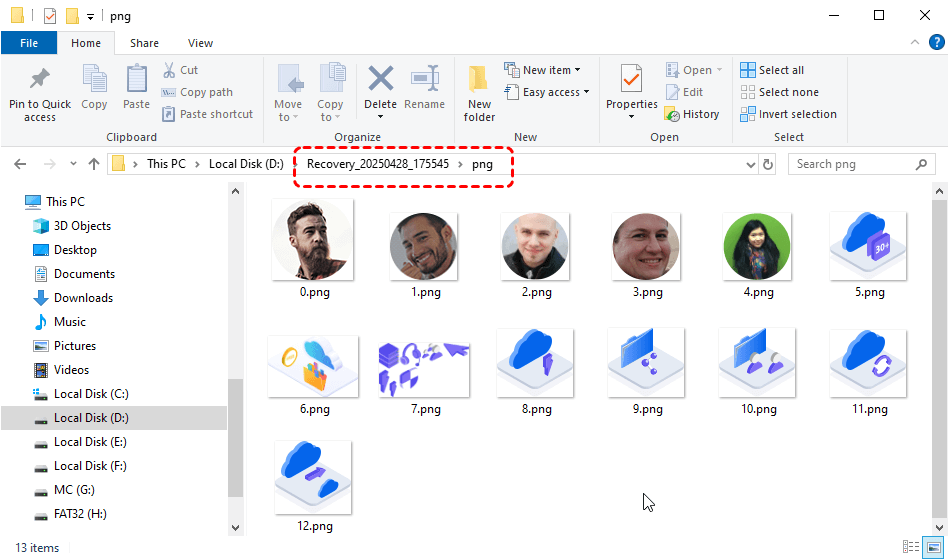
After recovery, you can hit on Y key to directly access the recovered pics.
4. Apply Professional Data Recovery Tool
If Microsoft Windows File Recoverycommands are too complex to understand, turning to a GUI data recovery tool is recommended. Among all options available on the market nowadays, MyRecover stands out relying on the following highligts:
- 💖User-Friendly Interface: No command-line skills required — the intuitive GUI makes scanning and recovery straightforward for beginners and professionals alike.
- 💖High Recovery Rate (99%): Advanced scanning algorithms ensure a higher chance of retrieving permanently deleted, formatted, or lost photos.
- 💖1000+File Format Support: Recover photos in popular formats like JPG, PNG, HEIC, and RAW, along with videos, documents, and other file types.
- 💖Preview Before Recovery: Allows you to preview files before restoring, ensuring you only recover the ones you need.
- 💖Applicable to 500+Data Loss Situations: Accidental deletion, disk formatting, system crash, virus attack, partition loss, or other issues.
- 💖Supports 500+Devices: Recover files from HDDs, SSDs, USB drives, SD cards, PCs, laptops, cameras, and more — all in one tool.
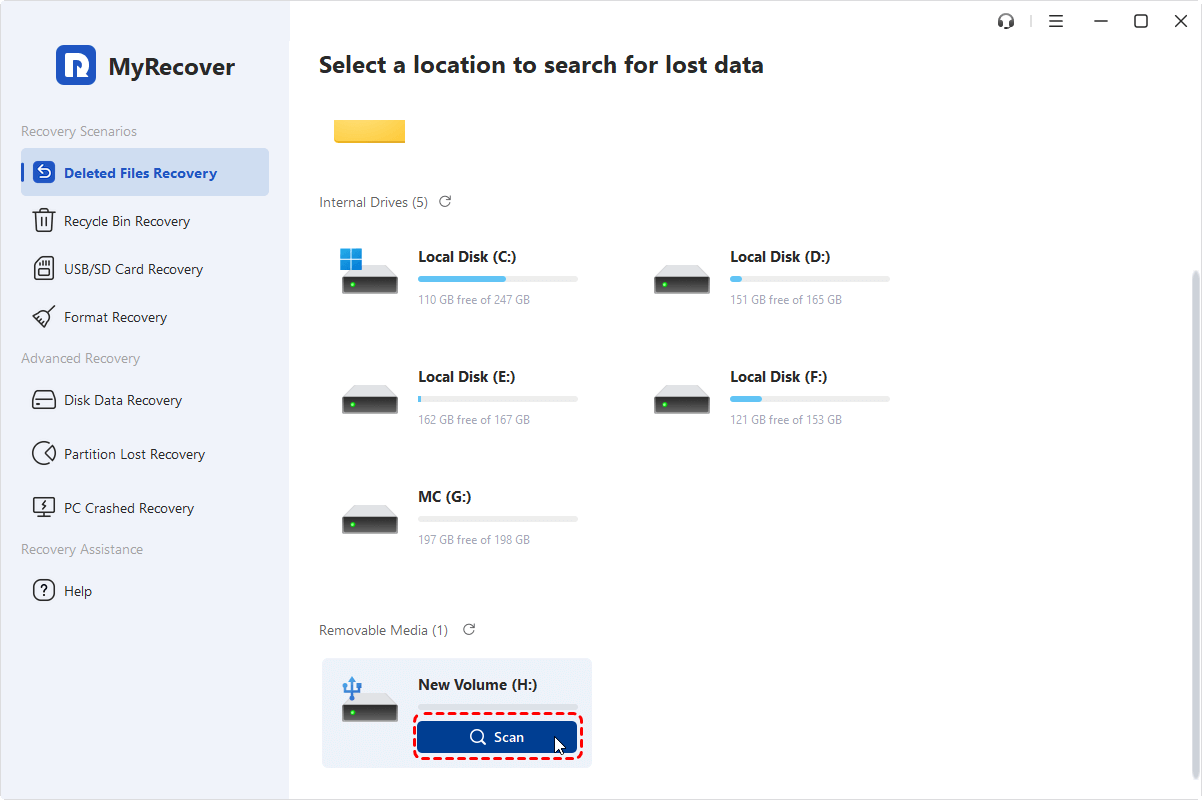
Step 1. Download MyRecover, and install it on a different drive than the one where your lost files were stored to avoid overwriting.
Step 2. Open the software and choose the hard drive, SSD, USB, SD card, or other device where your files were lost.Click “Scan” to start scanning.
Step 3. After scanning, you can filter and preview pictures , videos, or documents.

Step 4. Check the files you want to recoverand click “Recover” button.
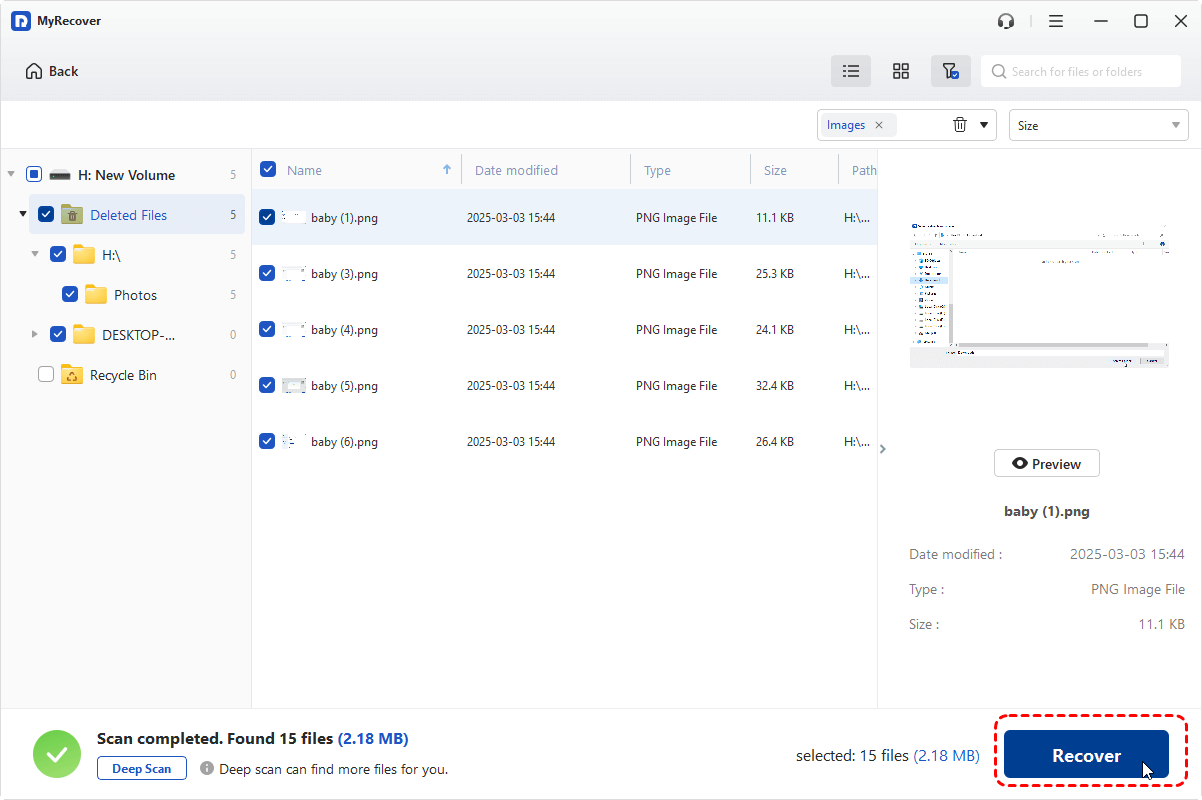
Step 5. Save the files to a safe location (different from the original drive).

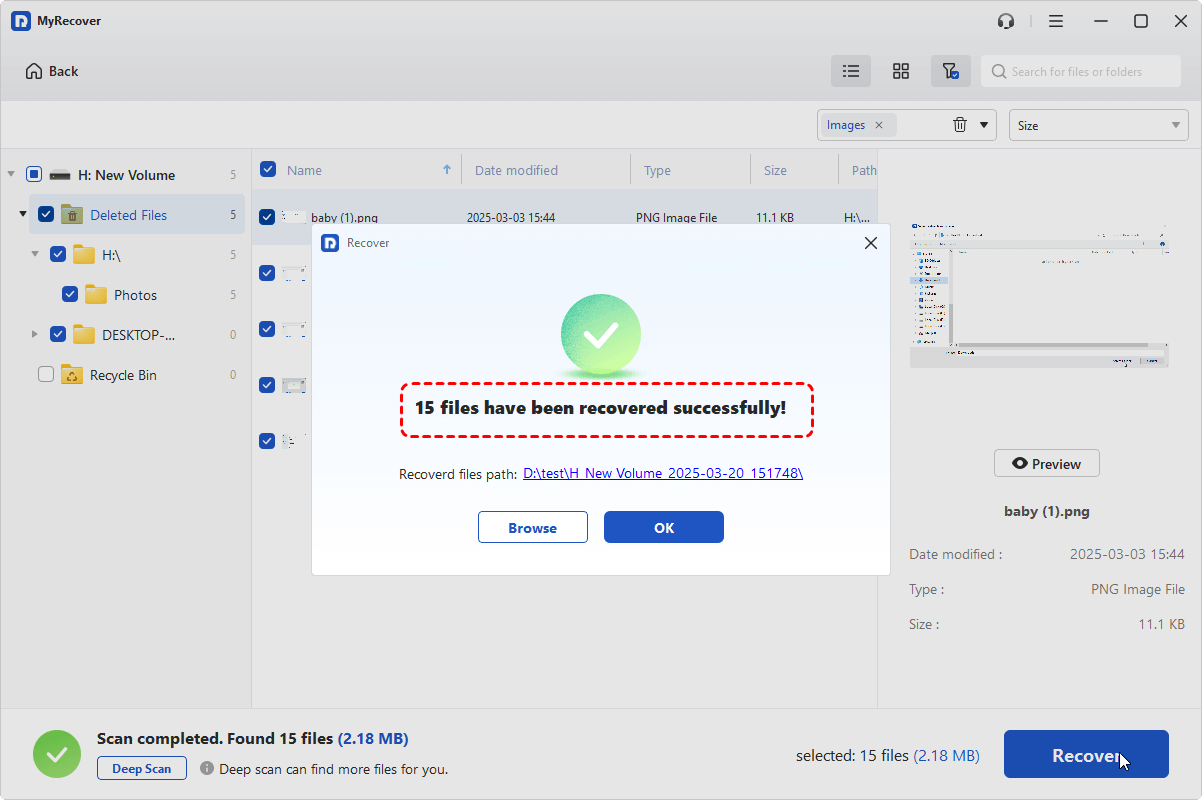
Wait for the process to finish, and a notification will show how many files were recovered and where they are saved.
Summary
Knowing where pictures go when you delete them is the first step in protecting and recovering your valuable photos. Whether you’re using an iPhone, Android, or Windows PC, deleted photos often remain temporarily in folders like Recently Deleted or the Recycle Bin, giving you a chance to restore them.
If temporary recovery isn’t possible, using backups, Microsoft Windows File Recovery, or professional tools like MyRecover ensures you can retrieve permanently deleted files safely and efficiently. By following the methods outlined above, you can recover your photos from almost any device or storage scenario, minimizing the risk of permanent loss.


Stay Updated With Our
Latest Tips
Add us as a preferred source on Google to never miss helpful guides.