
Windows 11 Update Deleted My Files? 7 Methods to Recover Them
Have you experience Windows 11 update deleted your files? This may be caused by reasons such as insufficient storage space or corrupted configuration files. This article will analyze the causes of the problem and how to recover lost files after Windows 11 update, and also provide methods for upgrading to Windows 11.
By Aria / Updated on May 23, 2025
Windows 11 Update Deleted my Files!
I just did some Windows updates…I restarted when asked and it applied the updates and restarted. It asked for my PIN, which it never does. Now all of my personal files are gone!!! Windows update wiped out all my files!!! Where are my files? What's wrong with my account?
- Question from Berton
Since Microsoft released Windows 11, more and more people have chosen to update from Windows 10 to Windows 11 to obtain a more modern user interface, smoother performance, and higher security. Although upgrading to Windows 11 has many advantages in user experience, some glitches may also occur during the update process, such as Windows 11 update deleted your files. There are some potential reasons why this could happen.
Insufficient Disk Space: Updating to Windows 11 requires at least 64GB of free disk space. If space is low, the system will automatically delete some temporary files, which may include your personal files.
Corrupted User Profile: The update may have reset your profile, make files be hidden or disappeared.
Failed Partition Conversion: If your computer switches from legacy BIOS to UEFI, partition errors may cause data loss.
Failed Update Process: If the update interrupted due to power loss, system crashes, etc., some files even whole folder might have been lost.
Third-party Software Conflict: Antivirus or optimization tools may interfere with updates, causing file corruption.
How to Recover Lost Files after Windows 11 Update
The disappearance of files after a Windows 11 update doesn't mean they are lost forever. As long as the files have not been overwritten by new data, they can still be retrieved. Therefore, it is crucial to take immediate action to recover the data as soon as you discover the file deletion. Here are 7 methods you can try to restore the deleted data.
Check the Recycle Bin
You can find all temporarily deleted files in the Recycle Bin (permanently deleted files cannot be found here). Files recently deleted during Windows 11 update may have been temporarily removed for some reason.
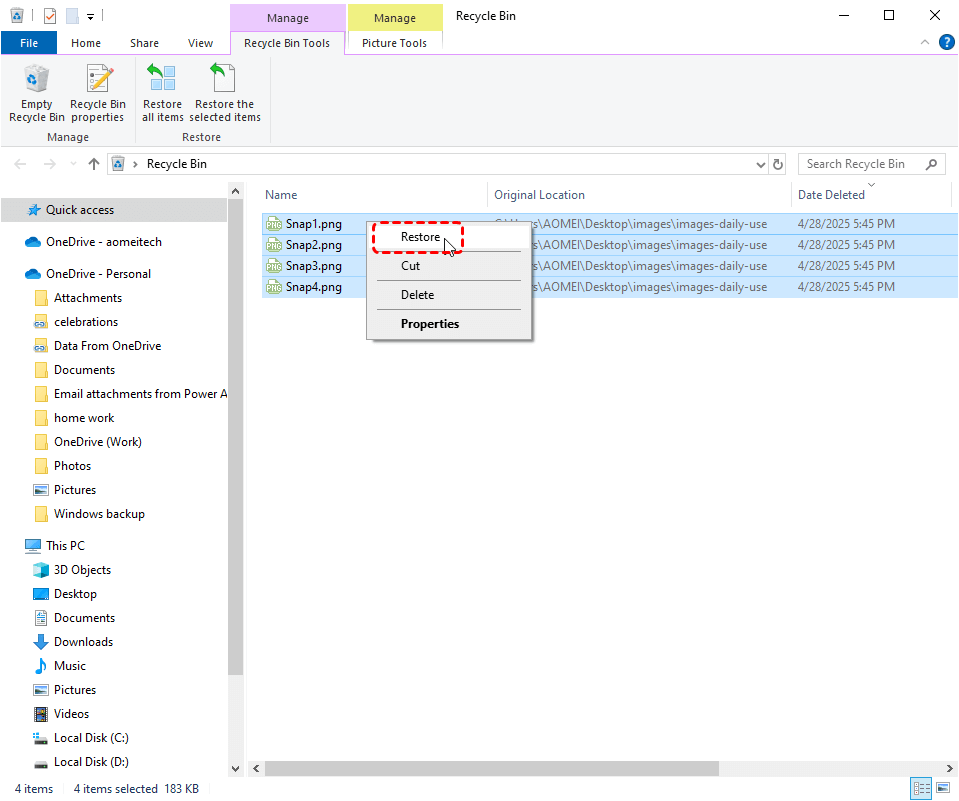
Step 1. Double click "Recycle Bin" icon to open it.
Step 2. Choose the files you want to restore and right click to select "Restore". The files will be recovered to its original location.
Look for the Files Using Search
If you are unsure whether a file has been deleted or cannot locate its storage position, you can search for it in the Windows 11 search bar.
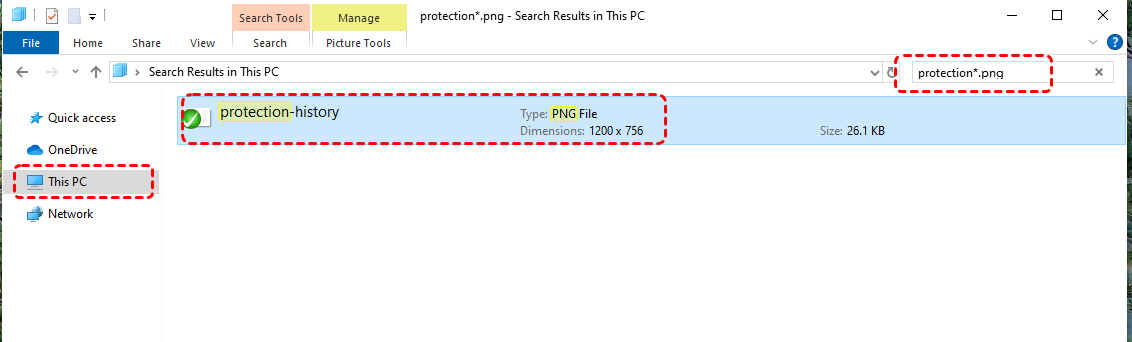
Step 1. Double click "This PC" to open File Explorer.
Step 2. Select "This PC" options in the left-hand navigation panel and enter the file name you want to recover in the search bar. And you can filter files by typing "*.png" to display all available picture files with this extension.
Sometimes, the update process may hide your files rather than erase them. You can also unhide them in the file explorer to recover lost files after windows 11 update.
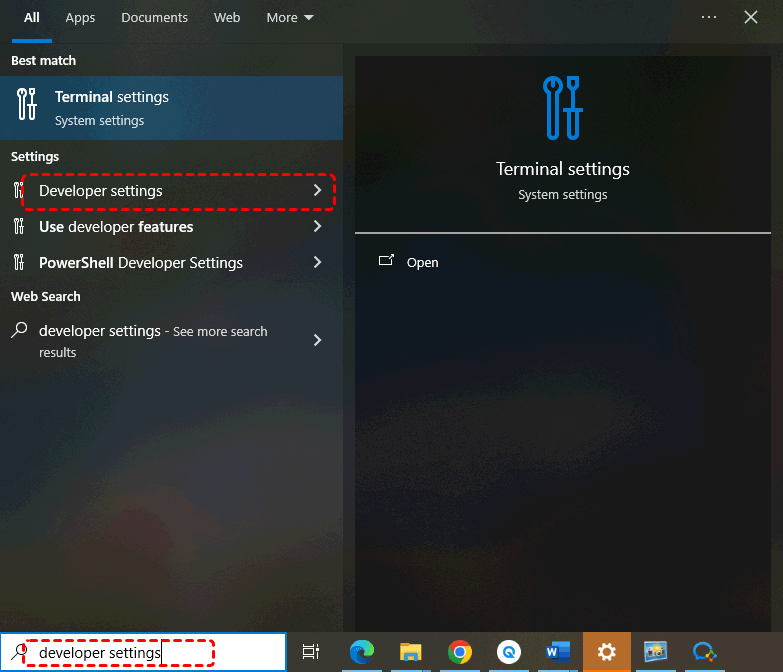
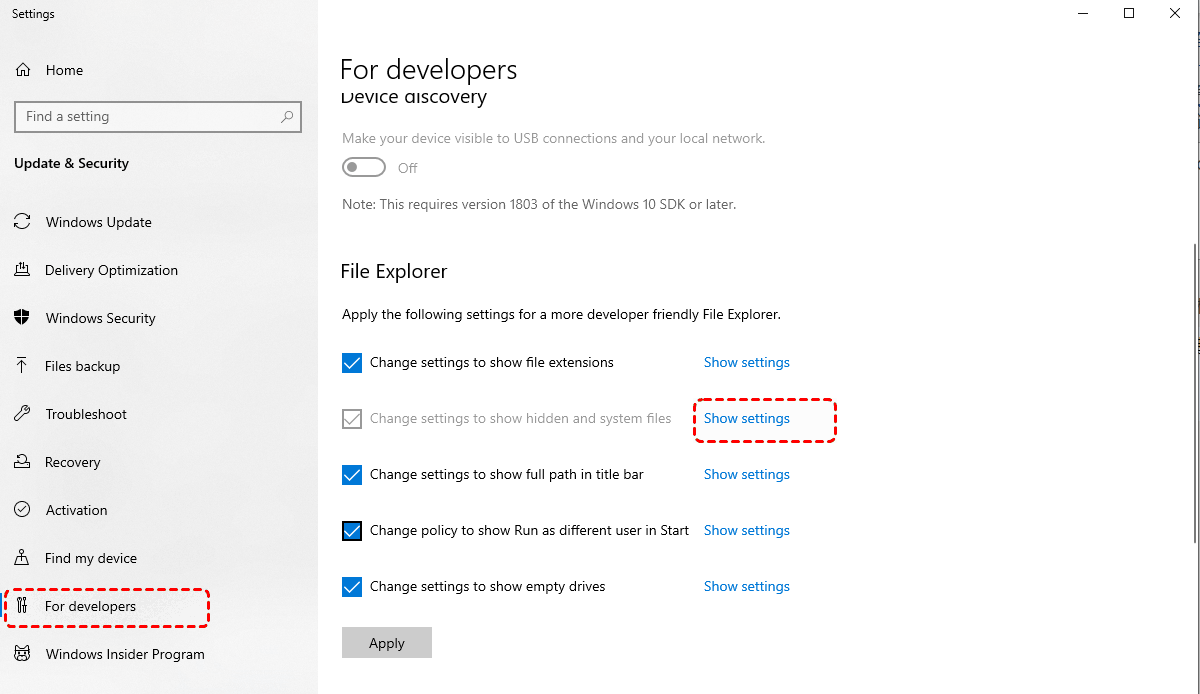
Step 1. Type "Developer settings" in the start menu and open it.
Step 2. Under the "File Explorer" select "Show settings" next to "Change settings to show hidden and system files".
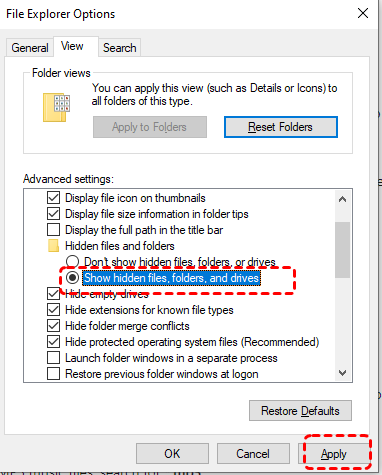
Step 3. Mark the "Show hidden files, folders, and drives" option under the "Hidden files and folders" and click "Apply".
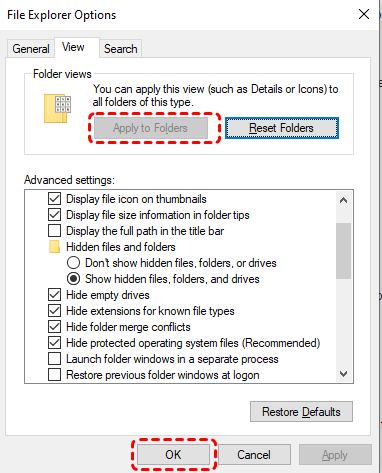
Step 4. Click the "Apply to Folders" button and "OK" to close the window.
Enable Administrator Account
If your files go missing after upgrading from a previous version of Windows and you created a new Microsoft account during the process, they might be stored in a disabled administrator account. To get back your files, you need to enable this account and sign in again.
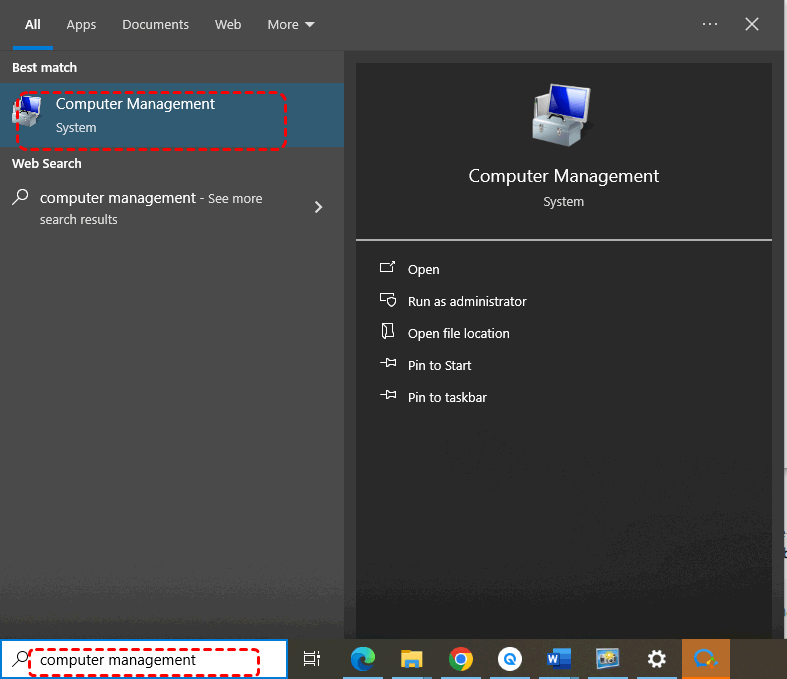
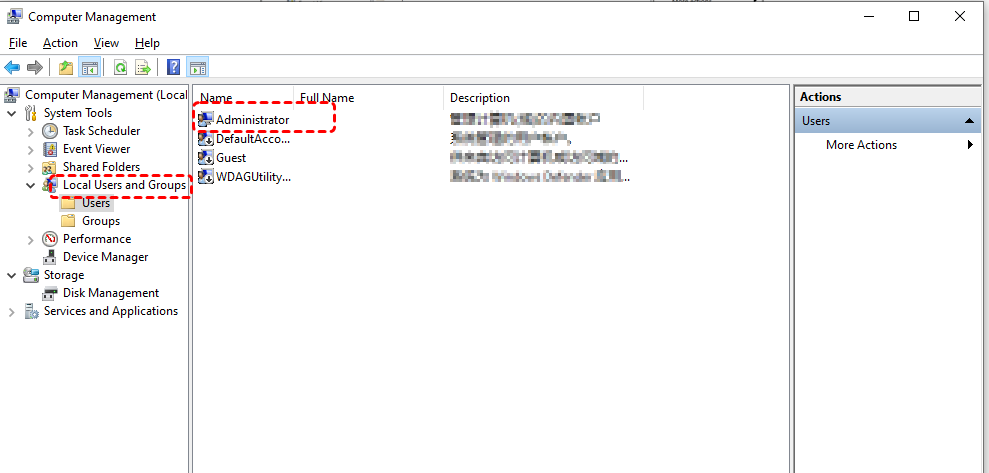
Step 1. Type "Computer Management" in the start menu and open it.
Step 2. Click "Local Users and Groups" and open "Users" to check the administrator account is enabled or not. If there is a downward arrow on the account icon, it indicates that the account is disabled.
Step 3. Right click the administrator account and choose "Properties" option. Then clear "Account is disabled" option and click apply to enable the account.
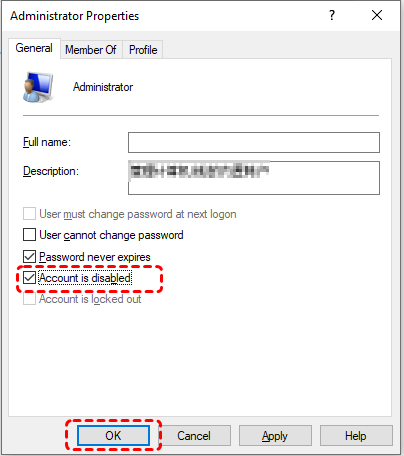
Step 4. Perform a sign-out and sign in again utilizing the administrator account to access the files.
Remove Temporary Account
After upgrading to Windows 11, if you can't find your old files, it may be because you're using a temporary or old account. Therefore, you should first check whether you're signed into a temporary account. If so, remove it to recover files after installing the new Windows. Here's how:
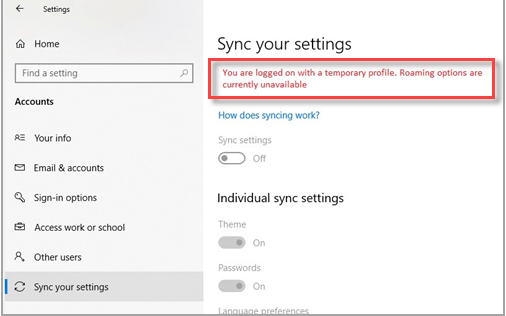
Step 1. Select "Start > Settings > Accounts > Sync your settings". If you see a message at the top stating, "You are signed in with a temporary profile. Roaming options are presently unavailable," restart your PC and sign in again. This should remove the temporary account, and your documents should become accessible once more.
Step 2. Repeat step 1. again and turn on sync settings if it is disabled.
Step 3. Restart your computer and sign in again. When you see the message " We can’t sign in to your account", log out and sign in once again to fix the problem.
Restore your Files with File History (If Enabled)
Windows File History is a built-in backup feature designed to automatically save different versions of your files over time. Enabling File History feature before file loss can effectively reduce the risk of data loss. This enables you to restore them in cases where files are accidentally modified, deleted, or corrupted.
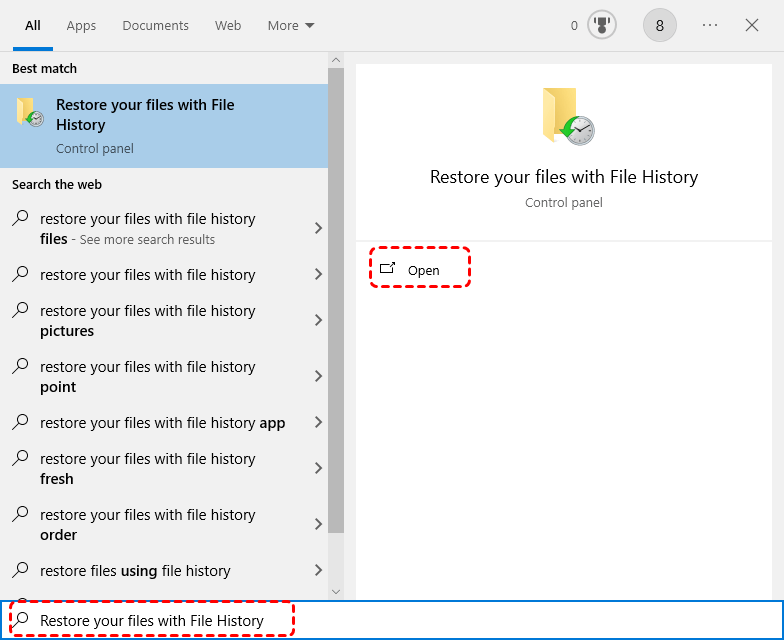
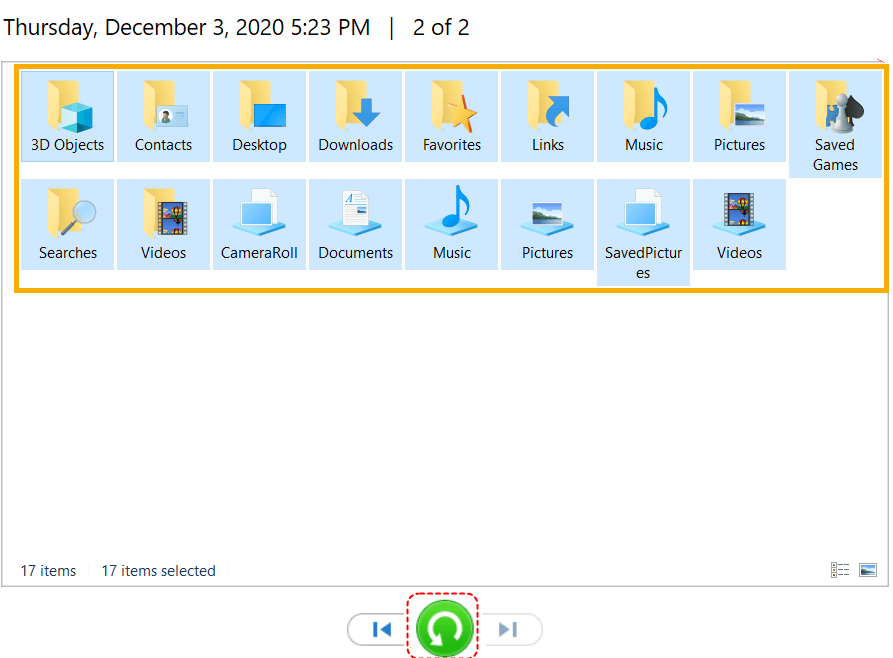
Step 1. Type "Restore your files with File History" and open it.
Step 2. Browse through the folders that contain the lost files and select the files you want to recover.
Step 3. Click the green restore button to recover files.
Backup and Restore (If Enabled)
Backup and Restore refers to the process of copying data and applications to a secondary device or location, enabling the recovery of data in the event of loss or damage. This process creates safeguard copies, which can be used to retrieve deleted files
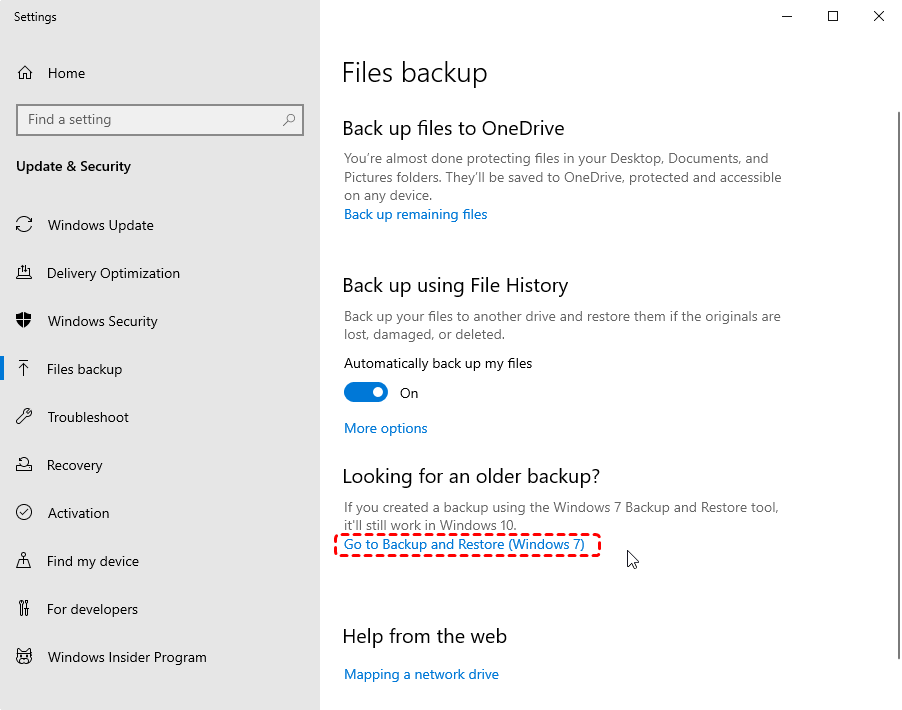
Step 1. Type "Backup Settings" in the start menu and open it, click "Go to Backup and Restore (Windows 7)".
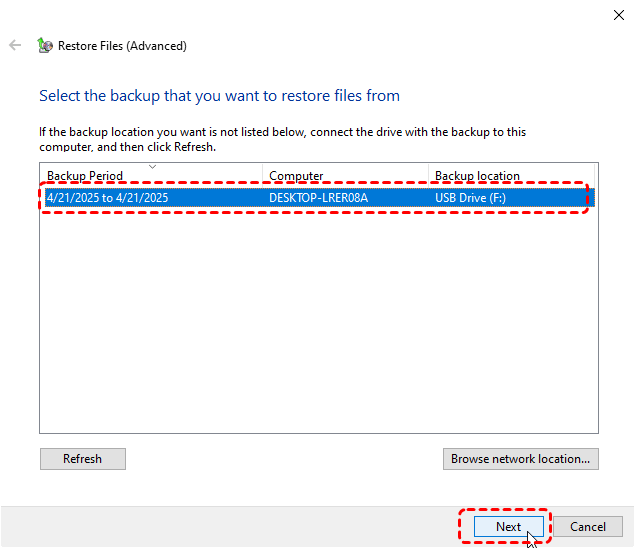
Step 2. Choose "Select another backup to restore files from" and select a created backup.
Step 3. Browse and select the backup for files or folders you want to restore.
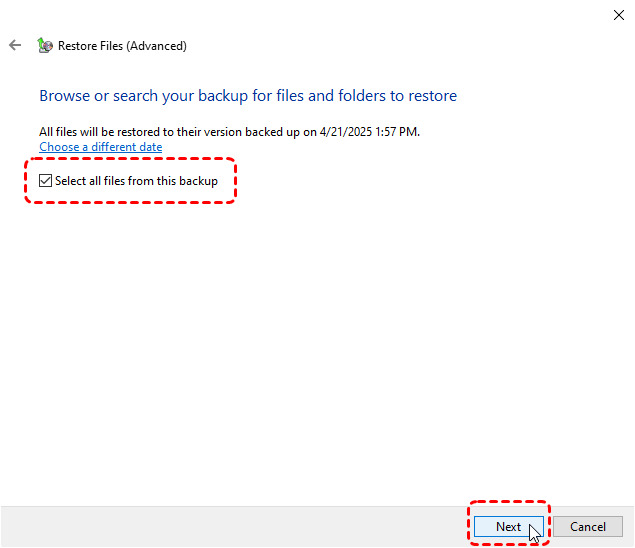
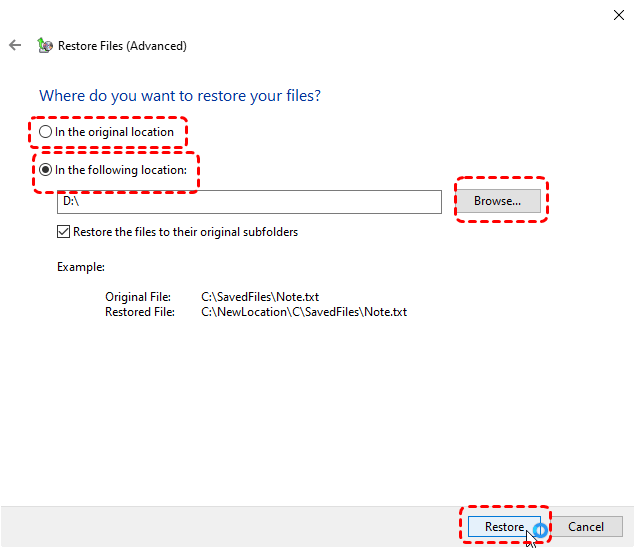
Step 4. Choose a safe location to store the recovered files and click "Restore".
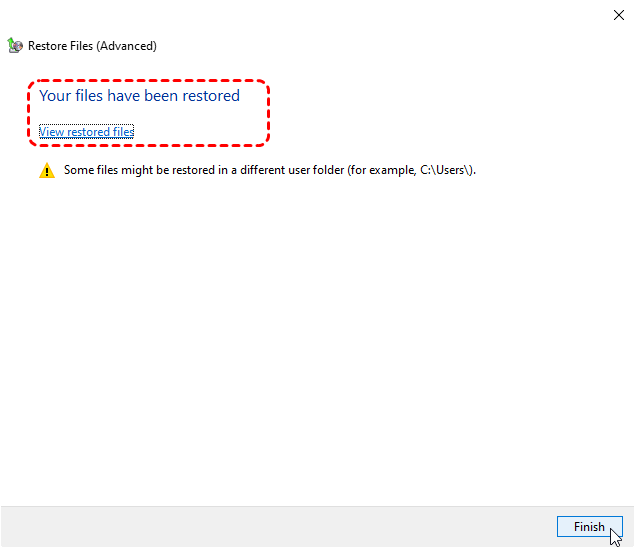
When the process is finished, the message "Your files have been restored" will appear on the screen, you can check the files in the destination folder.
Both "File History" and "Backup and Restore" require being enabled before file loss occurs to take effect.
Professional Data Recovery Software (Without Backup)-MyRecover
If none of the above methods work, you can also try third-party data recovery software. MyRecover is highly recommended. It requires no advance backup and can help you recover deleted data at any time. It uses a simple graphical user interface, which is very friendly even to novice users. You can recover lost files after Windows 11 update in just four steps.

- With a success rate of up to 99% for all Windows data.
- Support 500+ devices,such as SSDs, HDDs, internal & external hard drive, and more.
- Cover multiple data loss scenarios, like format, deletion, system crash, etc.
- Recover data from special loaction with shorter waiting times.
Step 1. Download and install MyRecover on your computer.
Step 2. Launch it and select the drive where the lost file was stored to scan.

Step 3. Choose the files you want to recover in the recoverable lists and click "Recover".

Step 4. Select a different location to save the recovered files.

When the message indicating successful recovery appears on the screen, you can access the recovered files in the destination folder.
Conclusion
After exploring the causes and solutions for file deletion during Windows 11 update, you should have a clear idea of how to choose a recovery method. If you want a once-and-for-all solution, consider trying MyRecover. It can cover various data loss scenarios, such as permanent file deletion, hard disk formatting, and inaccessible partitions. For users with more advanced needs, MyRecover also offers the Professional and Technician editions, which allow you to preview file contents before recovery.


Stay Updated With Our
Latest Tips
Add us as a preferred source on Google to never miss helpful guides.