
Windows Found Errors on This Drive: Top Solutions That Work
When Windows detects errors on a drive, it can cause system instability and data loss. In this article, we explore the causes behind the "Windows found errors on this drive" message and provide practical, effective solutions to resolve the issue and recover data.
By Aria / Updated on December 2, 2025
Overview
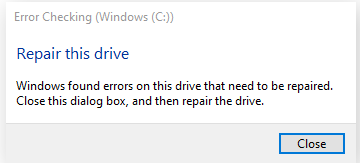
Have Windows 8.1. To correct errors on my hard drive I tried to repair it by: Clicking on "This PC", right clicking on C: drive and then clicking on "Properties". I clicked on Tools. Then I clicked on the box "Check", a window opens. Clicked on 'Scan Drive". After a short time, a window opens saying "Repair this drive. Windows found errors on this drive that needs to be repaired. Close this dialog box, and then repair the drive." Only option is to close. So how do I repair the drive? Thanks...
- Question from Don Cook
The error message "Windows found errors on this drive" can be quite alarming, especially when you're in the middle of an important task or trying to access critical files. This message typically appears when Windows detects issues with the integrity of your hard drive or storage device. The problem could be related to disk corruption, bad sectors, or other underlying hardware/software issues.
Common Causes of "Windows Found Errors on This Drive"
Several factors can lead to the "Windows found errors on this drive" message. Understanding the root causes is essential to effectively resolve the issue. Some common reasons include:
🔔File System Corruption
A corrupted file system is one of the leading causes of this error. This can happen due to improper ejection of drives, unexpected shutdowns, or software bugs.
🔔Bad Sectors
If your drive has bad sectors (physical or logical), Windows might not be able to read or write data correctly, triggering the error message.
🔔Disk Hardware Failure
Physical failure in the hard drive or external storage device can result in this error, especially if the drive is old or has been subjected to extreme conditions.
🔔Virus or Malware Infections
Sometimes, viruses or malware can corrupt system files, leading to disk errors.
🔔Outdated or Corrupt Disk Drivers
In some cases, outdated or corrupt drivers can cause communication issues between the drive and Windows, resulting in errors.
🔔Windows System Bugs
Occasionally, issues with Windows itself, such as corrupted system files or a bug in the operating system, can manifest as disk errors.
How to Recover Data from the Malfunctioning Drive Using MyRecover
Before trying to fix the "Windows found errors on this drive" issue, it’s necessary to prioritize the security of your data to prevent permanent data loss. MyRecover is an excellent data recovery tool that can help you recover files from the inaccessible drive. It adopts AI-embedded file recognition and recovery technology, enabling deep scanning of your storage device to ensure no files are missed.

- Faster scanning compared to command-line tools.
- Higher success rate for permanently deleted files.
- Compatible with all Windows operating systems.
- Work on HDD, SSD, USB flash drive, memory card, etc.
- Allow extracting files from the hard drive.
Step 1. Download and install MyRecover on your computer from Microsoft Store, avoid installing it on the drive with lost files.
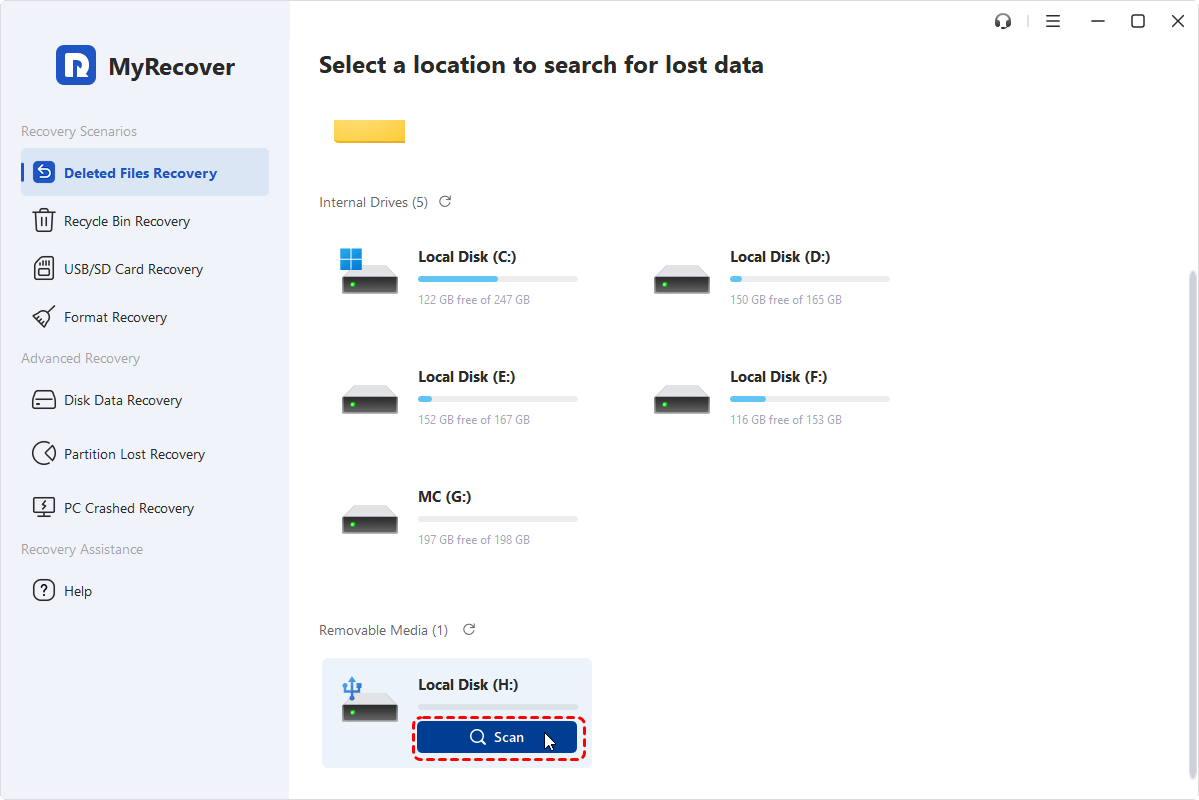
Step 2. Run the program and select the malfunctioning drive to scan, then click "Scan".
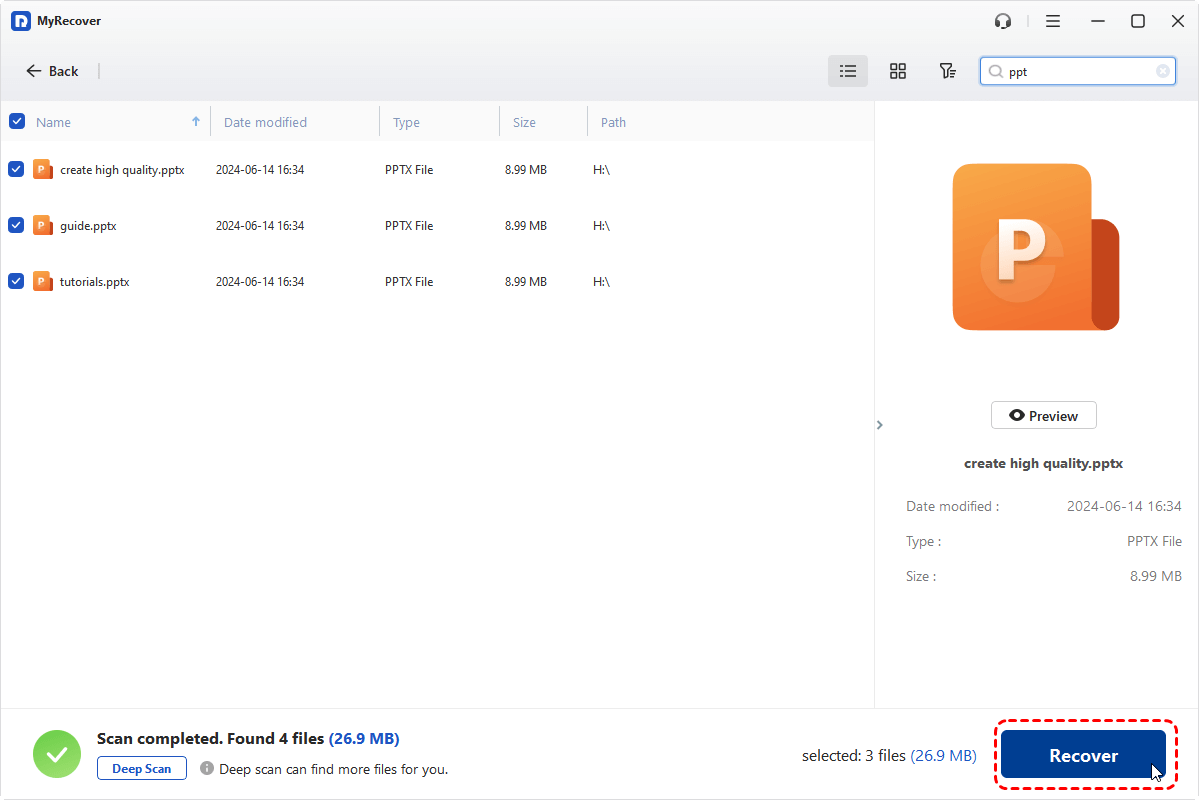
Step 3. Choose the files you wish to recover from the recoverable lists and click "Recover".
-
If there are no lost files you want to recover, select the "Existing file" folders to easily extract files from this drive.
-
With MyRecover Free, you can recover up to 500MB of data at no cost. But if you need unlimited recovery capacity and the ability to preview files before restoring them, MyRecover Professional edition is the perfect upgrade.
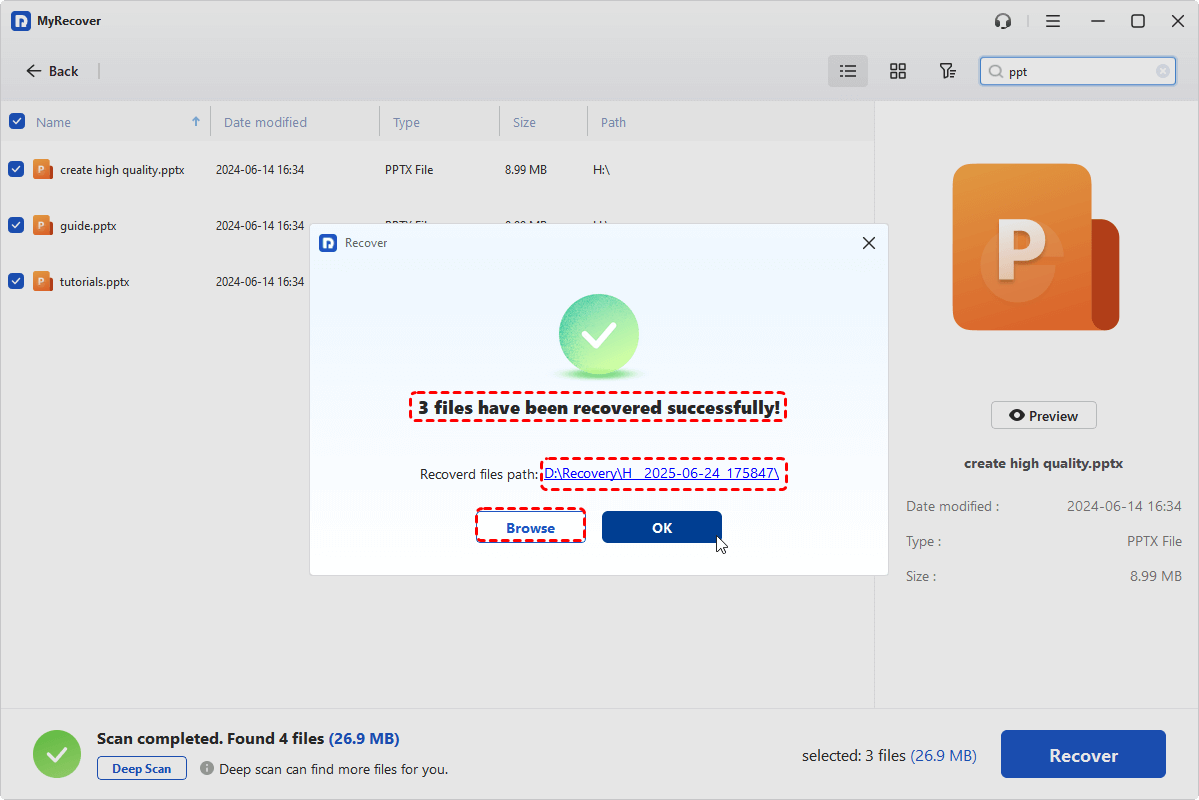
Step 4. Select a safe location to save the recovered files.
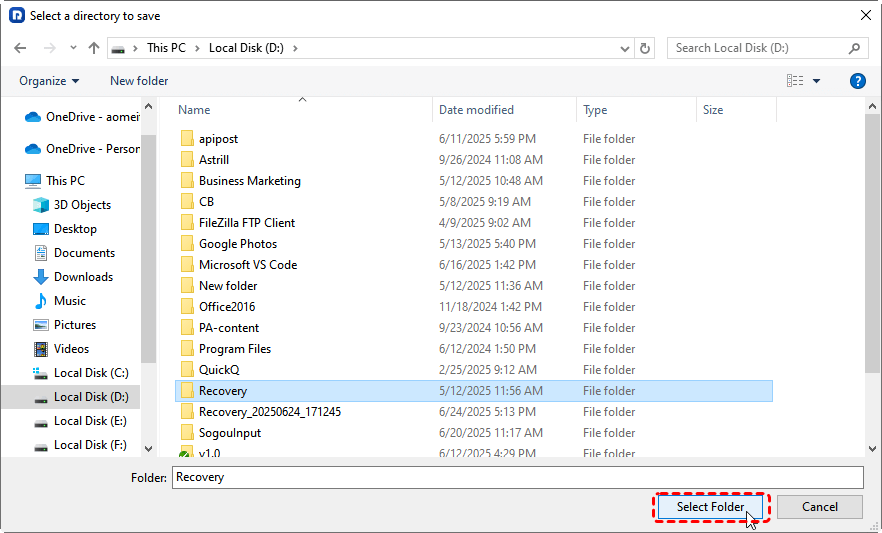
When the process is finished, the message "Files have been recovered successfully" will pop up. Then, you can check the recovered files in the destination folder by clicking on the "Browse" button.
7 Solutions to Fix "Windows Found Errors on This Drive"
Once you've safely recovered your files, it's time to fix the underlying issue causing the "Windows found errors on this drive" error. Here are seven solutions to help resolve the problem. Let's explore them one by one.
Solution 1. Run CHKDSK Command
When a storage device malfunctions, using the CHKDSK command to repair it is the simplest and most effective method. The CHKDSK (Check Disk) command is one of the most reliable methods for fixing file system errors. It scans your drive for errors and attempts to fix them.
Step 1. Locate Command Prompt in the Start menu and right click on it, then select "Run as administrator".

Step 2. Enter the following command "chkdsk G: /f /r" and press "Enter" key. Replace the drive letter "G" with the letter of drive experiencing the error.

This command will automatically check for bad sectors and file system issues and attempt to fix them.
- Notes:✎...
- Answer "Y" when CHKDSK asks you if you want to check the drive next time Windows boots.
- If CHKDSK finds any physical bad sector, the data on the sector would be lost.
Solution 2. Run DISM & SFC Command
Corrupted system files can also lead to disk errors. Running the SFC and DISM utilities which can scan and repair the corrupted or missing system files helps fix the "Windows found errors on this drive" problems.
Step 1. Open Command Prompt and run it as administrator.
Step 2. Type the command "DISM /Online /Cleanup-Image /RestoreHealth" to repair system image.
Step 3. After the DISM completes, enter "sfc /scannow" to run SFC command.
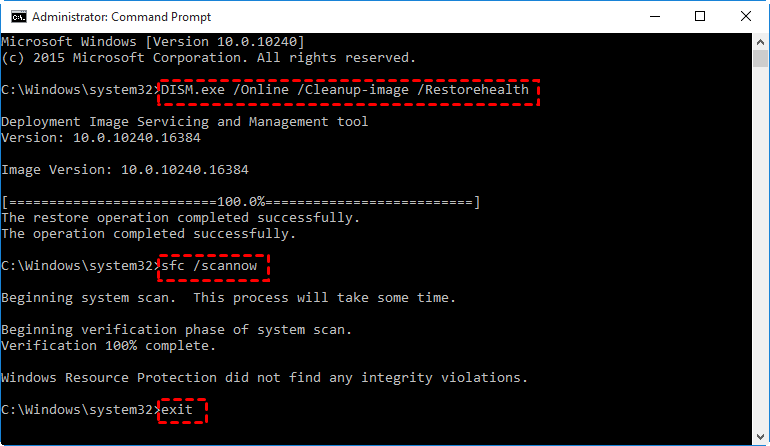
Restart your computer to check if the drive errors still exist.
Solution 3. Run Repair-Volume Command with PowerShell
Apart from CHKDSK, Windows further supplies a more contemporary and robust repair-volume command to assist in the diagnosis and repair of drive errors. You can try to fix the "Windows found errors on this drive" issue.
Step 1. Press "Win" + "X" and choose "Windows PowerShell (Admin) to open it.
Step 2. Input the command "Repair-Volume H –Scan" and press "Enter". Replace the drive letter "H" with your actual drive letter.
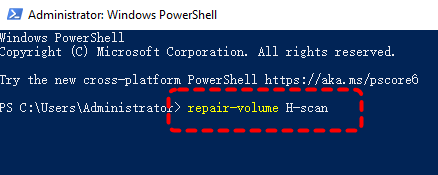
Step 3. Wait for the scan to complete. If the scan result shows "OfflineScanNeeded", you need to enter the following repair command "Repair-Volume C -OfflineScanAndFix".
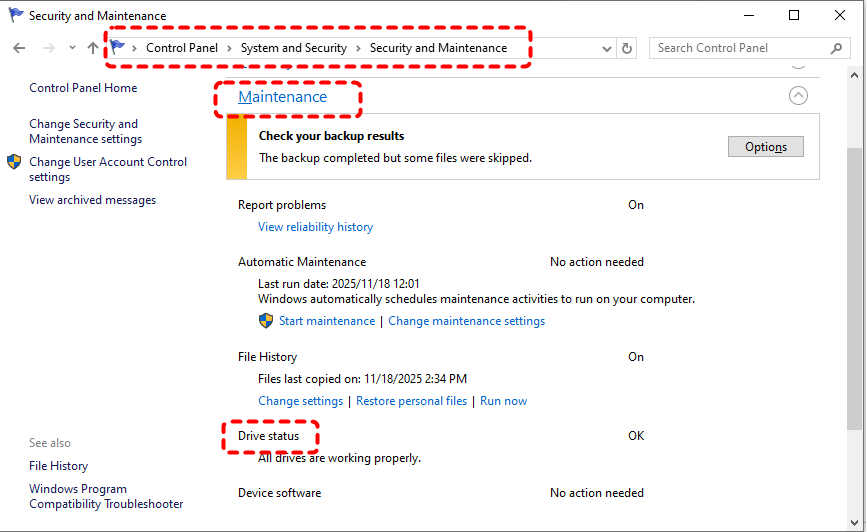
Solution 4. Check Security and Maintenance
Sometimes, Windows might have additional security-related or system maintenance issues. Checking the Security and Maintenance tab might help you to identify hardware or software issues.
Step 1. Navigate to "Control Panel" > "System and Security" > "Security and Maintenance".
Step 2. Expand "Maintenance" to check for drive status issues.
Solution 5. Update Disk Driver
Outdated or corrupted drivers might cause issues with disk accessibility. Try to update the disk driver in Device Manager:
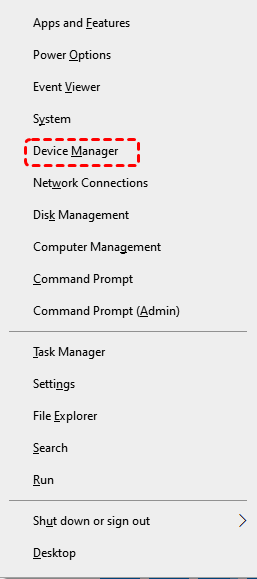
Step 1. Press "Win" + "X" and choose “Device Manager” to open it.
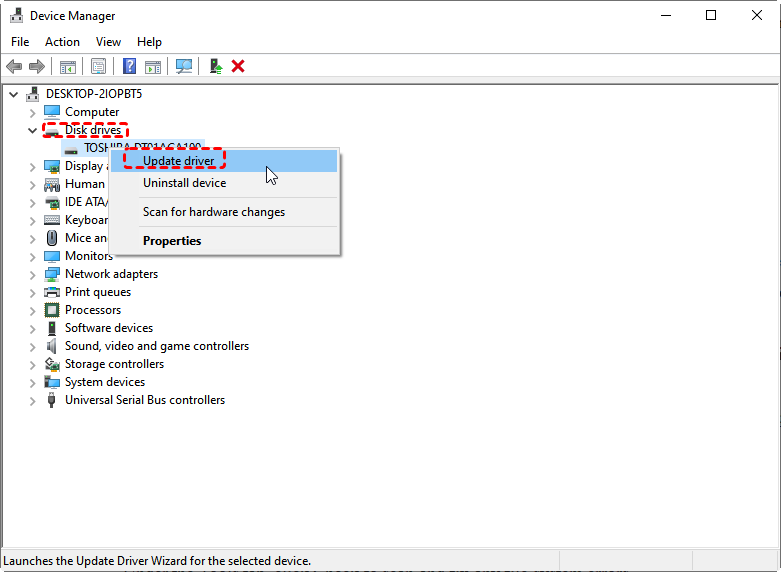
Step 2. Expand "Disk drives" and right click on your hard drive, then select "Update driver".
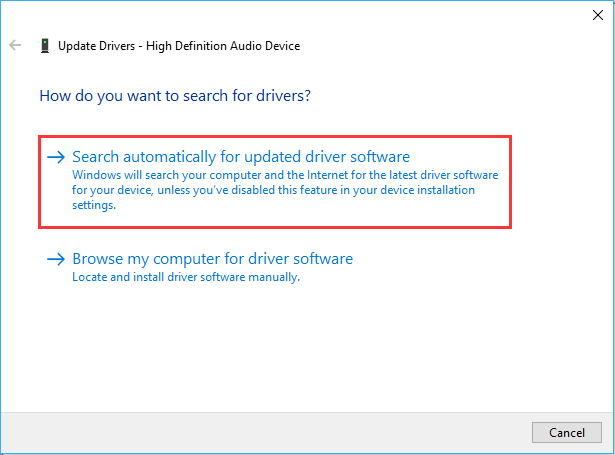
Step 3. Choose "Search automatically for updated driver software" to continue the process.
Solution 6. Repair Disk Under Safe Mode
Attempting to repair the drive in Safe Mode can resolve conflicts caused by third-party software. Safe Mode only loads core programs, which helps improve the success rate of repairs.
Step 1. Restart your computer and press F8 during the boot process to access the "Advanced Boot Options".
Step 2. Click on "Troubleshoot" > "Advanced options" > "Startup Settings" > "Restart". After your computer restarts again, press 4 or F4 to enable Safe Mode.
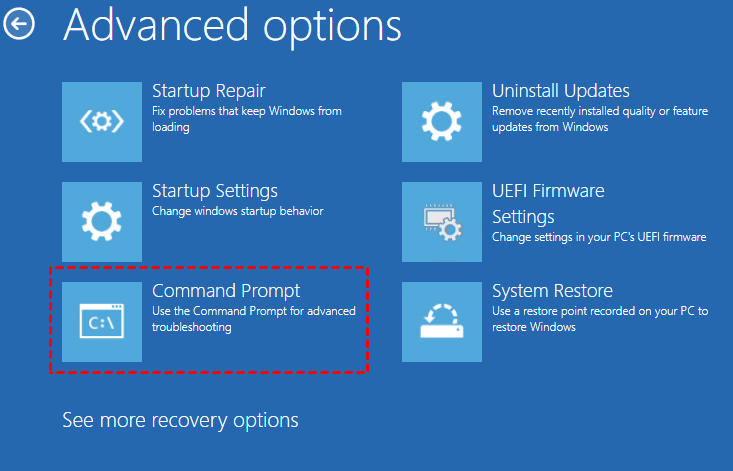
Step 3. Choose "Troubleshoot" > "Advanced options" > "Command Prompt".
Step 4. Then you can follow the steps in solution 1 to repair the drive.
Solution 7. Format the Disk
If none of the above solutions work and the drive is still inaccessible, you may need to format the drive to fix it. Formatting the disk will erase all data, so be sure all files are safe before proceeding.
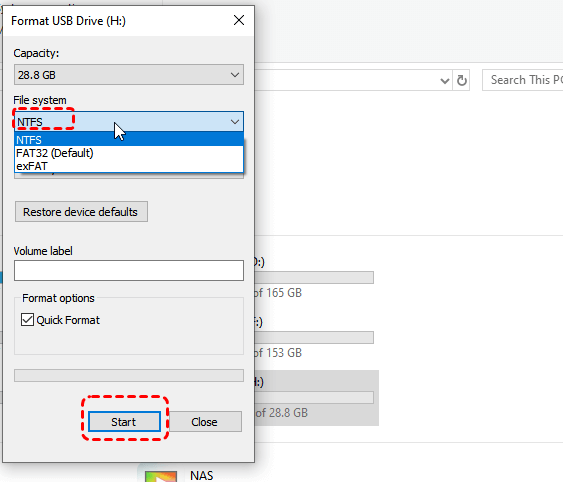
Step 1. Locate the drive in File Explorer and right click on it, then select "Format" from the context menu.
Step 2. Choose your preferred file system (usually NTFS for larger drives) and check the "Quick Format" option, then click "Start" to begin the process.
If you haven’t recovered data from the drive in advance, don’t worry. MyRecover allows you to retrieve data from a formatted drive.
Summary
The "Windows found errors on this drive" message can be a daunting issue, but with the right tools and techniques, you can recover your data and restore the functionality of your drive. Whether you opt for CHKDSK, SFC, or use MyRecover for data recovery, these solutions can help you resolve the error and prevent future data loss.
MyRecover is a powerful tool to help you recover files and protect your data before attempting more drastic solutions. Its Professional edition even allows you to recover data from unbootable laptop. Remember, if the drive suffers any physical damage, don't hesitate to contact a professional data recovery service.


Stay Updated With Our
Latest Tips
Add us as a preferred source on Google to never miss helpful guides.