
How to Configure File History Backup to OneDrive on Windows 10/11
Too many File History backups take up too much disk space. Is there a way to back up File History to OneDrive? This guide will provide 2 practical methods to configure File History backup to OneDrive, along with a professional recovery tool to rescue your data when backups fail.
By Aria / Updated on July 28, 2025
Can File History Backup to OneDrive?
Backing up your important files is one of the most crucial practices in safeguarding your data. One of the simplest and most efficient ways is through File History, a built-in backup tool in Windows. File History automatically backs up your files on a regular basis, a process that can consume excessive disk space. As a result, many users opt to disable File History on Windows to free up storage and boost their computer’s performance.
![]()
However, there is no doubt that turning off File History will increase the risk of data loss. Therefore, a solution has been proposed: File History backup to OneDrive. This way, it not only avoids occupying local disk space but also provides users with the opportunity to restore lost files.
Can File History back up to OneDrive? Of course! This article will explore 2 effective methods to configure File History backups to OneDrive.
How to Configure File History Backup to OneDrive on Windows 10/11
If you have enabled File History on Windows, just following these steps to set up File History backup to OneDrive, ensuring your documents, photos, and other important data are protected in the cloud.
Method 1. Share Local OneDrive Folder
This method leverages OneDrive's automatic cloud synchronization feature. When File History writes new file versions to the local OneDrive folder, OneDrive's cloud service will automatically sync the newly added files to the cloud upon detecting this change. With files stored both locally on the computer and in OneDrive's cloud, this provides double protection for your data.
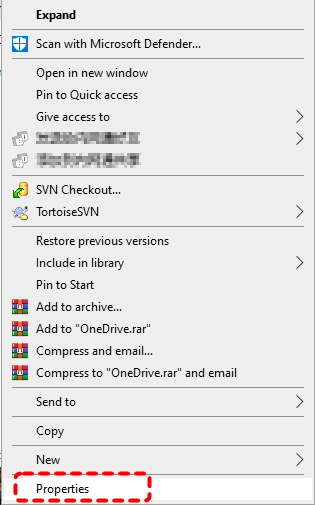
Step 1. Locate to the OneDrive folder on your computer and create a folder named as you like to store backup. Right click it and choose "Properties" from the context menu.
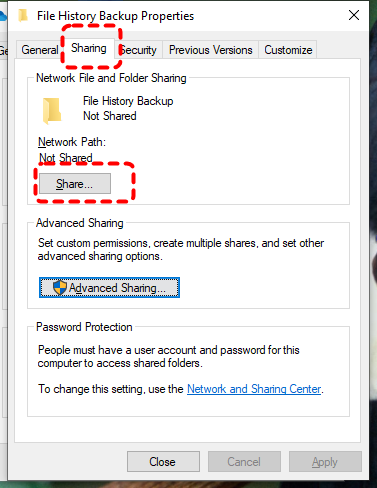
Step 2. Go to the "Sharing" tab, click "Share". Then choose someone to share with and click "Share".
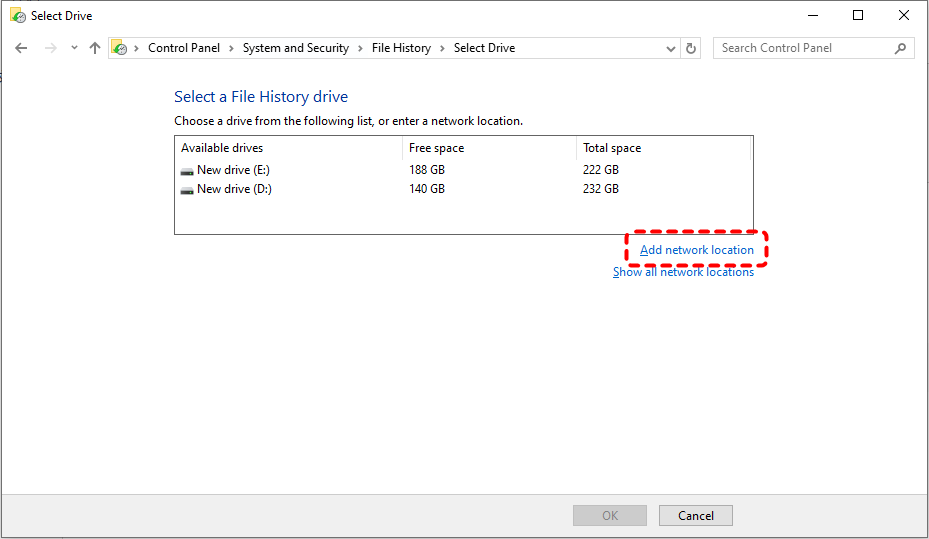
Step 3. Open "Control Panel" and select "Save backup copies of your files with File History".

Step 4. Choose "Select drive", and click "Add network location".
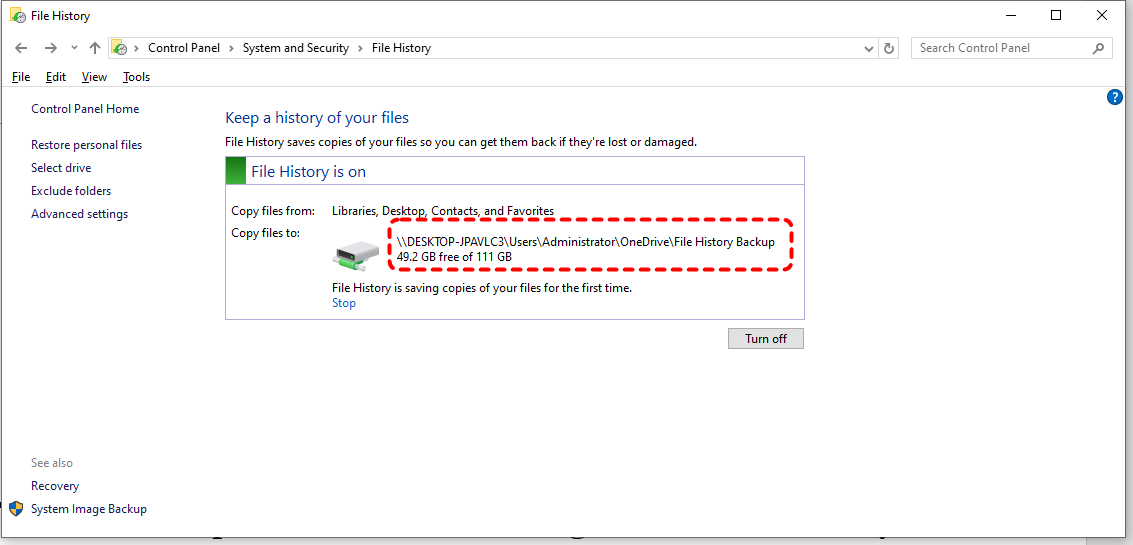
Step 5. Enter the path of the shared folder in OneDrive and click "Select Folder". Then you can check the copies in the OneDrive.
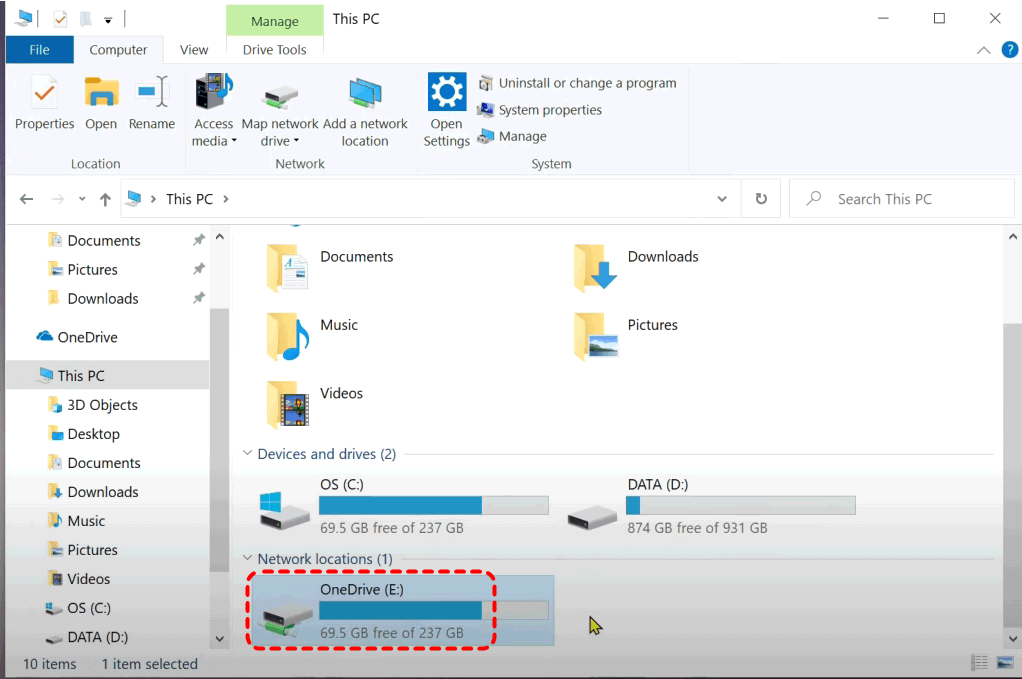
Method 2. Map OneDrive as Network Drive
Another option to integrate OneDrive into your system is by mapping it as a network drive. This allows you to access your OneDrive files directly from File Explorer as if they were stored on a local drive. You can directly back up File History to the OneDrive "drive".
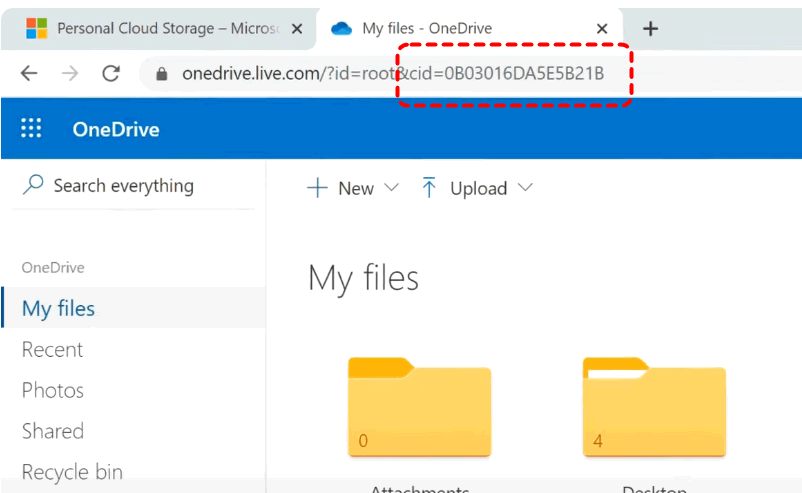
Step 1. Go to the OneDrive official site and sign in with your account. Copy and note the number behind "cid=" in the URL.
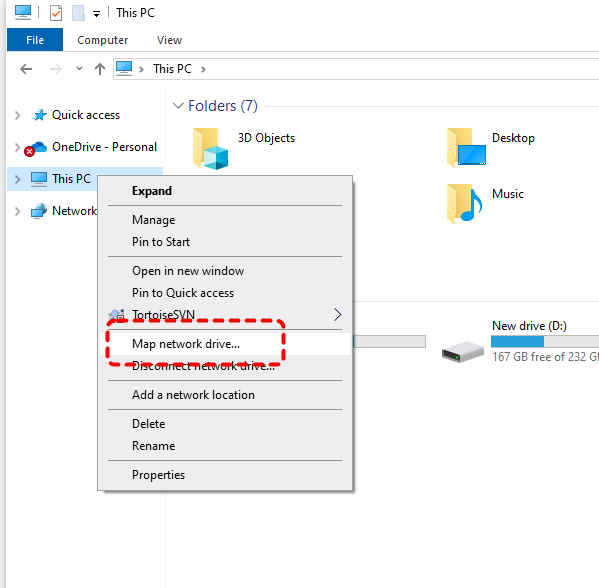
Step 2. Open File Explorer and right click "This PC", then choose "Map network drive".
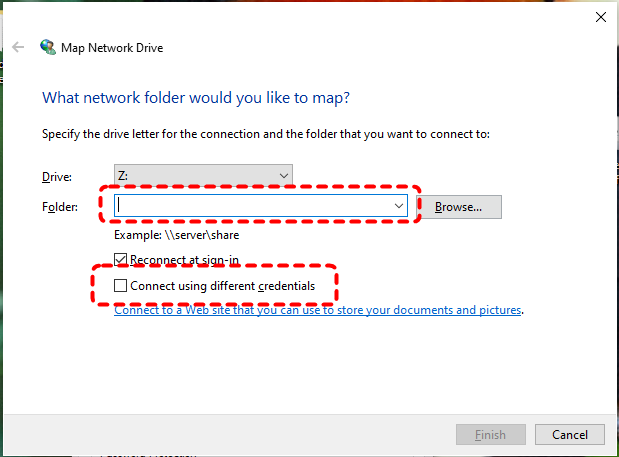
Step 3. Enter https://d.docs.live.net/ followed by the CID number in the Folder field and check the "Connect using different credentials" option.
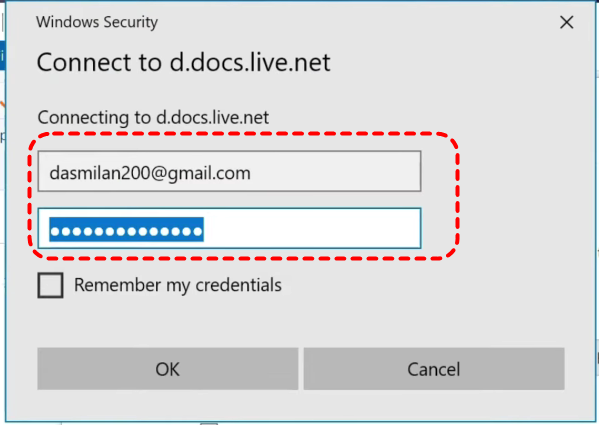
Step 4. Wait a while, the program attempts to establish a connection. Enter your OneDrive account and the password.
When the process is completed, assign a new drive letter for the network drive. Then, you can change File History backup drive to the OneDrive network drive in the settings.
When Backup Falls Short: Turning to Data Recovery Software—MyRecover
Although File History provides a reliable way to back up your files to OneDrive, it does have limitations. For instance, it only backs up certain file types and doesn't create full system backups. If something goes wrong, and your File History backups are inaccessible or incomplete, you might need additional tools to recover your data.
In such cases, free data recovery software—MyRecover can come to the rescue. It can scan your local hard drive and offer an opportunity to recover the lost files without any backup requiring. MyRecover is a fully reliable data recovery tool. It does not write data during the recovery process, fundamentally avoiding data overwriting. Let's explore the remarkable advantages of MyRecover.
✅Beginner friendly – No command line needed, employ simple GUI (graphical interface) for easy file recovery.
✅500+ Devices Support – Recover files from all types of devices like SSD, HDD, USB flash drive, SD card, cameras, game consoles and more.
✅Handle 500+ Data Loss Scenarios – Recover from deleted partition, formatted hard drive, emptied Recycle Bin, system crash, virus attack, etc.
✅Supports over 1,000 File Types – Including documents, photos, videos, audio, archives, emails and Outlook data files.
✅OS Compatibility – Work not only on Windows 11 /10, but also on Windows 8.1/ 8/ 7 and all Servers.
4 Steps to Recover Lost Files on Windows
Step 1. Download and install MyRecover on your computer, avoid installing it on the drive with lost files.
Step 2. Launch it and select the drive where lost files were stored to scan, then click "Scan".

Step 3. Choose files you wish to recover from the recoverable lists and click "Recover".

Step 4. Select a safe location (not the original one) to save the recovered files.

Upon the completion of the recovery process, the message indicating successful recovery will pop out. You can check and access the recovered files by clicking the destination folder.

Summary
Both of the methods above can guide you to back up File History to OneDrive, which effectively saves your local disk space. With simple configuration steps, you can protect your files in the cloud and access them from anywhere. However, it's essential to recognize the limitations of File History and be prepared for instances where you may need to use data recovery software.
If one day the files you lost are not backed up, you can also retrieve them using professional data recovery software like MyRecover. To meet users' more advanced needs, MyRecover also offers Professional Edition and Technician Edition. These editions allow users to recover data from crashed systems and support previewing file contents before file recovery.


Stay Updated With Our
Latest Tips
Add us as a preferred source on Google to never miss helpful guides.