
How to Disable BitLocker Windows 11/10 – 3 Easy Ways for Beginners
Discover step-by-step methods for how to disable BitLocker Windows 11, including options for decryption, removal, and temporary suspension. You'll also learn how to suspend BitLocker Windows 11 safely before firmware updates or hardware changes.
By Delores / Updated on March 23, 2026
How to Disable BitLocker in Windows 11?
How to disable BitLocker in Windows 11
Since BitLocker just gave me a thesis-related mini heart attack, can I disable it? The "manage BitLocker" screen does not seem to have a button for it.
I hope anyone here knows how to disable it.
- Question from reddit.com
BitLocker encryption is a great security feature, but sometimes it gets in the way—whether you’re installing an update, troubleshooting hardware, or just tired of the password prompt at startup. If that sounds familiar, you’re probably looking for a straightforward way to disable BitLocker in Windows 11. In fact, it’s simpler than you think, and we’ll walk you through every option.
Why Disable BitLocker Encryption?
BitLocker is great for security, but it can be a headache during system updates, hardware swaps, or if you’re trying to troubleshoot a boot issue.
Sometimes, it even slows things down if your computer doesn’t have a dedicated encryption chip.
Knowing exactly how to disable BitLocker Windows 11 gives you the flexibility to manage your system’s security without being locked out of your own machine.
Preparations to Disable BitLocker
Jumping in without preparation can lock you out of your data.
Check If BitLocker Is Active
Right-click your C: drive or other drives in File Explorer and look for “Manage BitLocker”. If it’s there, BitLocker is active. If not, it isn’t.

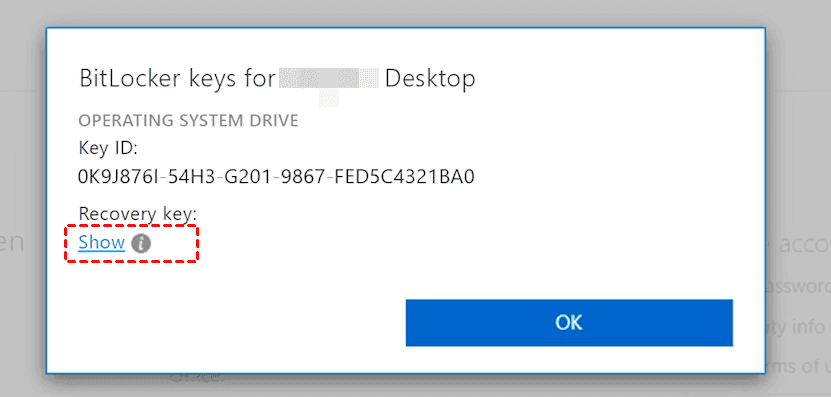
Prepare Your Recovery Key
Find your BitLocker recovery key in your Microsoft account online or on the external hard drive where you kept it. If something goes wrong during decryption, the key is your only way back in.
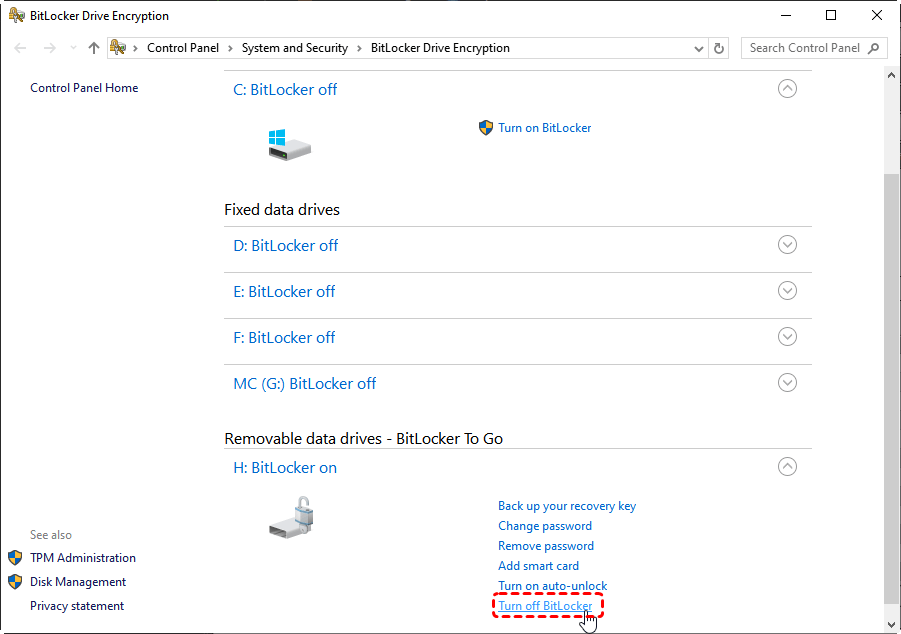
Way 1. Disable BitLocker via Control Panel in Windows 11
For a straightforward way to disable BitLocker, the Control Panel is your best option.
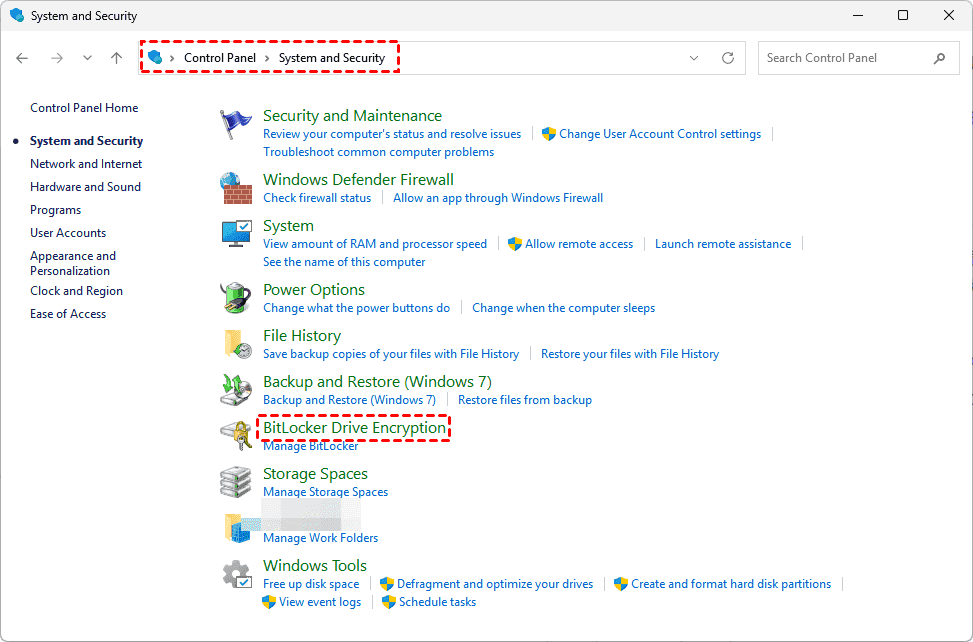
1. Input Control Panel from the Start search box to open it.
2. Click “System and Security”.
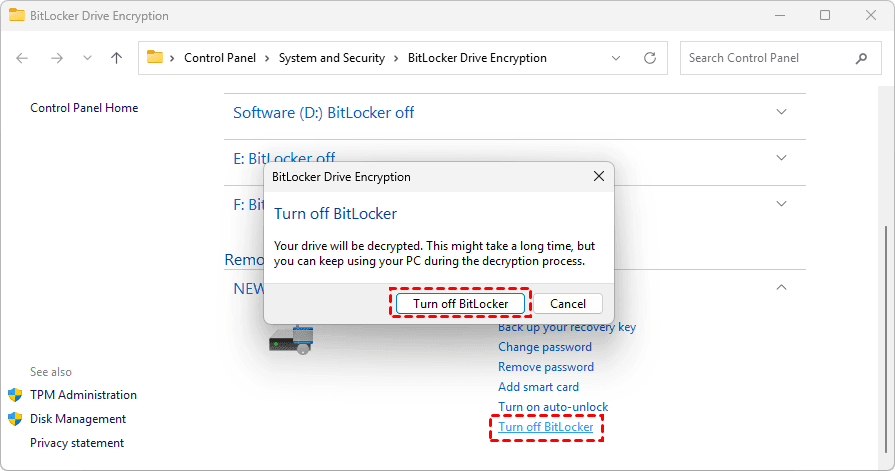
3. Then select “BitLocker Drive Encryption”. Your drives and their encryption status will appear.
4. Next to your drive, click “Turn off BitLocker”. Confirm the prompt. Decryption begins, and a progress indicator shows when it’s complete. Once it reaches 100%, your drive is no longer encrypted.
Way 2. How to Turn Off BitLocker via Settings
If Control Panel isn’t your preference, you can disable BitLocker in Windows 11 settings. Here it is:
1. Open Settings (Windows key + I).
2. Go to “Privacy & security”.
3. Click "Windows Security" > "Device Security" > “Manage BitLocker Device encryption” (or “BitLocker” on Pro/Enterprise).
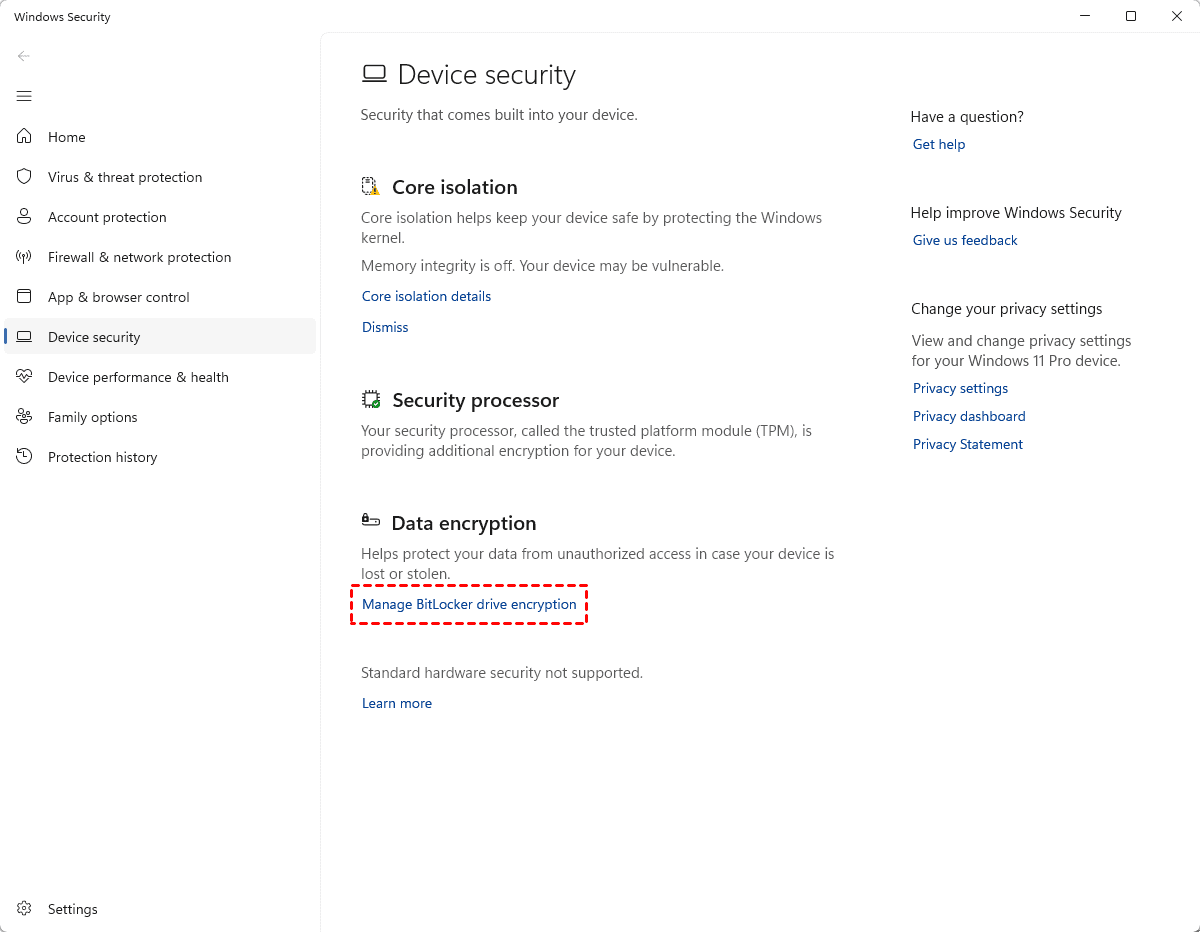
4. Toggle BitLocker off for the drive you need.
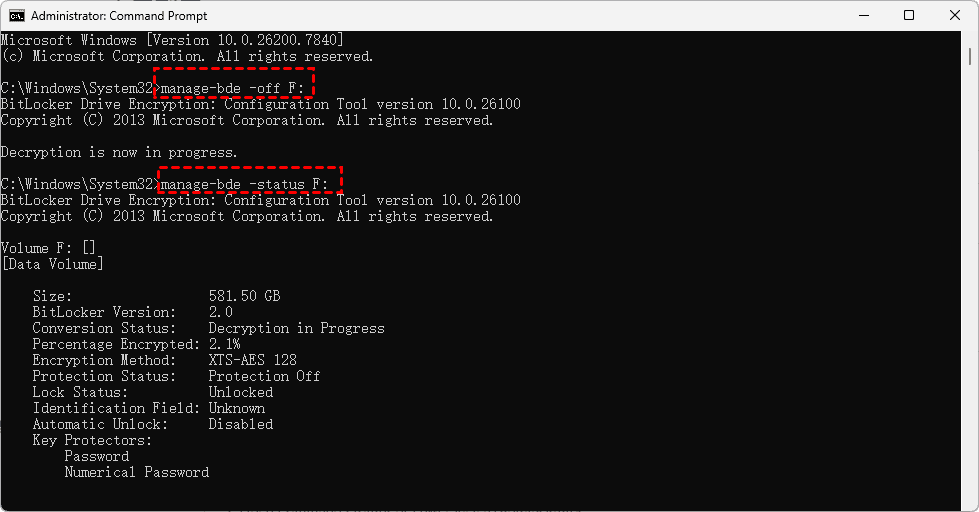
Way 3. How to Deactivate BitLocker Using Command Prompt
1. Open Command Prompt or PowerShell as administrator.
2. Type manage-bde -off F: (replace 'F:' with your drive letter) and press Enter.
3. Check progress with manage-bde -status F: (replace 'F:' with your drive letter).
These 3 solutions show how to remove BitLocker in Windows 11. It’s very easy to operate.
How to Suspend BitLocker Windows 11 Temporarily
Decryption takes time. For quick tasks like driver installs or BIOS updates, suspension is the smarter choice.
When Suspending Makes Sense? Suspension keeps your data encrypted but temporarily removes the password prompt. It’s ideal for firmware updates, hardware changes, or troubleshooting. When you’re done, resume protection with one click—no lengthy decryption needed.
Step-by-Step to Suspend BitLocker
1. Open BitLocker management in Settings or Control Panel.
2. Click “Suspend protection” for the drive.
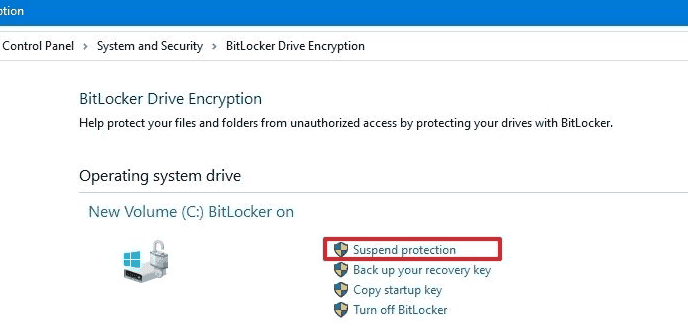
3. Confirm your choice.
The lock is off until the next restart. Remember to resume protection afterward.
Troubleshooting Common Issues When Disabling BitLocker
Sometimes, things don’t go as planned. Here’s how to handle the hiccups.
BitLocker Disable Option Is Grayed Out
If the option to turn off BitLocker is grayed out, you’re likely not an administrator on the device, or group policies are restricting the action.
Try running the Command Prompt method as admin. If that doesn’t work, check with your IT department if it’s a work device.
Forgotten Recovery Key or Password Problems
Lost your recovery key? Don’t panic.
Sign in to your Microsoft account online—most people save it there automatically.
A USB drive that contains your recovery key.
Insert your smart card to unlock the encrypted drive.
Or find the TXT file that contains your recovery key.
If you can’t find it and you’re locked out, the only way forward is to wipe the drive and reinstall Windows. That’s why backing up that key is so crucial.
Errors During Decryption or Suspension
If decryption stalls or fails, run a disk check.
Open Command Prompt as admin and type chkdsk C: /f. This fixes file system errors that might be blocking the process. Restart and try again.

Still stuck? Try suspending instead of decrypting, or use a third-party tool like MyRecover to recover data before a full reset.
Fast Recover Lost Files with MyRecover
You disable encryption, something glitches, and suddenly important files vanish. Maybe you accidentally deleted something while cleaning up. Don't worry, that’s where MyRecover comes in.
Whether files were deleted, lost during a BitLocker transition, or corrupted in the process, MyRecover digs deep to recover them.
- It supports over 1,000 file types, like documents, images, videos, audios, emails, and many more.
- It works with 500+ devices, including SSDs, HDDs, USB drives, SD cards, cameras, music players, Xbox One, PS4/5, etc.
- Plus, it lets you preview files before recovery, so you know exactly what you’re getting.
- The highest recovery rate in the market, 99%.
- It easily recovers files from any complex situation, like accidentally formatted, corrupted SD card, damaged partition, an emptied Recycle Bin, etc.
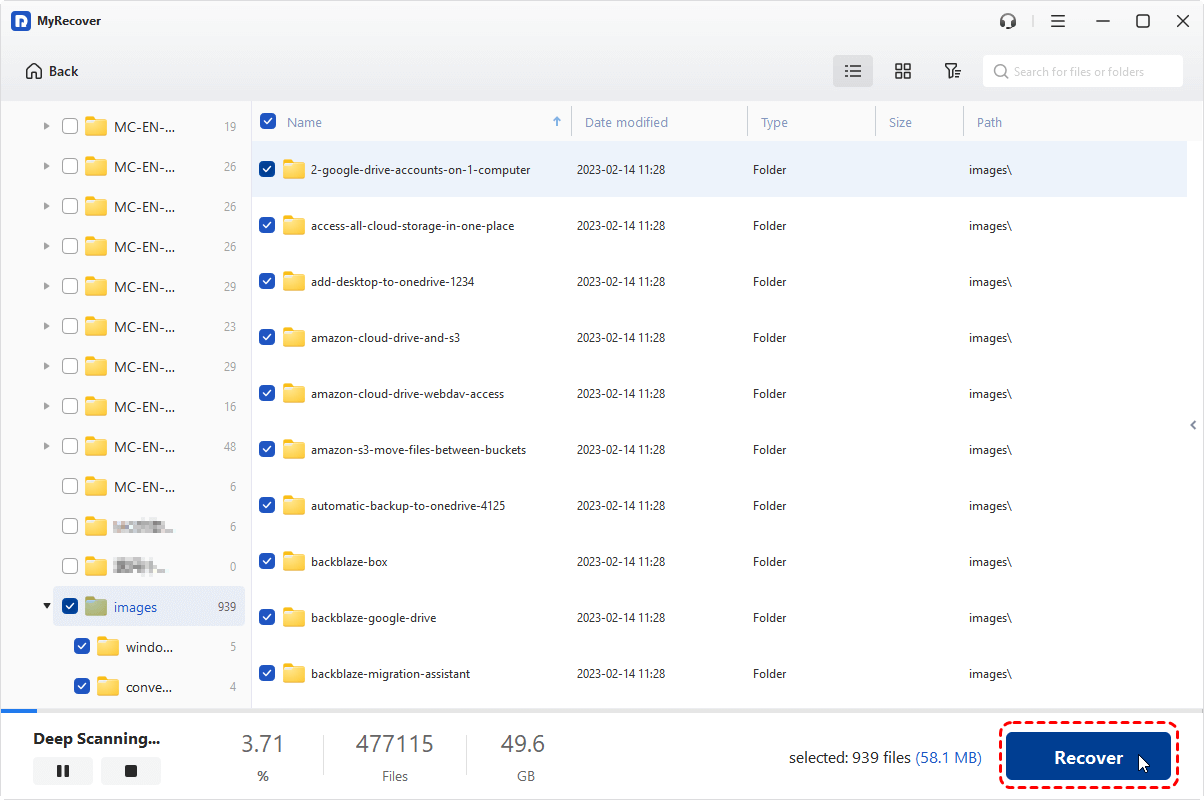
1. Download and install MyRecover. Make sure you install it on a different drive than the one you’re planning to recover files from. This prevents overwriting the very files you’re trying to recover.
2. Launch it, and select “Disk Data Recovery”, choose the drive where your lost files were located, and click “Scan”. It’ll start scanning your files now. Hit OK when it's done.

3. Once the scan finishes, use the filter to narrow down by file type, path, date, extension, or name. For example, if you’re looking for Word docs, just select the document category in the Type section.
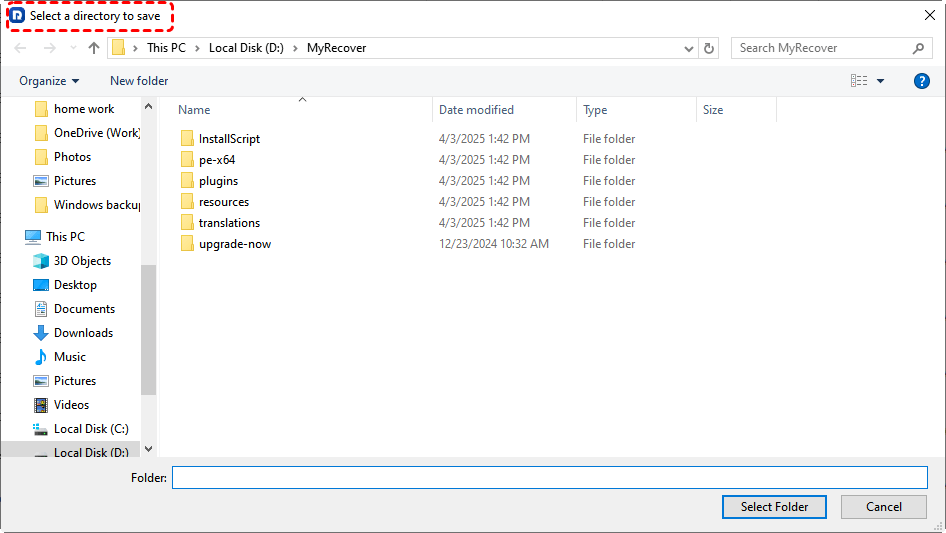
4. Preview and tick the files you want and hit “Recover”. Choose a safe location to keep them safe.
- Notes:✎...
- By default, MyRecover sorts the files by file type. It’s very easy to find your document files quickly.
- You’re able to recover unlimited files at a time if required.
- Upgrading to MyRecover Technician is your best choice if you are going to recover files from an unlimited number of computers in the future.

- Recover Deleted Files Easily with Simple Clicks
- 1000+ File Formats Supported
- Support HDD, SSD, External Hard Drive, USB Drive, SD Card, etc.
- Quickly Find Files Using File Types, Name, Size, etc.
- Preview Files Before Recovering
- Recover Unlimited Data
FAQs About Disabling BitLocker in Windows 11
Will disabling BitLocker erase my data?
A: No. Turning off BitLocker decrypts your data but leaves it intact. Your files, programs, and settings remain exactly as they were. The only difference is that your drive is no longer encrypted.
How long does it take to decrypt a drive?
A: It depends on the size of your drive and how much data is on it. For a typical 256GB drive with moderate use, expect anywhere from 20 minutes to a few hours. Larger drives or nearly full ones can take longer. You can keep using your computer during decryption, though it might feel a bit slower.
What’s the difference between disabling and suspending BitLocker?
A: Disabling turns off encryption entirely and decrypts the drive. Suspending temporarily pauses protection without decrypting. Suspension is faster and meant for short-term needs like updates or hardware changes. Once you restart, the drive remains encrypted, but you’ll need to re-enable protection.
Can I disable BitLocker without the recovery key or password?
A: If you know your password or PIN, you can disable it without the recovery key. If you’ve forgotten both, you’re out of luck—you’ll need that recovery key to proceed. If you’re locked out entirely, your only option is to wipe the drive and reinstall Windows.
Is it safe to disable BitLocker permanently?
A: Safety depends on your usage. If you’re the only person using the computer and it never leaves your home, disabling BitLocker is low-risk. For laptops or shared devices, keeping it on is generally recommended. If you do turn it off, just make sure you have another backup method in place.
How to disable BitLocker in Windows 11 without logging in?
Boot from a Windows installation USB or trigger Automatic Repair. Go to Troubleshoot > Advanced Options > Command Prompt. Type manage-bde -off C: to decrypt. The recovery key is required.
How to disable BitLocker in Windows 11 in BIOS?
You can’t disable BitLocker from BIOS. It’s an OS feature. If locked out, enter the recovery key at boot, then disable it in Windows. Or use Command Prompt from recovery media with manage-bde -off C: (Replace C: with your drive letter).


Stay Updated With Our
Latest Tips
Add us as a preferred source on Google to never miss helpful guides.