
How to Enable Backup and Restore on Windows 7: Protect Your Files Now
This guide provides complete instructions on how to enable backup and restore on windows 7 to protect your valuable files from unexpected loss. We also explain how to use backup and restore windows 7 on windows 11 for users running older backup files on newer systems.
By Delores / Updated on April 15, 2026
Microsoft provides a pretty solid safety net right into your operating system: Backup and Restore (Windows 7). It has remained available through multiple Windows generations, and despite its name, continues functioning in newer Windows versions as well. Learning how to enable backup and restore on Windows 7/10/11 is an important skill that you can't miss. Let's get started.
About Windows 7 Backup and Restore
The Backup and Restore utility in Windows 7 is a native, free application that protects your essential data (file backup) and system configurations (system image) and lets you access it when problems arise. This tool keeps file permissions, system configurations, and the underlying components that maintain your computer's expected functionality, which allows you to restore them.
When you initiate a backup, Windows establishes a backup catalog—a comprehensive index documenting everything that has been preserved. This catalog enables you to navigate through your backups and select specific files or folders for restoration, even when restoring to a different computer.

System Image vs. File Backup
A system image captures your entire computer at a specific moment—Windows, all installed programs, personal files, and system configurations. The drawback is significant storage consumption, often hundreds of gigabytes. However, when drive failure strikes and you need rapid full-system restoration, a system image delivers complete recovery capability.
File backups focus solely on your personal data—documents, photos, music, and other user-created content—excluding Windows system files and applications. These backups require less space, complete faster, and suit routine protection needs. You can automate them and rest assured that recently modified files remain safe.
How to Enable Backup and Restore on Windows 7/10/11
1. Click that Start button in the bottom-left corner of your screen, then click on Control Panel.
2. Once you're in, look for "System and Security" and give it a click.
3. Click "Backup and Restore (Windows 7)".
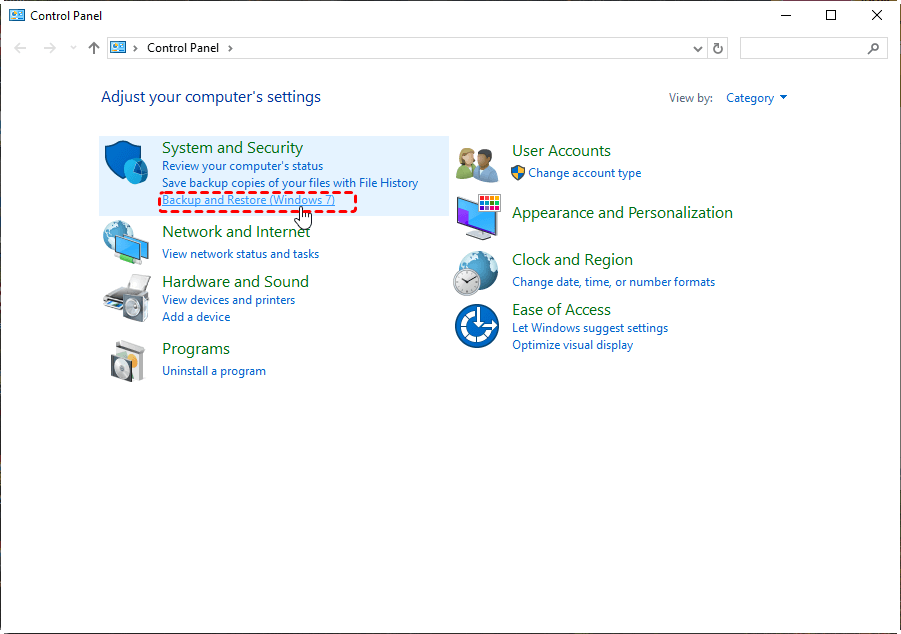
Tip: If you're on Windows 10 or 11, the path is the same—Control Panel, System and Security, Backup and Restore (Windows 7). Microsoft kept this tool around for backward compatibility, so your old backups aren't trapped in the past.
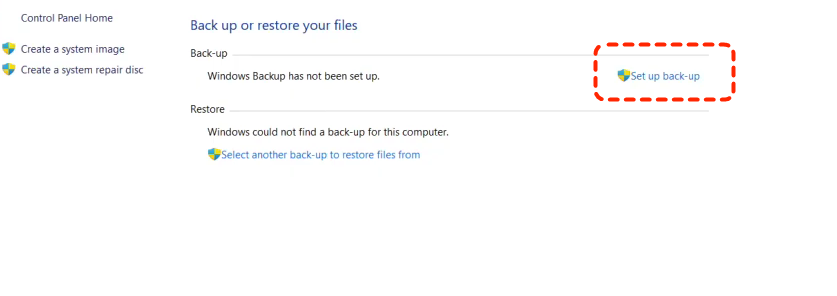
4. Click "Set up backup". Click it, and Windows will take a moment to scan your system for available drives.
5. Select an external hard drive, a USB flash drive with enough space, or a network location.
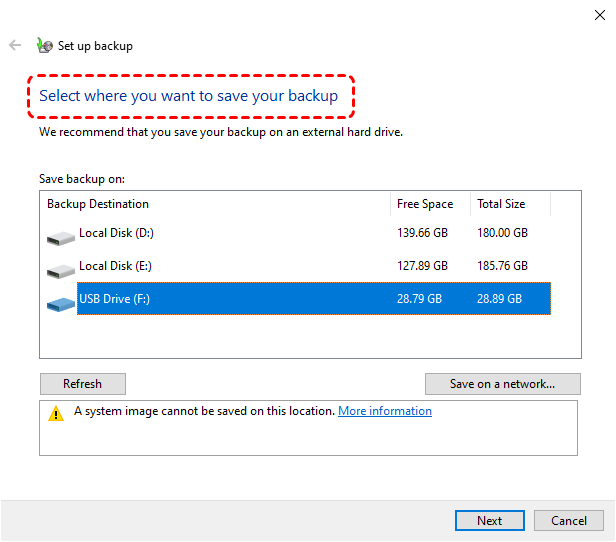
External drives: They're affordable, portable, and you can disconnect them when not in use. Win on speed and simplicity
Network Locations: Offer the advantage of being accessible from anywhere on your network, but they're slower and trickier to set up.
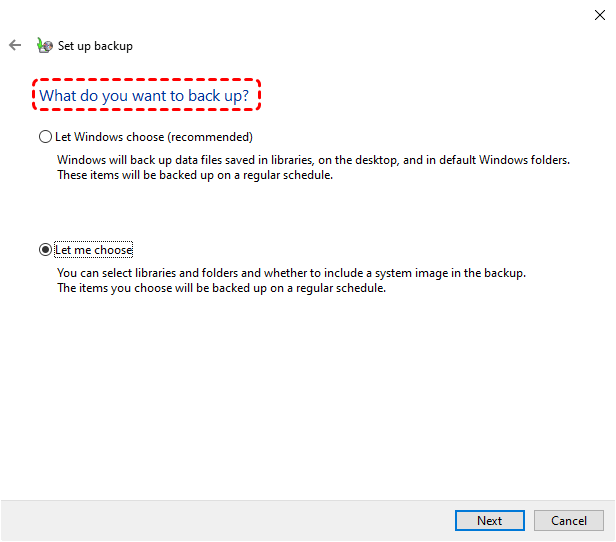
6. Choose one of the choices:
Tick the "Let Windows choose" option to automatically back up your libraries, desktop, and default Windows folders, plus it creates a system image you can use to recover your entire computer.
Choose "Let me choose" lets you hand-pick individual folders, libraries, and even entire drives to include or exclude.
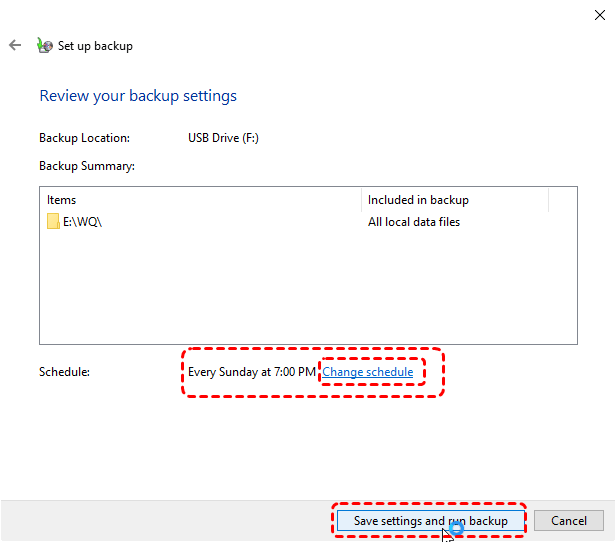
7. Tap Save settings and run backup.
- Notes:✎...
- You can also set up the preferred backup frequency. Daily backups ensure you never lose more than a day's work. Weekly backups are fine if your files don't change much. Monthly is better than nothing.
- While file restoration works perfectly, restoring a full system image from Windows 7 to a Windows 10/11machine with different hardware can get dicey. Drivers and system configurations have changed a lot since Windows 7, and trying to force an old system image onto new hardware might cause boot failures. Stick to restoring individual files when moving between different computers.
Restore Your Data When Disaster Strikes
Restore Files from a Standard Backup
For everyday file loss:
1. Open Backup and Restore, click "Restore my files", and follow the wizard.
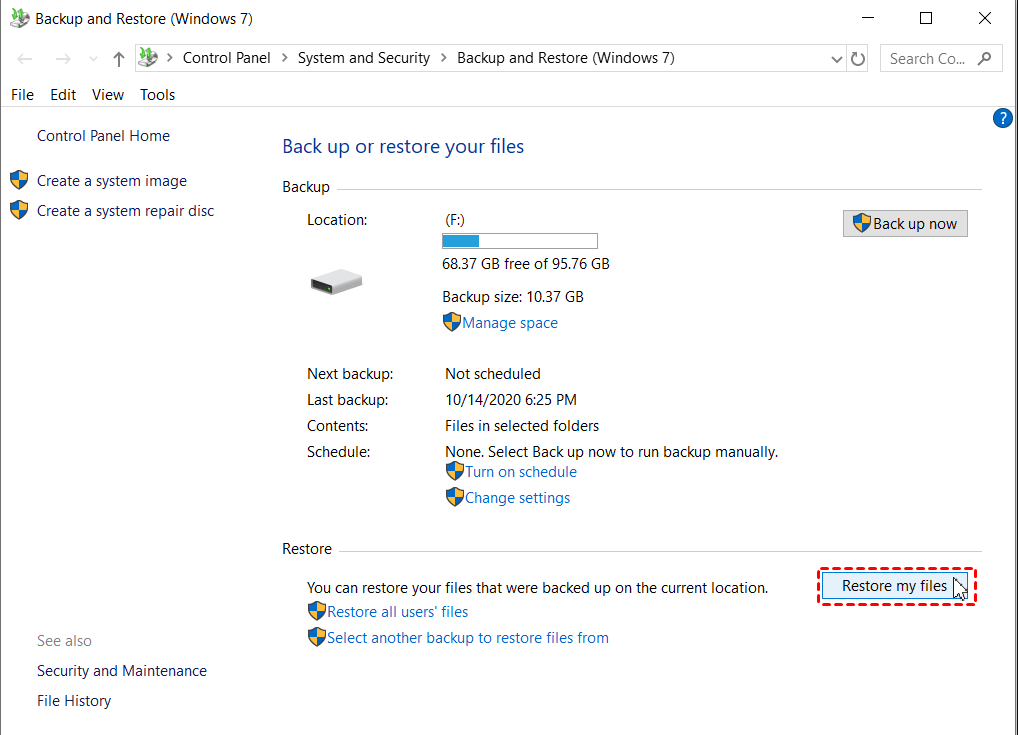
2. You can browse for individual files or entire folders. The interface shows you a timeline of backup versions, so you can pick exactly when the file was backed up.

3. Choose whether to restore to the original location (overwriting what's there) or a new location (keeping both versions). I usually recommend restoring to a new location first, then manually comparing and copying files—it prevents accidentally overwriting newer files with older backups.
Recover Your Entire System from a System Image
When your computer won't boot, or you're replacing a dead hard drive, a system image is your best friend.
1. First, boot your computer using Windows installation media or a system repair disc.
2. Insert the DVD or USB drive, restart your computer, and press the key that brings up the boot menu (usually F12, ESC, or something similar). Choose your media and let it load.
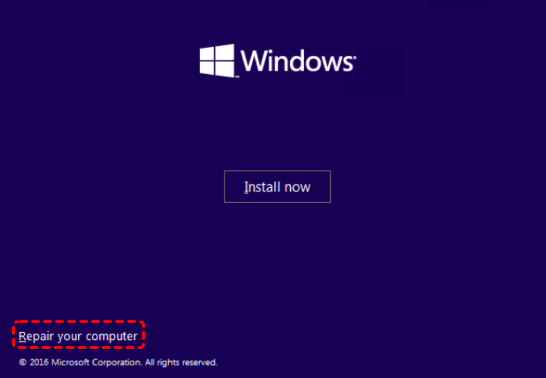
3. Once the Windows Setup screen appears, click "Repair your computer" in the lower-left corner.
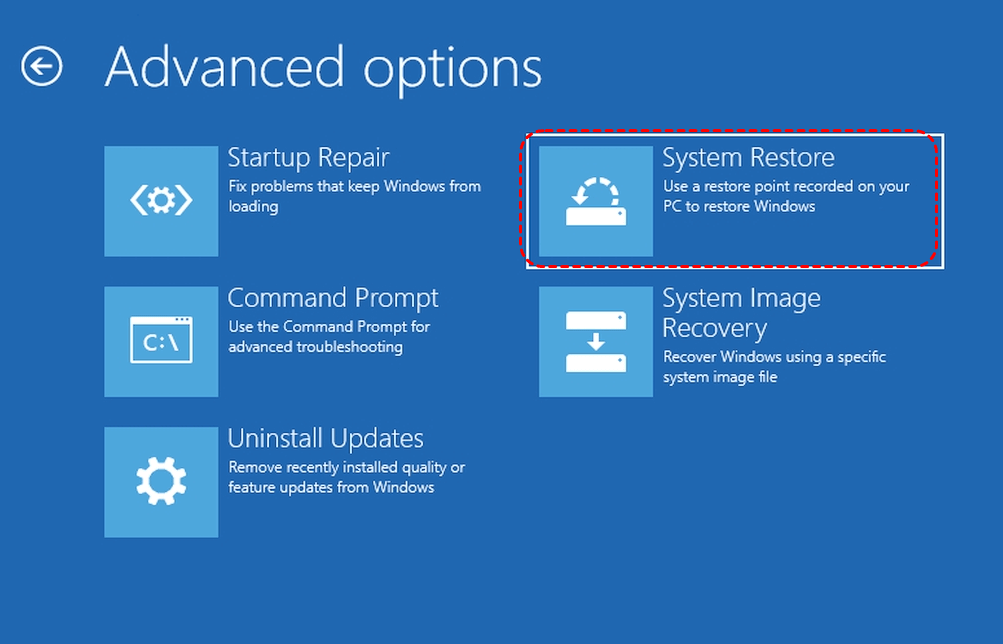
4. Then navigate to Troubleshoot > Advanced options > System Restore. Windows will search for available system images—select the most recent one that matches your situation.
5. Follow the prompts, confirm you're ready to replace everything on your system drive, and let the restoration begin.
This can take hours depending on the image size and your hardware. When it's done, your computer should boot up exactly as it did when you created the image.
Common Backup and Restore Errors and Fixes
Backup Fails Due to Insufficient Disk Space
Your backup drive fills up, and suddenly, backups stop working. You can either delete old backups you no longer need, move them to another drive, or get a larger backup drive.
In Backup and Restore, you can manage backup space by clicking "Manage space" in the task sidebar.
Restore Operation Cannot Find Backup Location
Windows can't find your backup, but you know it's there somewhere. This usually happens when drive letters change. If you plugged your backup drive into a different USB port, Windows might assign it a different letter.
Open Disk Management, find your backup drive, and either assign it the original letter or browse for the backup manually in the restore wizard.
Permission Denied Errors During Restoration
Sometimes Windows shows permissions errors when restoring files, especially if you're restoring to system folders.
Run the restore process as an administrator—right-click the Backup and Restore shortcut and select "Run as administrator".
If that doesn't work, try restoring to a different folder first, then manually copy files to their final destination.
FAQs About Windows 7 Backup and Restore
Can I use Windows 7 Backup and Restore on Windows 10 or 11?
A: Yes. The Backup and Restore (Windows 7) tool remains in Windows 10 and 11 for backward compatibility. Access it through Control Panel under System and Security. It works identically to the original, letting you create new backups or restore from existing Windows 7 backups.
Will restoring a Windows 7 system image to different hardware work?
A: It's risky and often fails. System images contain hardware-specific drivers and configurations that may not be compatible with different hardware. Only restore system images to the same computer or identical hardware. For different computers, restore individual files instead.
How much storage space do I need for Windows 7 backups?
A: It depends on what you're backing up. File backups need roughly the same space as the files themselves. System images are much larger—typically 50GB to 200GB or more, depending on installed programs and files.
How often should I create a new system image?
A: Create a system image before major changes like Windows upgrades, significant software installations, or after perfecting your computer setup. For ongoing protection, create a fresh image monthly or quarterly.
Why does my backup keep failing with an error about a shadow copy?
A: Volume Shadow Copy Service (VSS) errors mean Windows can't create a consistent file snapshot. This happens with file system errors, insufficient shadow copy space, or another backup already running. Run chkdsk to check for errors, ensure free space, and restart your computer to clear stuck backup processes.
Can I back up my Windows 7 computer to OneDrive or cloud storage?
A: The built-in Backup and Restore tool doesn't support cloud destinations directly—it requires a drive letter or network path.
What's the difference between Backup and Restore and File History?
A: Backup and Restore creates scheduled backups and optional system images in a proprietary format requiring the restore tool. File History continuously backs up file versions to an external drive with easy version browsing. File History is simpler for personal files; Backup and Restore offers more comprehensive system protection.
Fast Recover Missing Files with MyRecover
Maybe you never got around to setting them up, or your backup drive failed, or the files you need were created after your last backup. That's where MyRecover enters the picture.
Windows Backup and Restore is fantastic for what it does, but it can't recover files that were never backed up. If you accidentally deleted photos from your camera's SD card, lost files after a partition reformat, or suffered a corruption that Windows tools can't handle, you need specialized recovery software.
MyRecover digs deep into your storage drives, scanning every nook and cranny for traces of deleted files that haven't been completely overwritten.
Here is how to recover missing files with MyRecover in Windows 7/8/10/11:
1. Please download MyRecover and install it. Do not install it on the drive that you’re trying to recover from.
2. Tap Deleted Files Recovery, choose the drive where the deleted files were located before, and hit Scan.

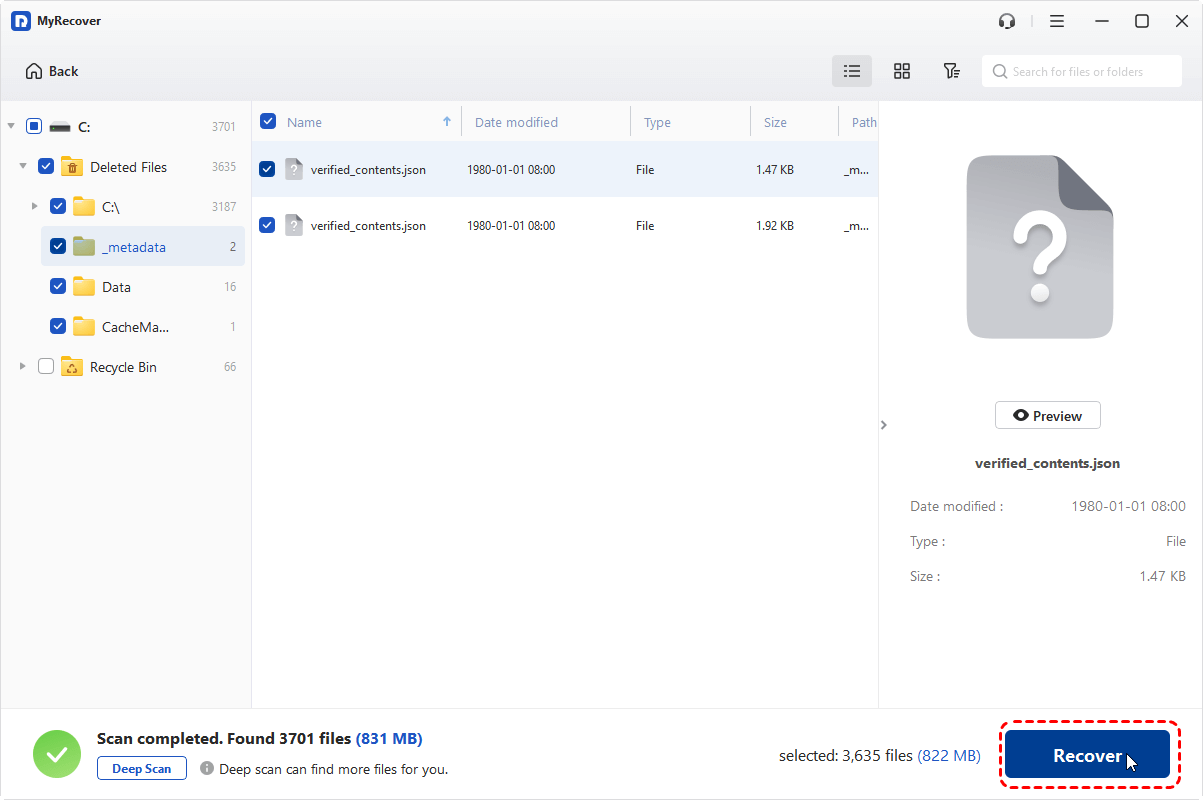
3. After scanning, double-click the files to preview, then tick all the files you need, and hit Recover.
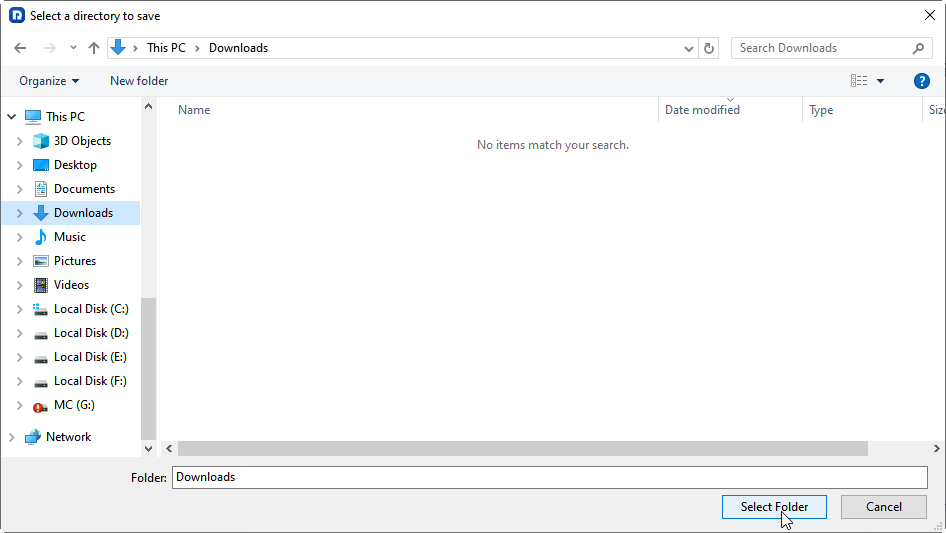
4. Select a folder as the destination to keep them safe.
- Notes:✎...
- Once scanning completes, you'll see a list of recoverable files organized by folder structure or file type. Use the filters to narrow down by file type or search for specific filenames. The preview feature lets you peek inside photos and documents to confirm they're the right ones before committing to recovery.
- You can also upgrade to MyRecover Technician to enjoy more advanced features, like recovering files from unlimited computers, etc.

- Recover Deleted Files Easily with Simple Clicks
- 1000+ File Formats Supported
- Support HDD, SSD, External Hard Drive, USB Drive, SD Card, etc.
- Quickly Find Files Using File Types, Name, Size, etc.
- Preview Files Before Recovering
- Recover Unlimited Data
The End
How to enable backup and restore on Windows 7 isn't complicated, and we will show you everything about Backup and Restore. Try to set it up and protect your files forever.
However, if the backup and restore (Windows 7) is not working, you can try MyRecover to recover your deleted files, or files from a formatted SSD, corrupted SD card, etc.


Stay Updated With Our
Latest Tips
Add us as a preferred source on Google to never miss helpful guides.