
How to Restore Your Computer from a System Image Backup | Step-by-Step
This guide details how to restore your computer from a system image backup. We cover the entire process for Windows 10, from boot media to final verification, ensuring you can recover from any disaster. Learn to restore from system image Windows 10 effectively.
By Delores / Updated on December 19, 2025
Preface
It's annoying if you encounter a blue screen of death or a stubborn boot loop that just won't quit. This is precisely why knowing how to restore your computer from a system image backup is very important. It’s not just about getting your machine running again; it’s about getting your exact files back—programs, settings, files, and all—without starting from scratch.
Whether you're a panicked user wondering "how do I restore my computer from a system image", or you're planning, this guide is your comprehensive roadmap from disaster to recovery.
What is a System Image Backup?
A system image is a complete, sector-by-sector copy of your computer's primary drive, captured at a specific moment in time. It is a full archival record of everything required for the operating system to function: the Windows installation itself, every installed application, all system files, personal data, and user customizations.
This differs fundamentally from backing up individual folders, as it preserves the entire operating environment in a single, restorable state. When you execute a restore of your computer from a system image backup in Windows 10, you completely overwrite the current contents of the drive with this archived state, replicating the original system configuration precisely.
Key Benefits of System Image Recovery
The advantages of this method are definitive. Its primary strength is comprehensiveness, offering a consolidated recovery solution that eliminates the need to separately reinstall the operating system, applications, and configurations—a process often spanning days.
Furthermore, it ensures consistency; a restoration reverts the system to a known stable condition, effectively eliminating accumulated software errors, driver incompatibilities, or malware.
Ultimately, it represents significant efficiency, as a restoration can often be completed within hours, contrasting sharply with the protracted effort of a manual rebuild.
System Image vs. File Backup
This distinction is critical. A file backup selectively archives designated data, such as documents or photos, for routine safekeeping and version history. A system image, conversely, is a complete replication of the entire drive's structure and contents, necessary for full system recovery.
File backups protect against data loss, while a system image protects against total system failure. Therefore, mastering how to restore your computer from a system image backup involves understanding that you are performing a complete system reconstruction, not a selective file recovery.
How to Restore Your Computer from a System Image Backup?
Here, we are assuming that you have created a system image backup using Backup and Restore (Windows 7). Now, we will show you how to restore your computer from a system image backup in Windows 10 or Windows 11. Check the following steps:
Preparations:
- A System Image Backup (usually with an extension like .vhd, .vhdx). It might be on your external hard drive, a network location, or a stack of DVDs. If you can't find it, the entire process stops here.
- A Recovery Drive or Installation Media. When your computer is truly broken, you can't just boot into Windows and start the restore. You need to boot from a Windows 10/11 USB Recovery Drive you created earlier or the original Windows Installation Media (a USB created with the Media Creation Tool).
- Back Up Critical Data Before Restoration. A system image restore will overwrite everything on the drive it targets. If you've taken any new photos, written any documents, or received any emails since that image was created, they will be erased. It’s absolutely paramount to copy any new, important files off the primary drive onto another USB stick or cloud service before you begin.
Now, it’s time for you to restore your computer from a system image backup in Windows 10/11:
Part 1. Restore Your Computer from System Image Backup (Your PC can boot up)
If you can boot up your Windows computer and the PC needs restoration, you can do the following steps to restore:
1. Connect your drive that contains a system image backup.
2. Click Start, and choose Settings > System > Recovery > Recovery options > Advanced Startup > Restart now.

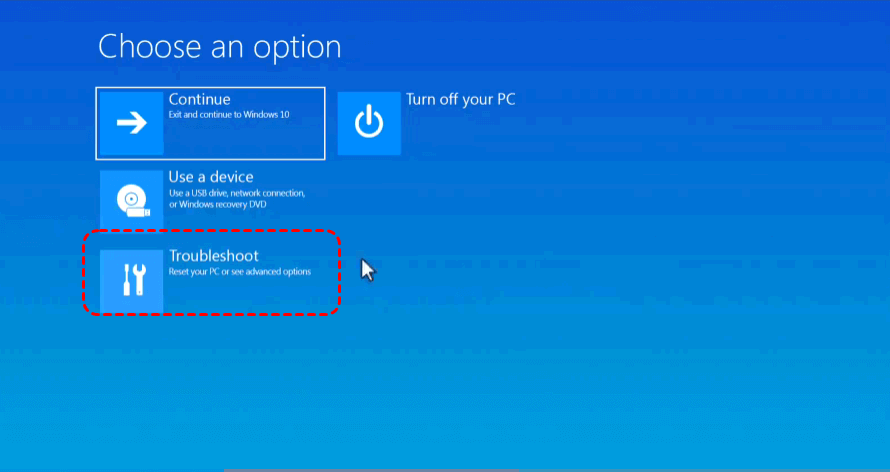
3. Then choose Troubleshoot.
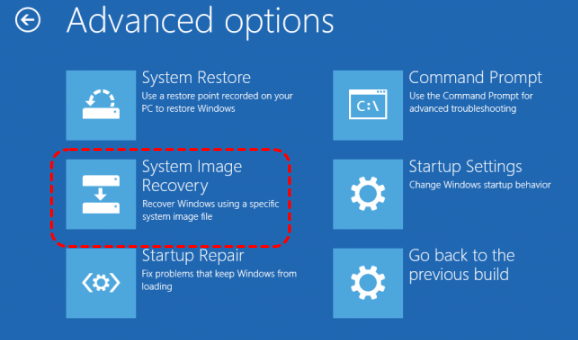
4. Choose Advanced options.
5. Tap See more recovery options.
6. Now, you can choose System Image Recovery.
7. Choose your system image backup, and follow the guide to complete the restoration.
Part 2. Restore from System Image (If Your PC won’t boot up)
1. Plug in both the drive holding your system image and your Windows Recovery/Installation USB.
2. Power on, and immediately press the key to enter the boot menu (usually F12, F2, ESC, or DEL—check your PC maker's splash screen). Select the USB drive to boot from.
3. You'll see the Windows setup screen; click 'Next', then choose 'Repair your computer'.
4. Navigate to Troubleshoot > Advanced Options> System Image Recovery.
- Tip:✎...
- Windows will now search for and (hopefully) automatically find your system image on the connected external drive. If it doesn't, you can manually browse to its location.
5. Locate your system image backup, then follow the guide to restore your computer to a previous state.
- Tips for Part 1 & Part 2:✎...
- For most standard restorations, you can click 'Next' and then 'Finish'.But there's an "Exclude Disks" option and an "Install drivers" button here that are lifesavers in niche scenarios. If you've added a new hard drive after creating the image, you might exclude it from being formatted.
- If you're attempting a restore Windows image backup to another computer with different hardware, you would use the "Install drivers" button to load crucial storage controller drivers so the new machine can even see the old image.
FAQs on System Image Recovery
Q: Can I restore a system image to a smaller hard drive?
A: Generally, no. The image replicates the original drive's total capacity. It can only restore to a drive of equal size or larger. A critical nuance is that the actual space used matters. If your old 1TB drive only contained 200GB of data, restoring to a 500GB drive might be possible, but the process is complex and risky, often requiring third-party software. For reliable results with Windows' native tool, the target drive should be at least as large as the original.
Q: Will restoring a system image delete files on my other drives?
A: Not automatically. The process only formats the specific drive(s) contained in the original backup, usually just the C: drive. The final confirmation screen before restoring lists exactly which disks will be overwritten. Drives not included in that list, like a separate D: drive for data, will remain untouched. Always verify this summary screen carefully.
Q: How often should I create a new system image?
A: Create one after any major system change, such as installing significant software or completing a major Windows update. For ongoing protection, a monthly schedule is effective. This balances having a recent recovery point with the time required to create the image. Treat it as core insurance, supplemented by more frequent file backups for your documents.
Q: Can I extract a single file from a system image?
A: Yes. The image file (typically a .vhd file) can be mounted as a virtual drive in Windows on a working machine. You can find this option in Control Panel under File History > System Image Backup, or by right-clicking the .vhd file and selecting "Mount." This allows you to browse the archived contents and copy out individual files without a full restore.
Q: What's the difference between "Reset this PC" and a system image restore?
A: "Reset this PC" reinstalls a clean version of Windows, removing all applications and settings (though you can optionally keep personal files). It delivers a new, out-of-the-box system. A system image restore returns your computer to the exact state it was in when the image was created—with all apps, settings, and customizations intact. One is a fresh start; the other is a precise reversion.
Q: How do I fix the "No System Image Was Found" error?
A: Follow these steps:
Check Connections: Ensure your external drive is on, plugged in, and try a different USB port.
Browse Manually: Use the wizard's "Browse" option. Navigate to the WindowsImageBackup folder (not the file inside it).
Recover Files Even If the Computer Won’t Boot
Unfortunately, it’s annoying to recover files while the computer can’t boot up (black screen, blue screen, boot loop). What should you do? Here comes the powerful Windows data recovery software MyRecover to do you a great help! MyRecover is designed to recover files from any complex situation, including recovering files from your PC that won’t boot up, etc.
You can create a Windows bootable media on a working computer, then boot the computer that won’t boot from the media, then recover all files from MyRecover directly.
Here is how it works:
Preparations:
- A working second computer (a friend's, family member's, or work computer)
- MyRecover software was downloaded to that working computer
- Two USB drives: USB Drive 1: To create a MyRecover bootable emergency media (32GB+ recommended). USB Drive 2: A separate, empty USB drive or external hard drive (large enough to hold your recovered files)
Steps for recovering files from an unbootable media
1. Connect your USB drive 1 to the working computer, and download and install MyRecover on the working computer.
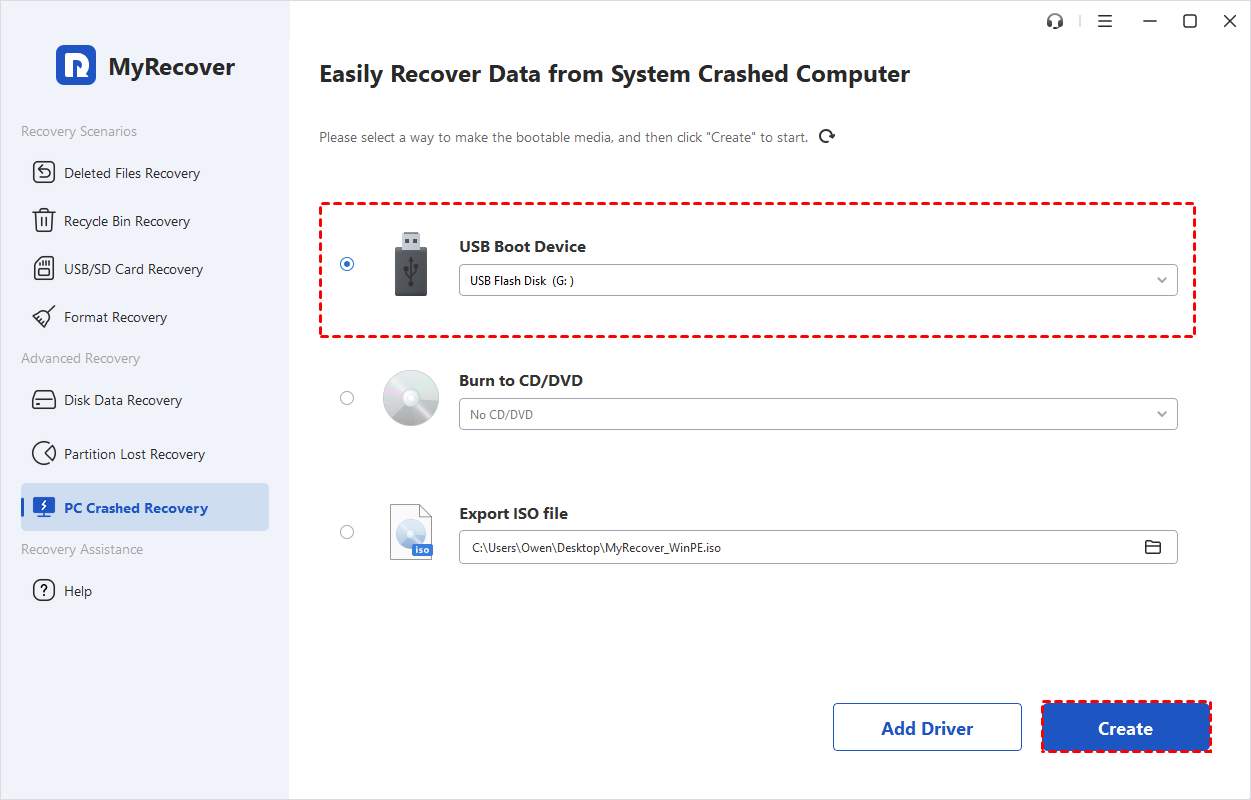
2. Launch MyRecover, tap PC Crashed Recovery, choose your USB drive 1, and hit Create. Wait for the process to complete.
3. Connect USB Drive 2 or an external hard drive to the unbootable computer. Boot up the unbootable computer from the USB bootable media. MyRecover will automatically run.
4. Choose Disk Data Recovery, choose your drive, and hit Scan.

- Tip:✎...
- You can disconnect your second or other disks from the unbootable computer, connect them to another working computer, then use the data normally again.
5. Hit OK when it’s finished.
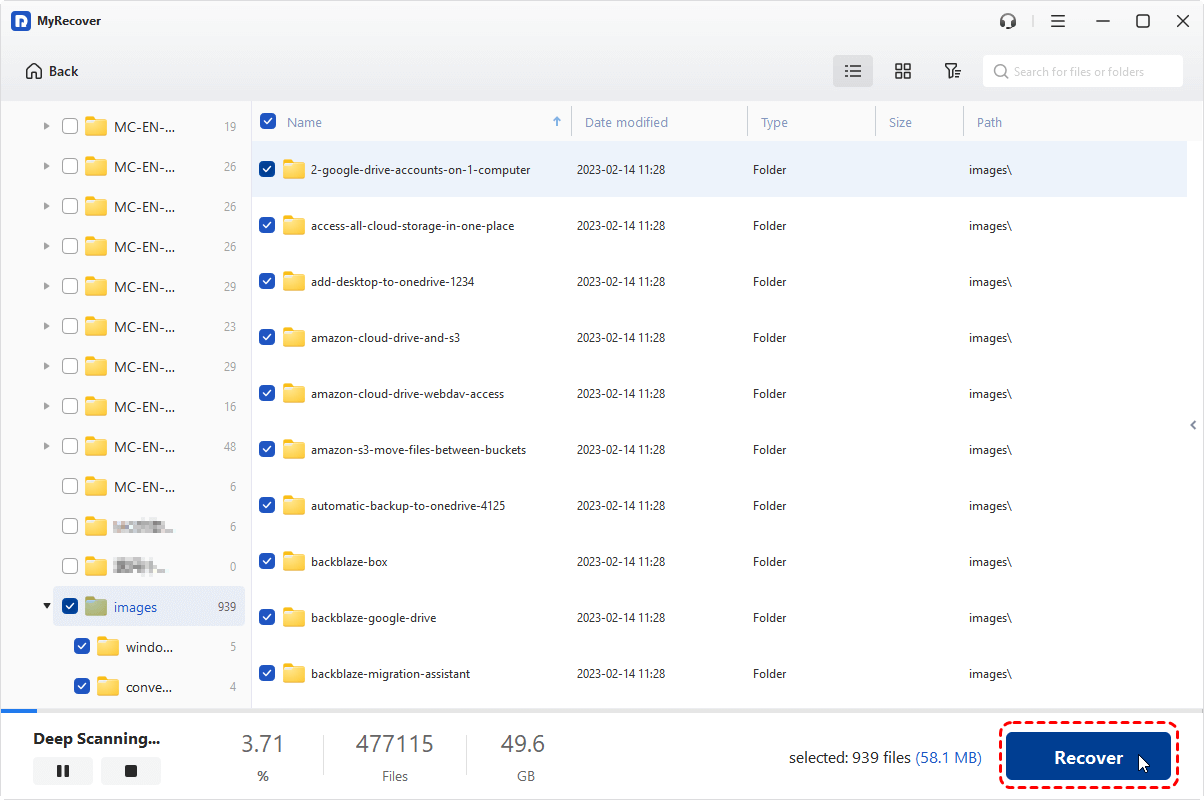
6. Preview and select the files you need, and hit Recover.
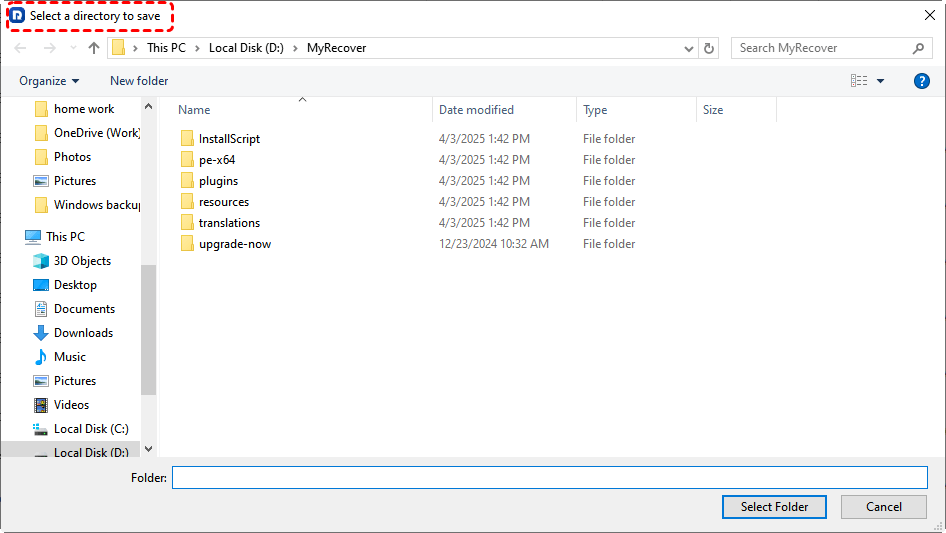
7. Select the USB drive 2 or the external hard drive to keep files safe, and check the integrity.
- Tips:✎...
- If your computer can boot up normally, you can directly copy files to another place. For missing files recovery, MyRecover can also help.
- To recover files for unlimited computers within a company, or other situations, you can upgrade to MyRecover Technician to enjoy.

- Recover Deleted Files Easily with Simple Clicks
- 1000+ File Formats Supported
- Support HDD, SSD, External Hard Drive, USB Drive, SD Card, etc.
- Quickly Find Files Using File Types, Name, Size, etc.
- Preview Files Before Recovering
- Recover Unlimited Data


Stay Updated With Our
Latest Tips
Add us as a preferred source on Google to never miss helpful guides.