
[2026] How to Recover Unsaved, Deleted, Corrupted or Overwritten CSV File
CSV, short for Comma Separated Values, is susceptible to loss due to accidental deletion, unexpected hiding, formatting, or virus infections. Whether file is unsaved, deleted, corrupted, overwritten, learn step - by - step processes to safeguard your valuable CSV data and minimize losses in this guide.
By Aria / Updated on March 27, 2026
Overview of CSV File
CSV (Comma-Separated Values) files are widely used for storing tabular data such as financial records, product inventories, and research results. It stores plain-text data separated by commas, making it compatible with Excel, Google Sheets, and many database applications. While lightweight and simple, CSV files can be prone to accidental deletion, corruption, or overwriting like any other types of files.

The good news is that recovery is often possible, depending on how the file was lost and what actions were taken afterward. This guide focuses on practical, step-by-step methods to help you recover unsaved, deleted, corrupted, or overwritten CSV files in different scenarios, so you can regain access to your data quickly and minimize potential loss.
How to Recover Unsaved CSV File in Excel
If you forgot to save your CSV file before closing Excel or your computer crashed unexpectedly, these unsaved CSV files may seem to have completely disappeared. However, Excel actually offers an AutoRecover feature that can recover these unsaved CSV files.
👉 Using Autorecovery File
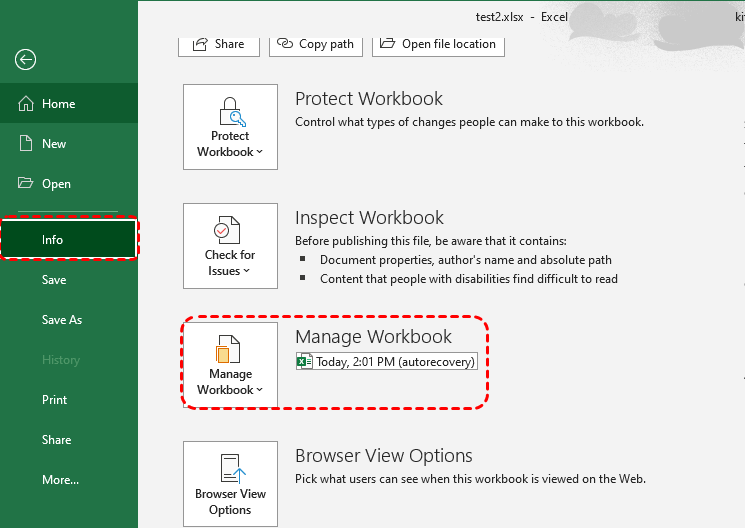
Step 1. Launch Excel and go to "File" tab.
Step 2. Select "Info", under the "Manage Workbook", you can see a list of autorecovery file from different points of time.
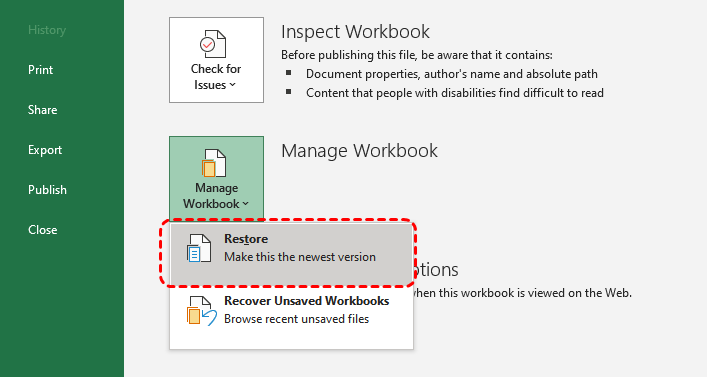
Step 3. Choose a file you wish to recover and open it to check if it's the version you want. If it's, click "Restore" to make it the newest version immediately.
- Notes:✎...
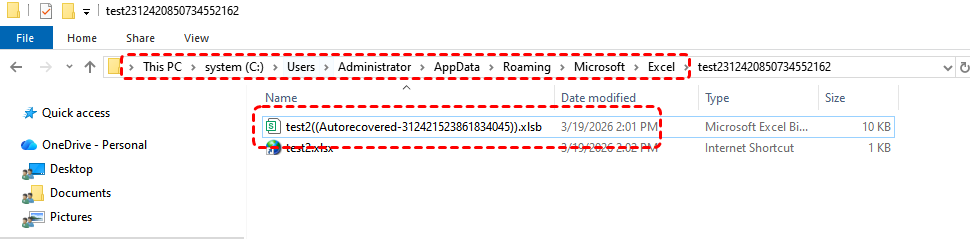
- If you close Excel without saving the CSV file, you may find that the AutoRecovery files are not available here. This is because once you close Excel, the system assumes you no longer need these temporary copies, and they will be deleted immediately.
-
However, as long as you act quickly, it is still possible to find copies of the CSV files that have not yet been deleted by the system. Navigate to the following path:
C:\Users\[UserName]\AppData\Roaming\Microsoft\Excel
-

👉 Using Document Recovery (For Suddenly Crahsed Excel or PC)
If you lost your CSV file due to an unexpected Excel or system crash, Excel's Document Recovery will save recent copies of the file, allowing you to restore your files to its previous state.
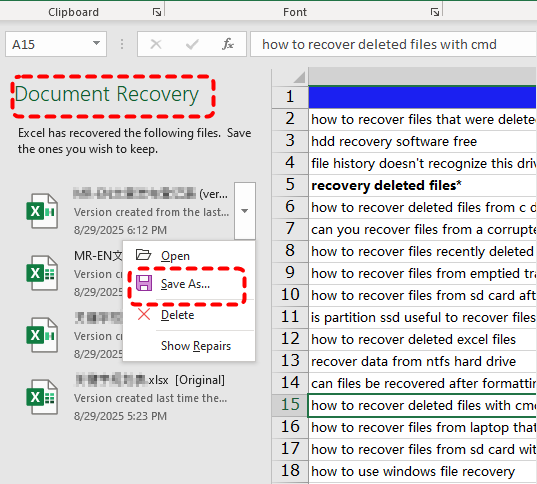
Step 1. Relaunch Excel once the computer or Excel working normally.
Step 2. Document Recovery will list the recent file cpies in the left panel. Select the file you want to recover and open it to check if its the one you want, then click "Save As" to save it to a safe location.
How to Recover Deleted CSV File on Windows
If you have saved the CSV file but it gets deleted due to accidental deletion, emptying the Recycle Bin, permanent deletion, or other such reasons, there are multiple methods available to help you retrieve the deleted CSV file. As long as you are still working on the CSV file and haven’t closed Excel, pressing "Ctrl" + "Z" or using the "Undo" button is the simplest way to recover lost data in the CSV file. However, recovering an entire lost CSV file is more complicated. You can try the following methods based on your actual situation.
Check the Recycle Bin
Most deleted files (not using “Shift + Delete”) first go to the Recycle Bin before being permanently removed. Checking the Recycle Bin first is the simplest and fastest way to retrieve any lost files.
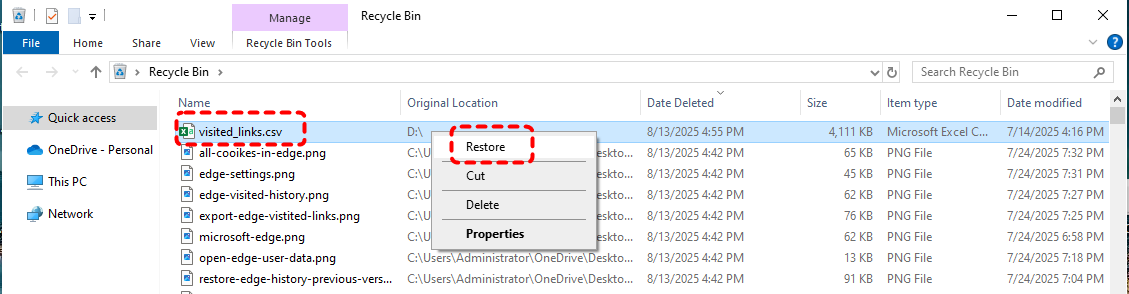
Step 1. Double click the Recycle Bin icon to open it.
Step 2. Browse through the deleted items and select the CSV file you want to recover.
Step 3. Right click on it and choose "Restore" to return it to its original location.
Restore from Backups
If you regularly back up your files using Windows built-in backup tools or cloud backup, restoring the CSV file from a backup is quick and straightforward. Windows provides two backup tools: File History and "Backup and Restore". Here, we'll take restoring from a backup created via Backup and Restore as an example.
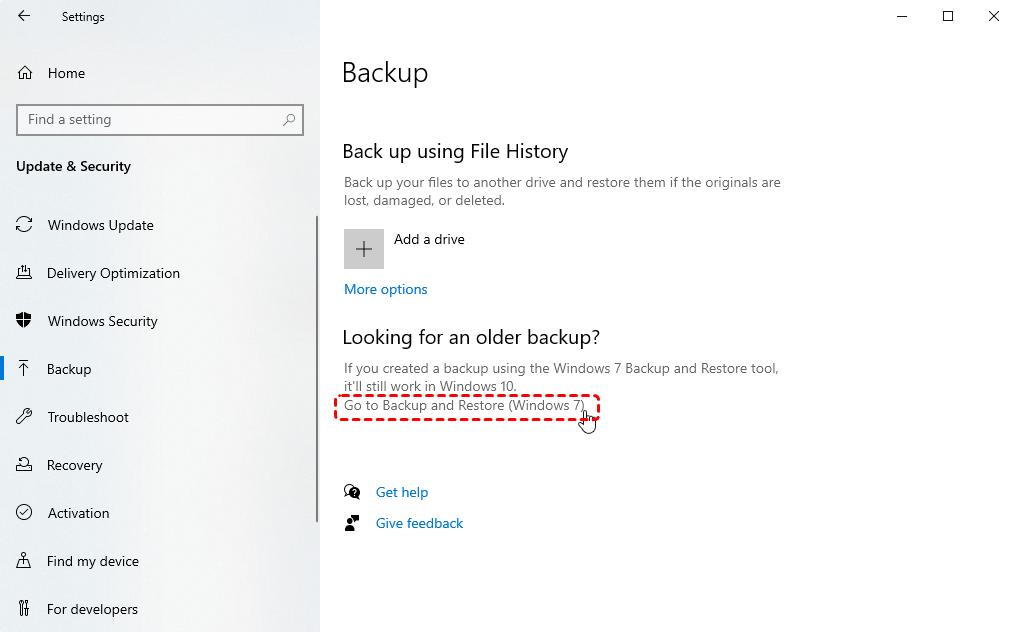
Step 1. Open "Backup Settings" and select "Go to Backup and Restore (Windows 7)".
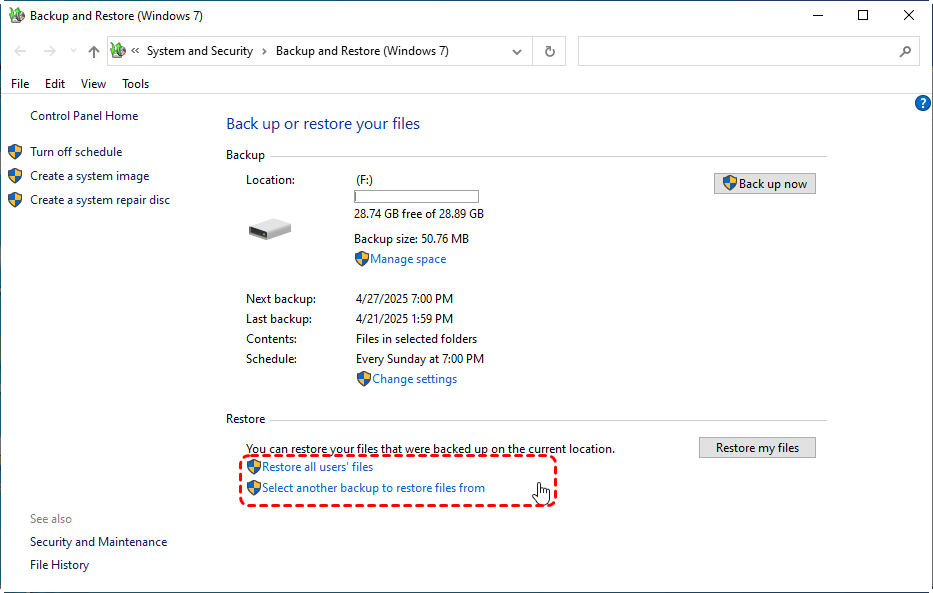
Step 2. Choose "Select another backup to restore files from" and select a created backup including the lost CSV file.
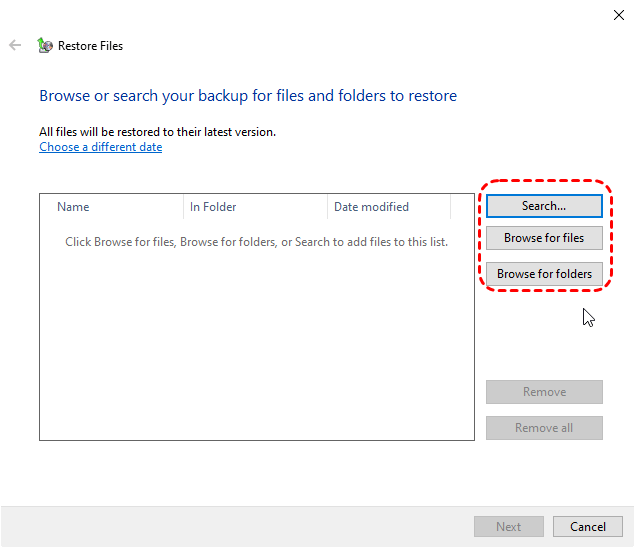
Step 3. Click "Browse for files" to choose the CSV file to restore from the backup.
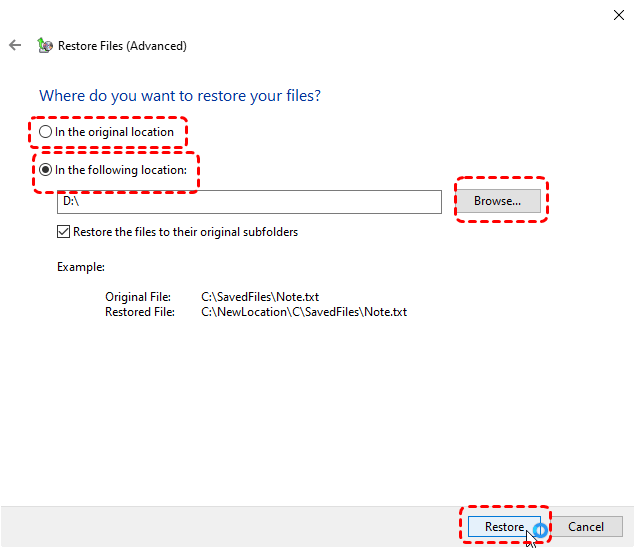
Step 4. Choose a safe location to save the recovered files and click "Restore" to start the process.
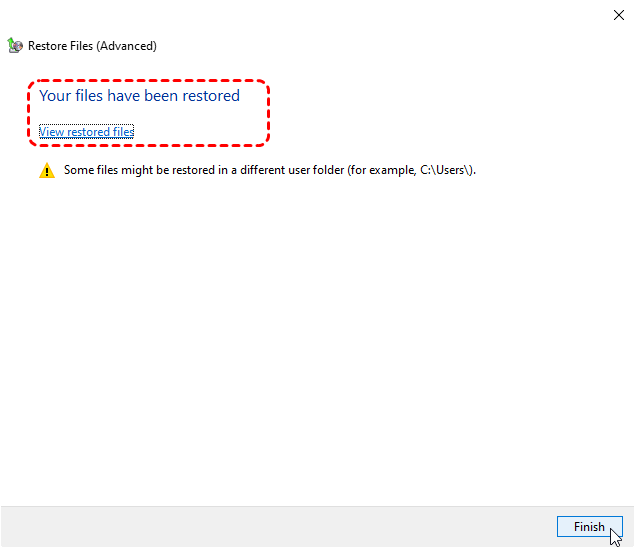
When the process is completed, the message "Your files have been restored" will pop up. You can check the recovered CSV file in the destination folder by clicking on "View restored files".
- ★Tips:
- If you enabled File History before the data loss, you can also restore the lost files from File History.
- Additionally, using cloud backup tools like OneDrive for backup is increasingly chosen by more users. You can also recover lost files from OneDrive with easy steps.
Run Windows File Recovery Command
Windows File Recovery is a free Microsoft command-line tool for retrieving permanently deleted files. It can recover files from local storage devices like USB drives, SD cards, HDDs and more. But it requires basic familiarity for Windows File Recovery command and it only works on Windows 10 and 11.
Step 1. Download and install Windows File Recovery on your computer from Microsoft official channel.

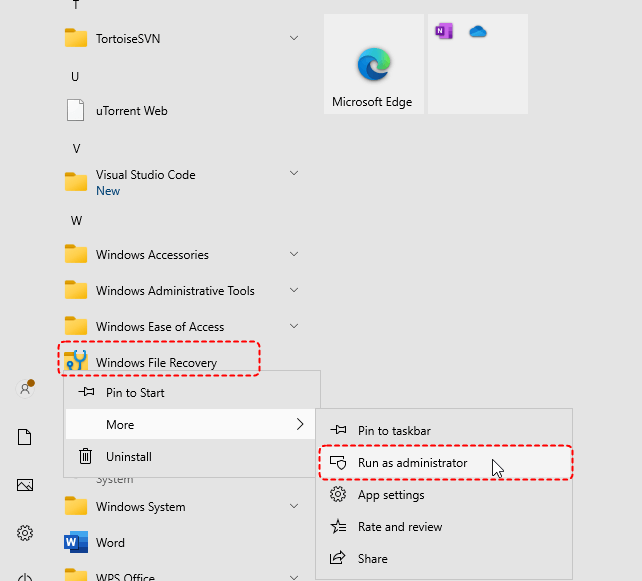
Step 2. Open Windows File Recovery and run it as administrator.
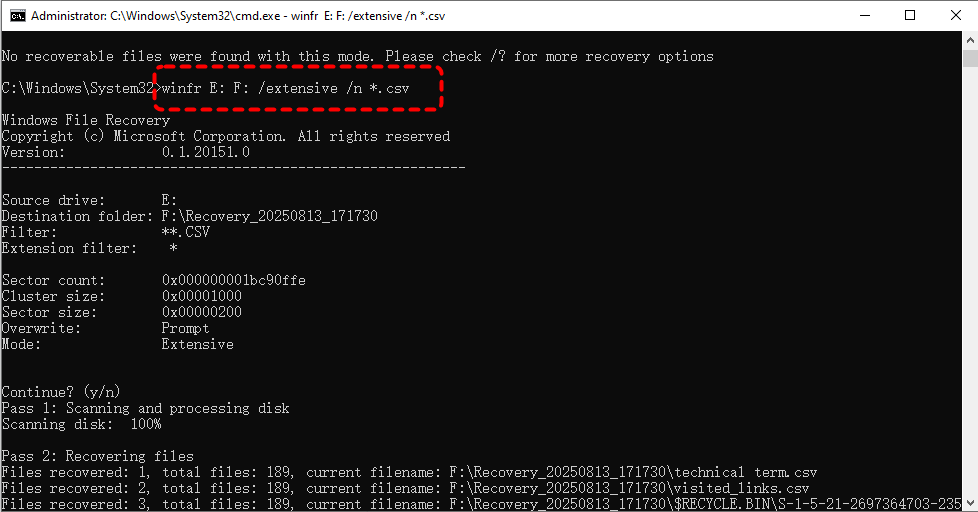
Step 3. Type the following command "Winfr E: F: /extensive /n *.csv" and press "Enter". Replace the drive letters "E" and "F" with your actual drive letters.
- ★Tips:
- E: The source drive letter.
- F: The destination drive letter.
- Extensive: Perform a comprehensive scan. If you don't want to spend too much time, you can switch to regular mode for a quick scan.
- /n *.csv:Filter condition. Specifies to recover only files with the ".csv" extension.
When the process is finished, you can press "y" to check the recovered CSV file in the destination folder.
Recover Deleted/Lost CSV File via Professional Recovery Tool: MyRecover
In the event that Windows File Recovery does not return the expected results, or if you find the command-line process difficult to manage, it may be more practical to switch to a professional data recovery tool. While Windows File Recovery is powerful, it relies on specific commands, recovery modes, and file system conditions, which can make it less predictable for general users, especially when dealing with fragmented or partially overwritten CSV files.
In this situation, using a dedicated recovery tool with a visual interface—MyRecover can simplify the process and improve efficiency. It is designed to scan storage devices more intuitively, allowing you to locate and recover deleted or lost CSV files without relying on complex syntax or parameters. It also provides the filtering features, which help you quickly identify the correct files before recovery.

- Easy to use, no technical skills required.
- "Quick Scan" for recently deleted files while "Deep Scan" for thoroughly searching lost data from formatted, corrupted, or inaccessible drives.
- Works on all modern windows versions like Windows 11, 10, 8, 7 and Server 2025, 2022, 2019, 2016.
- Handle with more complex data loss cases like OS crash, formatted, RAW, corrupted or deleted drive.
4 Steps to Recover Deleted CSV File on Windows
Step 1. Download and install MyRecover on your computer from secure channel, avoid installing it on the drive with lost files.
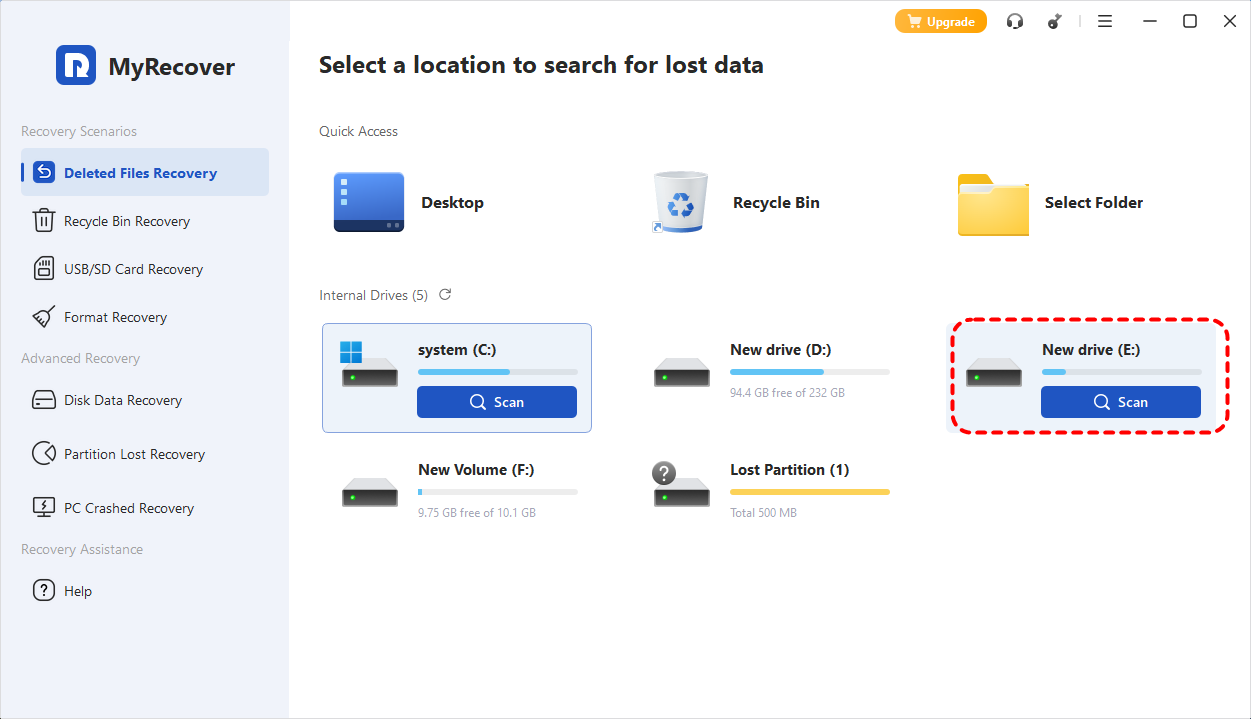
Step 2. Launch MyRecover and choose the drive where the CSV file were stored, then click "Scan".
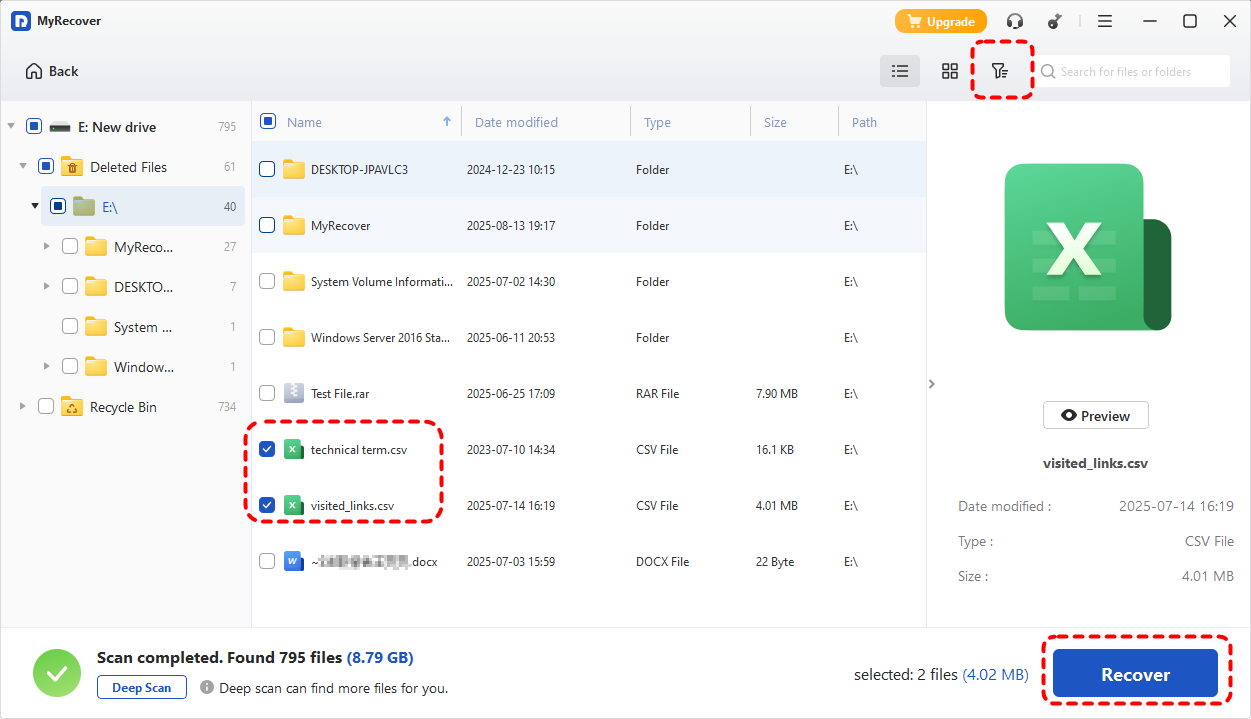
Step 3. Choose the CSV file from the recoverable lists and click "Recover". If there are too many scanned files to easily find the one you want, you can use the filter function in the top - right corner to quickly access the file you wish to recover.
-
You can filter files from the following four dimensions, and it is more accurate to recommend filtering by file size and file type.
- Filename: Enter the file or folder name.
- File type: Filter file types such as documents, images, videos, audio, and emails.
- File size: Filter by file size, such as 10MB to 100MB.
- Data modified: The recent modification time of the file.
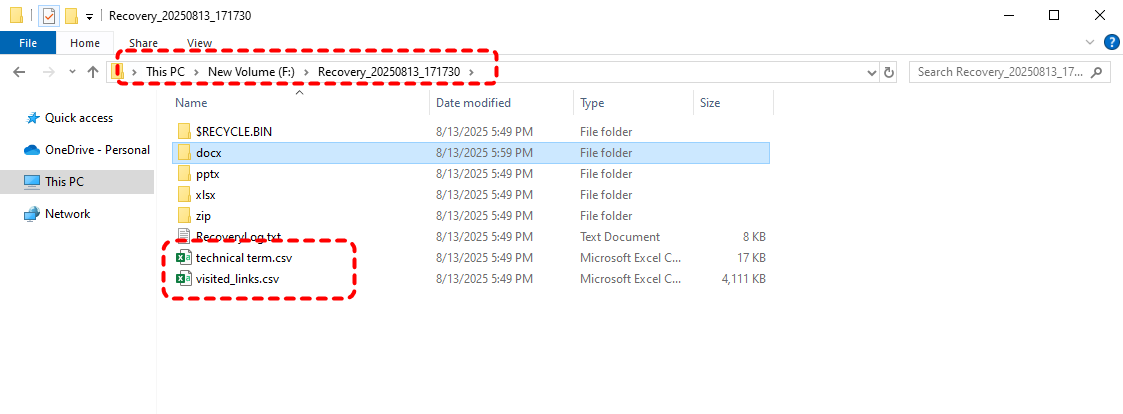
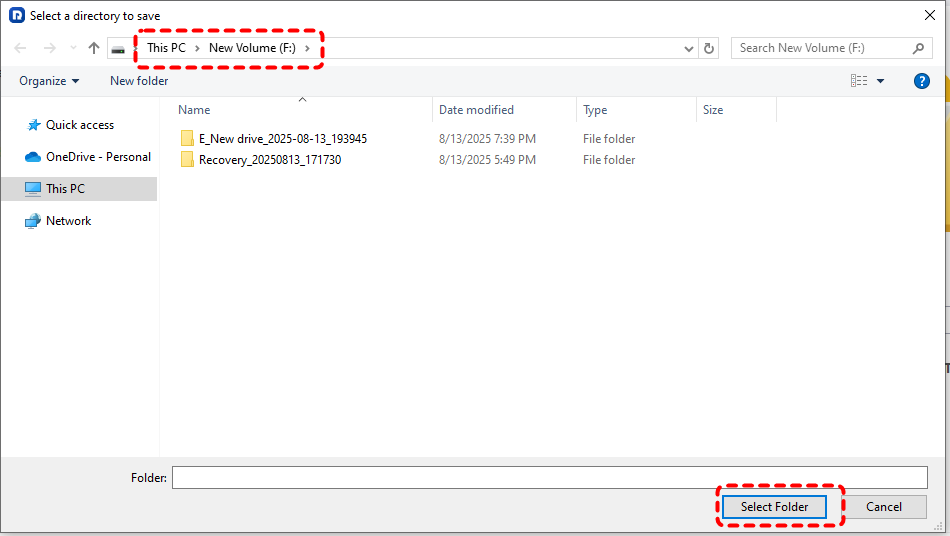
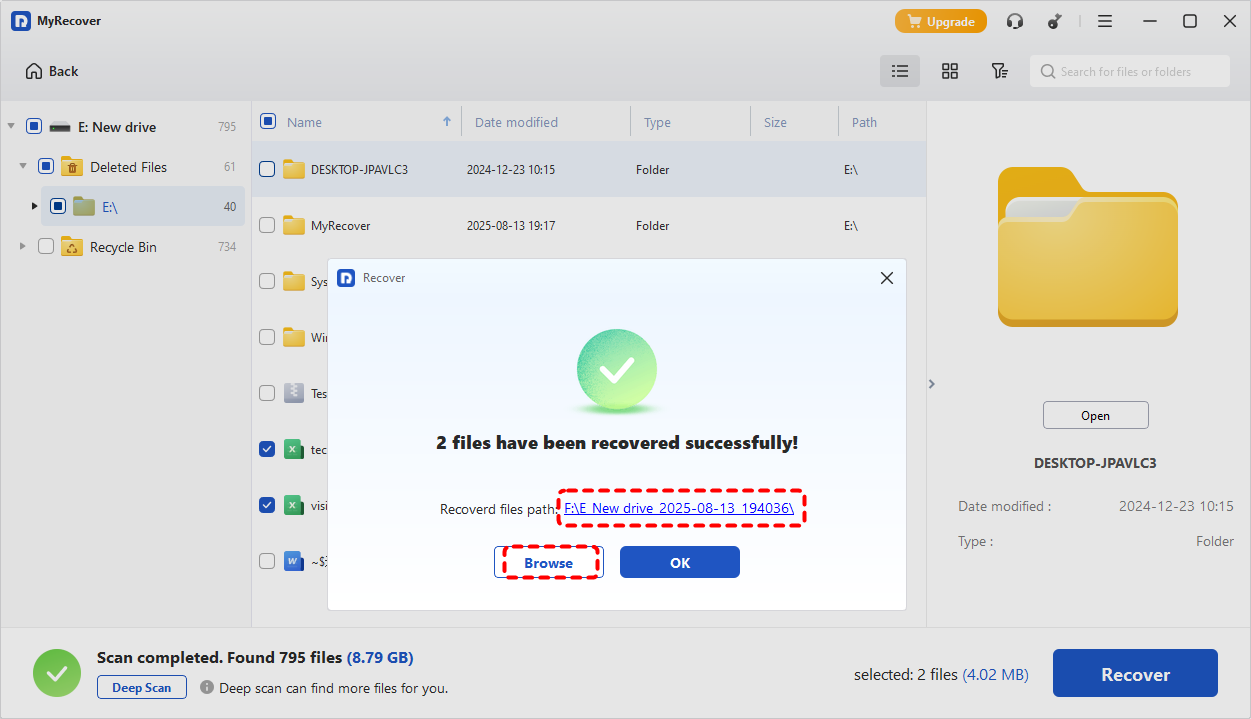
Step 4. Select a location different from the original one to save the recovered files.
Upon completion of the recovery process, the message "Files have been recovered successfully" will pop out. You can check the recovered CSV file by clicking on destination folder path or "Browse" button.
How to Recover Corrupted CSV File
When a CSV file becomes corrupted, the issue is often related to encoding errors, formatting inconsistencies, or software compatibility. Unlike deleted files, corrupted CSV files may still contain readable data, but it is not displayed correctly due to structural or encoding problems. Therefore, the following methods focus on repairing how the file is interpreted, helping you restore usable data step by step.
Switch to Another CSV Editor
Different programs interpret CSV structure and encoding differently. Opening the file in another editor like Google Sheets, Notepad++ can sometimes bypass compatibility issues and reveal the original data. Check whether the data appears correctly, then save a new copy if the content is readable.
Convert CSV to XLSX or XLS
Converting the CSV file into an Excel format can help rebuild its structure and resolve formatting inconsistencies that cause corruption symptoms. Follow these steps:
Step 1. Open the CSV file in Excel (or another spreadsheet application).
Step 2. Click "File" > "Save As" and choose "Excel Workbook (*.xlsx)" or "Excel 97-2003 (*.xls)".
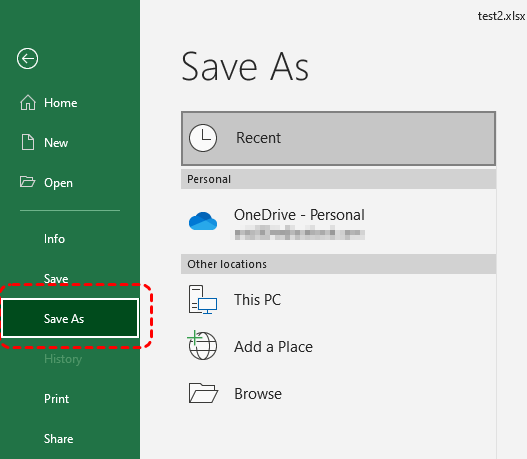
Step 3. Save the file as a new copy and reopen it to verify whether the data is displayed correctly.
Use the "From Text/CSV" Import Feature in Excel
Encoding issues are a common cause of corrupted or unreadable CSV files, especially when dealing with special characters or data from different systems. If your files contain special characters but are not encoded in UTF-8, they may become corrupted.
Step 1. Open a new workbook in Excel.
Step 2. Go to the "Data" tab and click "Get Data" > "From File" > "From Text/CSV".
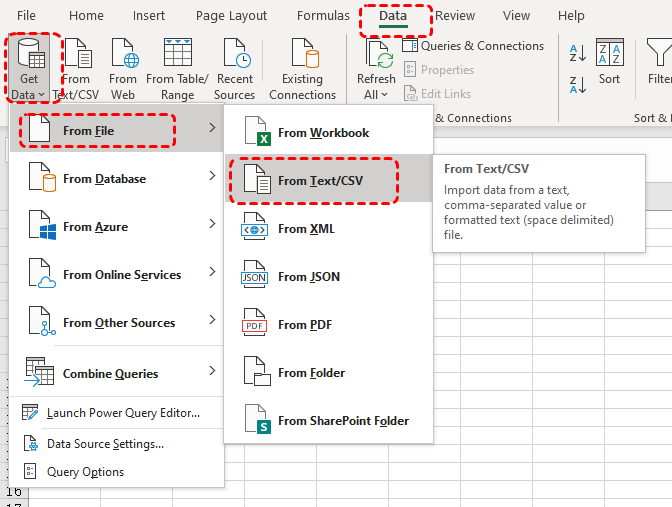
Step 3. Select the corrupted CSV file and click "Import".
Step 3. If the file content appears garbled, change the "File Origin" to "65001: Unicode (UTF-8)" and click "Load".
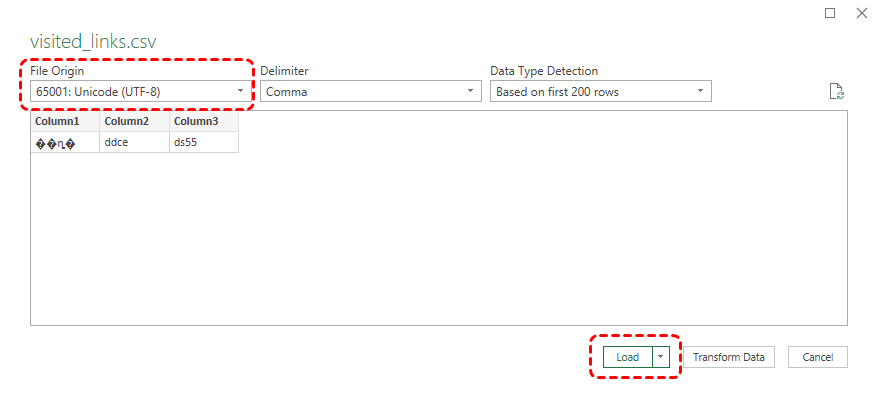
Step 4. Save the file and reopen it to confirm that the content is properly displayed.
How to Recover Overwritten or Replaced CSV File
When editing a CSV file, you must have encountered such a situation: after modifying and saving the CSV file, you find that the previous version was better. Here are several methods to restore the CSV file to the previous state you want.
Restore Previous Versions
If you have enabled Shadow Copy or File History before data loss, you can use the "Restore previous versions" feature to restore a previous version of a CSV file.
Step 1. Open File Explorer and navigate to the folder where the CSV file was stored.
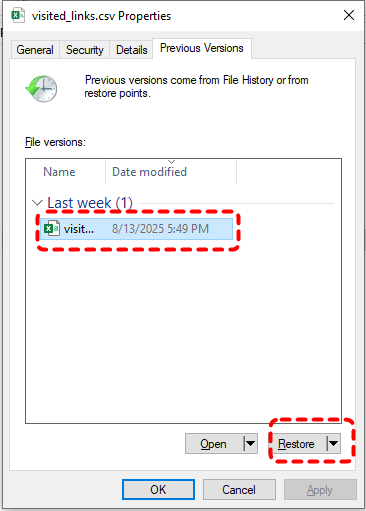
Step 2. Right click on it and choose "Restore previous versions" from the context menu.
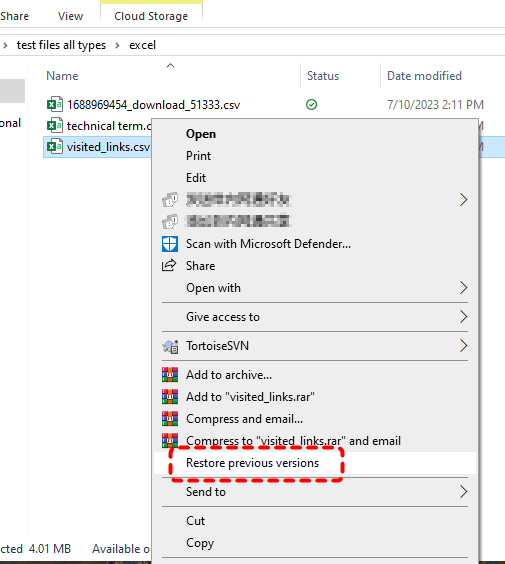
Step 3. Select a desired version and click "Restore" to recover it to its original location.
Check OneDrive Version History
If you have backed up your CSV file to cloud backup tools like OneDrive, it will automatically record the modified versions of the file. You can view and restore previous versions in OneDrive.
Step 1. Sign in to OneDrive with your correct account.

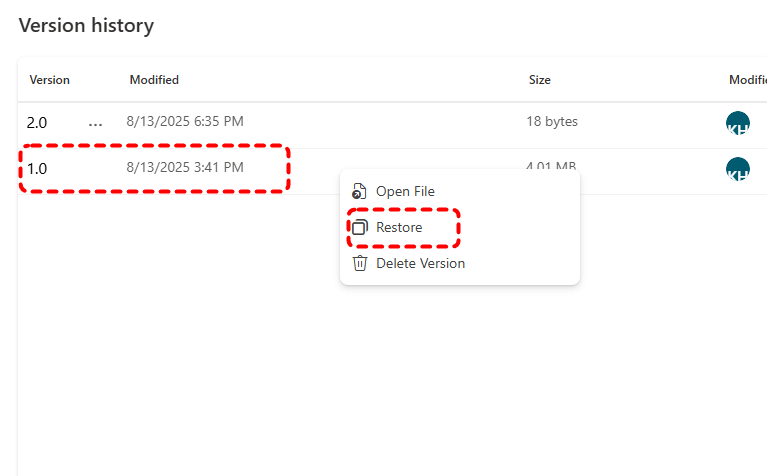
Step 2. Navigate to the CSV file and right click on it, then choose "Version history". A list of earlier versions will be displayed.

Step 3. Check which version is the one you want and right click it, then choose "Restore" to replace the current version.
Final Words
Losing a CSV file can be stressful, but knowing how to recover CSV files, whether they are unsaved, deleted, corrupted or overwritten, can save you time and frustration. You can choose the appropriate method from the above options based on your actual situation. If those fail, professional recovery software like MyRecover can dig deeper to restore your data.
For power users and IT technicians, MyRecover's Professional Edition offers unlimited recovery volume and file content preview before restoration, making it a reliable solution for any data loss situation involving data recovery from unbootable Windows.


Stay Updated With Our
Latest Tips
Add us as a preferred source on Google to never miss helpful guides.