
Recycle Bin Shows Empty But It Not? Why & How to Fix?
This article explains why the Windows Recycle Bin may show as empty even though it contains deleted files. Additionally, it provides step-by-step methods to fix the issue, ensuring that deleted items are properly visible and recoverable in the Recycle Bin.
By Emma / Updated on November 27, 2025
Why Recycle Bin Shows Empty When It is not?
Although the Recycle Bin is designed to offer a second chance for users to recover recently deleted files, sometimes it may appear empty even when it actually contains items. This issue often confuses users because they expect to see their deleted files but find nothing listed. Several common reasons can cause this issue:
1. Corrupted Recycle Bin Folder: Each drive has a hidden system folder ("$Recycle.Bin") that stores deleted files. If this folder is corrupted, Windows may fail to display its contents correctly.
2. Hidden or System Files Settings: When certain display settings hide protected operating system files, items in the Recycle Bin may not be visible even though they are still present.
3. User Account Permissions: Deleted files are stored per user account. If you are logged in with a different account or have limited permissions, the Recycle Bin may appear empty.
4. Display Cache Issues: Windows Explorer sometimes fails to refresh properly, causing icons and file lists to display incorrect states.
5. Disk or File System Errors: Errors on the storage drive can affect file indexing, resulting in an inaccurate Recycle Bin display.
Solutions to "Recycle Bin Shows Empty But It Not" Issue
Now that you know why the Recycle Bin may show as empty even when it actually contains files, it’s time to look at how to solve the problem. The good news is that most of these issues are caused by incorrect settings, minor glitches, or temporary system errors, and they can be fixed easily. Below are several proven methods you can follow step by step to restore the Recycle Bin to normal and ensure your deleted files appear as expected.
Solution 1: Reset the Recycle Bin
One of the most common reasons for the Recycle Bin displaying incorrectly is corruption in its system folder. By resetting it, Windows will delete the corrupted $Recycle.Bin folder and automatically create a new one, often fixing the issue immediately.
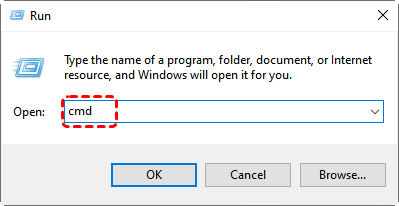
1. Press "Win + R", type "cmd", and press Ctrl + Shift + Enter to run as administrator.
2. In Command Prompt, type the following command and press Enter: rd /s /q C:\$Recycle.Bin
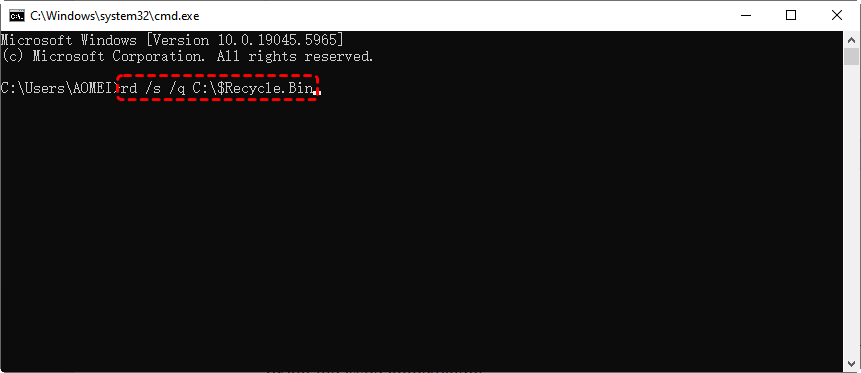
3. Repeat for other drives if needed (e.g., D:\$Recycle.Bin).
4. Restart your computer. Windows will automatically recreate a healthy Recycle Bin folder.
Solution 2: Show Hidden and Protected Files
Sometimes, deleted files in the Recycle Bin may not appear simply because Windows is set to hide certain system or protected files. Adjusting the folder view settings can make these files visible again.
1. Open "File Explorer"and click the "View"menu.Click "Options"->"Change folder and search options".

2. Select "Show hidden files, folders, and drives".
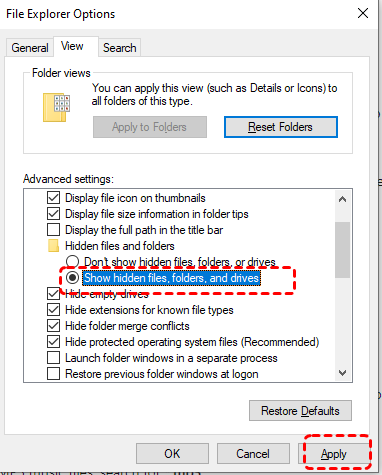
3. Uncheck "Hide protected operating system files"(confirm the warning when prompted).
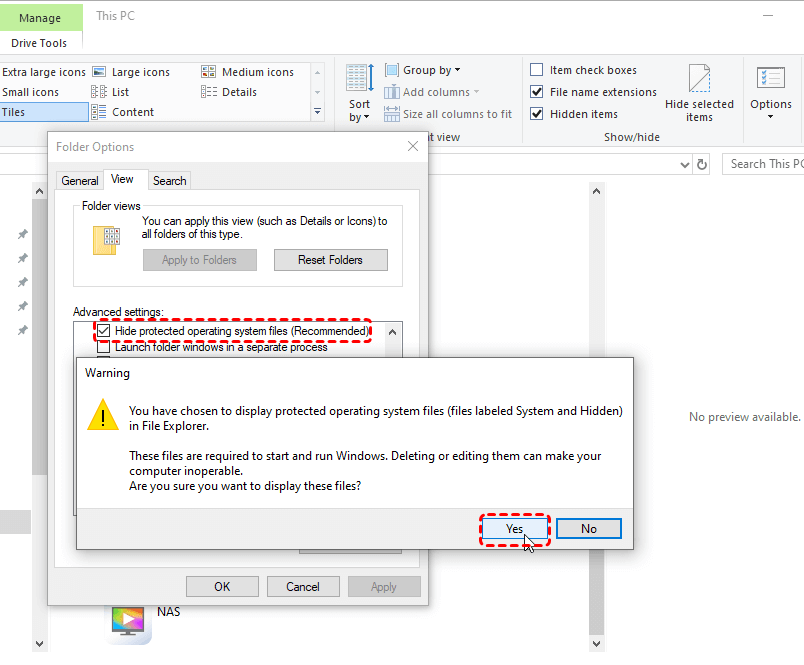
4. Click "OK" and check the Recycle Bin again to see if the files appear.
Solution 3: Check User Account Permissions
Recycle Bin content is managed per user profile, which means deleted files from one account might not be visible to another. If you are logged in with a different or restricted account, the Recycle Bin may appear empty. Ensuring proper account permissions often resolves this issue.
1. Press "Win + R", type "netplwiz", and press "Enter".
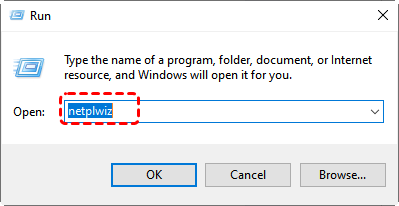
2. Verify that you are logged in with the correct user profile that deleted the files.

3. If your account is a standard user, log in with an "Administrator" account.
4. Try deleting and restoring files again to check if the Recycle Bin is now showing items correctly.
Solution 4: Refresh or Rebuild Display Cache
Sometimes the Recycle Bin icon or file list may not refresh properly because of Windows Explorer display cache issues. Refreshing the interface or rebuilding the icon cache can quickly fix this problem.
Quick Fix: On the desktop, press "F5" to refresh.
Rebuild Icon Cache:
1. Open "Command Prompt" as administrator.
2. Run the following commands:
taskkill /IM explorer.exe /F
del /A /Q %localappdata%\IconCache.db
start explorer.exe
![]()
3. Restart your computer and check if the Recycle Bin now shows files correctly.
Solution 5: Repair Disk or File System Errors
If there are file system errors on your drive, deleted files may not be indexed or displayed properly in the Recycle Bin. Running a disk check can repair these errors and restore normal functionality.
1. Open "This PC", right-click the drive, and choose "Properties > Tools"tab.
2. Under "Error checking", click "Check".
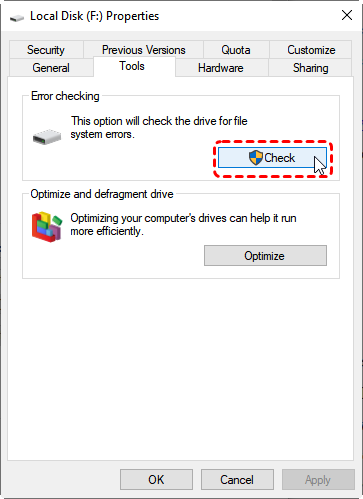
3. If errors are found, click "Repair drive", then restart and check the Recycle Bin.
How to Recover Files When Recycle Bin Shows Empty?
As you can see, there are various reasons why the Recycle Bin may appear empty even though it still contains deleted files. Whether it’s due to system folder corruption, hidden settings, user permissions, display glitches, or disk errors, these issues can prevent you from accessing your lost files through the usual method.
In cases where the Recycle Bin shows empty but you still need to recover important files, relying on manual fixes might not be enough or could be too complex for everyday users. Fortunately, tools like MyRecover offer a straightforward and efficient way to recover deleted files quickly without any technical hassle.

- Easy to Use: an intuitive and user-friendly interface, allowing users of all skill levels to recover files without any technical knowledge.
- Supports 500+ Data Loss Scenarios: whether it’s accidental deletion, formatting, system crash, virus attack, or partition loss, MyRecover efficiently recovers your files.
- Fast Recovery with High Accuracy: Utilizing deep scan technology, it quickly locates lost files and greatly improves recovery success rates.
- Supports 1000+ File Types and 500+ Storage Devices: Compatible with common documents, photos, videos, audio files, and works on HDDs, SSDs, USB drives, memory cards, and more.
- File Preview Before Recovery: Allows you to preview files before restoring, so you can confirm you’re recovering exactly what you need.
- Safe and Risk-Free Recovery: The recovery process won’t cause any further damage to your existing data, ensuring data security.
Step 1: Download, install and launch MyRecover.
Step 2: In the main interface, choose the drive where the deleted files were originally located (e.g., C: drive or D: drive).Click on the "Start Scan” button to begin scanning.

Step 3: MyRecover will performeithera "quick scan" or a "deep scan" automatically. After the scan, you can browse all found files, or quickly filter files by "type". Click on a file to preview it and verify it’s the one you want to recover.

Step 5. Then select the files or folders you want to restore by checking the boxes next to them. Click on the "Recover" button.
Step 6. Choose a different drive or folder as the recovery destination to avoid overwriting lost data.

Then wait for the recovery process to complete. Upon completion, you will receive a notification displaying both the number of successfully restored files and their new storage location.

Summary
The "Recycle Bin shows empty but it not" issue can be triggered by various reasons such as system folder corruption, hidden file settings, user account issues, display cache errors, or disk problems. If you just want to recover files from Recycle Bin, you can make use of MyRecover as well.
It offers a powerful yet user-friendly way to recover deleted files—even when the Recycle Bin appears empty. With features like deep scan technology, multiple data loss scenario support, file preview before recovery, and risk-free operations, MyRecover ensures quick and secure file restoration in just a few steps. What’s more, it is able to restore files from unbootable computers.
FAQs
Q1: Why Did My Recycle Bin Empty Itself?
Q2: Why Are My Deleted Items Not Showing In The Recycle Bin?
Q3: Does Emptying The Recycle Bin Actually Delete Files?
Q4: How To Retrieve Files From An Empty Recycle Bin?


Stay Updated With Our
Latest Tips
Add us as a preferred source on Google to never miss helpful guides.