
'This Drive Cannot Be Used to Store a System Image' Error: Ultimate Fix Guide
The 'This Drive Cannot Be Used to Store a System Image' error often occurs when trying to back up your system to a drive that isn't properly configured for this task. This article covers the common causes of the error and provides proven methods to resolve it. Whether you’re troubleshooting a simple error or recovering important files, this guide offers all the solutions you need.
By Aria / Updated on January 4, 2026
Why Can't I Store a System Image onto an Empty USB?
Hi! Hope you can help, I just purchased the Microsoft Surface Pro. The guy in store recommended backing up the system image onto a USB, and sold us one with the pro - I am attempting to back it up onto a Scandisk 32, and have received the following...
'This drive cannot be used to store the systems image because it is not formatted with NTFS.'
Why would this USB not be formatted to NTFS (what is?!) and how can I overcome the issue? Many thanks!
- Question from Lisahwood
A system image is a complete backup of your operating system, applications, settings, and all files. It allows users to quickly restore the entire system, including the operating system configuration and installed software, in case of system failure or hard drive damage. With a system image recovery, users can ensure that they can return to their previous working state after a disaster.

However, many users report that when they try to create a System Image backup using an external hard drive, the error message "This drive cannot be used to store a System Image" always pops up. This is truly a frustrating problem. But why does this happen, and what can you do to solve it?
Key Factors Leading to "This Drive Cannot be Used to Store a System Image" Error
This error can arise for various reasons, and understanding the key factors behind it can help you resolve the problem. Below are the main causes of this error:
📂File System Compatibility
The destination drive might not have a compatible file system (such as NTFS) to store a system image. FAT32 and exFAT file systems cannot handle large system image files.
🔋Insufficient Free Space
The destination drive does not have enough available space to accommodate the system image. A system image can take up several gigabytes or even more depending on the size of the operating system and installed programs.
🔒The Drive is Write-Protected or Locked
If your USB drive is locked or encrypted with BitLocker, Windows may not allow you to store a system image on it unless the encryption is disabled. This could be a security feature that prevents from accidentally deletion or mistake operation.
Another possibility is a file system error on your USB drive. If there are bad sectors, corrupted files, or system errors on the USB, the drive will fail to function as a valid destination for storing your system image.
How to Solve the "This Drive Cannot be Used to Store a System Image" Error
Now that we understand the potential causes, let’s explore how to fix the issue and successfully store your files on an external USB drive. This section will provide several methods to fix the error, you can try them one by one until the error is fixed.
Check Available Space on the Drive
Ensure that your USB drive has enough free space to accommodate the system image. System images can range in size from 20 GB to over 100 GB, depending on the data stored on your system. By default, a system image contains all data on your entire system drive, including operating system files, installed applications, and personal files. If your drive doesn’t have enough space, you can either free up space or use a larger drive.
Disable BitLocker Encryption
When a hard drive is protected by BitLocker encryption, you won’t be able to access it or write any data to it unless you unlock it. To fix the "cannot create system image on external hard drive" problem, simply turn off BitLocker temporarily before you create the system image.
Step 1. Type "Manage BitLocker" in the Start menu and open it.
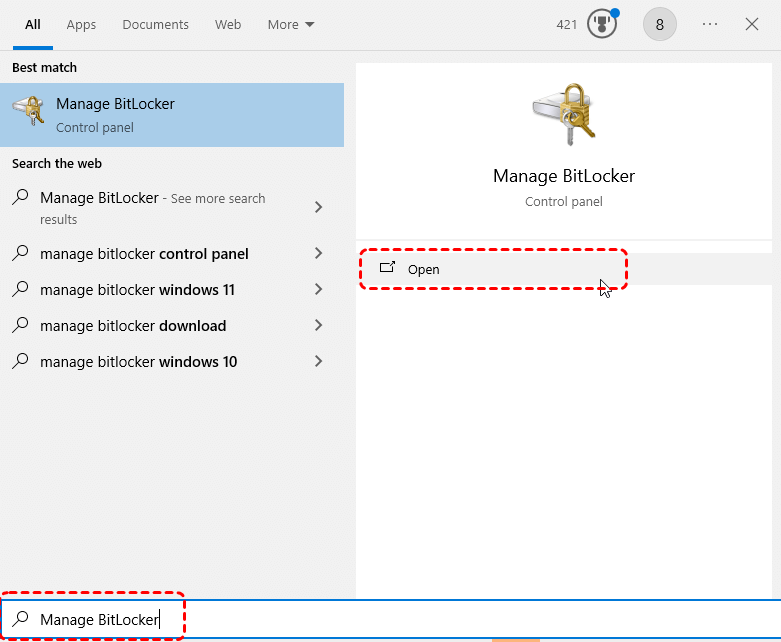
Step 2. Locate the encrypted drive and click "Turn off BitLocker".
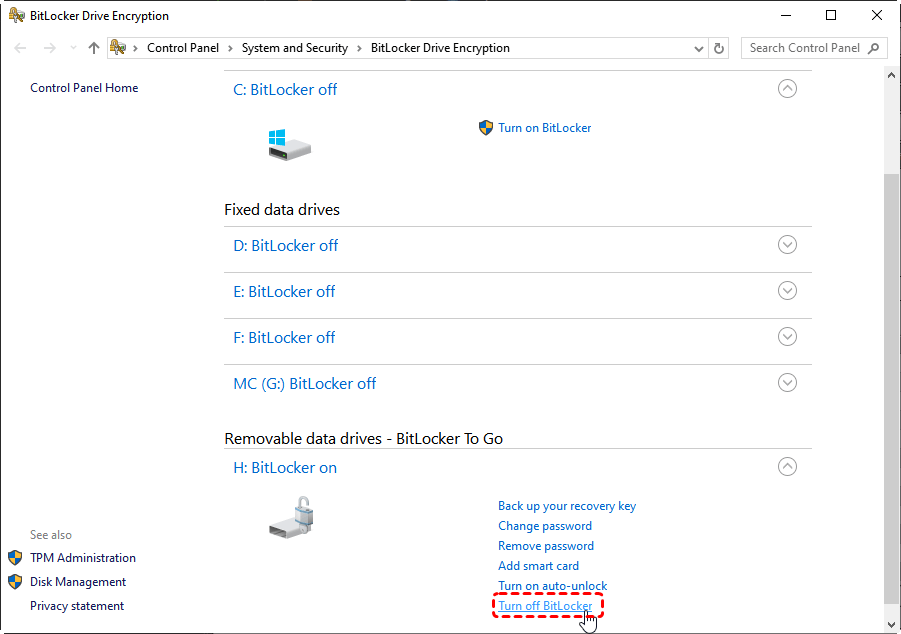
Step 3. Wait for a moment until the hard drive is fully unlocked, then try creating a system image with this drive again to check if the error persists.

Check File System Errors Using CHKDSK
If there are file system errors or other logical errors on the hard drive, it may prevent the system image from being created or written to. You can use CHKDSK command to check and repair the file system errors.
Step 1. Locate Command Prompt in the Start menu and right click on it, then click "Run as administrator".

Step 2. Enter the following command "chkdsk G: /f /r" and hit the "Enter" key. Replace the drive letter "G" with your actual drive letter.

Alternatively, find your hard drive in File Explorer and right click on it, and select "Properties". Under the "Tools" tab, click "Check" to start the process.
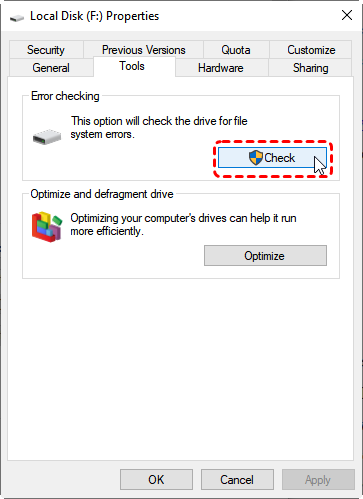
Wait for the process to complete and check if the error persists.
Convert the File System to NTFS
The system image backup feature only supports NTFS-formatted drives. If your drive uses a different file system like FAT32 or exFAT, it will cause the "this drive cannot be used to store a system image" error. You can try to convert the file system from FAT32 to NTFS using Command Prompt without data loss.
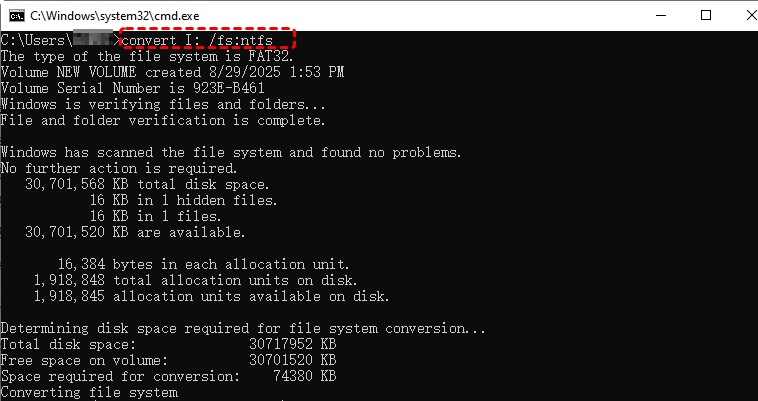
Step 1. Run Command Prompt as administrator.
Step 2. Enter the following command "convert I: /fs:ntfs" and press the "Enter" key. Replace the drive letter "I" with your actual drive letter.
Step 3. Wait for the process to complete, then check if the error still exists.
- Notes:✎...
- This command is exclusively applicable for the conversion of FAT and FAT32 file systems to the NTFS file system.
If your drive uses the exFAT file system, you can only convert exFAT to NTFS by formatting it. However, please note that this will erase all data on the drive. Here's how:
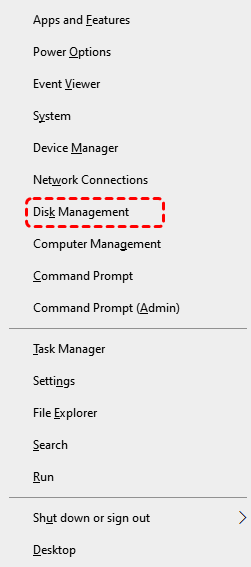
Step 1. Press "Win" + "X" and choose "Disk Management" to open it.
Step 2. Find your hard drive and right click on it, then choose "Format".
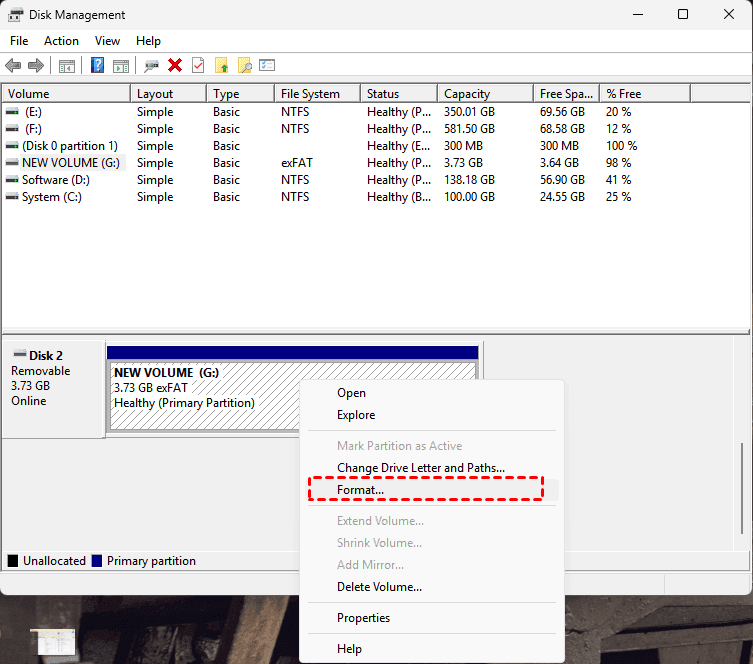
Step 3. Choose "NTFS" as the file system and click "OK" to start the process.

Bonus: How to Recover Data from Hard Drive After Formatting
If you’ve formatted your hard drive and lost important files without any backup, you can use MyRecover to recover your data. This powerful data recovery tool scans your drive for lost or deleted files and restores them, even from a formatted or corrupted drive. Its intuitive user interface allows even novice users to easily complete data recovery, all it takes is a simple click of an icon.

- Intuitive interface requiring no technical expertise.
- Faster scanning compared to command-line tools.
- Work on HDD, SSD, USB flash drive, memory card, etc.
- Compatible with all Windows operating systems and Server.
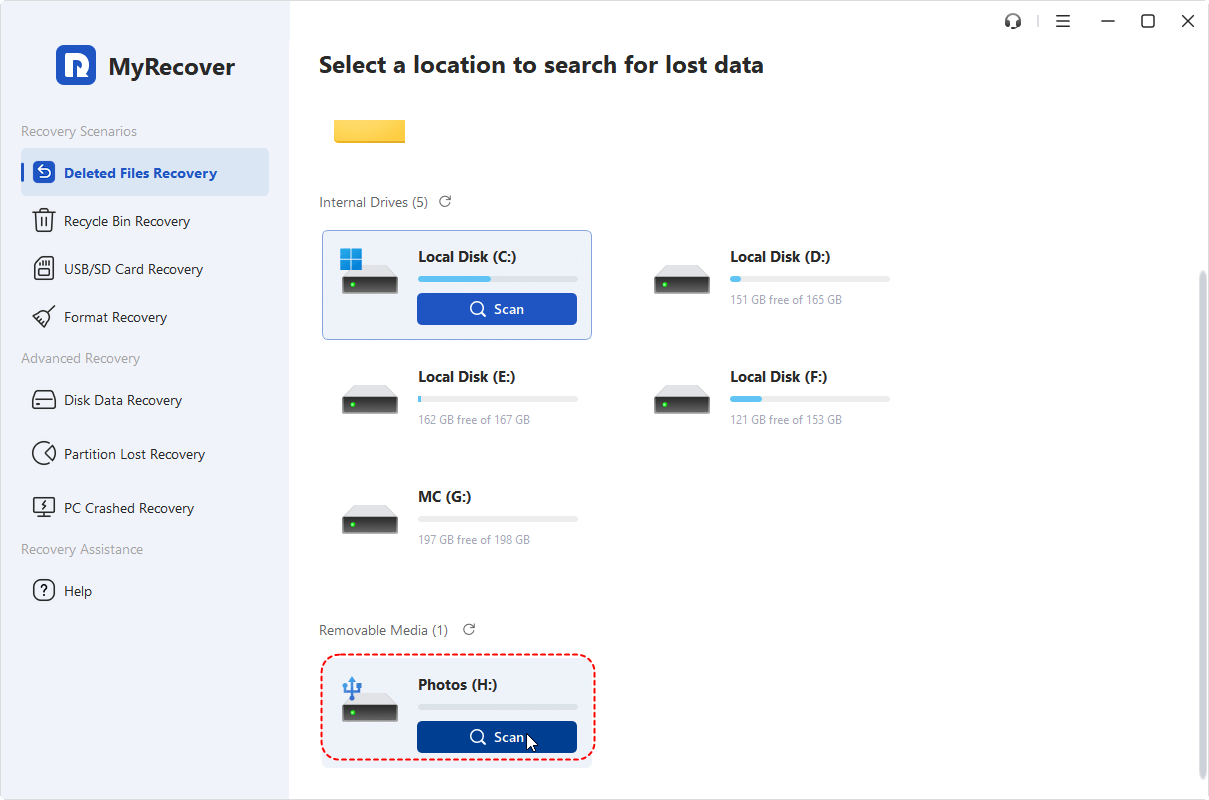
Step 1. Download and install MyRecover on your computer from Microsoft Store, avoid installing it on the formatted drive.
Step 2. Launch the app and select the drive to scan for formatted files, then click "Scan".
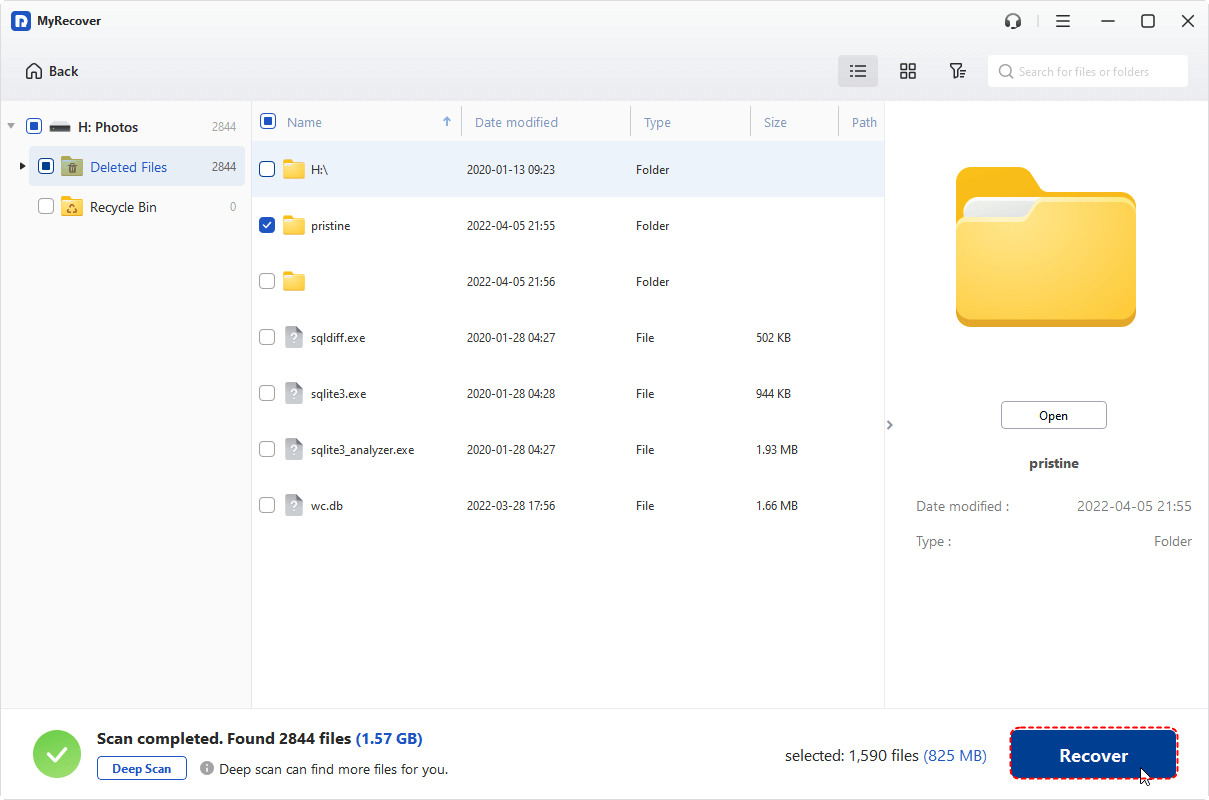
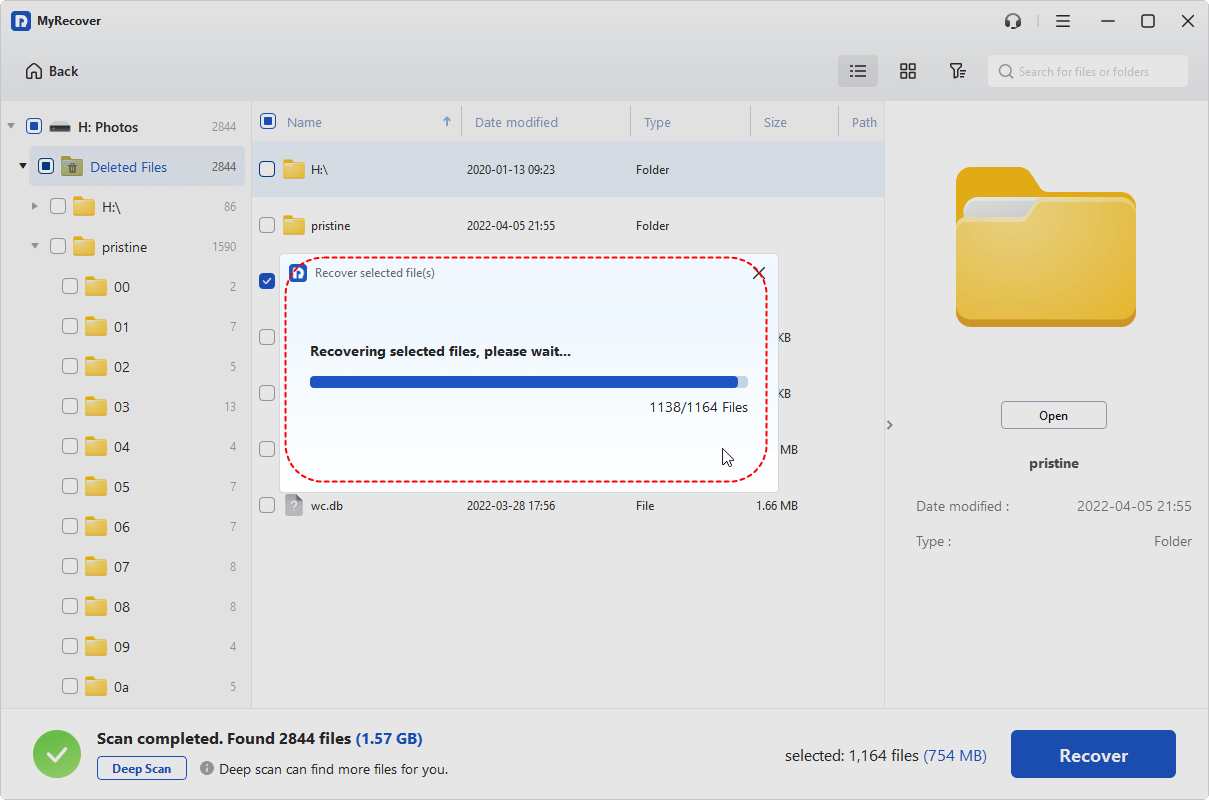
Step 3. After the scan is complete, choose the files you attempt to recover from the recoverable lists and click "Recover".
For users who need more like unlimited recovery or the ability to preview files before restoring, MyRecover Professional edition is the ideal choice, offering a complete recovery solution.
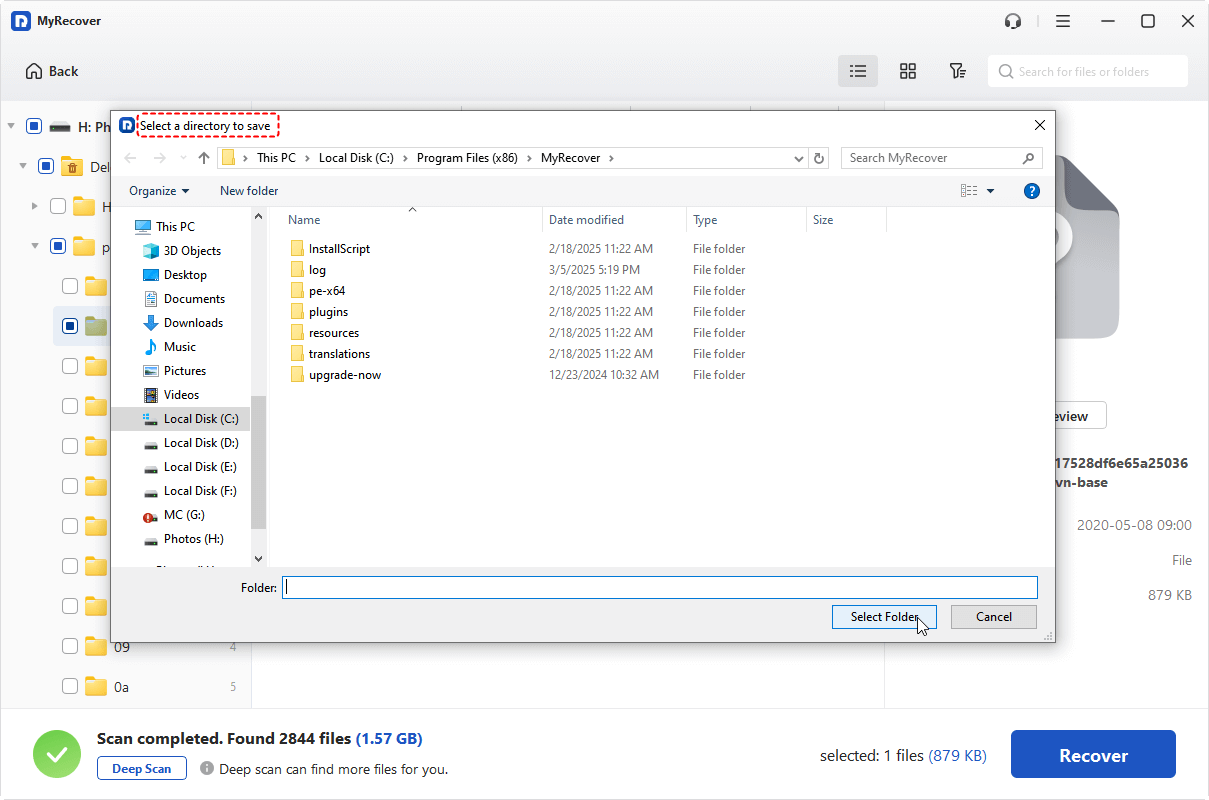
Step 4. Save the recovered files to a safe location (not the formatted hard drive).
When the process is done, you'll see the message "Files have been recovered successfully" will pop up. You can access the recovered files in the destination folder by clicking the "Browse" button.
The End
In conclusion, if you encounter the "This drive cannot be used to store a system image" error in the future, by following the methods outlined above, you should be able to resolve the issue and successfully store your lost files.
If your drive is corrupted or you’ve accidentally lost important data, MyRecover is an excellent tool for recovering lost files. It offers a fast and easy way to recover data from external drives, even if they’ve been formatted or corrupted. With its Professional edition, you even can create a bootable disk for data recovery.


Stay Updated With Our
Latest Tips
Add us as a preferred source on Google to never miss helpful guides.